OptinMonster makes it easy to capture your subscribers’ phone numbers in addition to their name and email address. Add a phone field to any campaign and seamlessly send it to any of OptinMonster’s native Email Service Provider integrations,
In this article, you’ll learn how to capture phone numbers with OptinMonster.
Add Phone Field
Follow the steps below to add a phone field to any OptinMonster campaign:
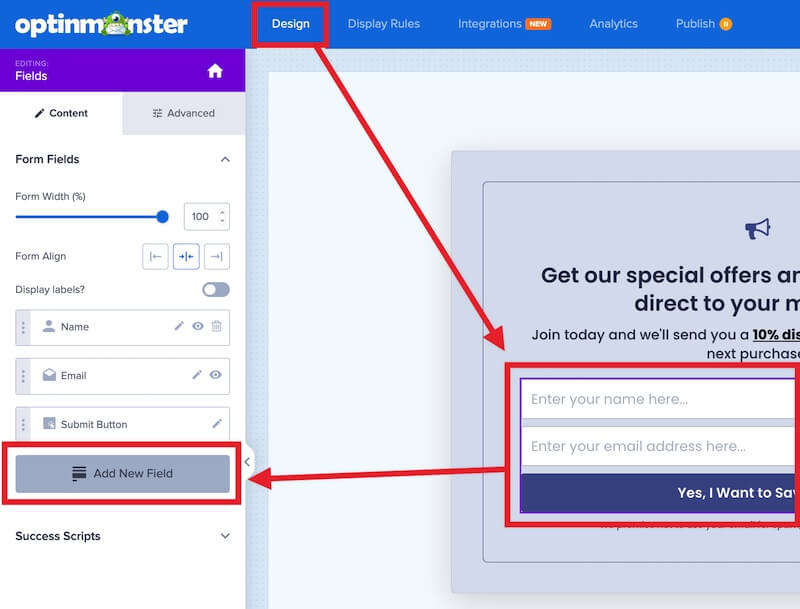
- From the Design view of the campaign builder, select the Fields block and select the Add New Field button from the left sidebar panel.
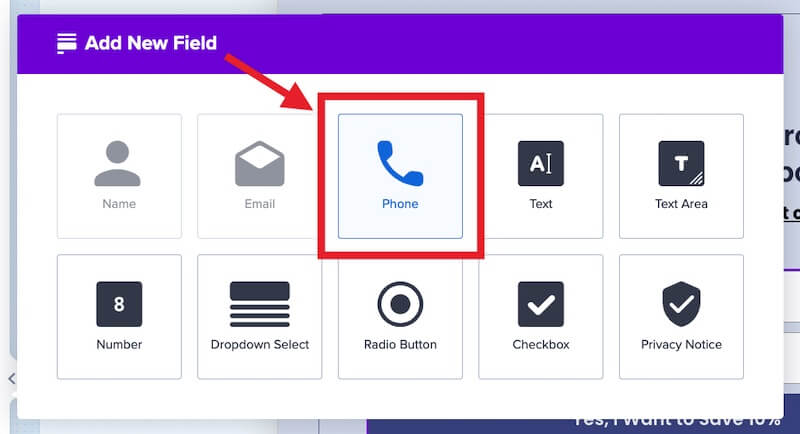
- From the popup modal select the Phone field.
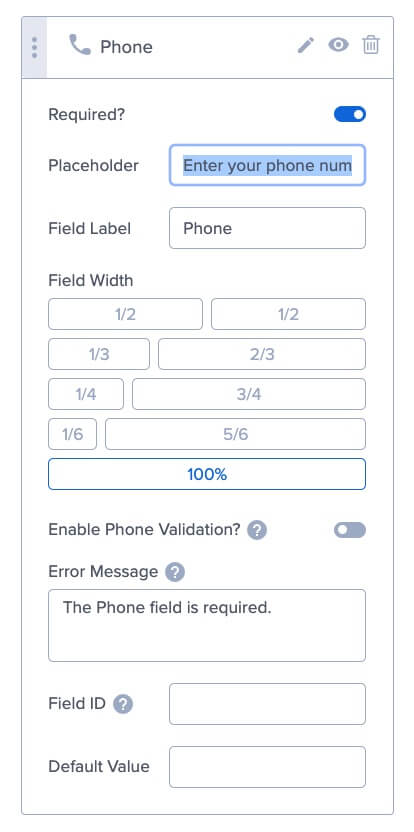
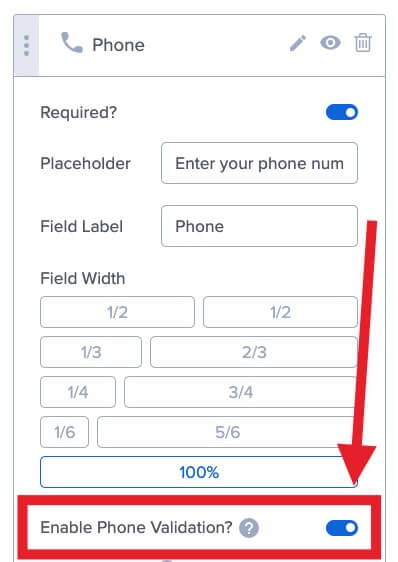
- The left sidebar panel will provide you with options to configure the new Phone field:
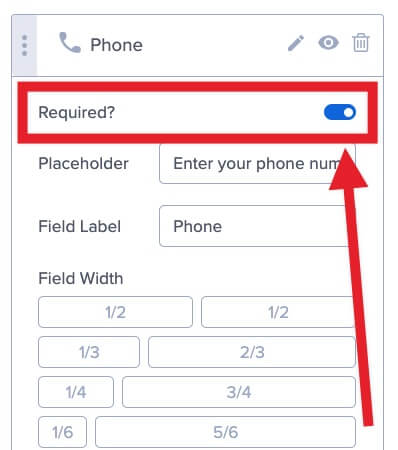
- Optional: Make the Phone field required or optional by toggling the Required? setting:
- Optional: The Enable Phone Validation? option is disabled by default. When enabled, the user will only be able to submit the following characters: 0-9, (), -, +, .
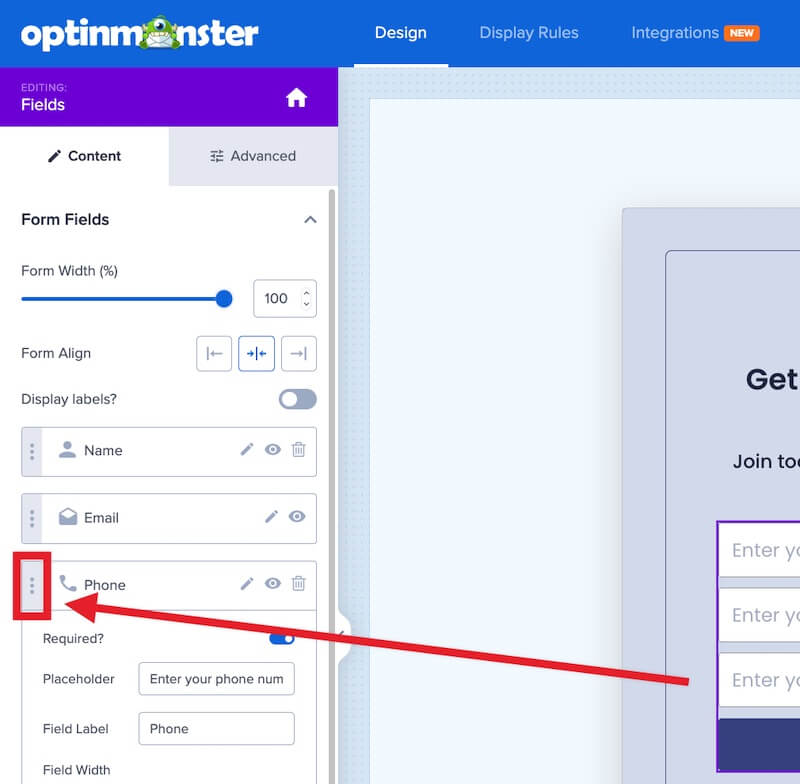
- Optional: You can reposition the Phone field by selecting the vertical three dots icon and dragging the field above or below other fields in the left sidebar panel.
- When you’re finished, Save the campaign.
FAQs
Which campaign types and templates support the phone field?
All campaign types and templates support the phone field.
If you’re serious about jumpstarting your website business growth, then get started with OptinMonster today!
Get Started With OptinMonster Today!BONUS: Done-For-You Campaign Setup ($297 value)
Our conversion experts will design 1 free campaign for you to get maximum results – absolutely FREE!
Click here to get started →

