
Fundraising Thermometers & Progress Bars: Get More Donations Fast!
Last updated on
by

Fundraising is one of the most stressful aspects of running a nonprofit. As a nonprofit marketer, you’re always looking for strategies that will help you reach your donation goals faster. Fundraising thermometers can be surprisingly effective at getting more supporters to click that “Donate Now” button.
I worked in nonprofit marketing for 15 years, and I’m going to share tips on when and how to use fundraising thermometers and progress bars. I’ll also show you 3 different ways to add one to your website, using tools like OptinMonster and Charitable.
- What Is a Fundraising Thermometer?
- Benefits of Fundraising Thermometers
- Tips for Using Fundraising Thermometers
- How to Add a Fundraising Thermometer or Progress Bar to Your Website
What is a Fundraising Thermometer?
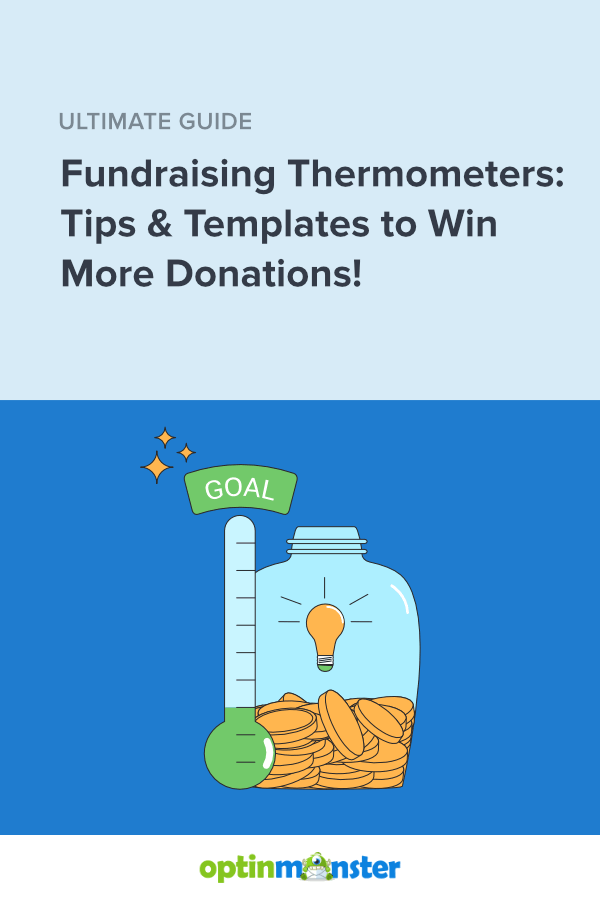
A fundraising thermometer is a visual representation of your organization’s progress toward a fundraising goal. It often actually looks like a thermometer, but it can also take the form of a horizontal progress bar.
A fundraising thermometer looks like this:

While a fundraising progress bar looks more like this:

Benefits of Fundraising Thermometers
Regardless of the form you choose, fundraising thermometers encourage supporters to make a donation so they can help fill the thermometer.
Ronald Pruitt, president and founder of 4aGoodCause, said this about why fundraising thermometers work:
“Potential donors want to know that their donation will make an impact. One study even found that people are more likely to donate to a cause when the campaign had already raised 66% or more of its goal amount. Showing donors a visual representation of the money you’ve already raised will give them that extra push to contribute.”
Ronald Pruitt, 4aGoodCausee
Here are some reasons why fundraising thermometers are so effective:
- Social proof: When people see that other people care about your cause enough to donate, they’ll feel more confident to donate, themselves. That’s called social proof, and it’s a powerful marketing tool.
- Urgency: Fundraising thermometers are usually paired with a deadline or countdown timer. This combo creates a sense urgency to fill the rest of that progress bar.
- Transparency: When donors give money, they want to trust that the organization is professional and honest. You can create transparency by being clear about your fundraising goals, your progress so far, and the dollar amount you still need.
- Feeling of Achievement: As a nonprofit marketer, you feel great satisfaction when you meet a fundraising goal. Donation thermometers let you share that celebration with your supporters.
In short, progress bars and thermometers help you build trust with your supporters and create excitement about reaching your fundraising goal.
Tips for Using a Fundraising Thermometer
When to Use Fundraising Progress Bars & Thermometers
- Special fundraising events: Do you host an annual auction, gala, telethon, or other fundraising event? Update your fundraising thermometer throughout your event to encourage attendees to help you push toward your final goal.
- Giving Tuesday: The Tuesday after Thanksgiving is dedicated to raising money for important causes. A progress bar lets you communicate your fundraising goal and progress throughout that day or week.
- Capital Campaigns: Nonprofits run capital campaigns to raise a large amount of money for a specific project, such as renovating a facility. For these large goals, wait until you’re at least 2/3 of the way toward your goal before using a fundraising thermometer. Otherwise, the large dollar amount will seem intimidating to donors. But once you’ve hit that point, the progress bar will help you close that final funding gap.
- Any short-term fundraising goal: You can use this fundraising tool any time you have a specific donation goal for a project or time period. Just remember that thermometers work best for shorter donor drives. If it’s going to take 6 months to fill your thermometer, then consider breaking your fundraising campaign into smaller goals.
Where to Add Fundraising Thermometers & Progress Bars
- Website landing pages: For any significant fundraising campaign, create a dedicated landing page that explains your goal, shows your fundraising thermometer, and includes a prominent Donate button or form.
- Email marketing campaigns: Email marketing is a powerful way to connect with your organization’s supporters. Your email subscribers have chosen to hear from you, so keep them updated on the progress of your donation drives by including your fundraising thermometer.
- Social media: Throughout your fundraising campaign, regularly update your followers by showing how much more you need to fill your thermometer.
- Website popups and floating bars: Donation progress bars help you raise more money with your website’s popups and floating bars. With OptinMonster’s robust targeting and triggering rules, you can tailor them specifically for visitors who are most likely to make a donation.
Get More Donations With OptinMonster!
OptinMonster helped the American Bird Conservancy increase its fundraising lead collection by 1000%!
How to Add a Fundraising Thermometer or Progress Bar to Your Website
Next, I’m going to show you a few different ways to incorporate fundraising progress bars and thermometers on your website.
- How to Add a Fundraising Progress Bar to Your OptinMonster Popup or Floating Bar
- How to Add a Fundraising Thermometer to an OptinMonster Campaign
- How to Add a Fundraising Progress Bar to Your Donation Form with Charitable
1. How to Add a Fundraising Progress Bar to Your OptinMonster Popup or Floating Bar
First, I’ll show you how easy it is to add a fundraising progress bar to an OptinMonster campaign. All OptinMonster customers at the Pro level or higher have access to the Progress Bar block. Here’s a quick video on how it works:
There are lots of possible uses for a progress bar, but I’m going to you step-by-step instructions on how to use one in a fundraising floating bar.
OptinMonster offers over 700 pre-made templates to help you get started. Today, I’m going to use our Giving Tuesday floating bar template:

OptinMonster’s drag-and-drop builder makes it easy to customize any template to meet your organization’s needs.
In just a few minutes, I can edit the Giving Tuesday template to look like this:

Step 1: I want this floating bar to focus on fundraising, so I hovered over the “Join our mailing list” text box and clicked the trash can icon.

Step 2: Next, I want to add a Progress Bar block to this campaign. I clicked the Home icon in the left navigation menu and scrolled down to find the Progress Bar block. I simply clicked and dragged that block to the space below the countdown timer:

Step 3: With the Progress Bar block in place, I can now customize it. Just click on that block in the builder, and you’ll see the Progress Bar settings in the left menu.

For my fundraising progress bar, I changed the following.
- I changed the text to “$3200 Raised!”
- I edited the Percentage Complete to 65%.
- I changed the colors in the progress bar
- I changed the Bar Style to the striped option
- Under the Advanced tab, I edited the font to match the rest of the campaign, and I increased the font weight for better readability.
As you continue to collect more donations, you can adjust the dollar amount in the text and the percentage in the progress bar. Those changes will go live when you save the campaign.
Step 4: The next step is to edit the call-to-action (CTA) button. This template uses OptinMonster’s Yes/No block. Just like with the Progress Bar block, I can click on the Yes/No block to edit the buttons in the left menu.
I made these changes to the Yes Button:
- I changed the Button Text to “Help Us Reach $5000!”
- I edited the Button Click Action to be Redirect to a url.
- I entered the URL for the website’s Donate page under Redirect URL
Now, users who click the Yes button will be taken to a page to make a donation.
For the No Button, I made these changes:
- I changed the Button Text to “I can’t donate, but I want to learn more!”
- I changed the Button Click Action to Go to a view.
- Under Go to a View, I selected The Optin View.
After making these changes, my floating bar looks exactly how I want it:
Users who click the red “Help Us Reach $5000!” button will be redirected to a donation page. Users who click “I can’t donate, but I want to learn more!” will see the Optin View of the campaign, which I’ll edit next.
Step 5: Click the Optin tab at the bottom of the page to edit the Optin View.

I want this view to focus on letting users stay up-to-date on my nonprofit’s work, so I edited it to look like this:

I followed the same methods I’ve already shown you. I simply clicked each block to access the editing settings.
Step 6: Users who submit an email address will then see the Success View. I clicked the Success tab at the bottom of the screen and edited to blocks until it looked like this:

With these simple steps, you’ll have a floating bar on your website, complete with a fundraising progress bar to encourage donations. But since not everyone is going to be ready to give money, the bar also gives visitors a chance to join your email list. Then, you can continue to nurture those subscribers toward making their first donation.
2. How to Add a Fundraising Thermometer to an OptinMonster Campaign
Fundraising progress bars are a bit more versatile than actual thermometers. But if you want the traditional, vertical fundraising thermometer, you can easily add one to any OptinMonster campaign.
CauseVox offers a free fundraising thermometer creator, which lets you enter your data to create a custom thermometer:

Then, you can either download the image or copy the Javascript code.
Several other fundraising thermometer tools are available, or you can create your own graphic using a design tool like Canva. But for today, I created one with CauseVox’s tool and downloaded the .jpg image. Next, I added it to an OptinMonster popup template.
Many OptinMonster templates include an Image block, or you can drag an Image block into any campaign. Simply click on the block and add your thermometer image:

I suggest creating thermometers at various percentage levels at once, so you have them ready when it’s time to update your popup.
3. How to Add a Fundraising Progress Bar to Your Donation Form with Charitable
You can also add a fundraising progress bar directly on your donation form with Charitable.

Charitable is a WordPress plugin dedicated to helping nonprofits collect donations. With Charitable, you can:
- Create fundraising campaigns with a drag-and-drop builder
- Collect one-time and recurring donations
- Integrate your donor data with other marketing platforms
- Manage peer-to-peer fundraising
- Monitor your fundraising with in-depth reports
Plus, nearly all of Charitable’s campaign templates include a fundraising progress bar. Here’s an example:

This progress bar is directly connected to your fundraising platform, so you don’t have to do anything to update it. Your fundraising progress bar will automatically change as more donations come in through your form. That means your website visitors can see your progress in real-time!
Try Charitable today, with a 14-day money-back guarantee!
Energize Your Fundraising Today!
Fundraising thermometers and progress bars can help you ramp up your donation drives. Add them to your website, email campaigns, and social media posts, and see what a difference they can make!
I want to leave you with one last tip to increase your online donations. I’ve shown you how you can use OptinMonster campaigns to ask for donations. You can also target and optimize those campaigns to get more (and larger!) donations.
OptinMonster lets you target your campaigns to new or returning visitors. Using those settings, you can create 2 donation campaigns:
- A campaign for first-time visitors that asks for a $5 donation.
- A campaign for returning visitors that asks for a $15 donation.
By using this strategy, you ask for a larger donation from people who are more familiar with your organization, while showing a very small ask for first-timers.
If those returning visitors don’t convert when you ask for $15, you can use OnSite Retargeting® to show a smaller request the next time they visit your site. This strategy creates a marketing funnel that tailors your asks based on each visitor’s behavior.
With OptinMonster, you have precise control over your donation popups, floating bars, and other onsite campaigns. And that control lets you show the right donation asks to the right people at just the right time.
More Resources for Nonprofits:
Disclosure: Our content is reader-supported. This means if you click on some of our links, then we may earn a commission. We only recommend products that we believe will add value to our readers.

-01 - OptinMonster")


Add a Comment