Easily show an optin form within your page content, sidebar, or below blog posts using Inline campaigns in OptinMonster. This type of campaign shows on the page instead of overlaying the page content.
In this article, you’ll learn how to create an Inline campaign.
Before You Start
Here are some things to know before you begin:
- Inline campaigns must be embedded within the page content where you want them to appear. They will not automatically appear on your site without this step. See our guide for embedding Inline campaigns.
Create Inline Campaign
To create an Inline campaign, follow these steps:
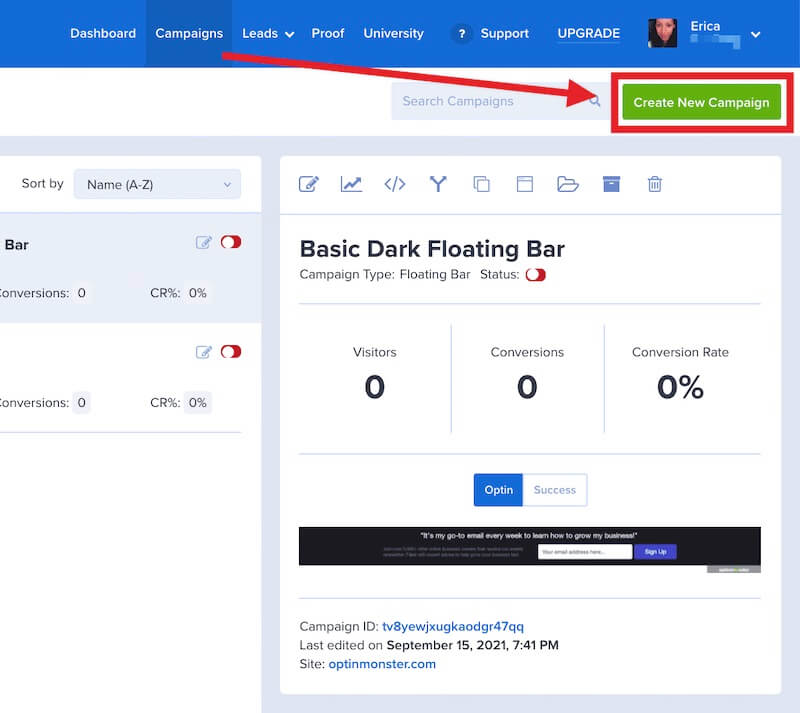
- From the Campaigns screen, select the Create New Campaign button.
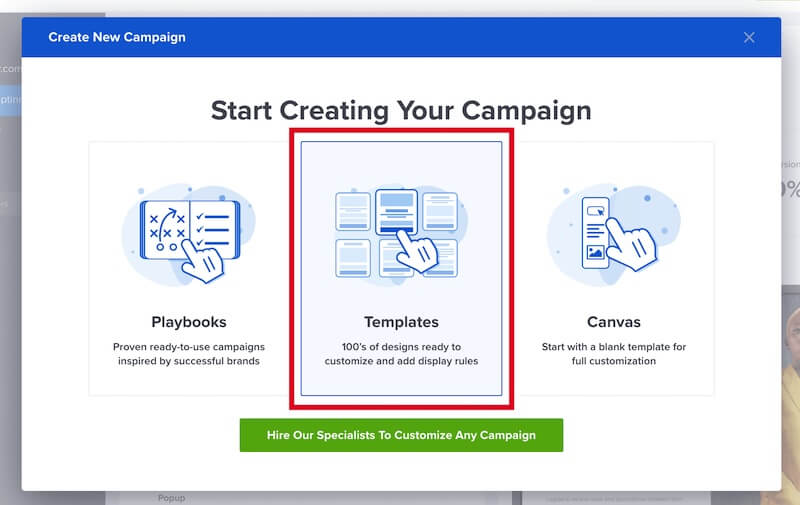
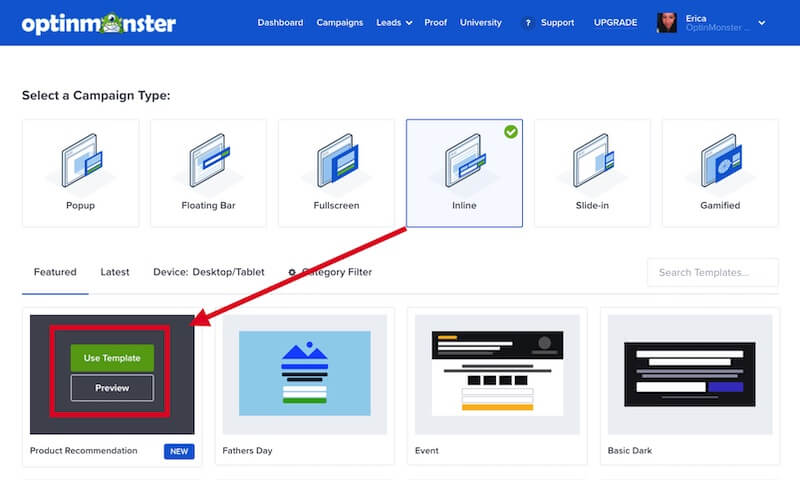
- From the modal, select Templates as the type of campaign you’d like to create.
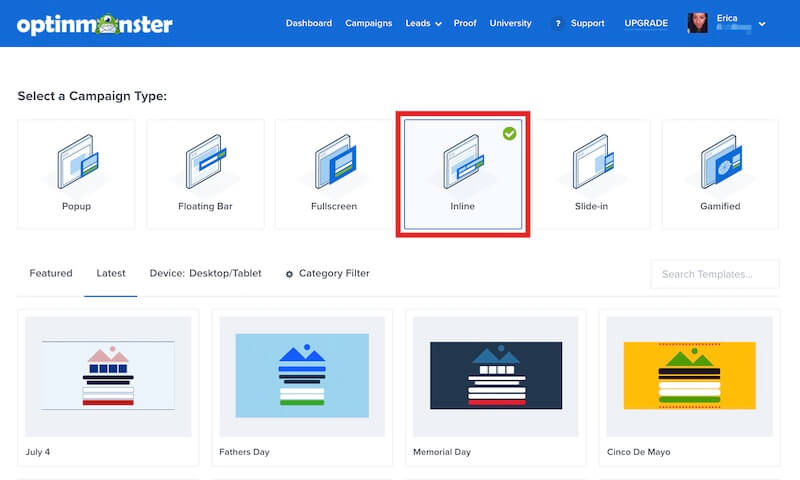
- On the next screen, select Inline as the campaign type.
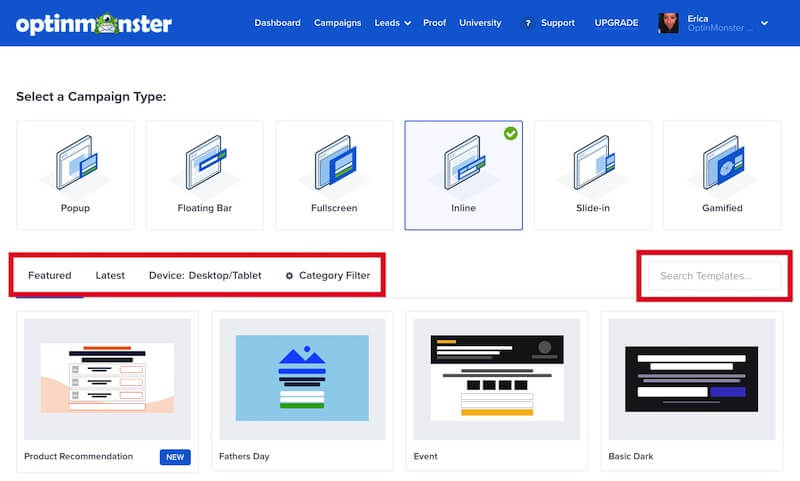
- You can filter, sort, and search from available Inline campaign templates.
- Hover over any template in the list to Preview or Use Template to select it and open the campaign builder.
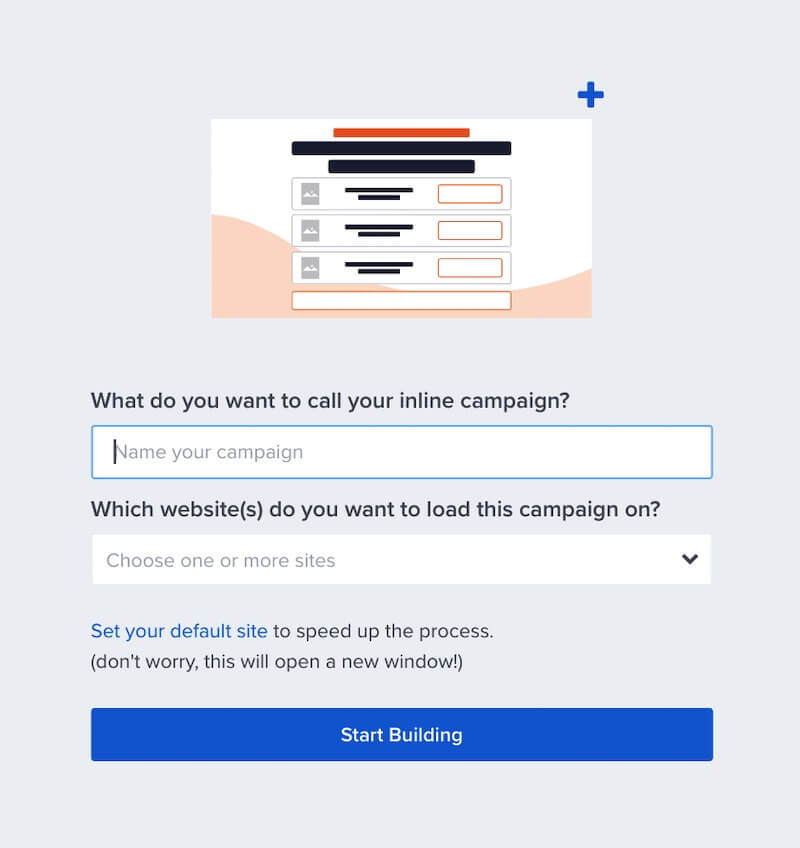
- Once you’ve selected a campaign you’ll be prompted to give it a name and assign it to a site in your account.
Select the Start Building button to create the campaign and open it in the builder to customize. - You can now configure and customize your campaign in the builder, be sure to Save the changes as you work.
Just getting started? Follow our guide here to customize your campaign, or join a demo!
Frequently Asked Questions
How are Impressions (Visitors) counted for Inline campaigns in my analytics reports?
An Inline campaign’s impression is counted when the campaign visually appears within the browser window to your visitor.
If the campaign is placed below the fold of your site the visitor will need to scroll the campaign into view before an impression is counted.
If you’re serious about jumpstarting your website business growth, then get started with OptinMonster today!
Get Started With OptinMonster Today!BONUS: Done-For-You Campaign Setup ($297 value)
Our conversion experts will design 1 free campaign for you to get maximum results – absolutely FREE!
Click here to get started →
Troubleshooting
I’ve added the OptinMonster Global Embed code to my site but my Inline campaign isn’t showing up.
You’ll want to be sure to place the Inline campaign’s embed code directly within your page content where it should appear to your visitors. This is required even if you’ve already added the Global Embed Code to your site.
Follow our guide for embedding Inline campaigns on your site.
Why does my Inline campaign’s design appear squished on the page?
Inline campaigns will automatically stretch to fit the width of the content area they are embedded within.
If you’re embedding the campaign within a narrower block of content on your site than the campaign appears in the builder it can cause significant visual differences between the two views.
We recommend you adjust the max-width of the campaign in the builder to more closely resemble the size of the block you will be embedding the campaign in on your site. This will make it easier to adjust the design to fit how it will appear on your site.
Why am I missing some Display Rules for my Inline campaign?
Inline campaigns will visually appear when the page is loaded and cannot be configured to use conditions like Time Delay, Scroll Percentage, Exit-Intent, InactivitySensor or MonsterLink to trigger their appearance. Those options will not be available when setting the Display Rules for your Inline campaign.

