Using OptinMonster’s MonsterLink feature, you can also create a floating MonsterLink uniquely styled.
In this article, you’ll learn how to create a floating MonsterLink button that closes once it’s clicked on.

Before You Start
Here are some things to know before you begin:
- MonsterLinks are available with a Pro or higher subscription.
- This article assumes you’ve already created a campaign and configured it to appear by MonsterLink.
Custom Floating Button
This method allows you to create a completely custom floating button using code. We’ll show you two examples: one that slides in from the right and another that slides up from the bottom.
This method is for more advanced users who are comfortable adding HTML, CSS, and JavaScript to their website. The code provided in these examples can be added directly to your website but we are unable to provide technical support for custom code implementations.
Example 1
In this first example, we’ll create a floating MonsterLink that slides in from the right side of the screen.

The HTML
Since the position of the Floating MonsterLink is set to absolute you can add the HTML anywhere in the body of your page.
The CSS
RECOMMENDED:
If the site’s body element doesn’t already include overflow: hidden; in its CSS styles we recommend you add this to prevent scrollbars from appearing when the Floating MonsterLink animates into and out of view.
body { overflow: hidden !important; }
The Javascript
We’re going to use some jQuery animations to smoothly transition the Floating MonsterLink into view, and the OptinMonster Javascript Events API to hide the Floating MonsterLink once the visitor selects the MonsterLink to open the campaign.
Be sure to load the jQuery library on your site before implementing the following code.
Example 2
In this second example, we’ll create a floating MonsterLink that slides in from the left side of the screen.

The HTML
Since the position of the Floating MonsterLink is set to absolute you can add the HTML anywhere in the body of your page.
The CSS
RECOMMENDED:
If the site’s body element doesn’t already include overflow: hidden; in its CSS styles we recommend you add this to prevent scrollbars from appearing when the Floating MonsterLink animates into and out of view.
body { overflow: hidden !important; }
Step 3 – The JavaScript
We’re going to use some jQuery animations to smoothly transition the Floating MonsterLink into view, and the OptinMonster Javascript Events API to hide the Floating MonsterLink once the visitor selects the MonsterLink to open the campaign.
Be sure to load the jQuery library on your site before implementing the following code.
Embedding the Campaign
Be sure to embed the campaign wherever you plan to display the Floating MonsterLink according to our MonsterLinks documentation.
In the examples in this article, we created a Lightbox campaign, but you can manually trigger any popup type campaign.
Downloading the PSD Files
You can optionally download the original PSDs used to create our demo Floating MonsterLinks from the following links:
Download the Style 1 PSD File — Download the Style 2 PSD File
Trigger via Slide-in Campaign
If you’re not comfortable with code, this is the method for you! We’ll set up a Slide-In campaign that appears on the screen, and when a visitor clicks a button inside of it, your main campaign (like a Popup campaign) will open. Let’s get started!
- First, you’ll need the Monsterlink for the campaign you want to open. Follow our guide to get your campaign’s MonsterLink code and copy it to your clipboard before moving to the next step.
- Now, we’ll connect that MonsterLink to a button in a Slide-in campaign. If you haven’t created one yet, you can follow our guide on how to create a Slide-in campaign.
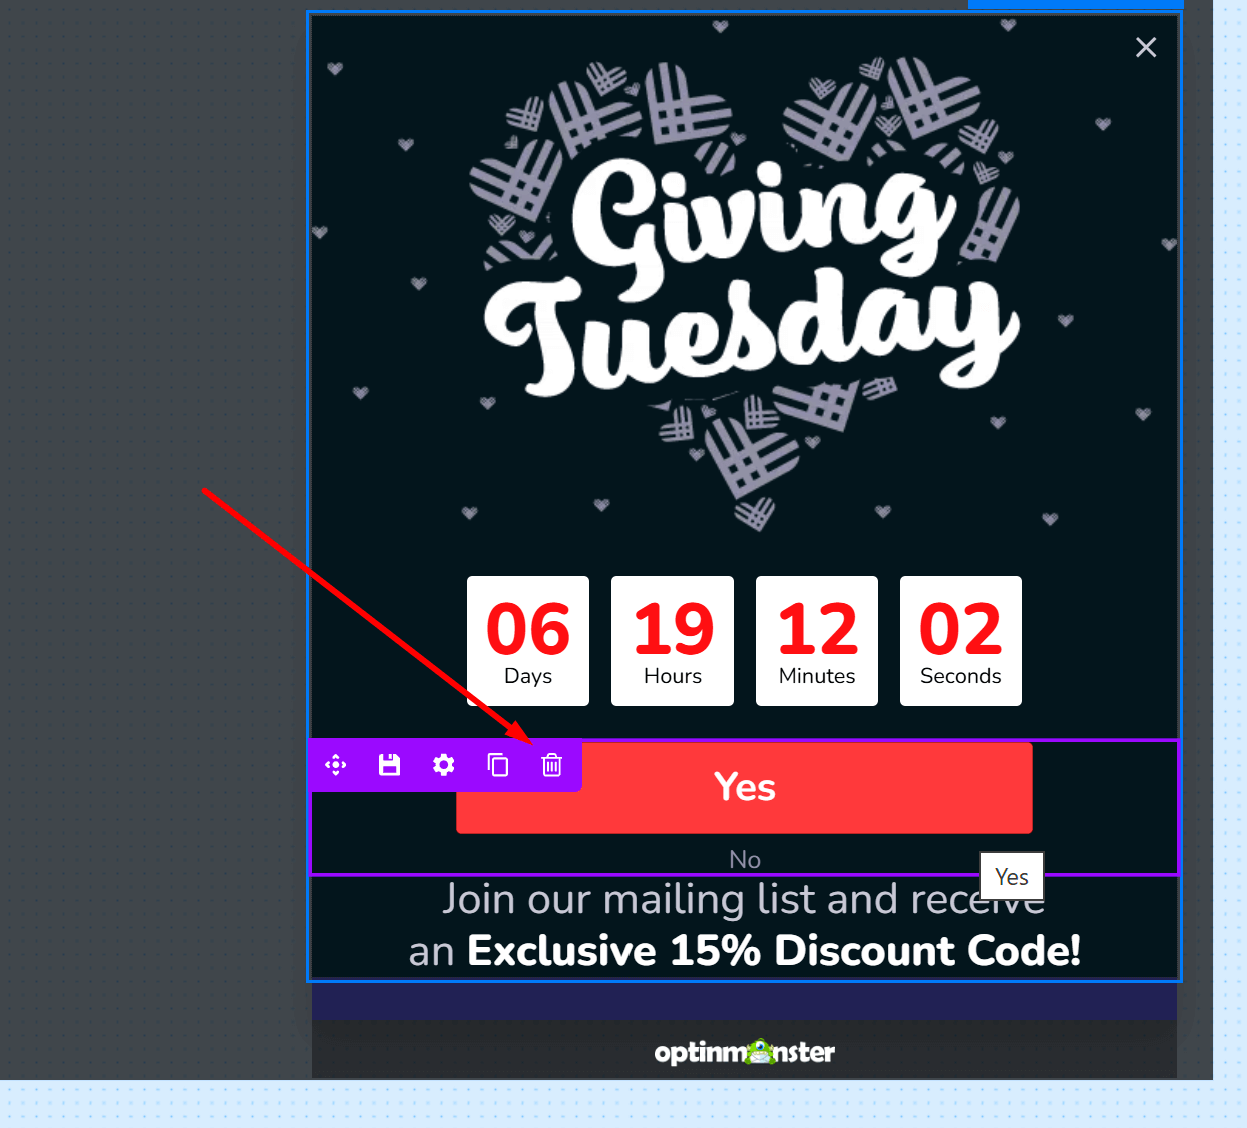
- If your OptinMonster campaign already contains a Fields block or Buttons block, you’ll need to delete it.
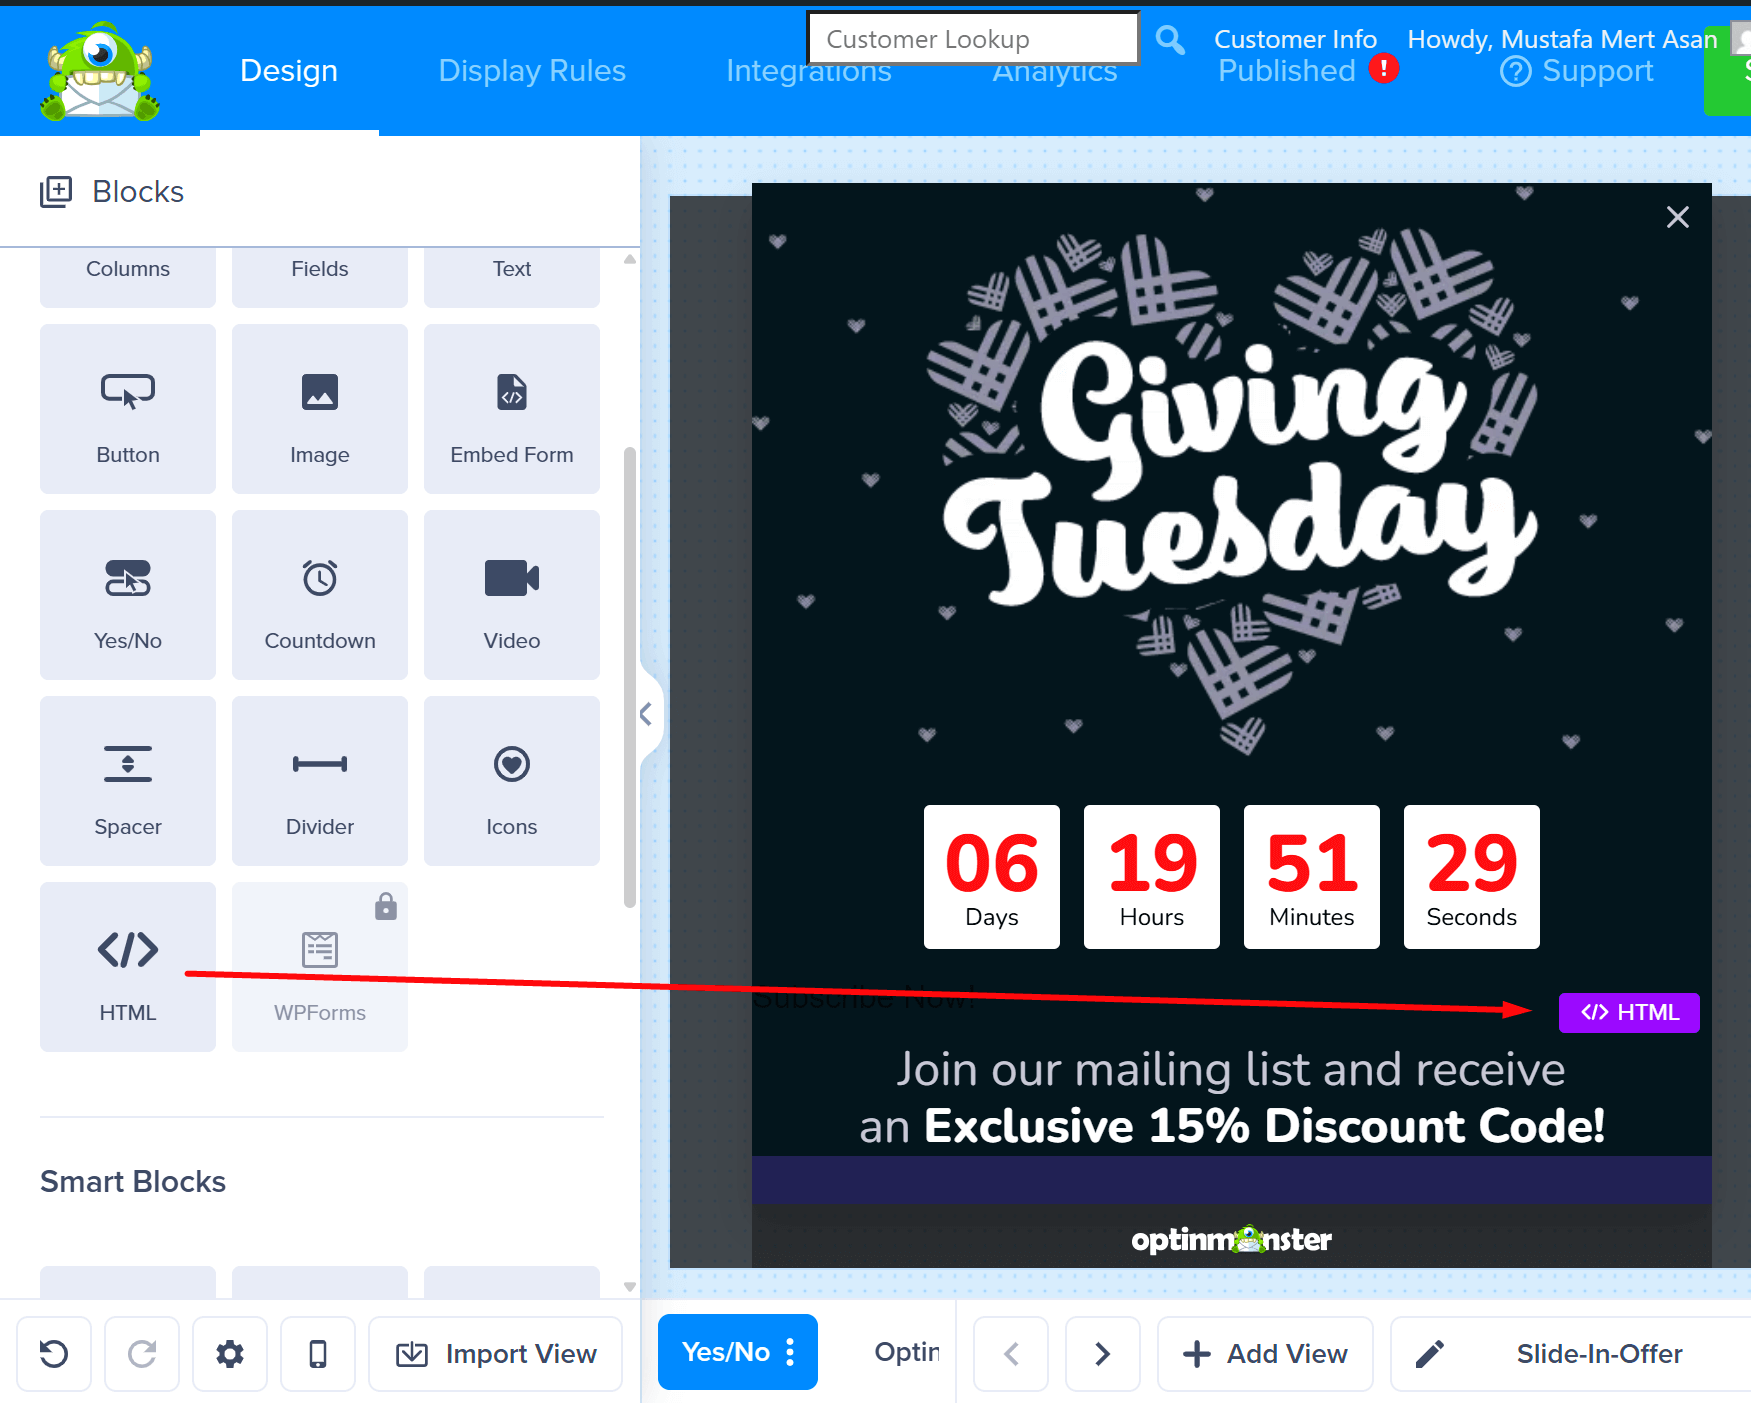
- From the left sidebar, drag and drop an HTML block into your campaign design.
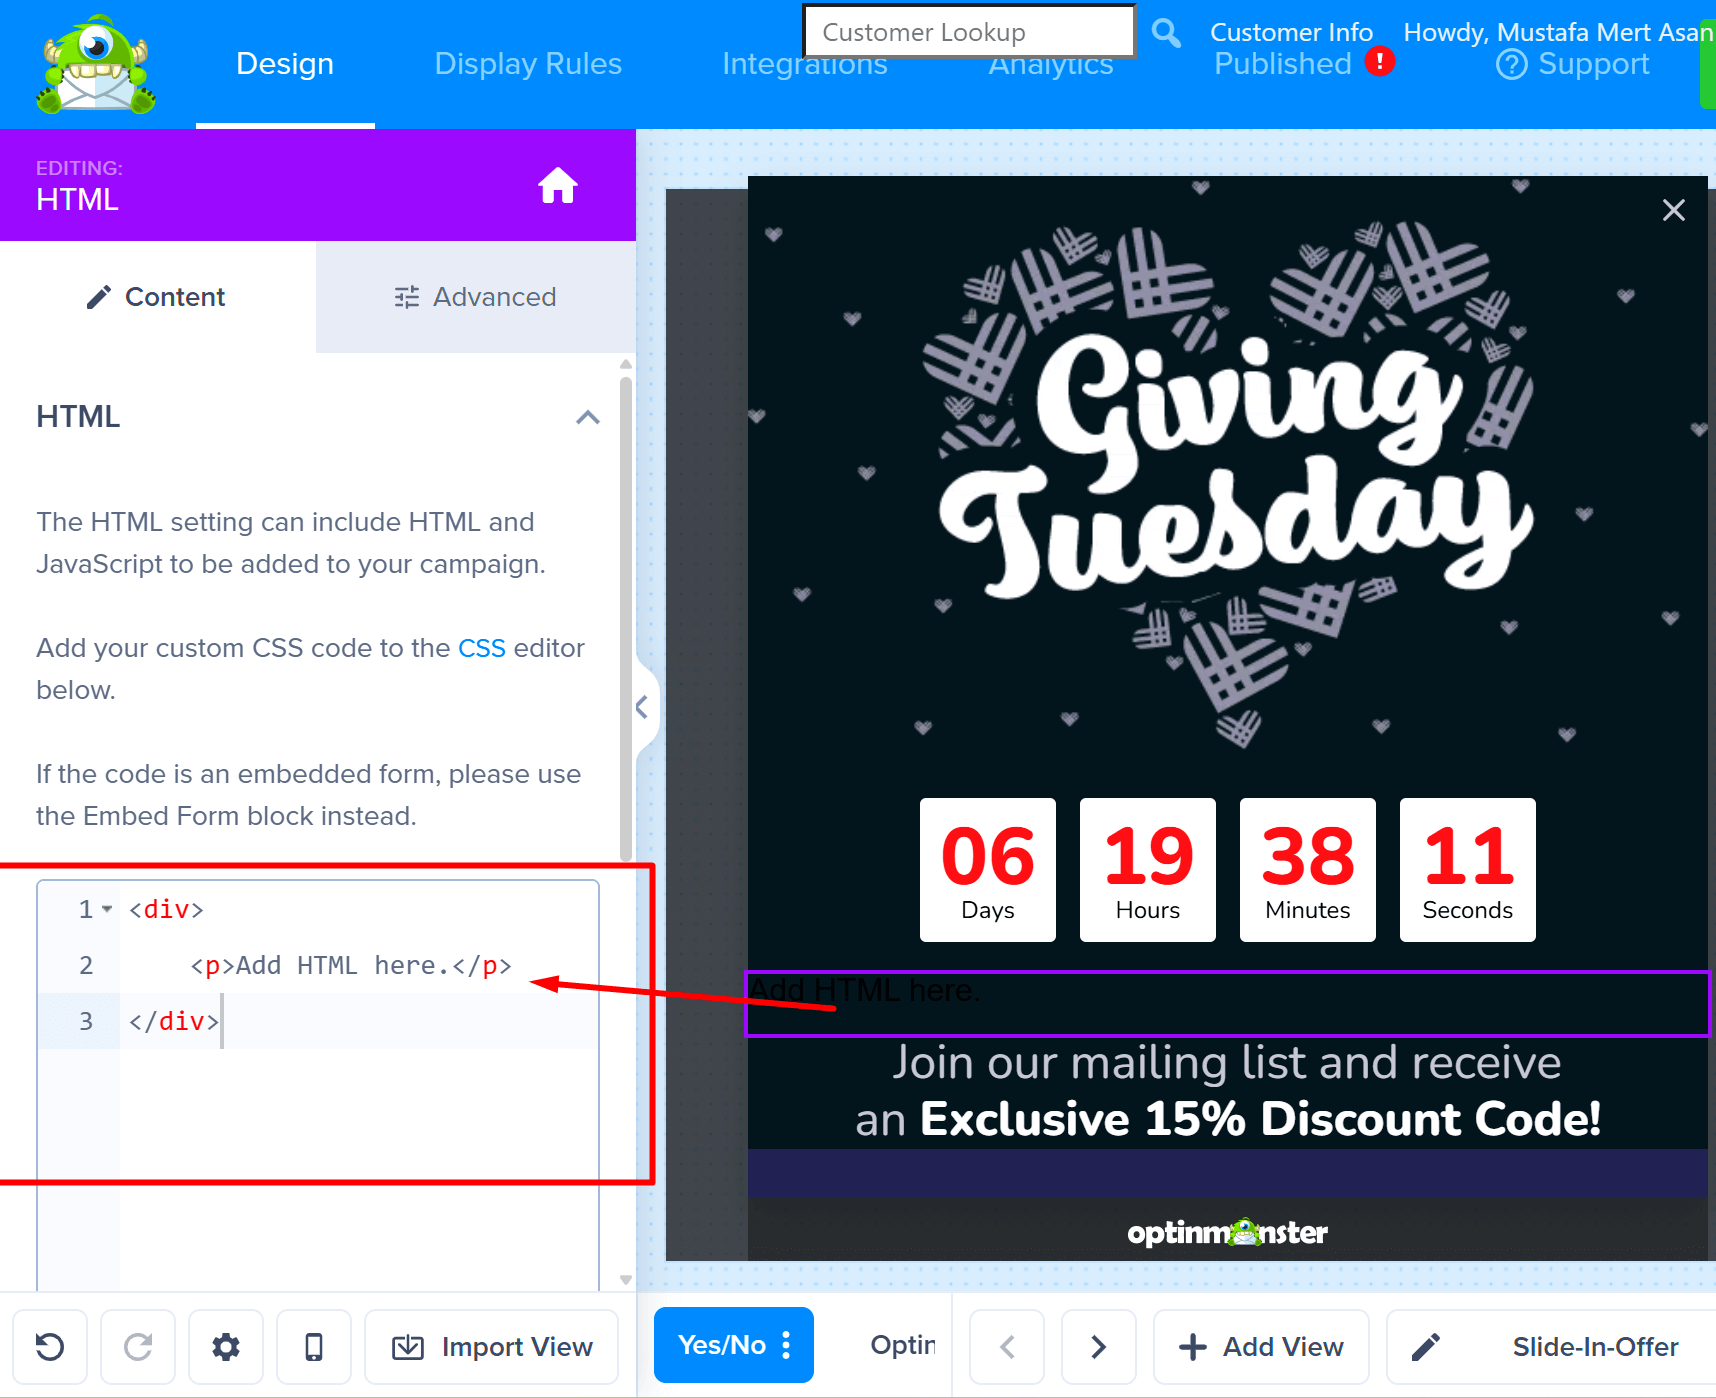
- Click on the new HTML block in your campaign to bring up the editing panel on the left.
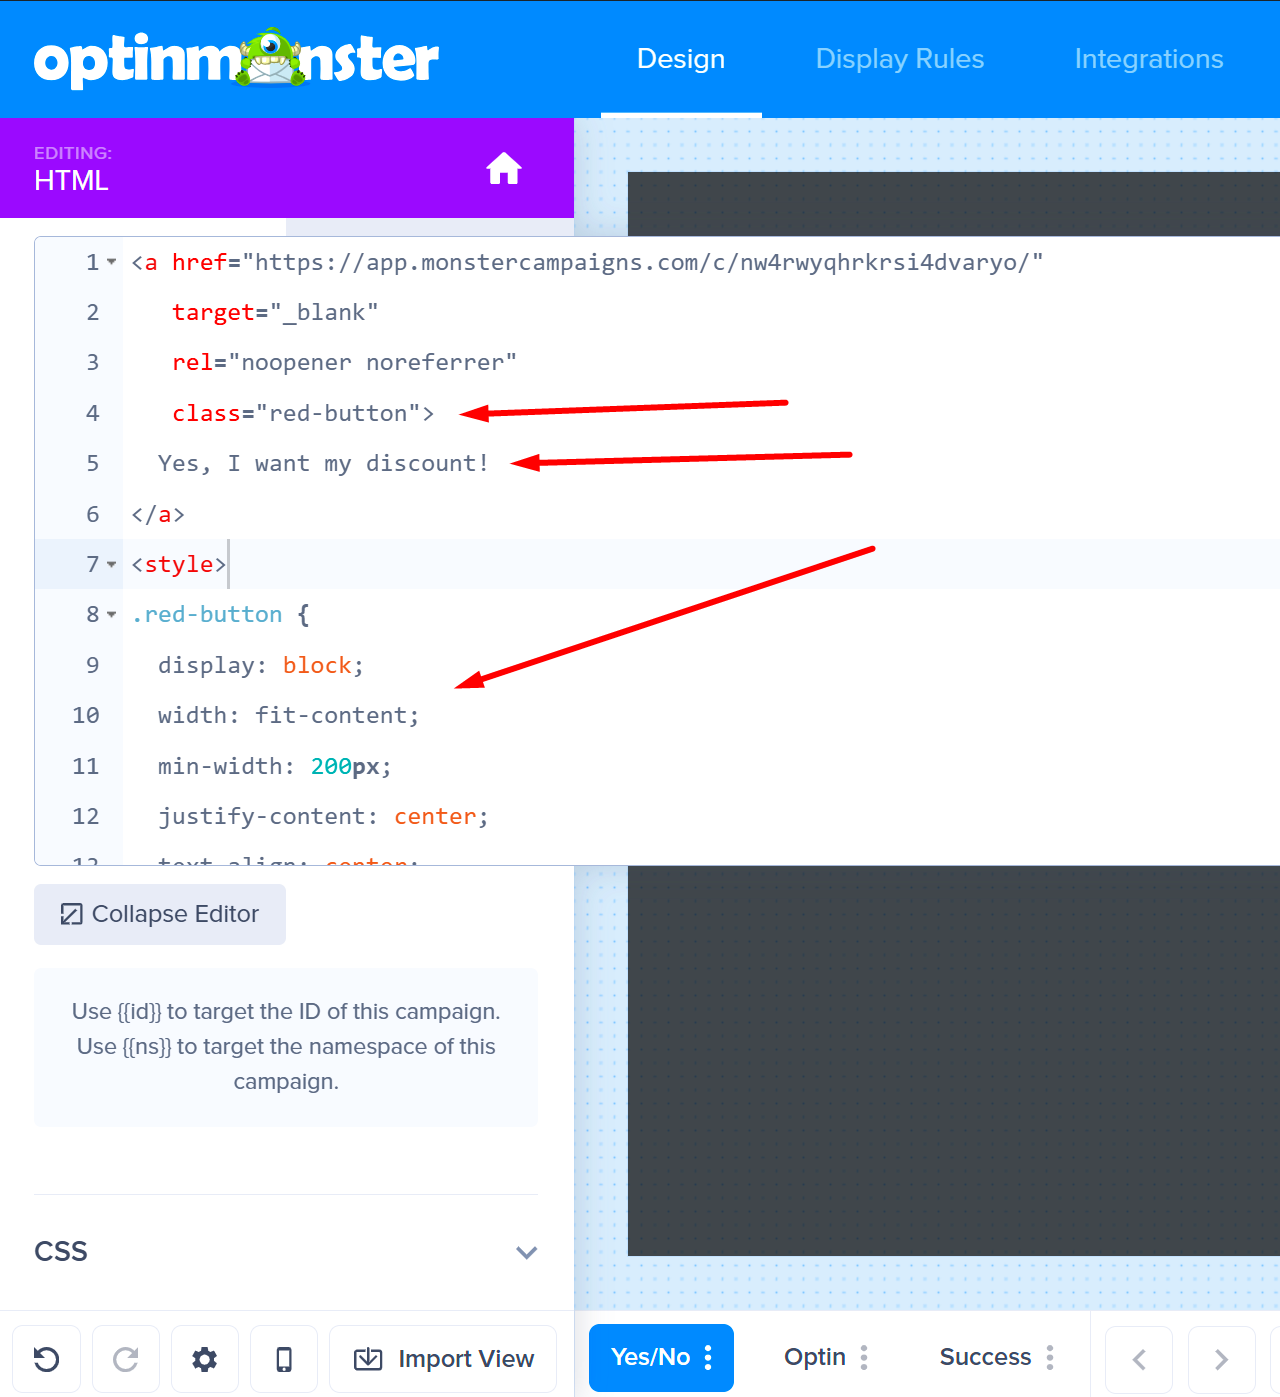
- Now, paste the full MonsterLink code you copied earlier directly into the HTML editing field.
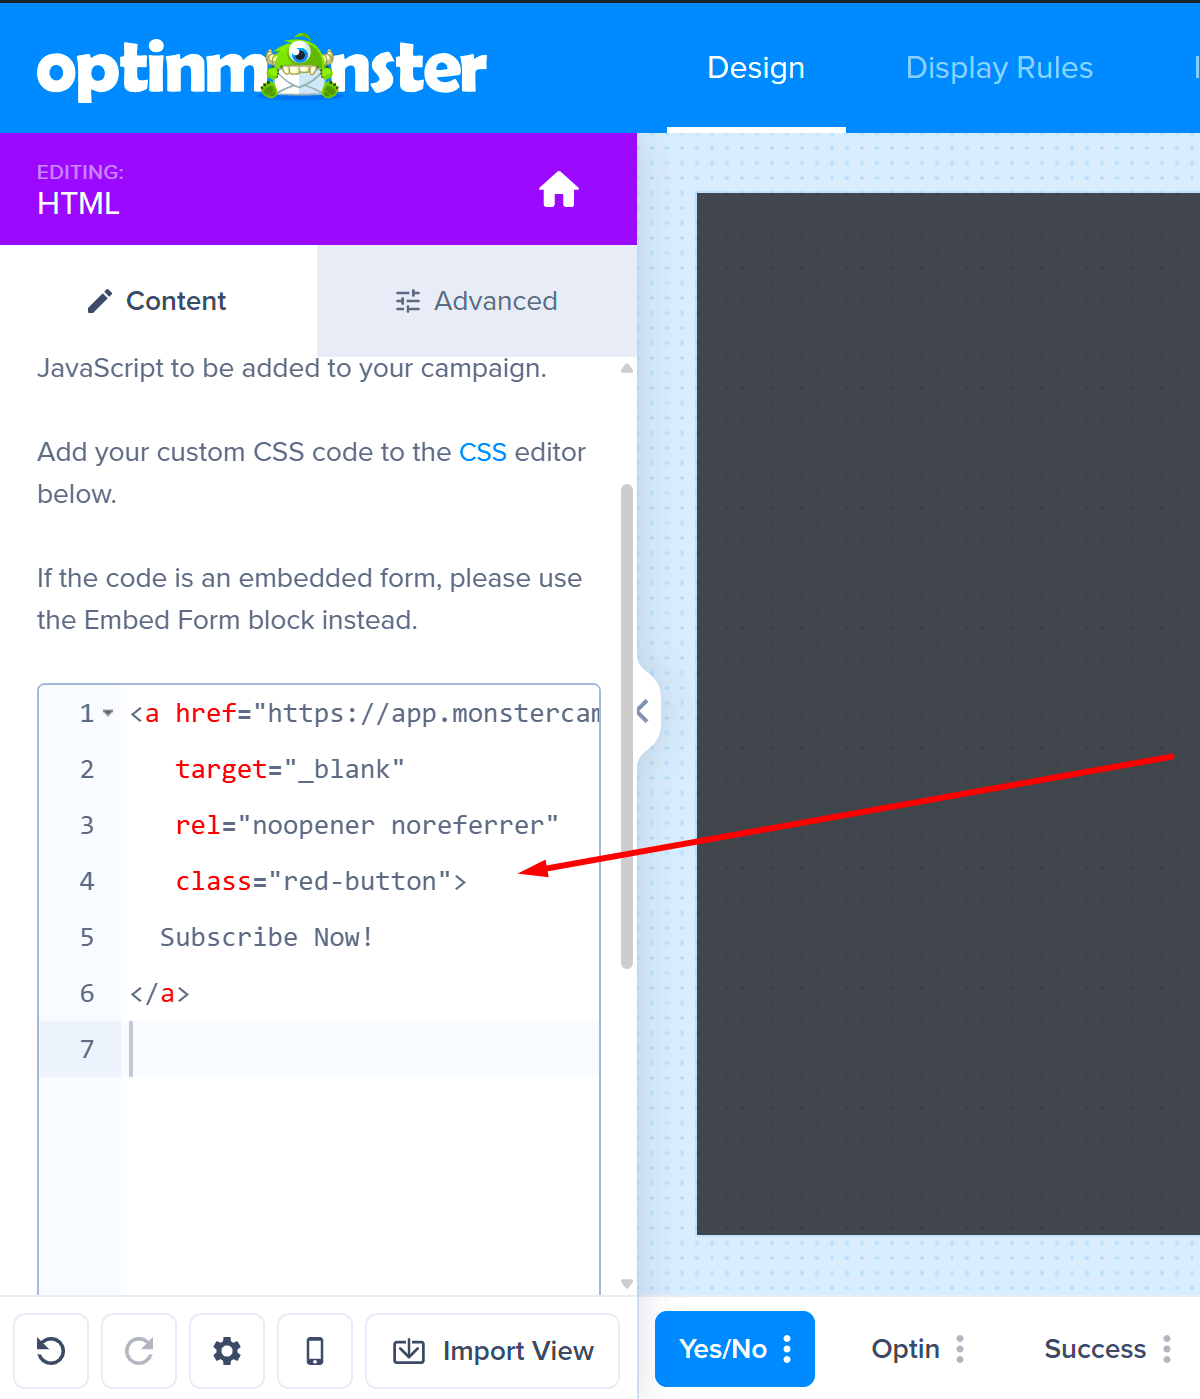
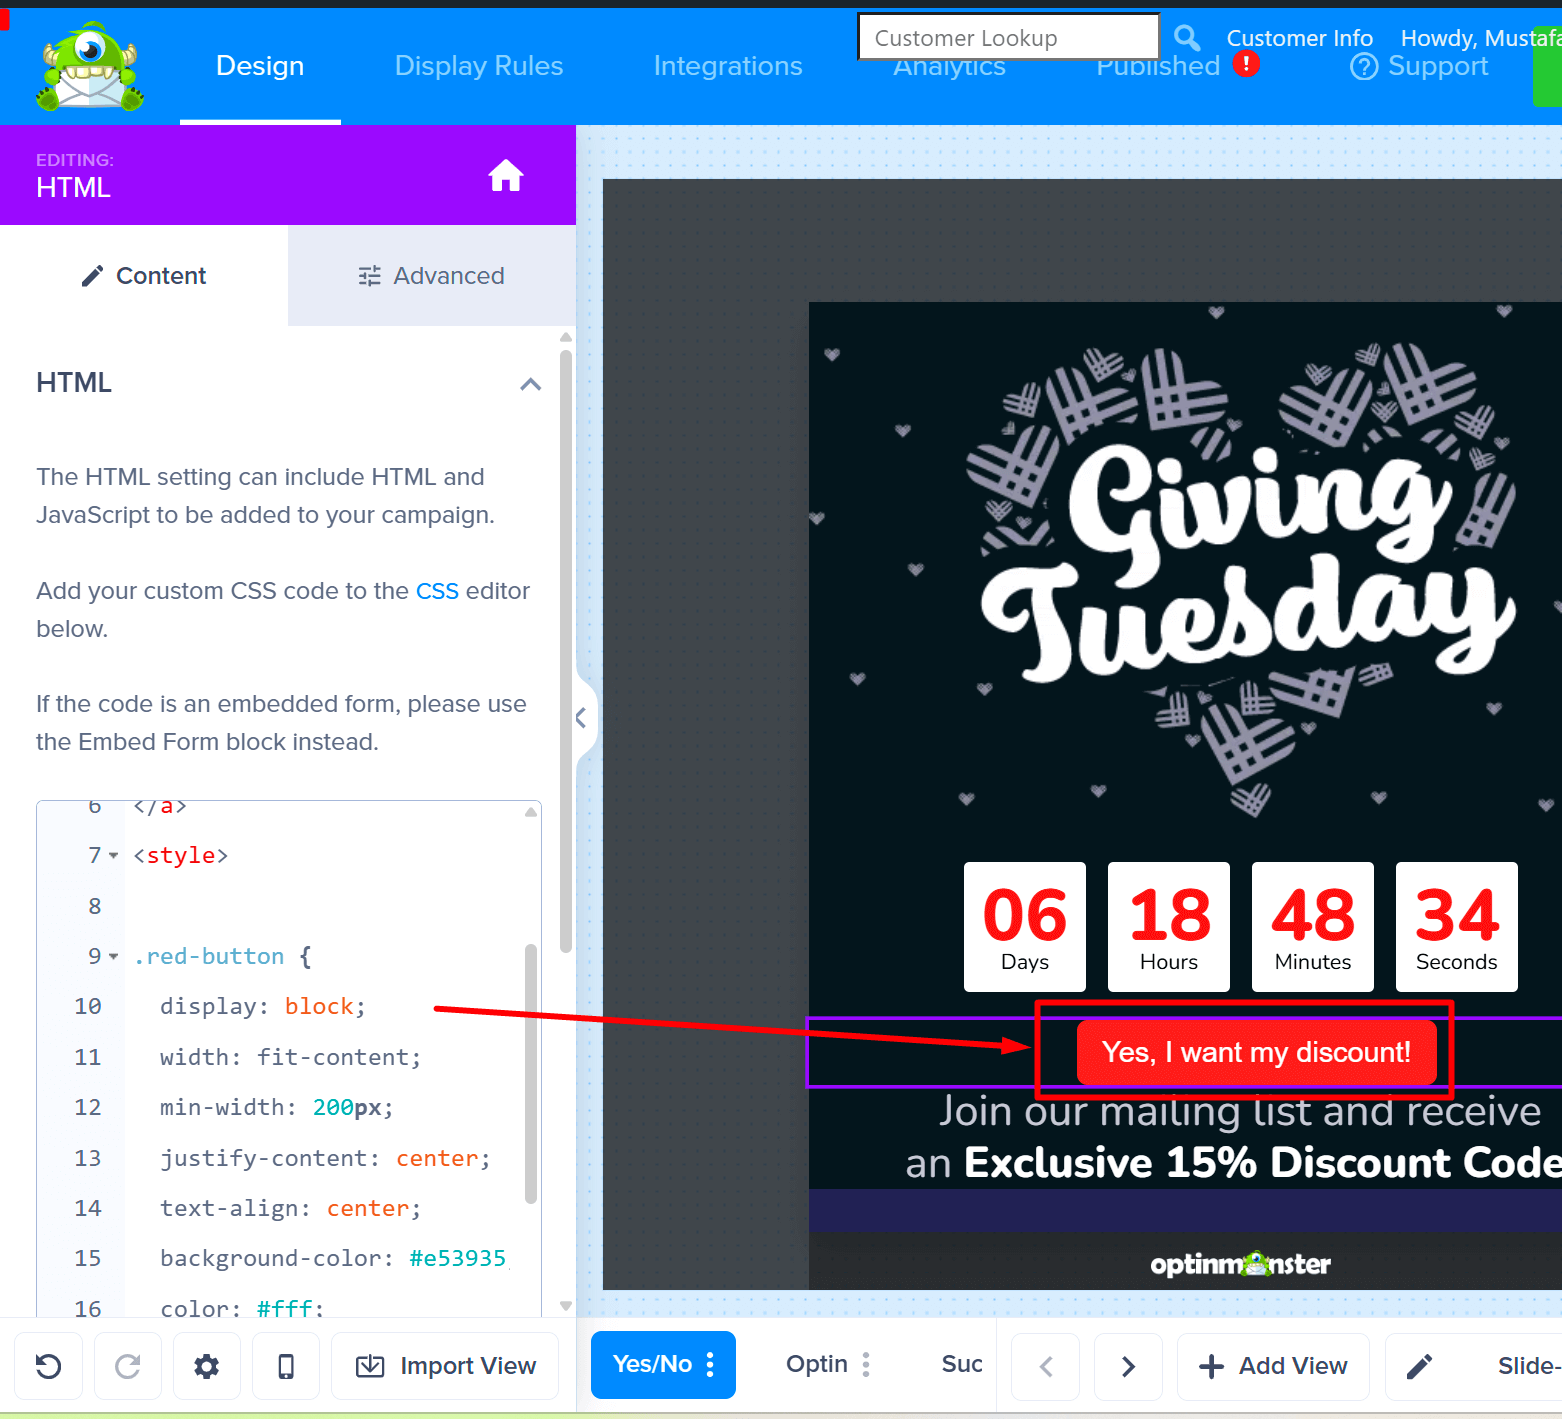
- You can customize the link text, for example, change it to Yes, I want my discount! for more impact and add styling to the Monsterlink code by giving it a class to improve its appearance.
Here’s the code added to the custom HTML block in this example, which will now display as a button.
- If you want the slide-in campaign to close when the button is clicked, add the
om-trigger-closeclass; if you want it to be counted as a conversion, add theom-trigger-conversion
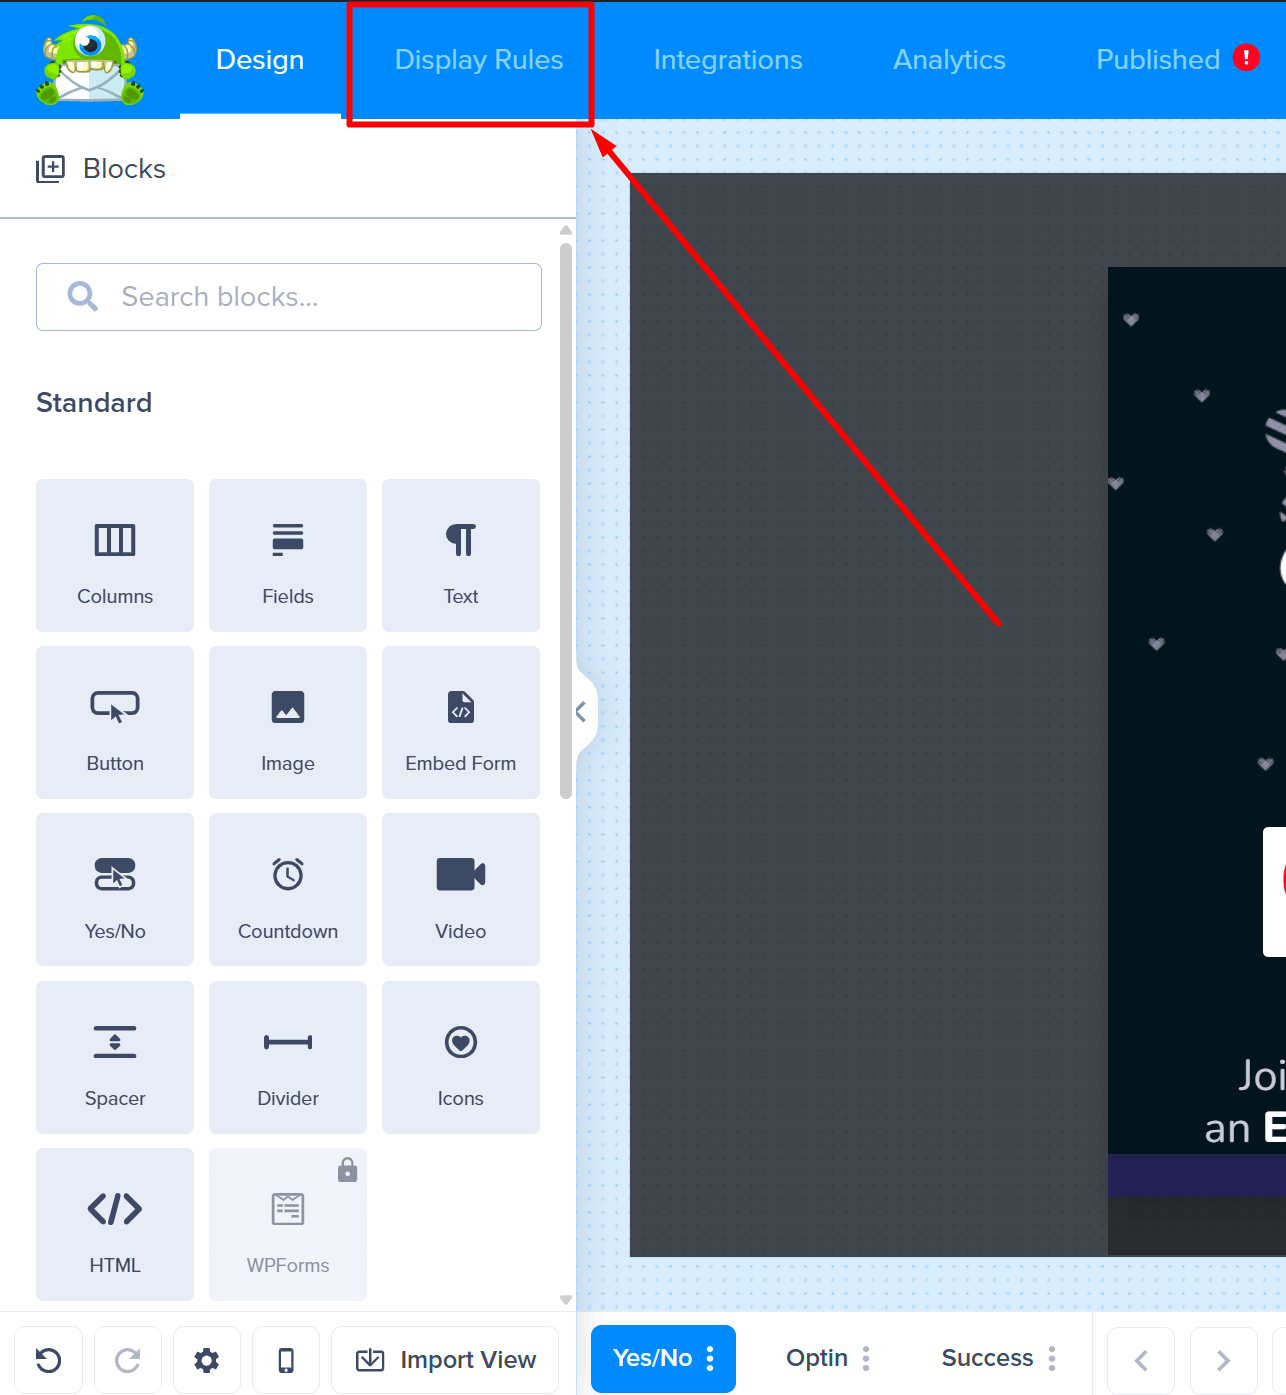
- When you’re done, go to the Display Rules tab to configure when your Slide-in should appear.
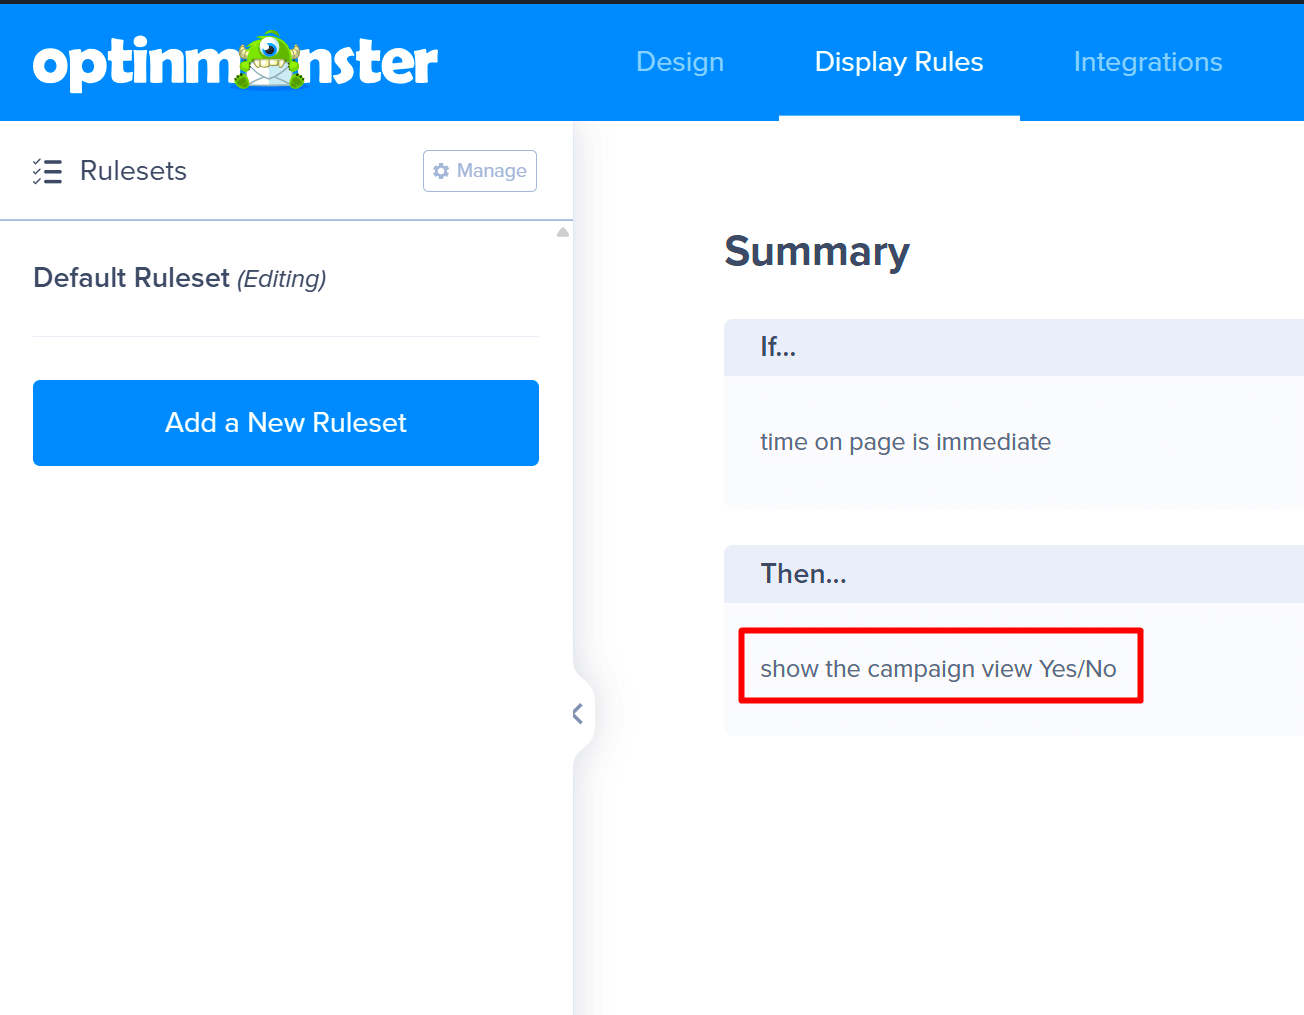
Important!
Make sure to select the view where you placed the Monsterlink embed code, for example, in this example, I added the Monsterlink to the Yes/No view, so that view should be selected to display when the display rules are met.
- Finally, Save and Publish both of your campaigns. Now, the link in your Slide-in will trigger your main campaign! That’s it!
FAQs
Is it possible to reposition the Slide-in campaign where the Monsterlink code has been added?
Yes, follow our guide here to reposition the Slide-in campaign to a different area of the screen.

