
Are you looking for how much revenue your OptinMonster campaigns have generated on your site? Google Analytics 4 can show you the revenue from visitors who converted on a campaign.
In this article, you’ll learn how to view revenue generated from OptinMonster campaigns in Google Analytics.
Before you start, this guide assumes you’ve already connected your campaign with Google Analytics.
Analytics data from OptinMonster: you can also view it inside your account by following this guide.
Understanding How Revenue Connects to Your Campaigns
OptinMonster sends 2 events to your GA4 property: optinmonster_impression and optinmonster_conversion. Each one includes the campaign name (om_campaign_name) and the campaign ID (om_campaign_id) as event parameters.
These events don’t include revenue. Your revenue comes from the purchase event that your site sends to Google Analytics.
To connect the 2, you’ll create a segment of the visitors who triggered optinmonster_conversion, and then look at the revenue for that segment.
Learn how OptinMonster’s own Revenue Attribution feature reports revenue
Creating the Custom Dimensions
Before you can use the campaign name in a report, you’ll need to register it as a custom dimension in Google Analytics.
To create the custom dimensions, follow these steps:
- First, sign into your Google Analytics account and select the property you’ve connected to your campaign.
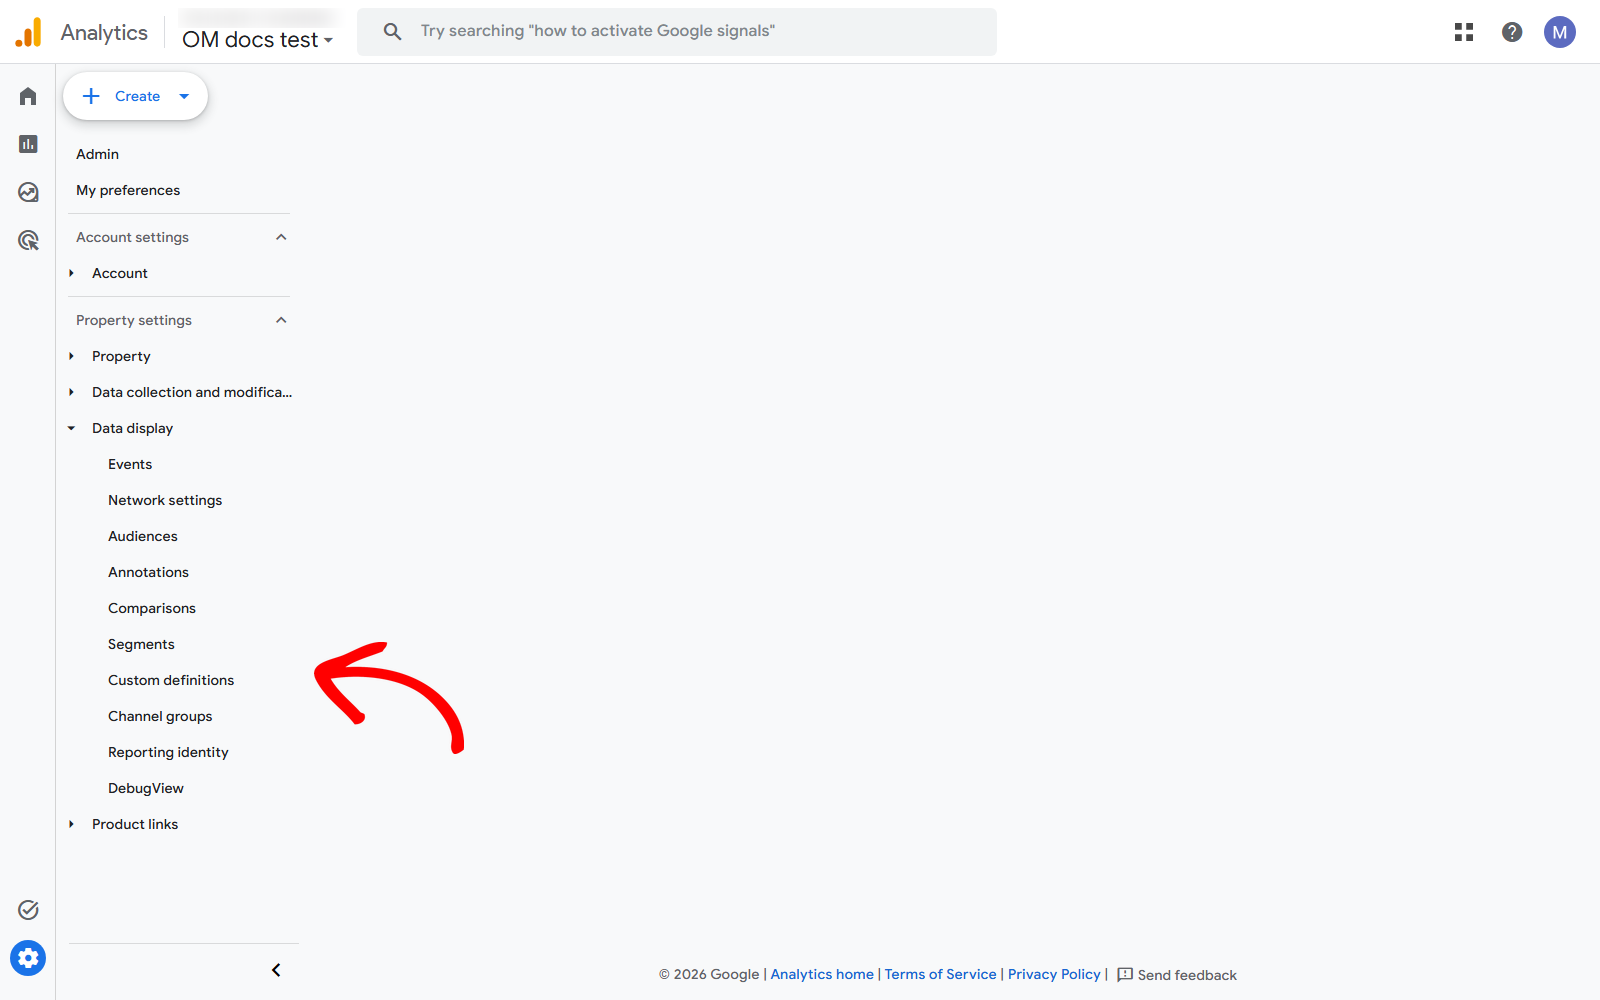
- Next, select Admin in the left-hand menu.
- Under Data display, select Custom definitions.
- Then, select Create custom dimension.
- In the Dimension name field, enter OM Campaign Name.
- Then, enter a Description, like
OptinMonster campaign name. - Next, leave Scope set to Event.
- In the Event parameter field, enter
om_campaign_name.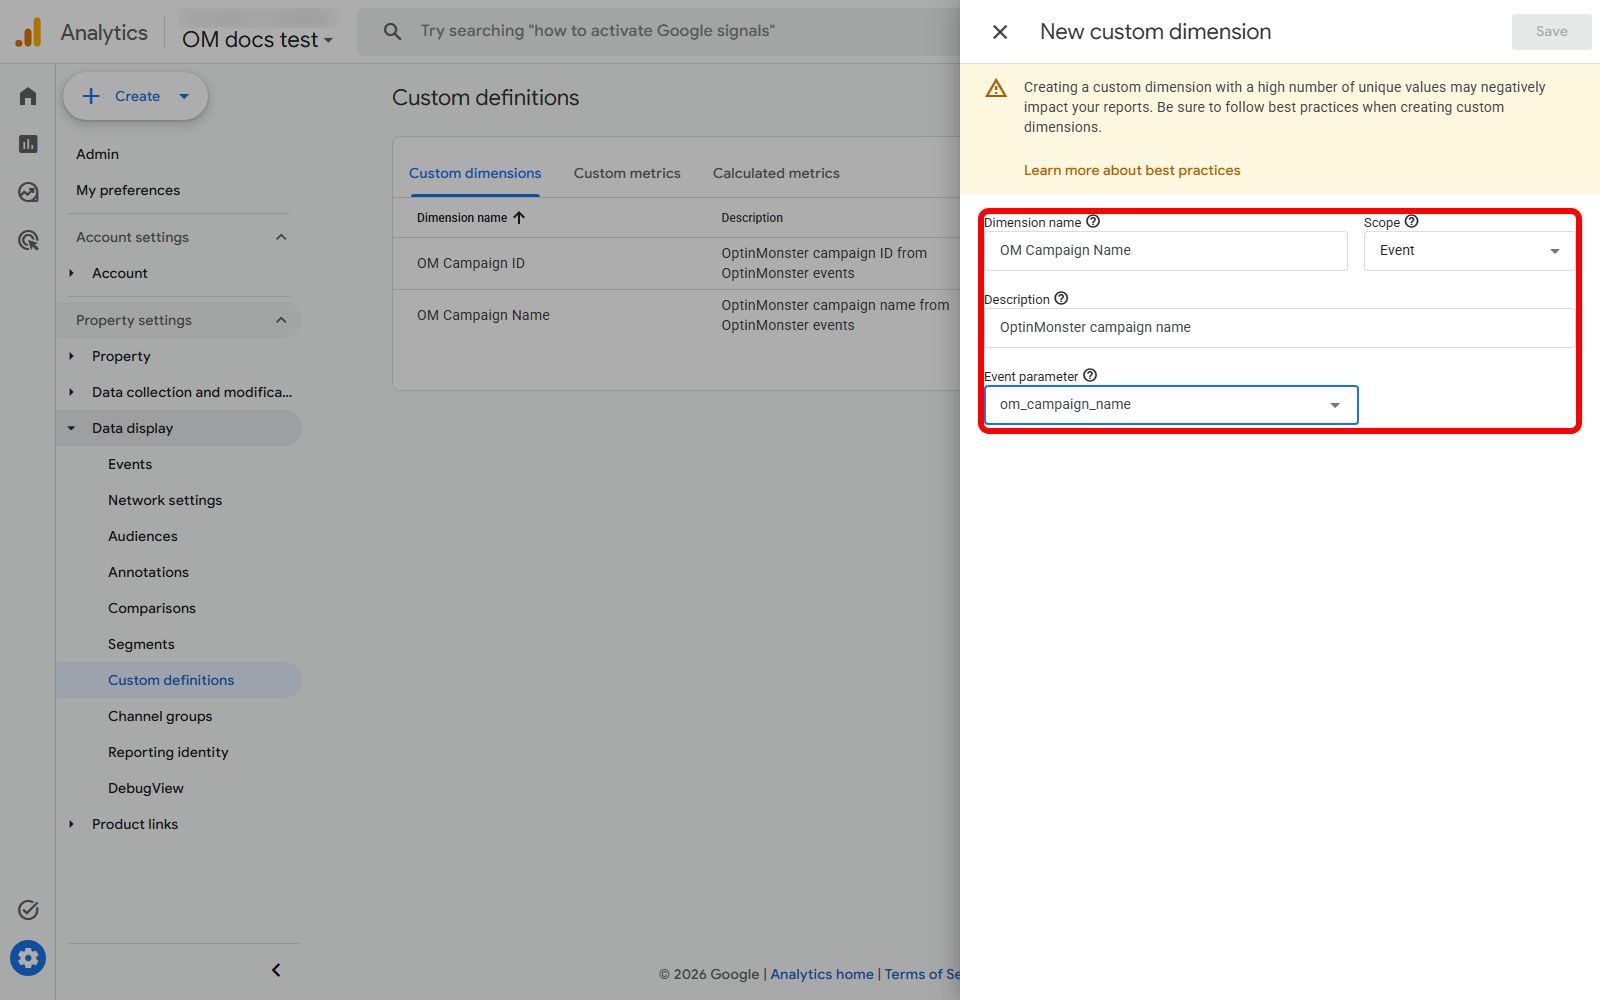
- Then, select Save.
- Next, repeat steps 4 through 9 to create a second dimension named OM Campaign ID with the event parameter
om_campaign_id.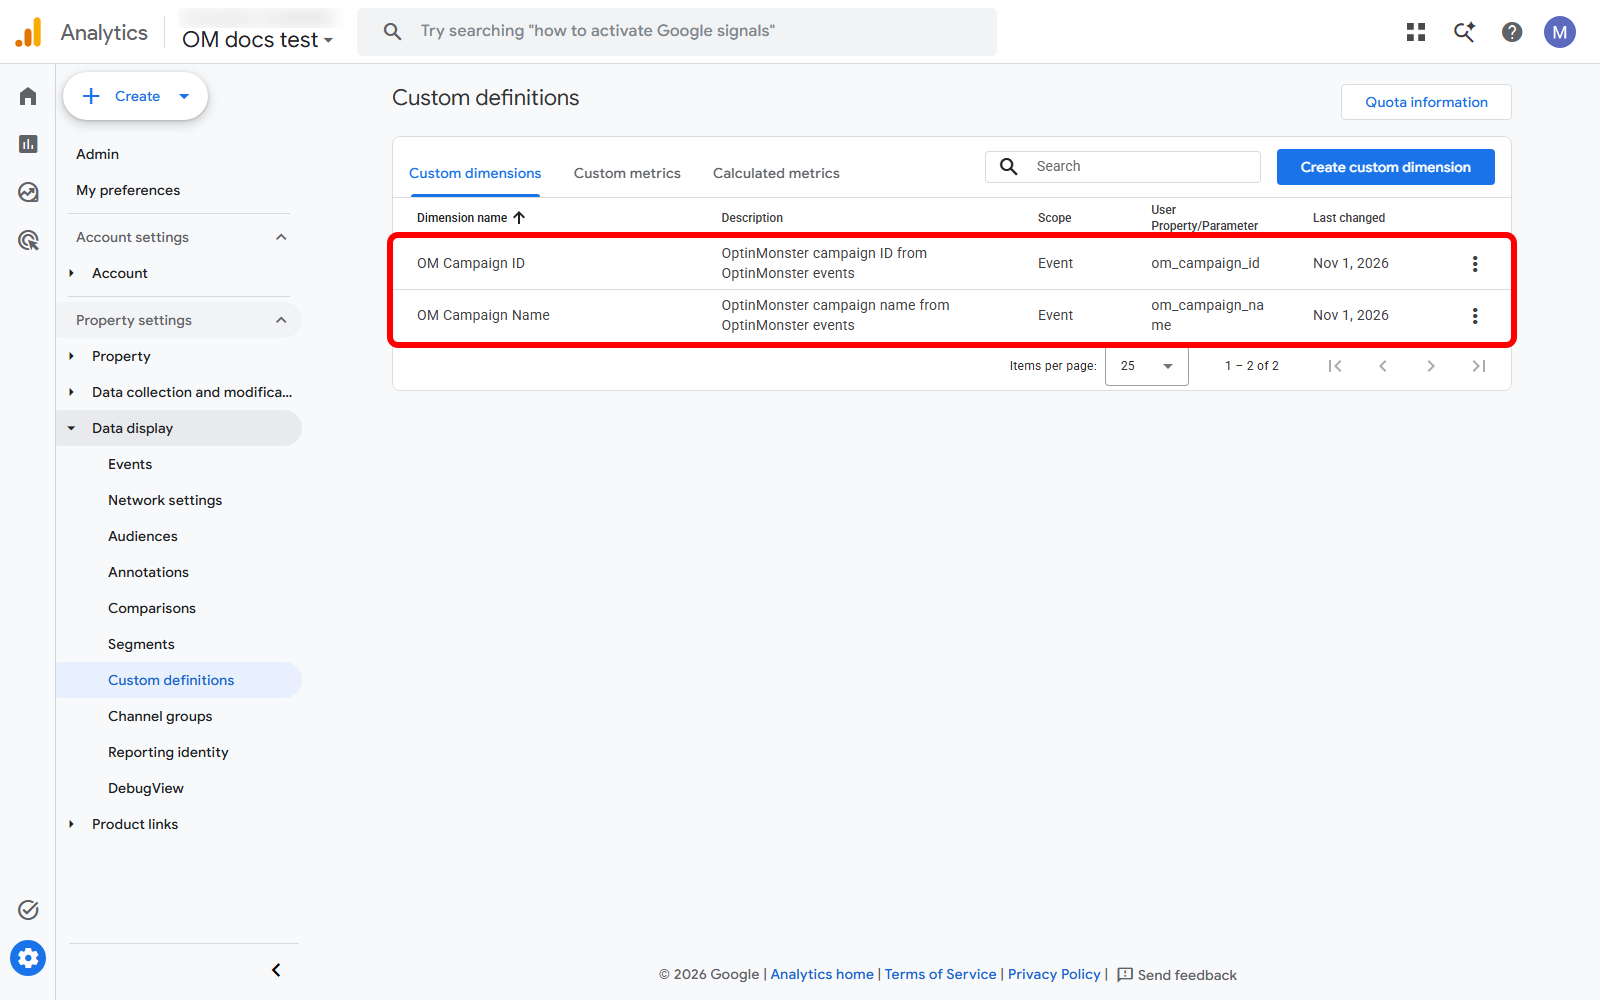
Building the Revenue Exploration
An Exploration lets you combine a segment of campaign converters with your revenue metrics on a single screen.
To view revenue generated from your OptinMonster campaigns, follow these steps:
- First, select Explore in the left-hand menu.
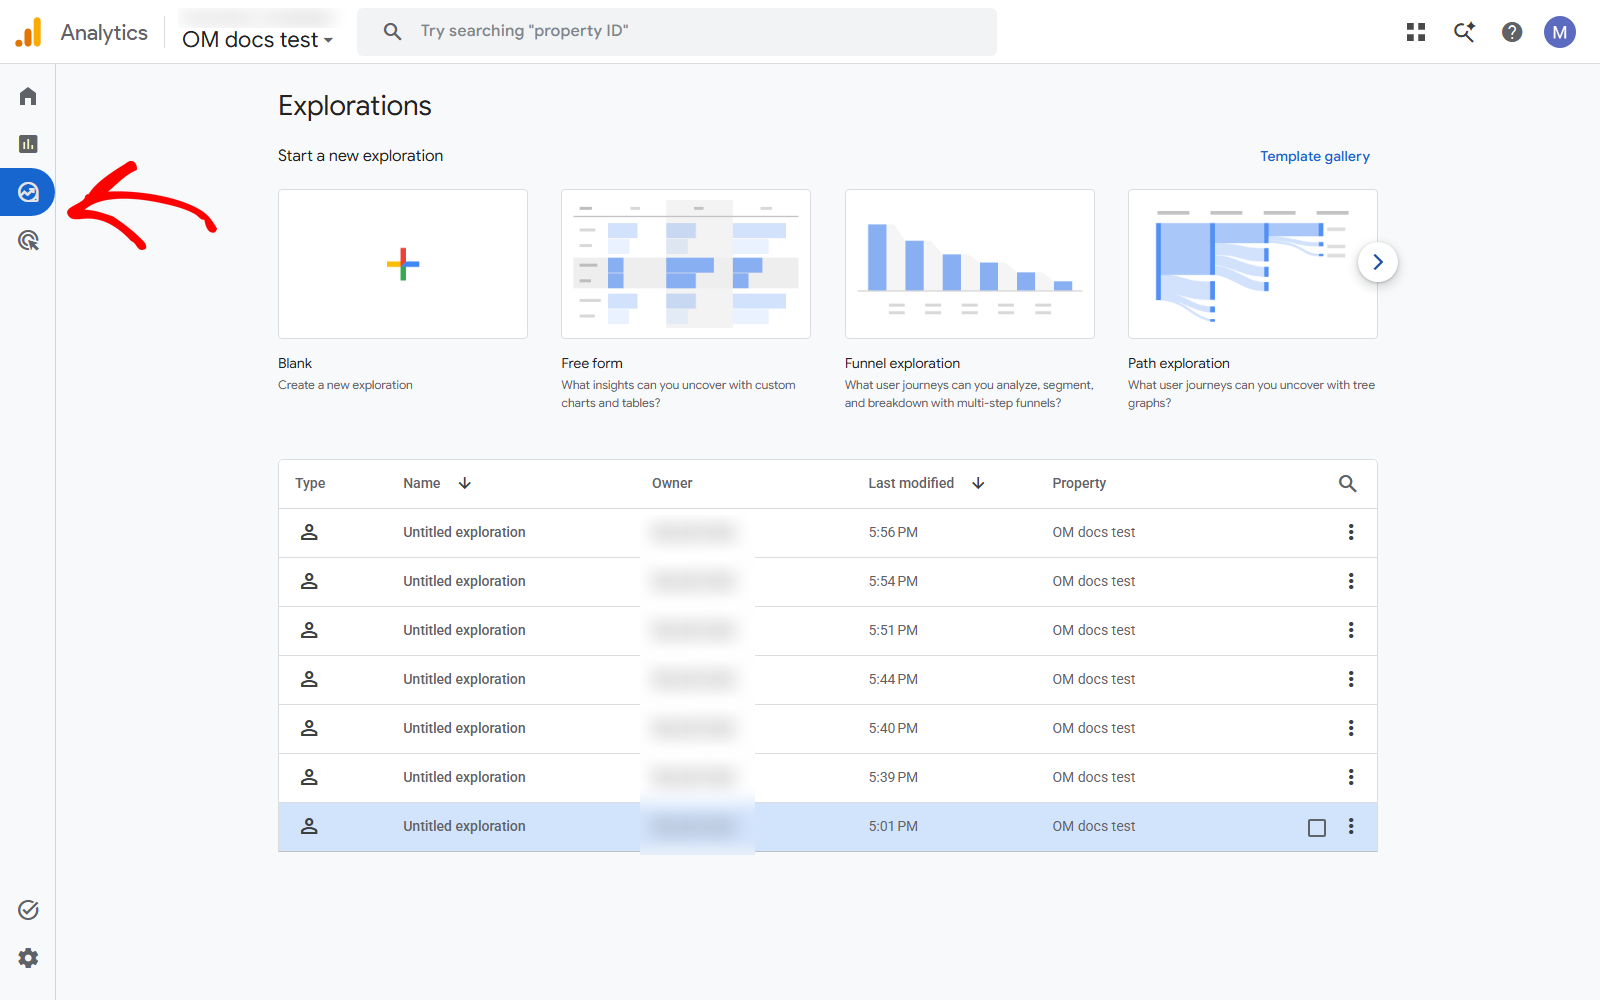
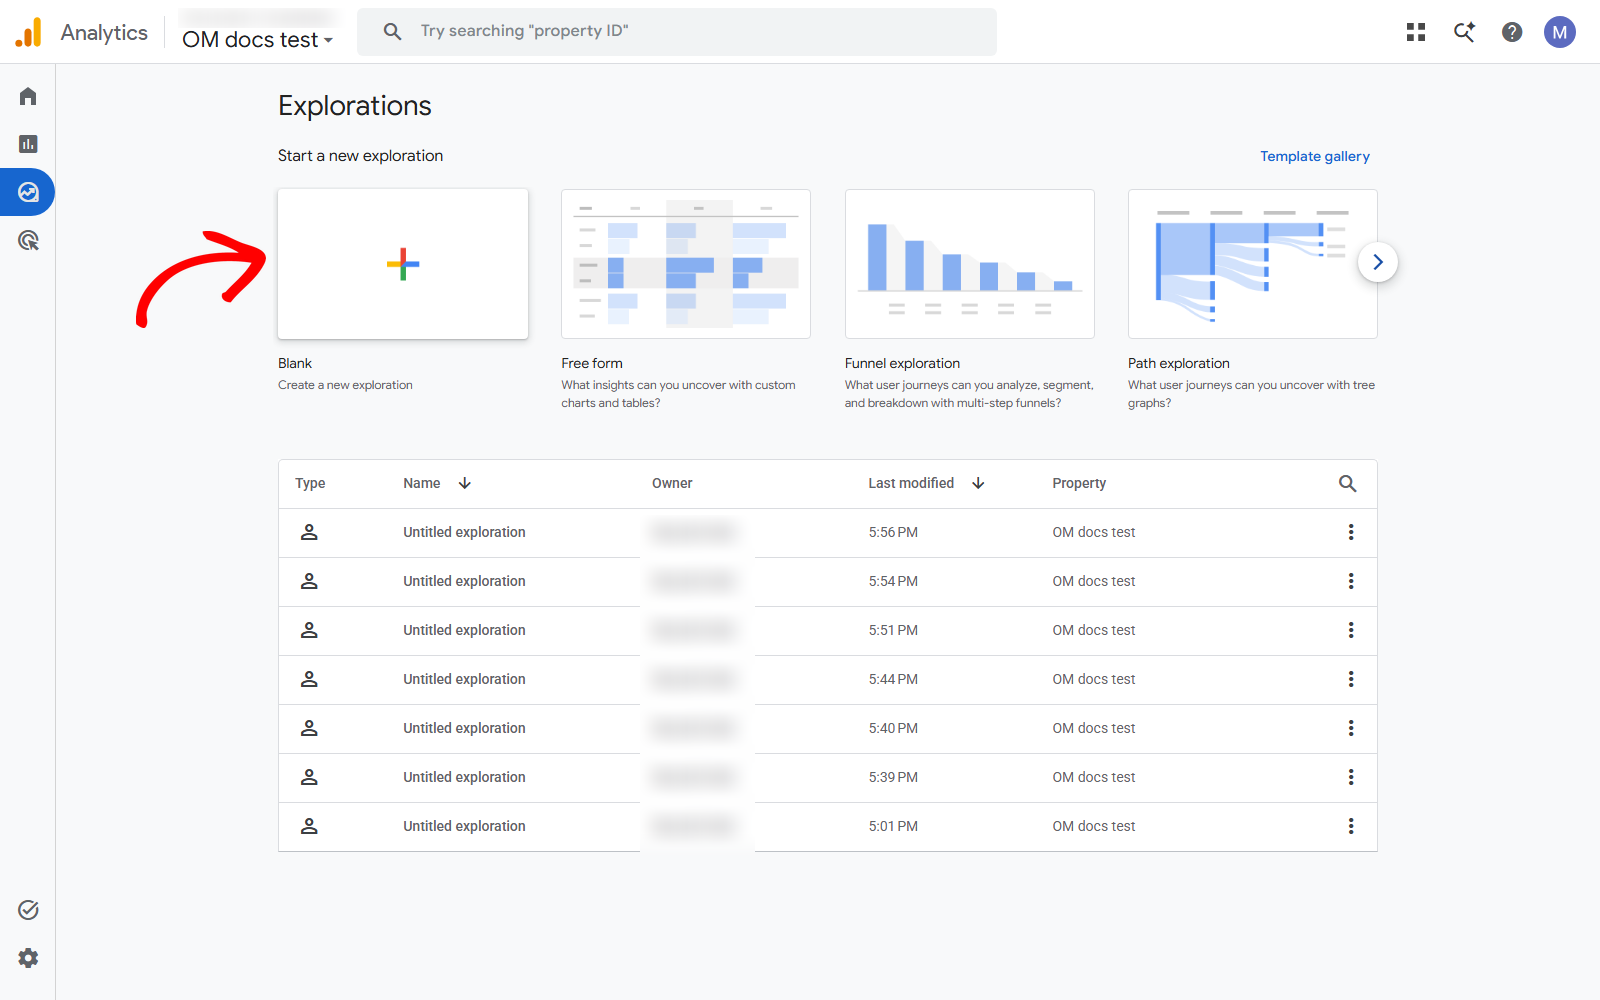
- Next, under Start a new exploration, select Blank.
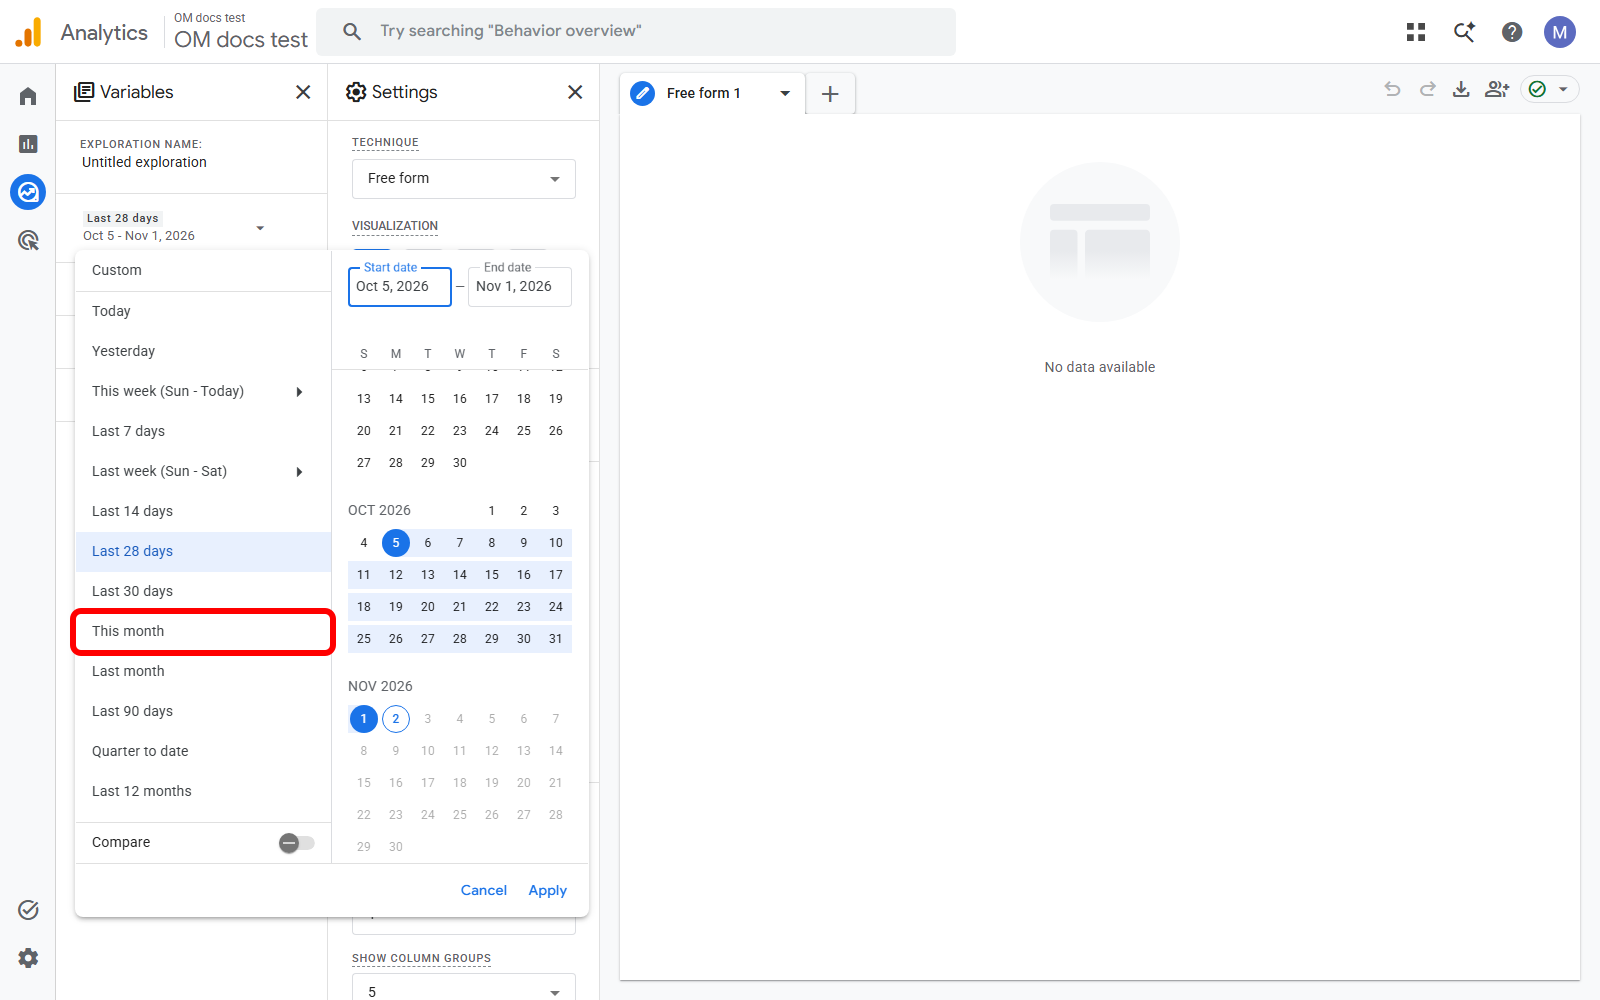
- At the top of the Variables column, select the date range, choose a range that includes the days your campaign ran, like This month, and then select Apply.
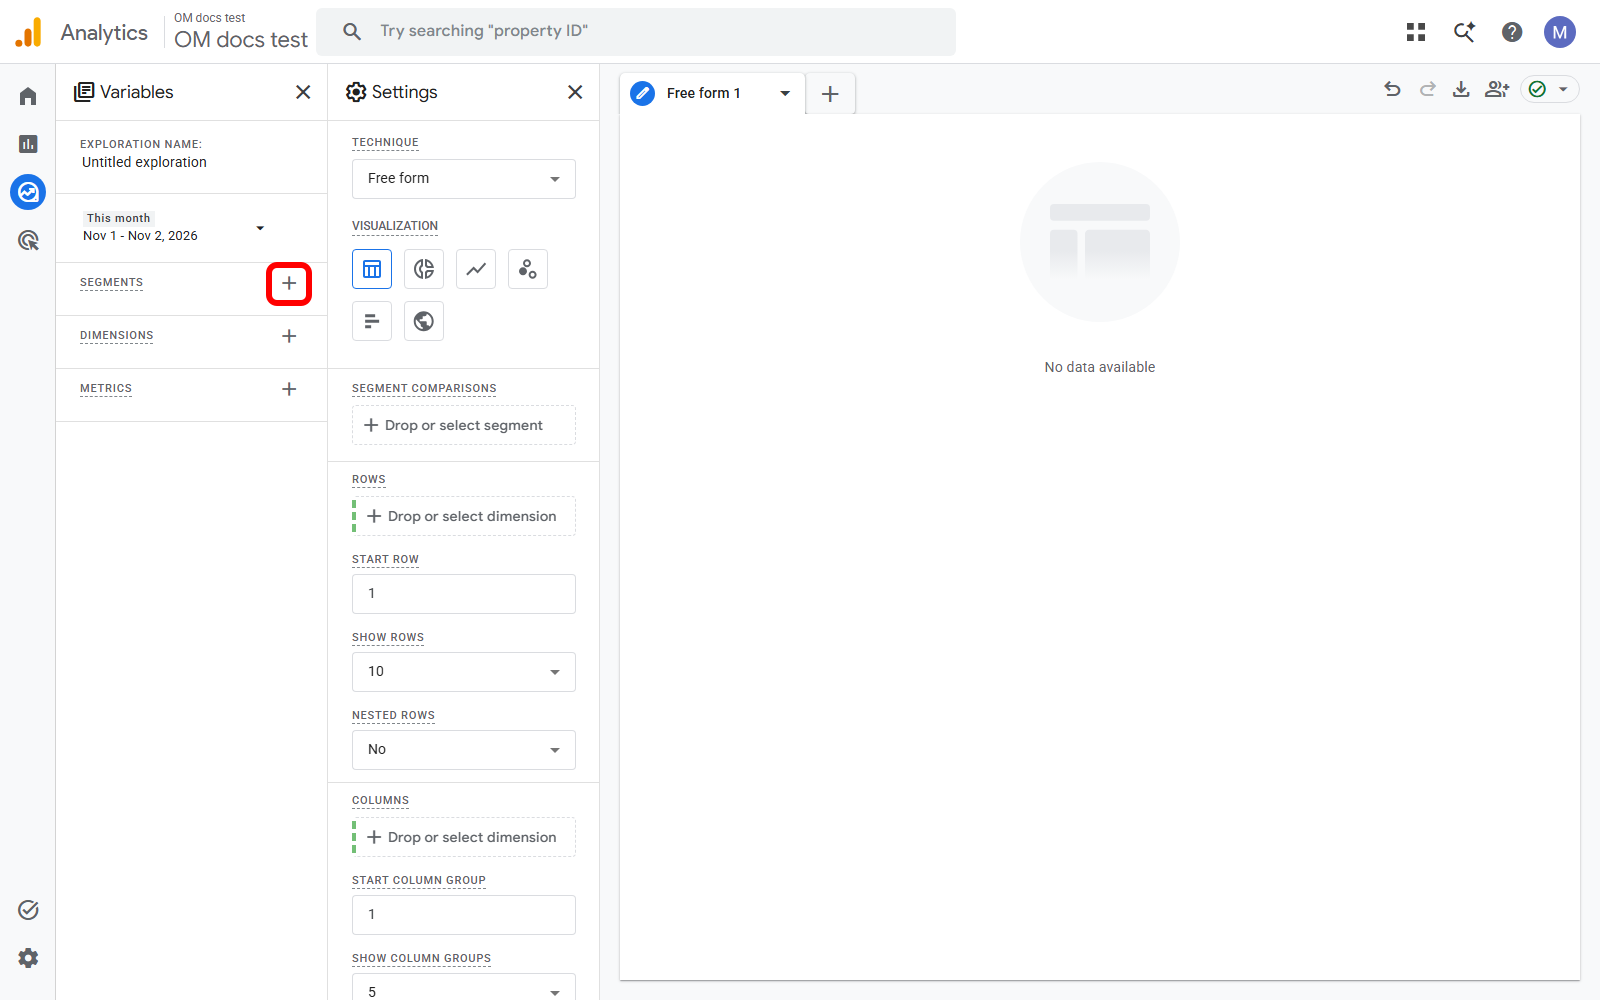
- In the Variables column, select the + icon next to Segments.
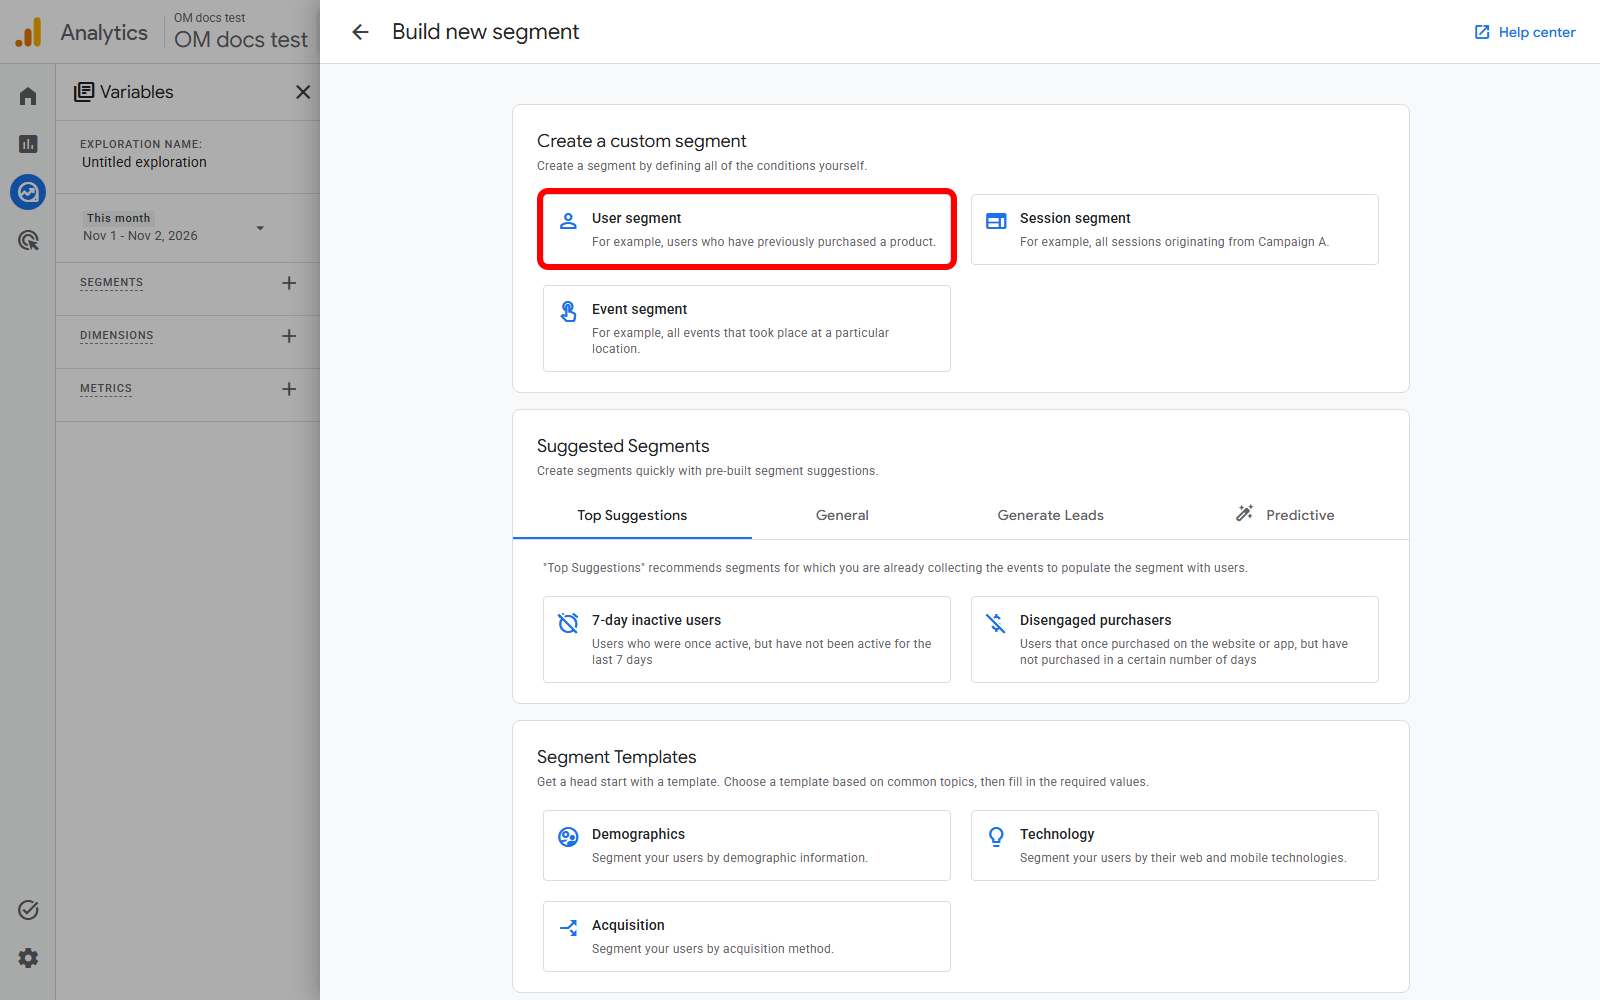
- Then, select Create a new segment, and choose User segment.
- Next, select Add new condition, search for
optinmonster_conversion, and select it.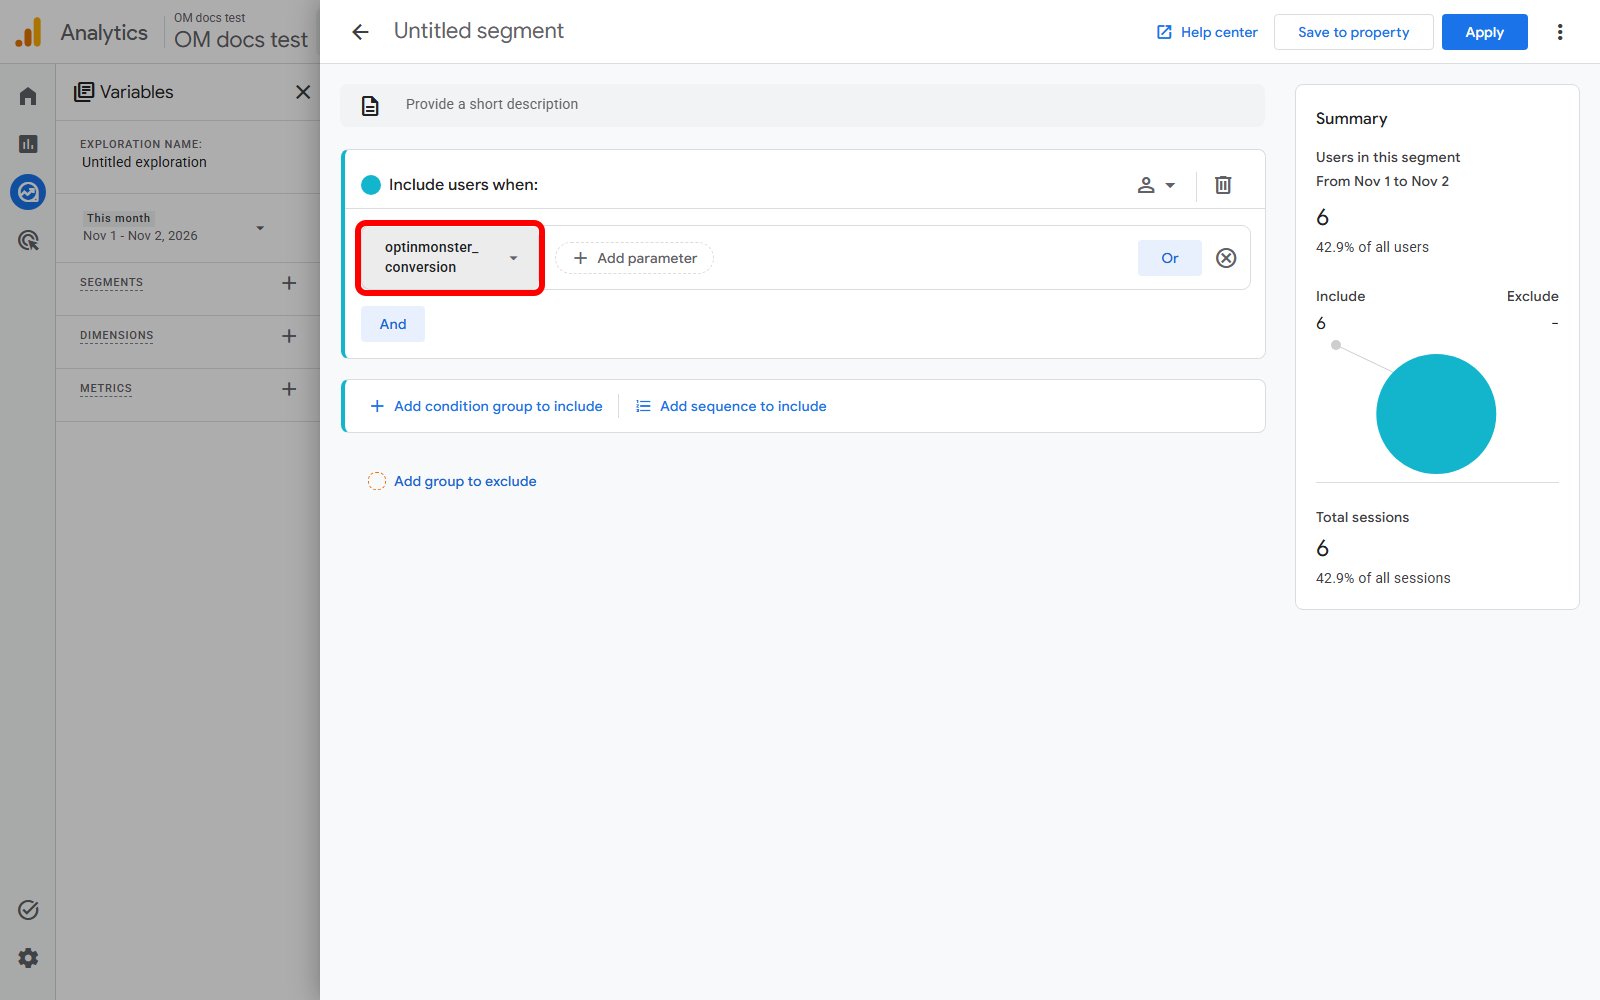
- Optional: To limit the segment to 1 campaign, select And, and then select Add new condition. Then, search for OM Campaign Name and select it.
- Next, select Add filter, set Condition to exactly matches (=), and enter the name of your campaign. Then, select Apply.
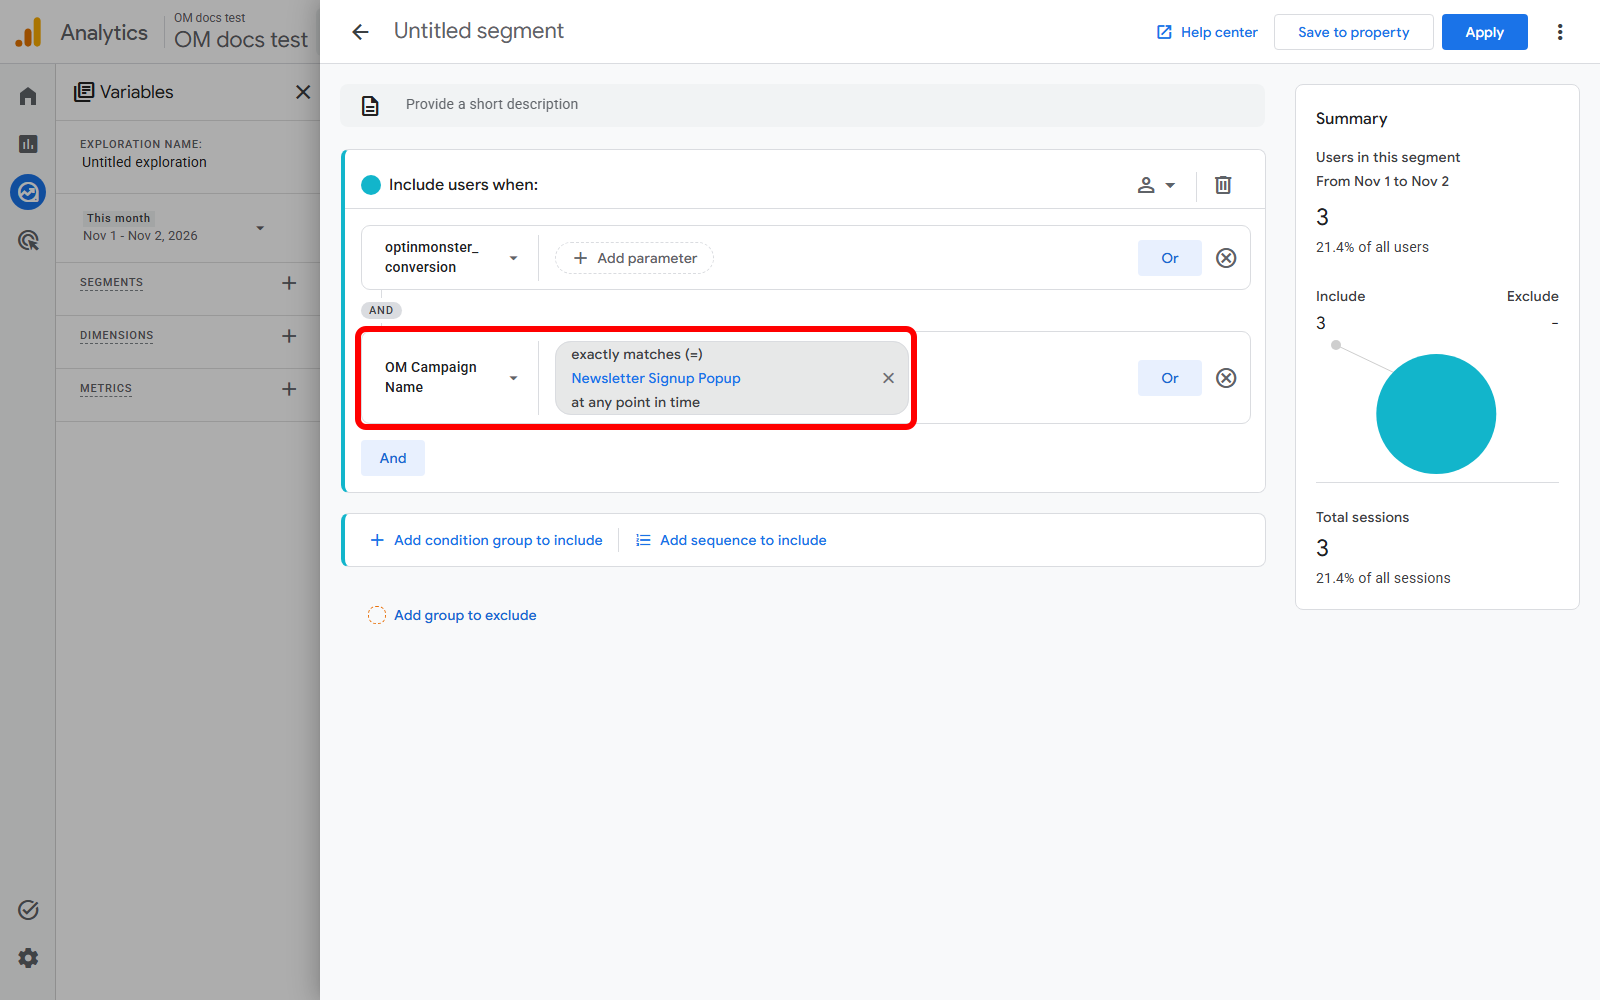
- Next, enter a name for your segment at the top of the screen, and then select Apply. Google Analytics adds your segment to Segment comparisons automatically.
- Next to Metrics, select the + icon, check Total revenue and Purchases, and then select Confirm.
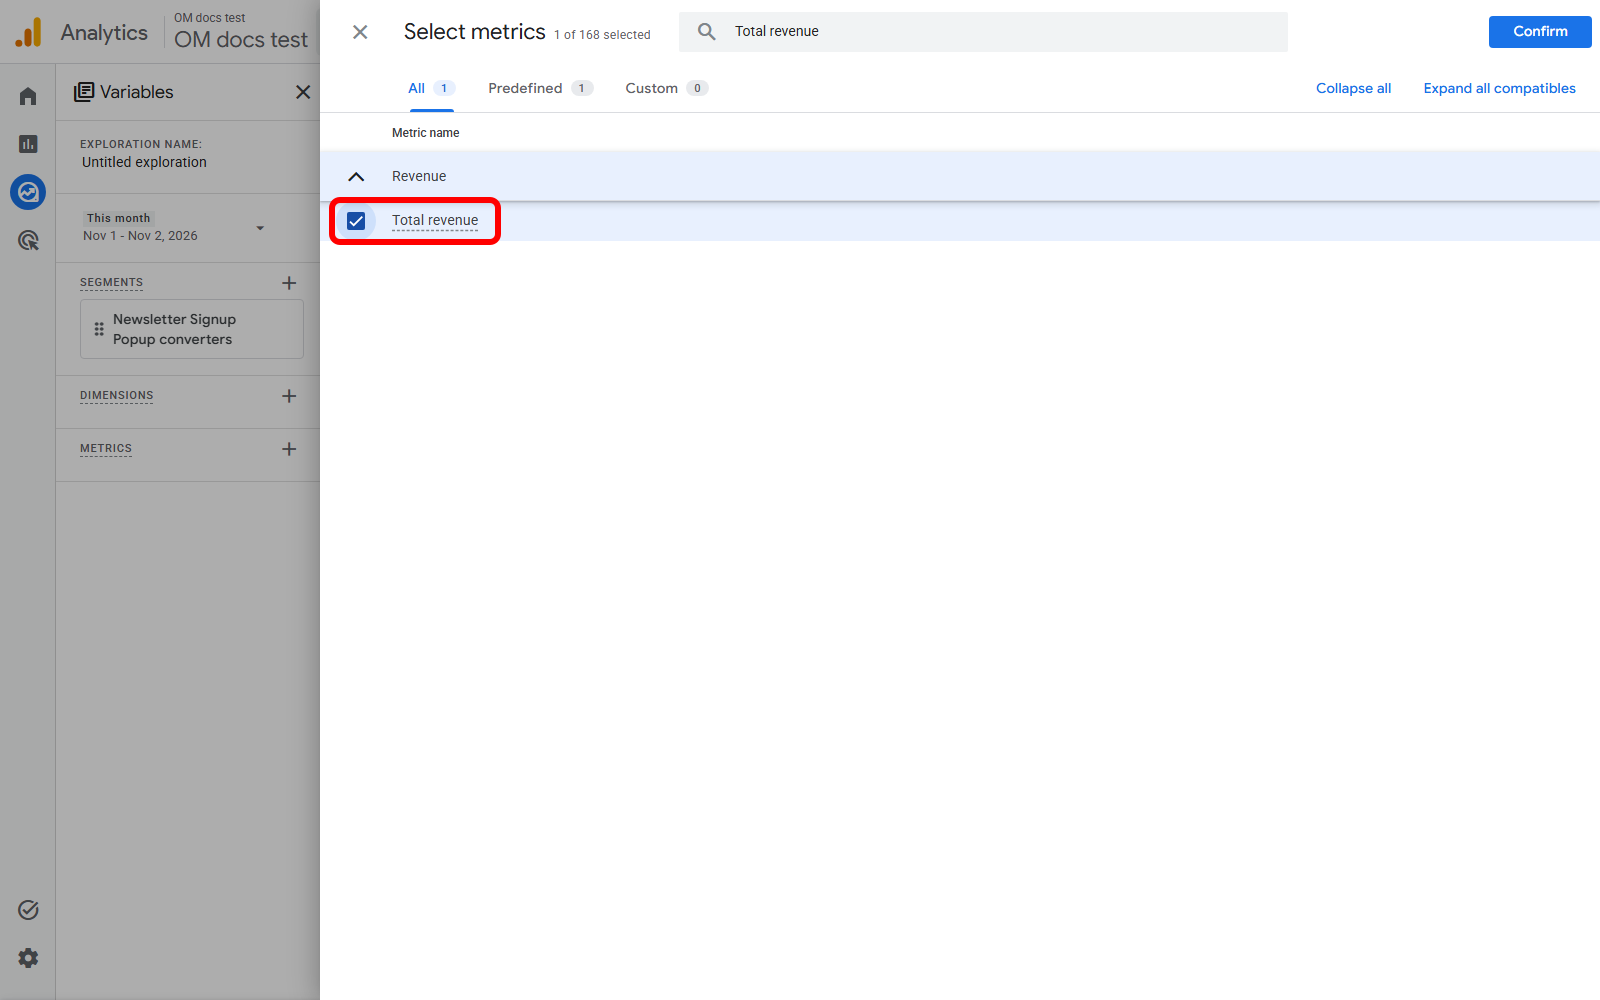
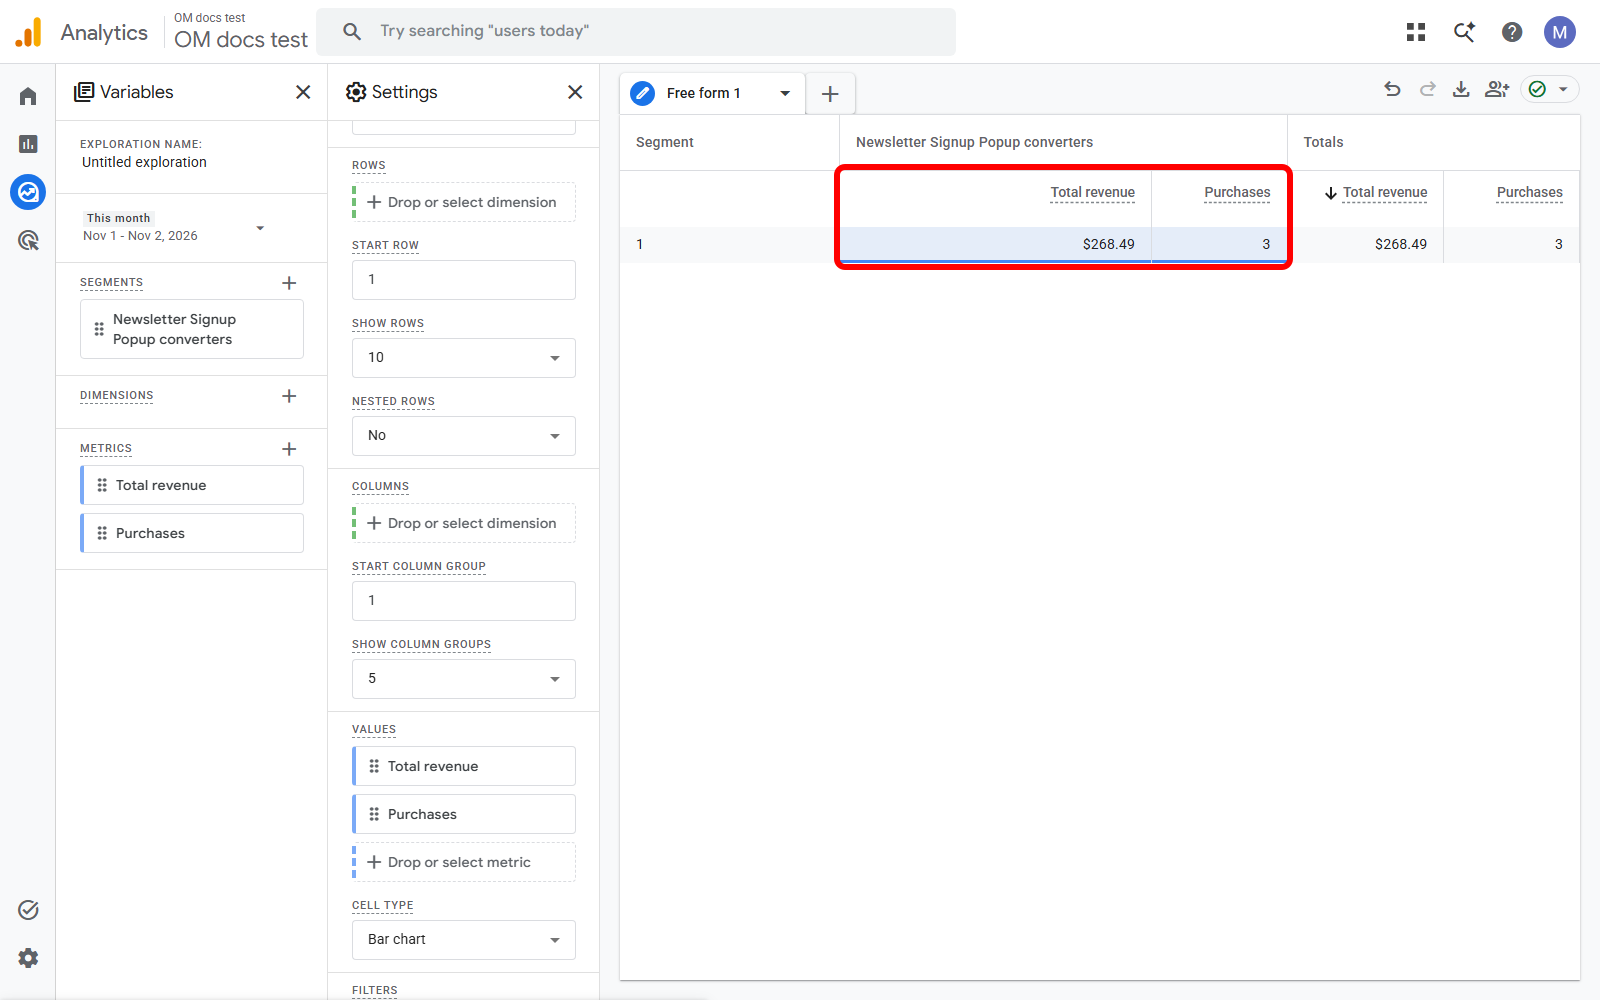
- Under Values, select Drop or select metric, and then choose Total revenue. Then, repeat the same steps to add Purchases.
Your table now shows the total revenue and the number of purchases for the visitors who converted on your campaign.
FAQs
Why don’t I see revenue on the optinmonster_conversion event?
OptinMonster’s events include the campaign name and ID, but not revenue. Revenue reaches Google Analytics on the purchase event that your site sends. That’s why the Exploration above combines the 2 with a segment.
That’s it! You can now see the revenue from visitors who converted on your OptinMonster campaigns.


