OptinMonster makes it easy to use Google reCAPTCHA v3 to prevent spam submissions with your optin campaigns.
In this article, you’ll learn how to connect Google reCAPTCHA v3 with OptinMonster.
Before You Start
Here are some things to know before you begin:
- You’ll need to create a Google reCAPTCHA account to use this feature.
- Once configured, reCAPTCHA is enabled by default for all campaigns. You can disable reCAPTCHA for individual campaigns.
- Google reCAPTCHA v3 can be added to any domain registered in your OptinMonster account.
- Google reCAPTCHA cannot be applied to a custom form added using our Custom HTML integration option. It will be applied only to native Email Marketing Service integrations configured for your campaign.
Connect Google reCAPTCHA
To prevent spam submissions through your optin campaigns you can use Google’s reCAPTCHA service.
To use Google’s reCAPTCHA service, follow these steps:
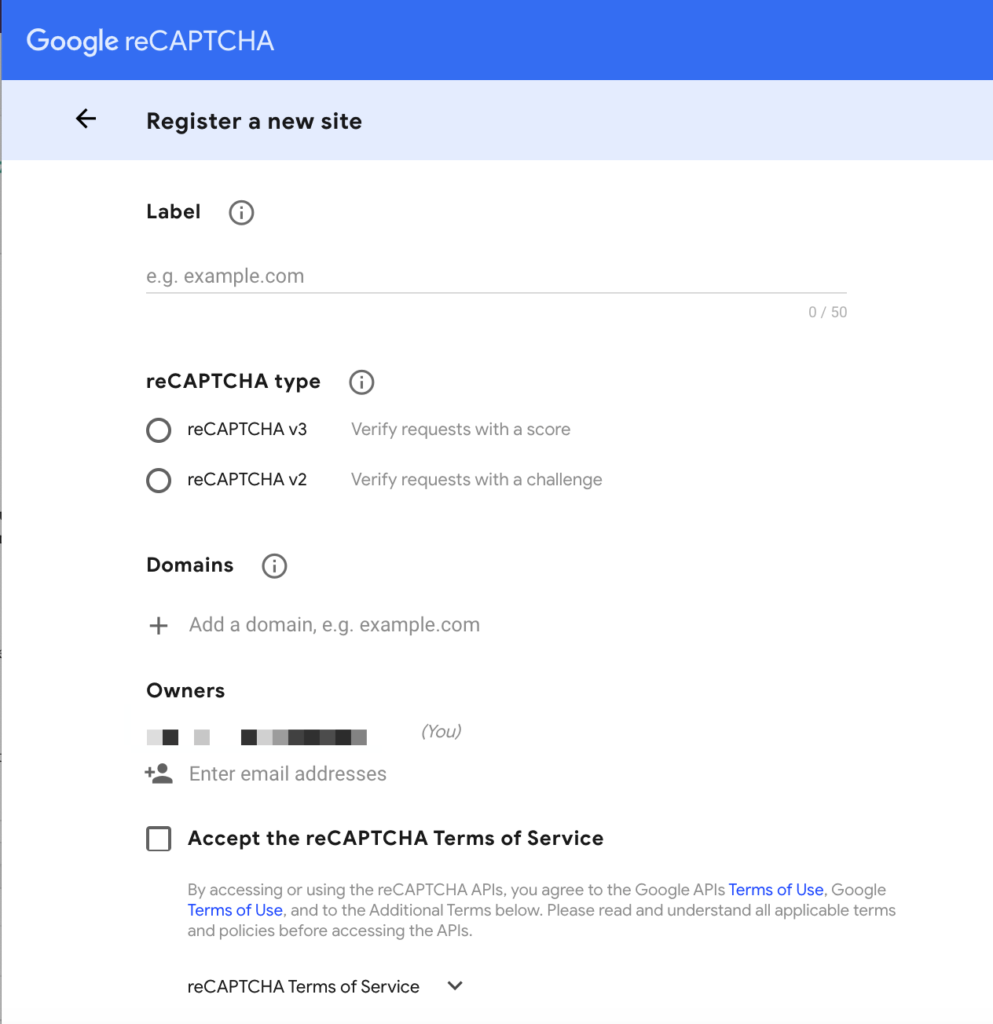
- Log into your Google reCAPTCHA account and register a new site to use reCAPTCHA on.
- Select reCAPTCHA v3.
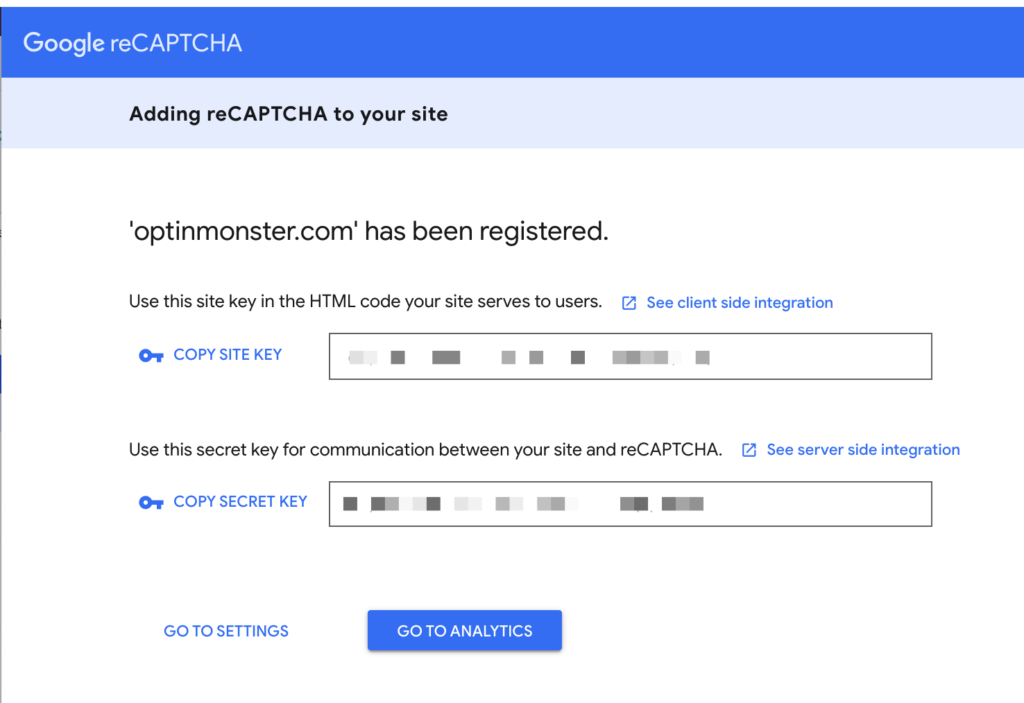
- Once registered you’ll be provided with a Site Key and a Secret Key.
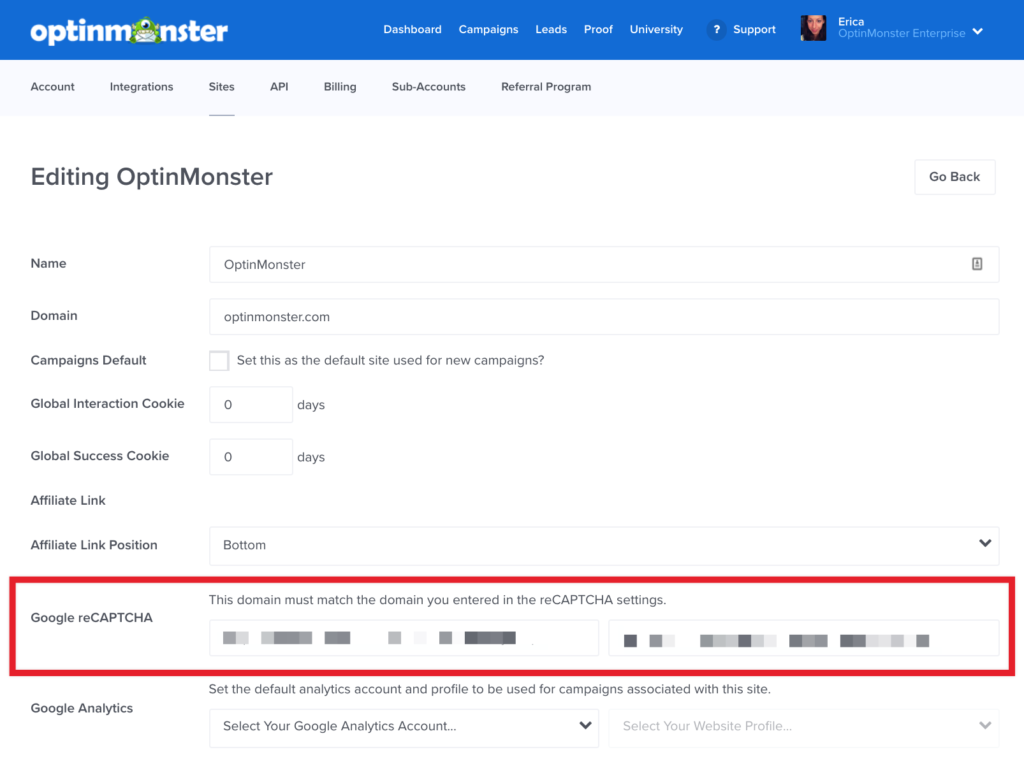
- Next, in your OptinMonster account open the Site Management page and edit the domain you want to add Google reCAPTCHA to.
- In the Site edit screen, add the Site Key and Secret Key you were provided with by Google in Step 2 to the corresponding fields.
- When you’re finished, click Save.
- No further configuration is required, reCAPTCHA will just work once configured according to the steps above.
If you’re serious about jumpstarting your website growth, then get started with OptinMonster today!
Our conversion experts will design 1 free campaign for you to get maximum results – absolutely FREE! Click here to get started →
Disable reCAPTCHA
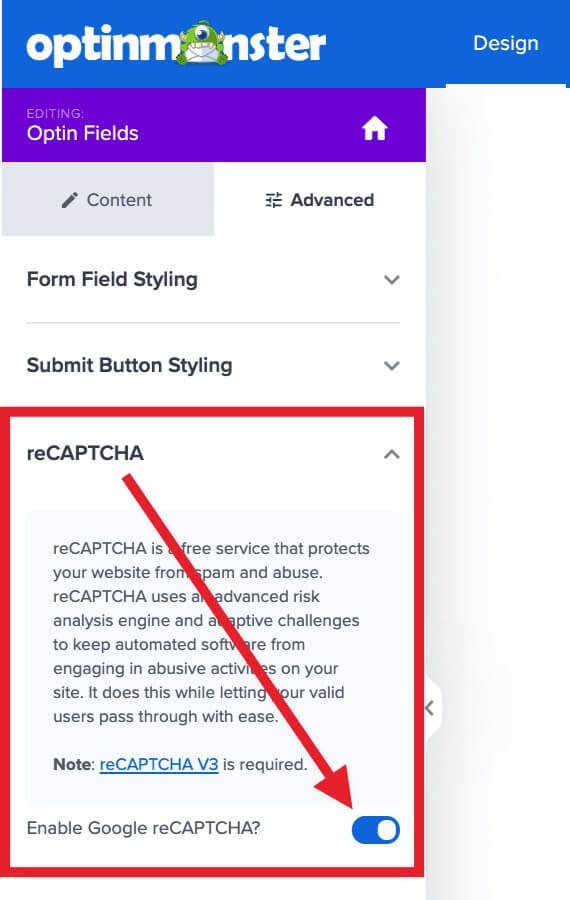
Once you’ve connected Google reCAPTCHA to your account it is enabled for all new campaigns by default. You can optionally disable reCAPTCHA on individual OptinMonster campaigns as you desire.
To disable Google reCAPTCHA on individual campaigns, follow these steps:
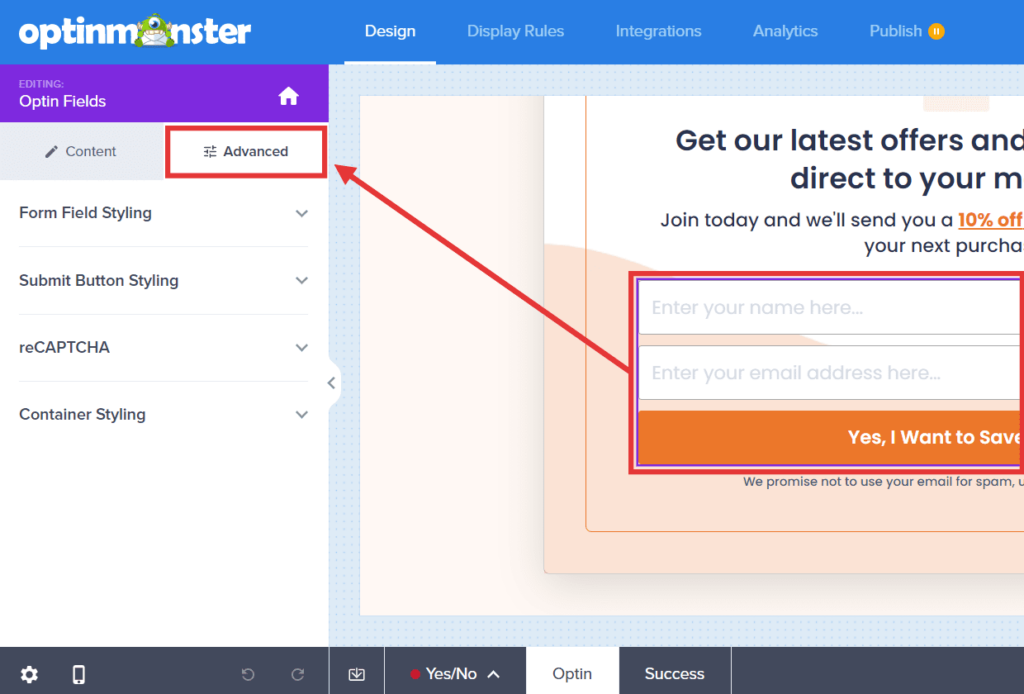
- From the Design view of the campaign builder select the optin fields element and select the Advanced tab in the sidebar panel.
- Next, click to expand the reCAPTCHA section and toggle the Enable Google reCAPTCHA? option.
- When you’re finished, Save the campaign.
Troubleshooting
I’ve configured reCAPTCHA for my site but I don’t see any captcha fields added to my optin form.
We use Google reCAPTCHA version 3, which is completely invisible.
We recommend you test-submit a campaign once you’ve configured Google reCAPTCHA in your OptinMonster account to ensure the lead submission completes normally.
If you encounter any issues or have any concerns, please reach out to our support team for assistance.

