Progressive forms in OptinMonster allow you to collect subscriber information step by step, rather than presenting a full form all at once. Instead of overwhelming visitors, this approach guides them through a smoother experience by splitting fields across multiple views.
This guide explains how to create a progressive form within a single OptinMonster campaign, ensuring a smoother user experience and better data collection.
Before you start, please note that progressive forms require the Smart Tags feature, which is available with a Pro and higher subscription.
Progressive forms also use our Multiple Views feature.
Creating Your Progressive Form
Progressive forms are built by designing several distinct views inside a single campaign, using our Multiple Views feature.
To create a progressive form in OptinMonster, follow these steps:
- Start by creating an OptinMonster campaign, or edit an existing one.
- Navigate to the Design view of your campaign in the OptinMonster builder.
- Use the Optin view in the campaign for the first view of your progressive form.
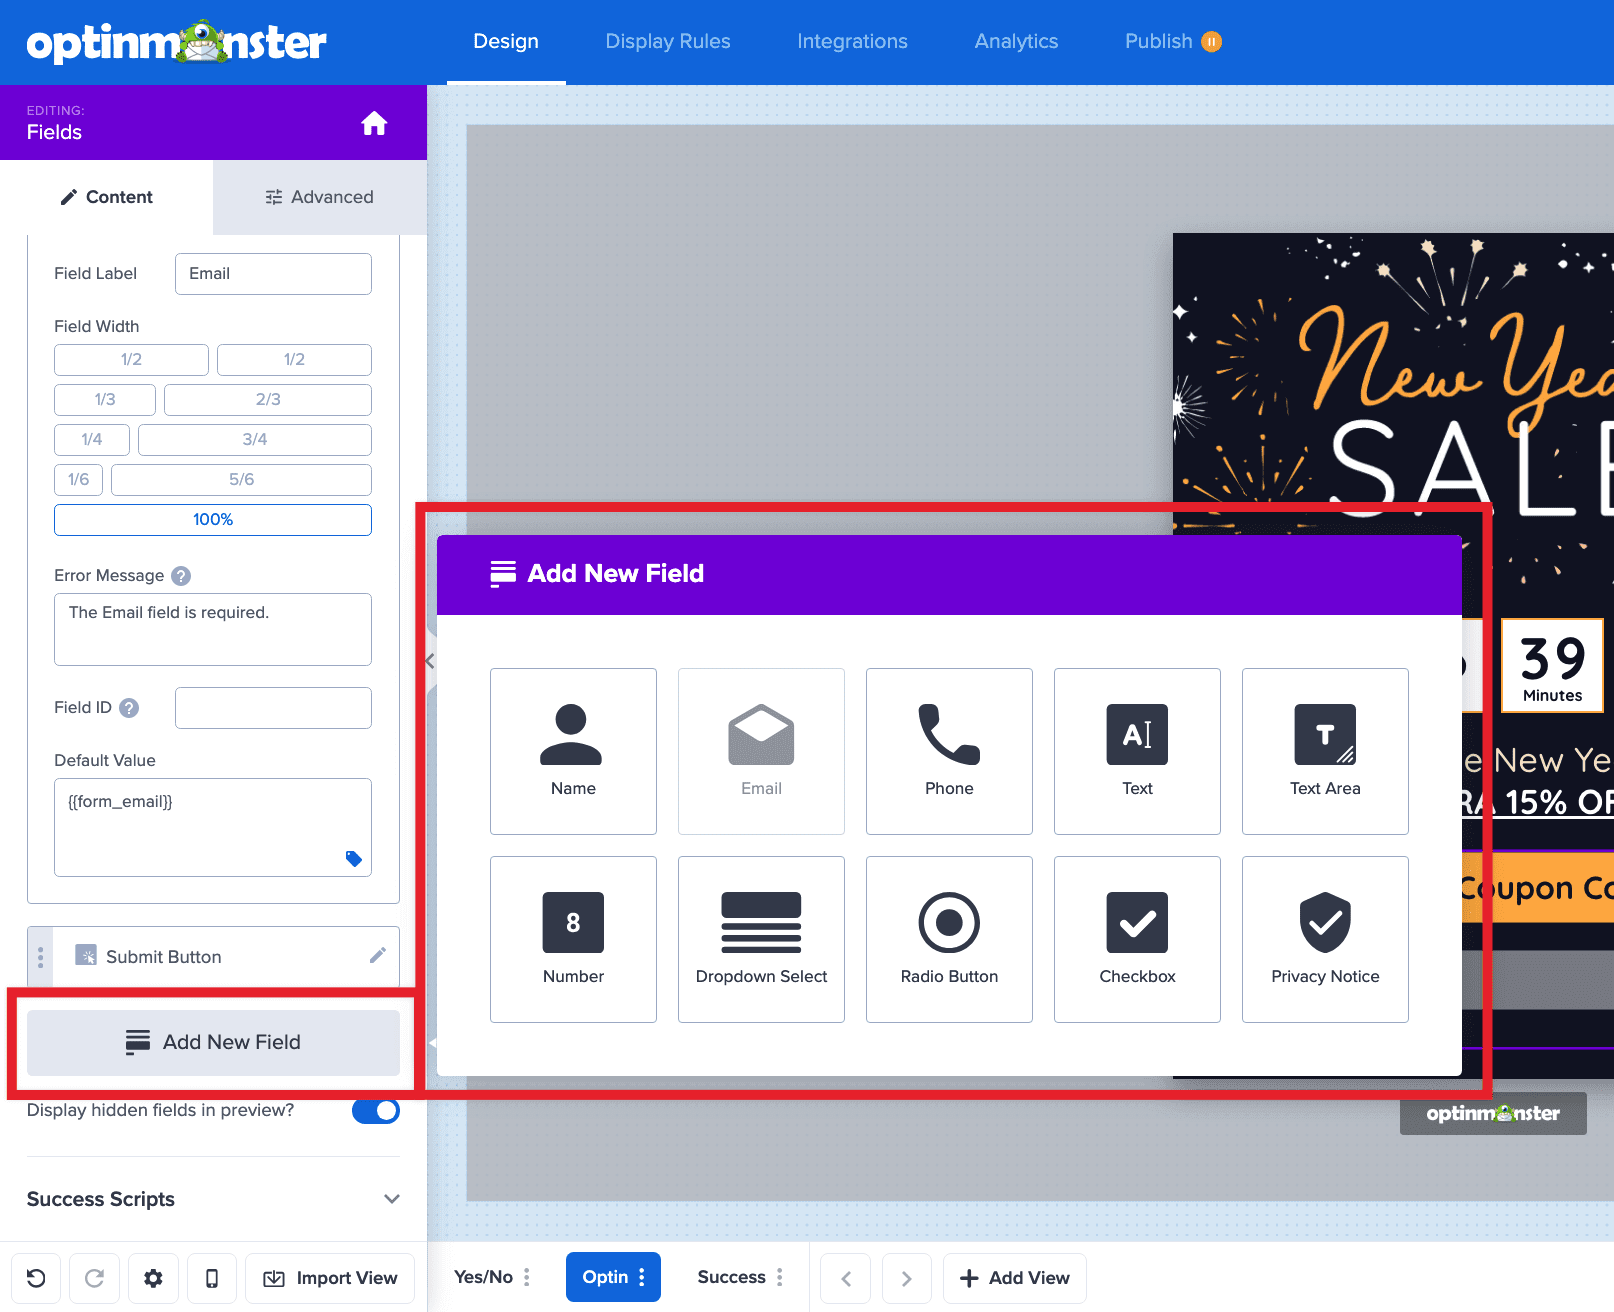
*If you’re creating a new campaign, this view will already contain Fields Block to customize which fields you capture right away. If you are editing an existing campaign and this view does not already contain the Fields block be sure to add it following our guide here. - The first view of your progressive form must capture the email address of the visitor. This is required because each unique lead is identified by email address, so additional data you capture in subsequent views can be correctly linked to the unique identifier (email address) of the lead.
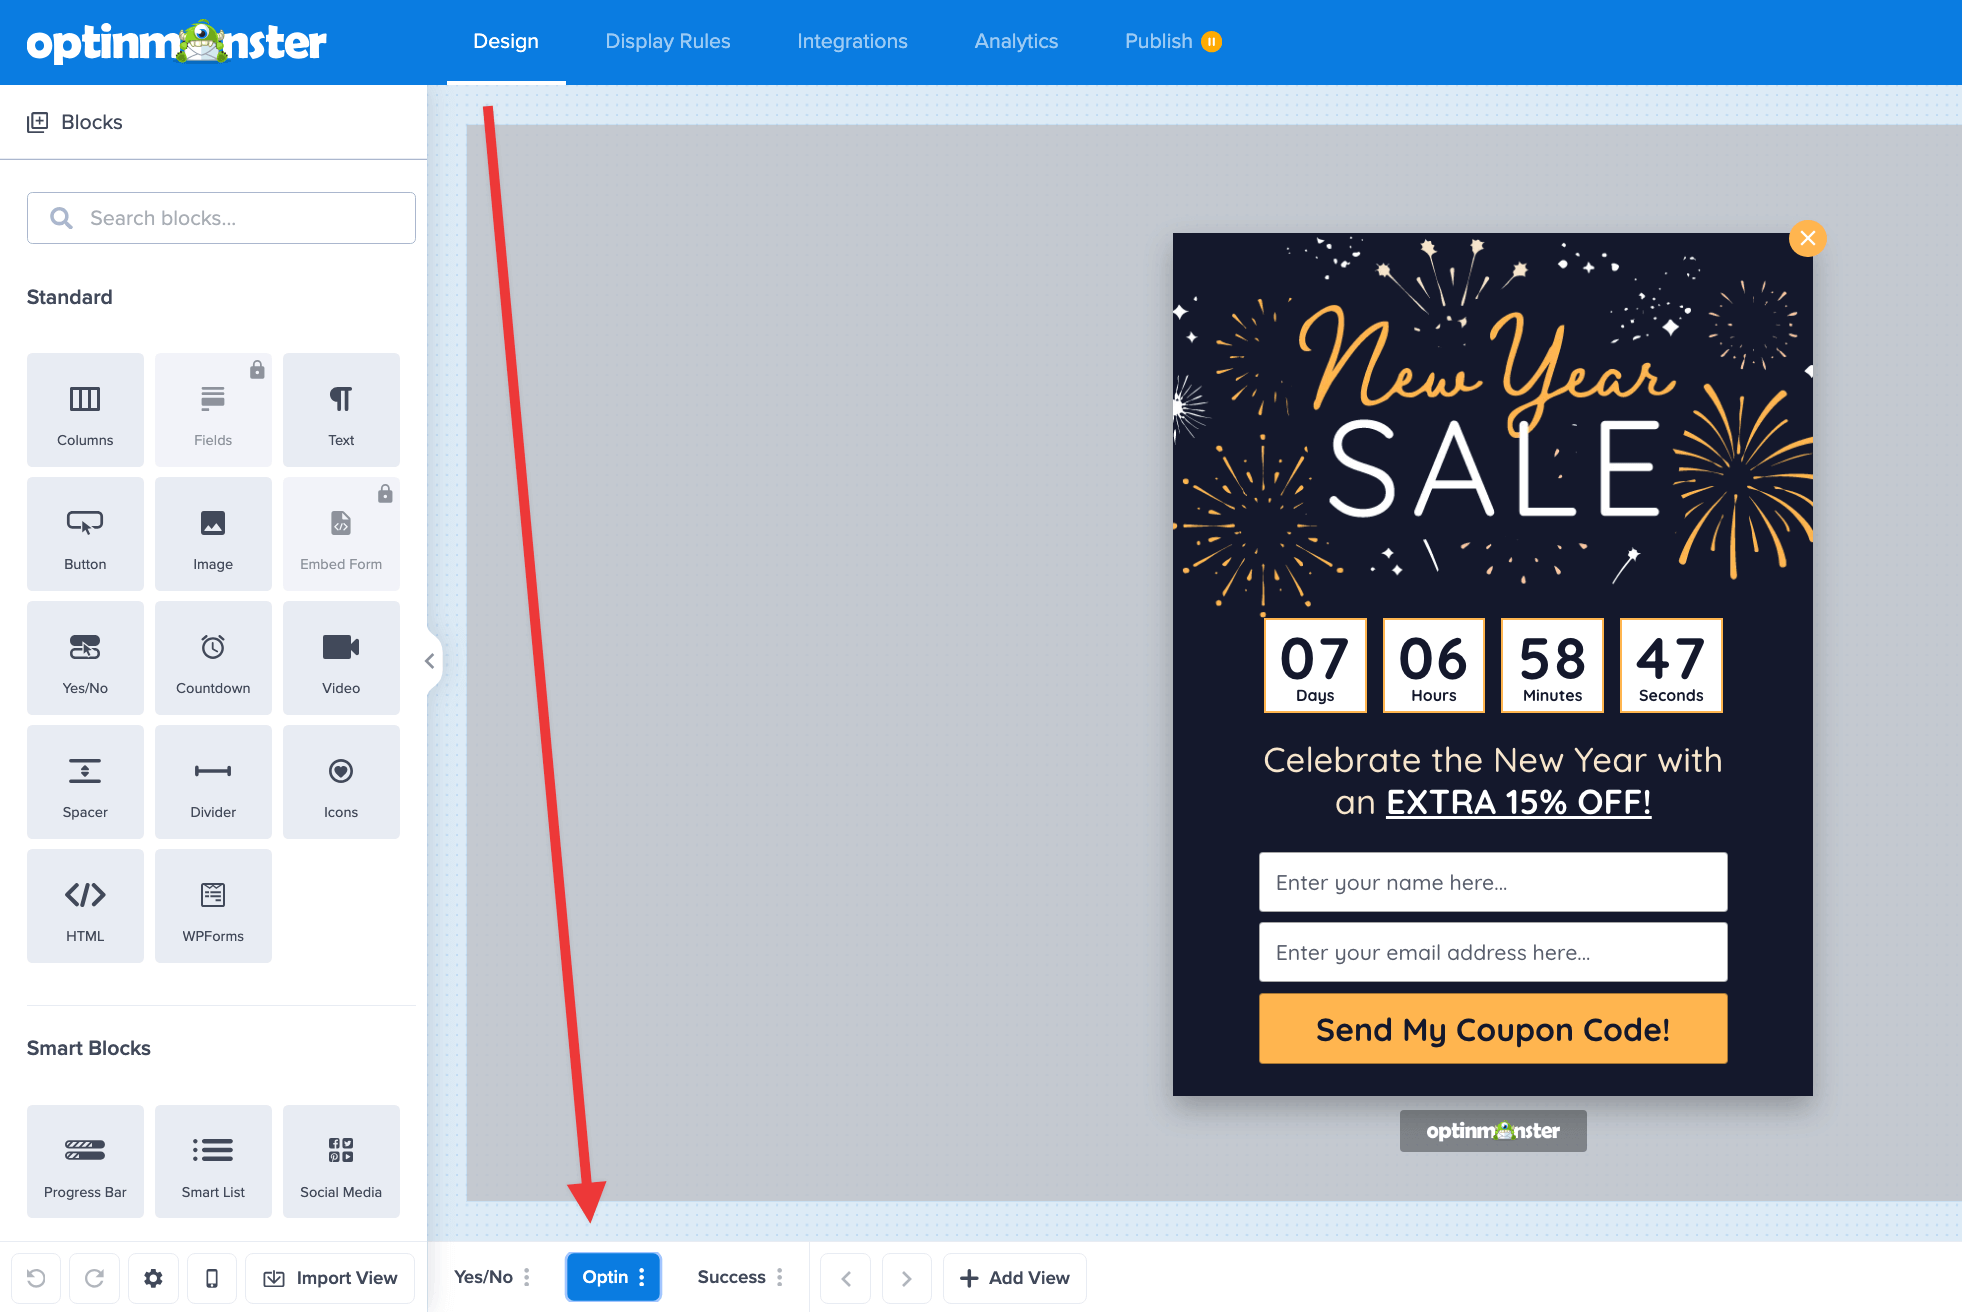
You can capture additional fields of data in this first view as well, but only the email address is required at this stage of your progressive form. - Next, add a view to your campaign for the second stage of your progressive form by clicking the + Add View button in the bottom toolbar.
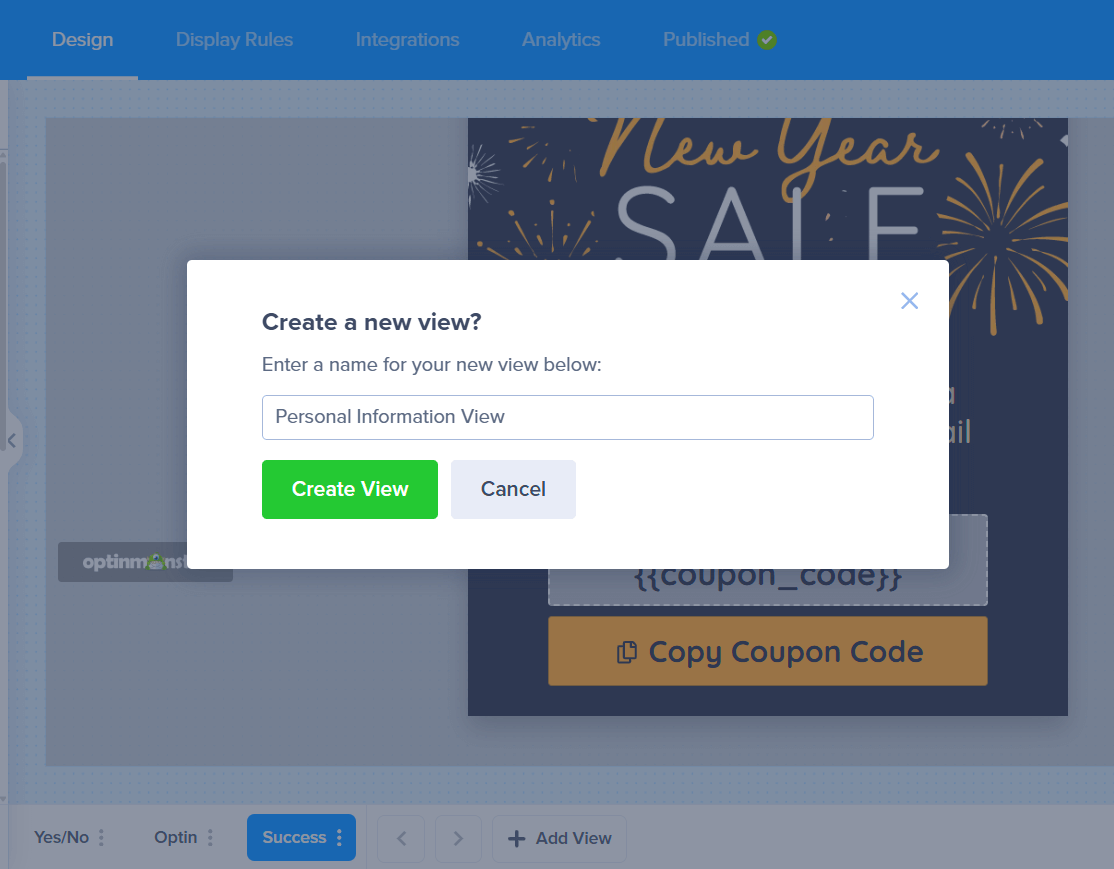
- A modal will appear, prompting you to give your new view a unique name. We recommend you enter a clear and concise descriptive name to reflect the type of data you’ll be collecting. For example, “Personal Information”, etc. Once you’ve entered a name, select the Create View button to proceed.
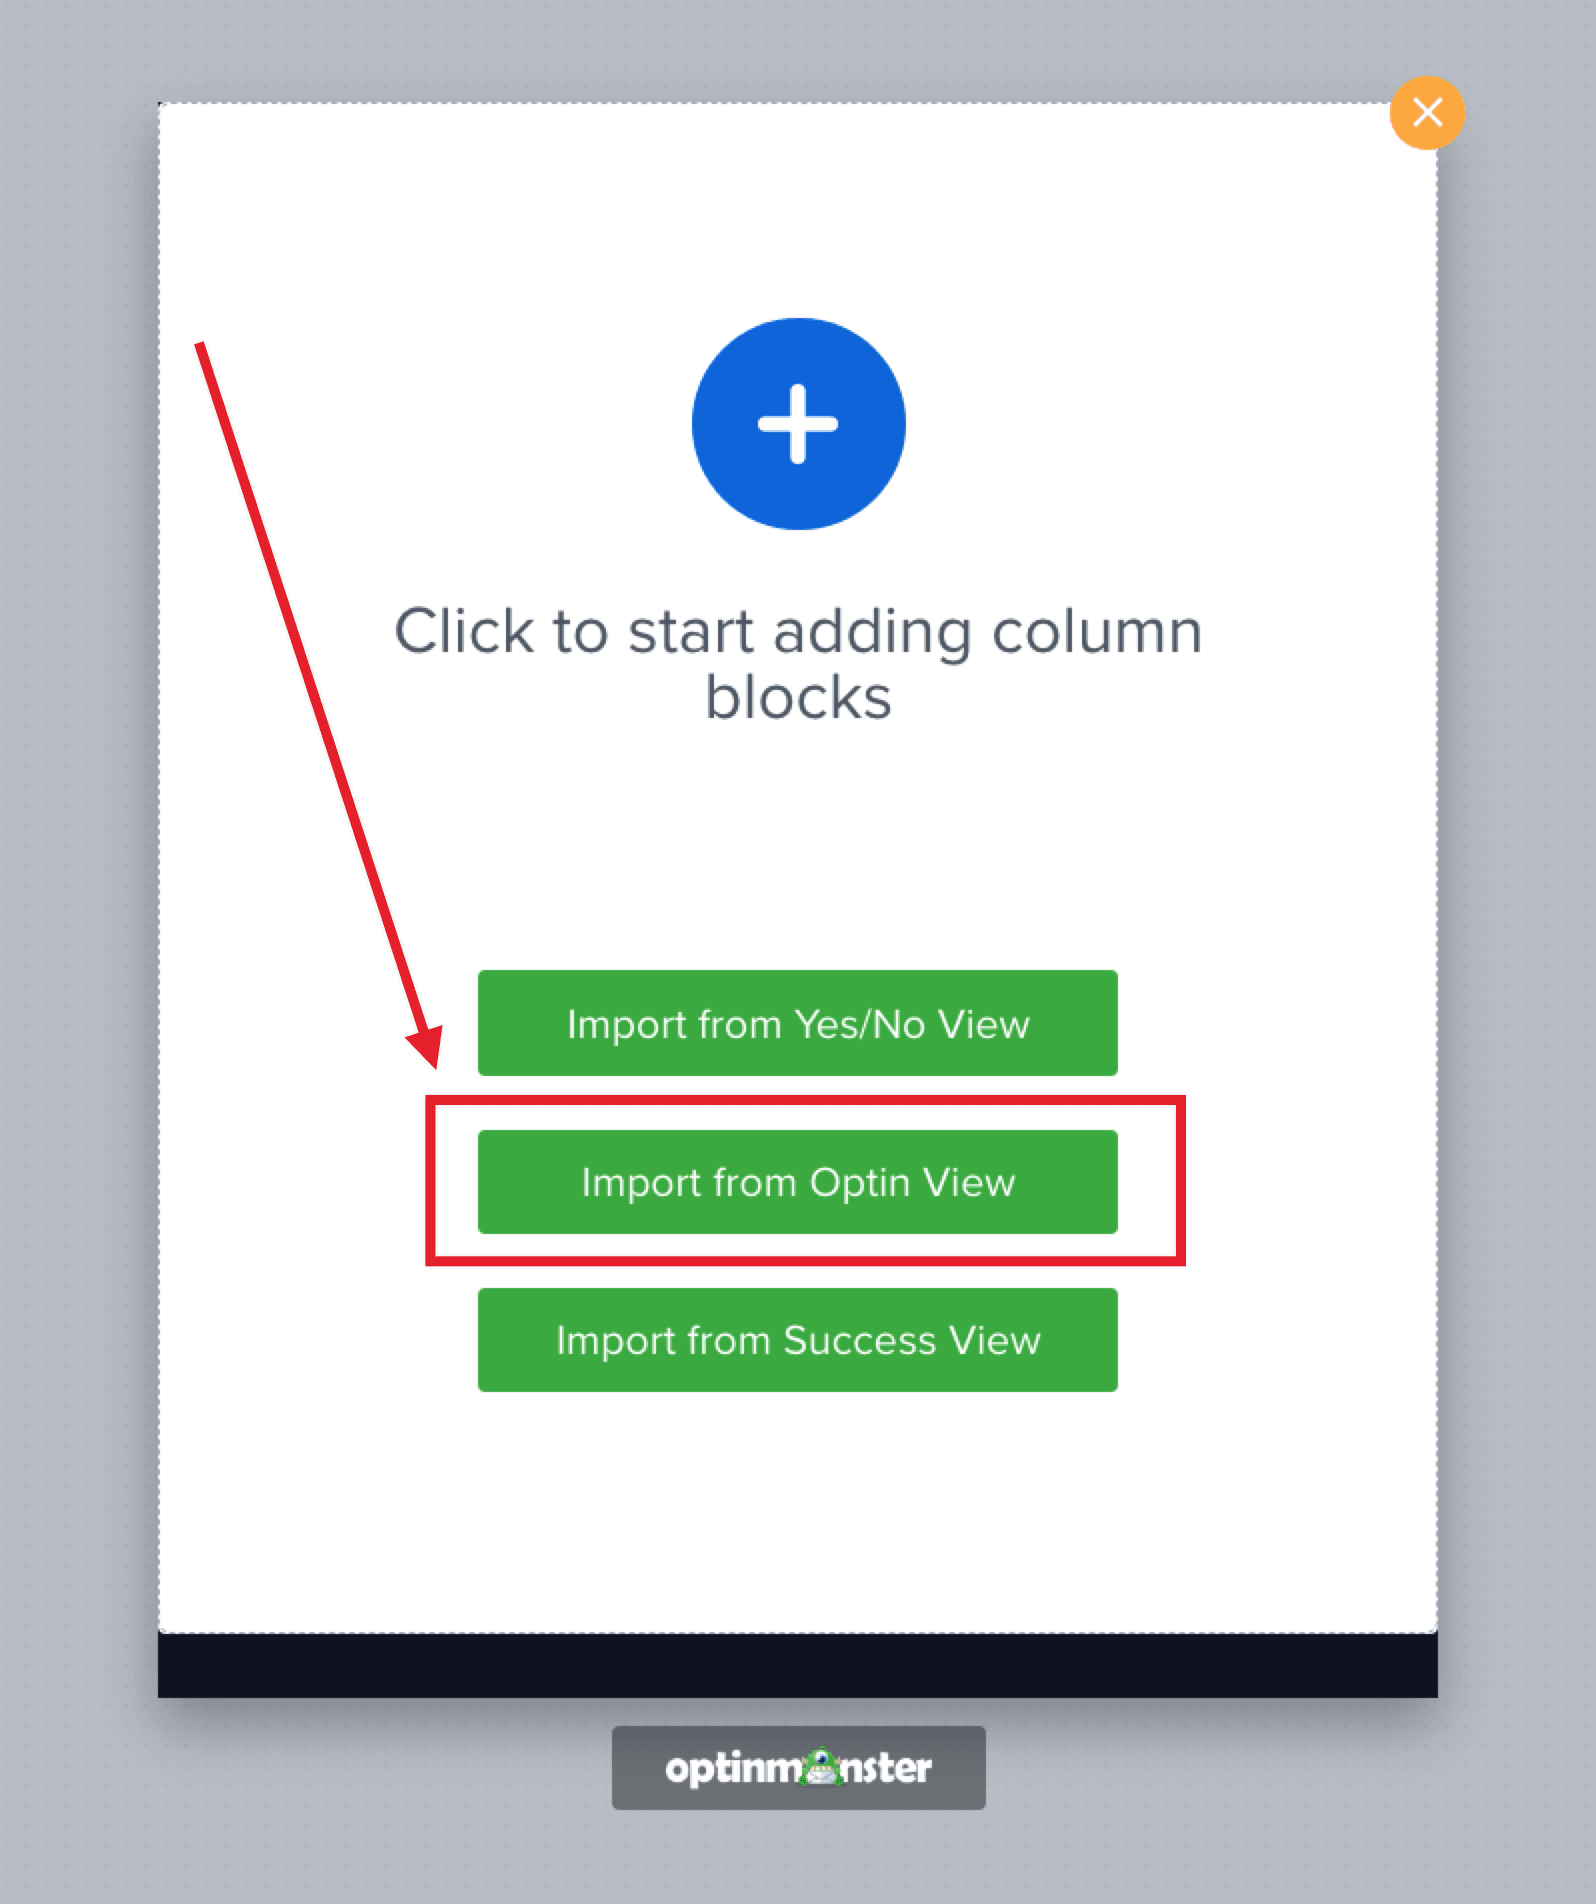
- Your new view will be empty to start. Select Import from Optin View to quickly populate the view’s design, including the first form you customized.
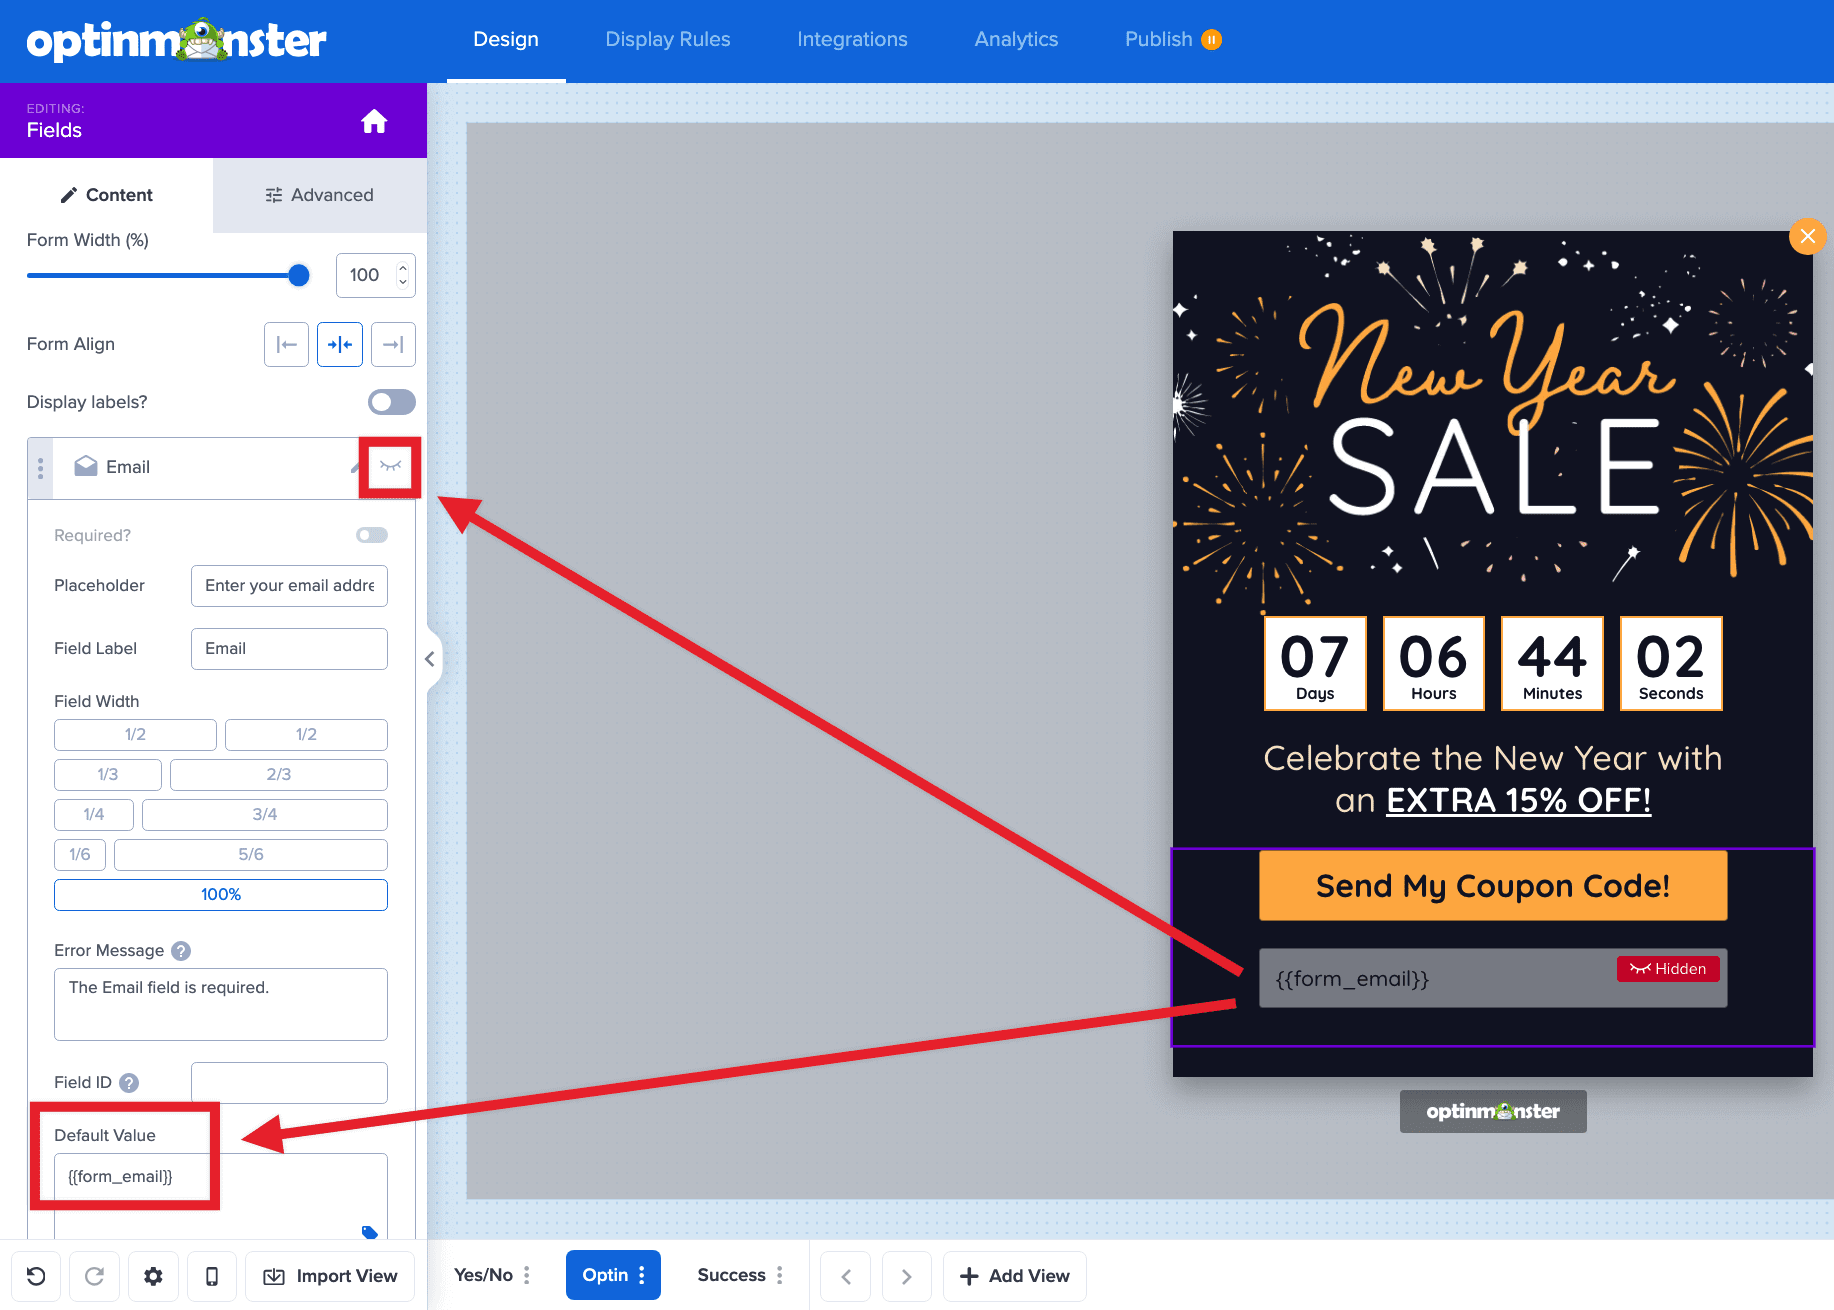
- Required: In this, and subsequent views of your progressive form, it is necessary to add the email address as a hidden field with a Smart Tag as the default value. Let’s walk through those steps now:
- From the design pane of the campaign builder, directly select the email address field to access its settings.
- You’ll make two edits to the email address field: Toggle the eye icon to make the email field hidden, and enter the Smart Tag
{{form_email}}as the default value.
*This will ensure that the email address captured in the first view of your progressive form gets passed along correctly as each additional form view is submitted.
- From the design pane of the campaign builder, directly select the email address field to access its settings.
- You are now ready to customize the rest of the Fields Block to add the specific form fields you wish to capture as data in this view. Learn more about adding additional fields to your form here.
- Repeat steps 5-9 in this section for each additional form step you would like to display in your progressive form. When you create a new view, you can import from any other previous view you’ve created–when creating a progressive form with 3 or more views, consider using the second form’s view which will already have the email address hidden.
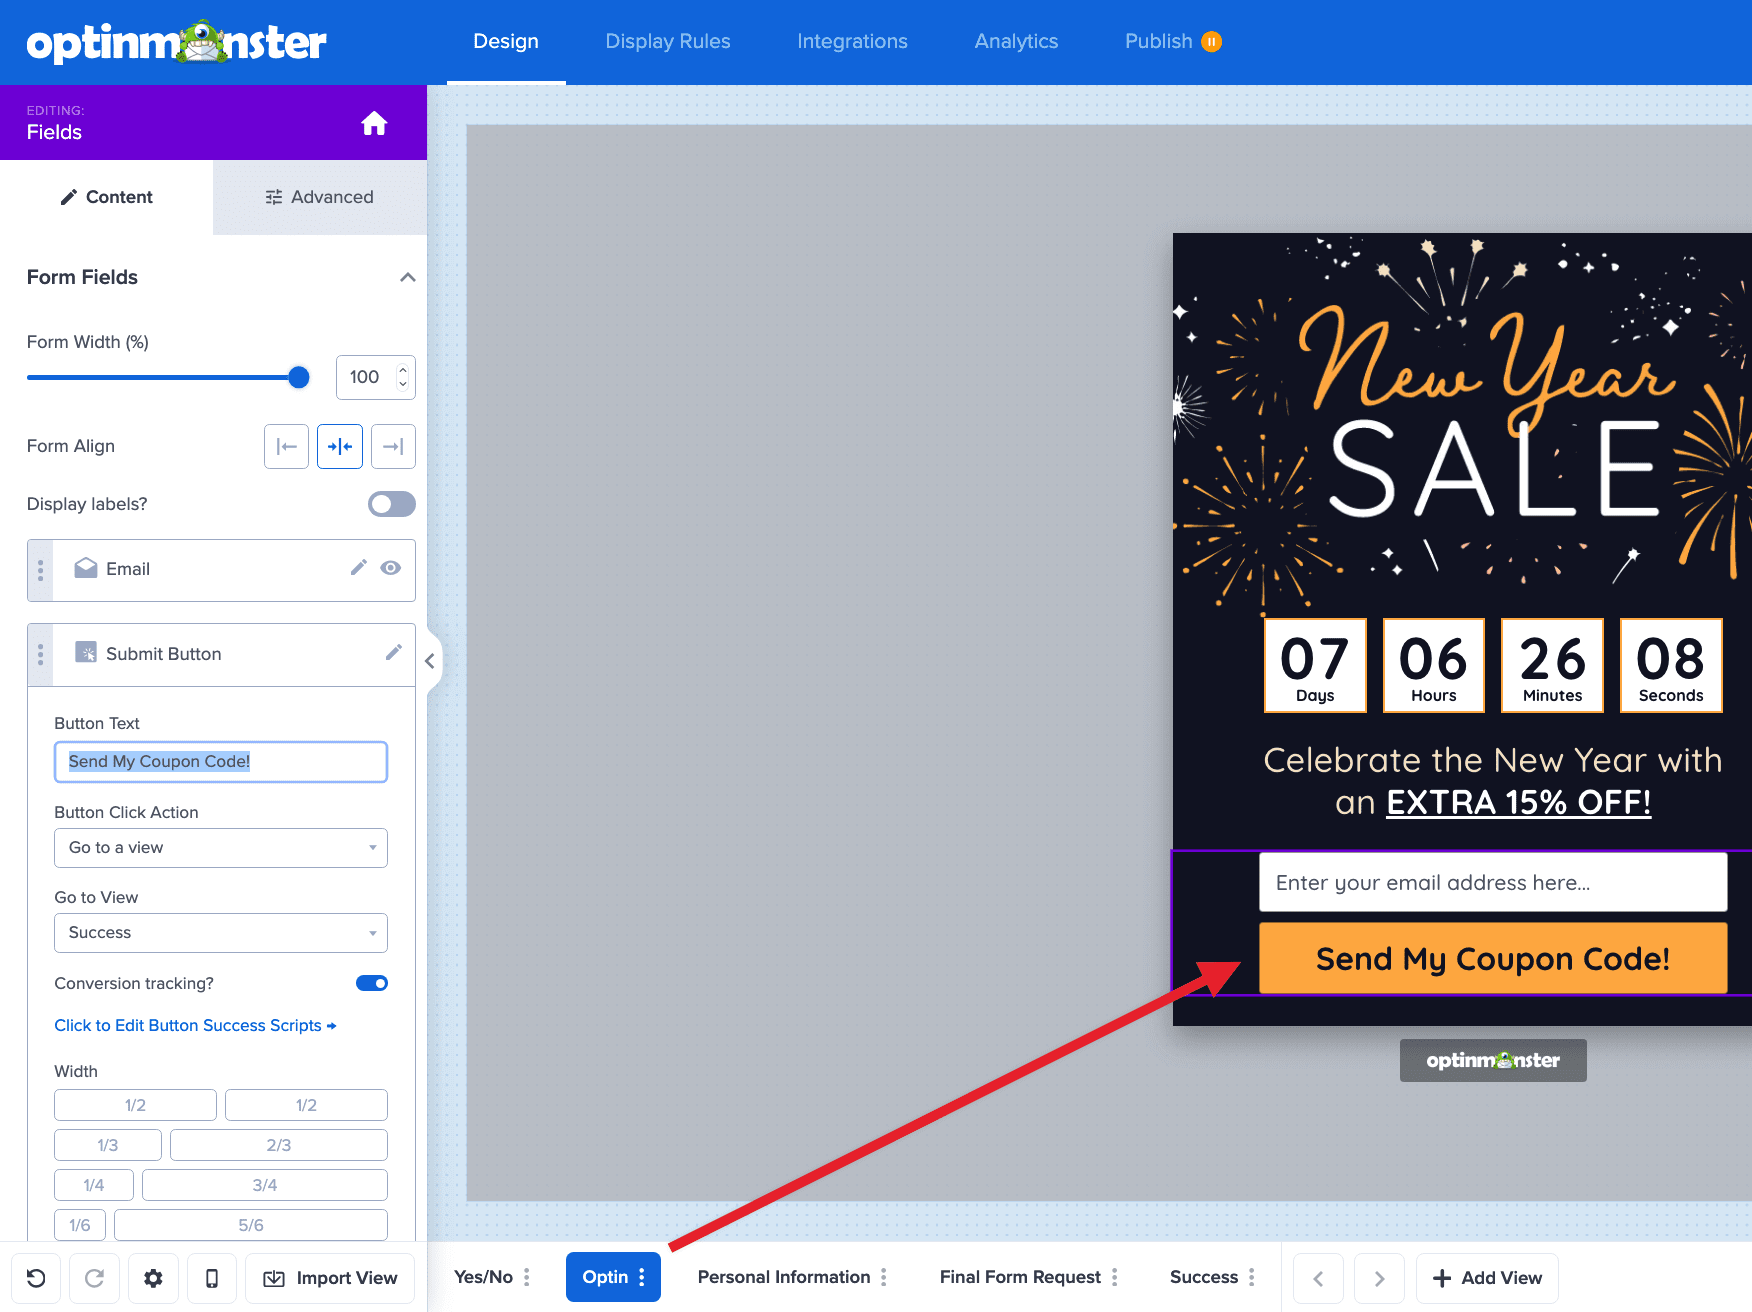
- Now, let’s make sure we link the views together for a seamless transition using Success Actions. From the Optin view of your campaign, directly select the submit button to begin editing the Success Action.
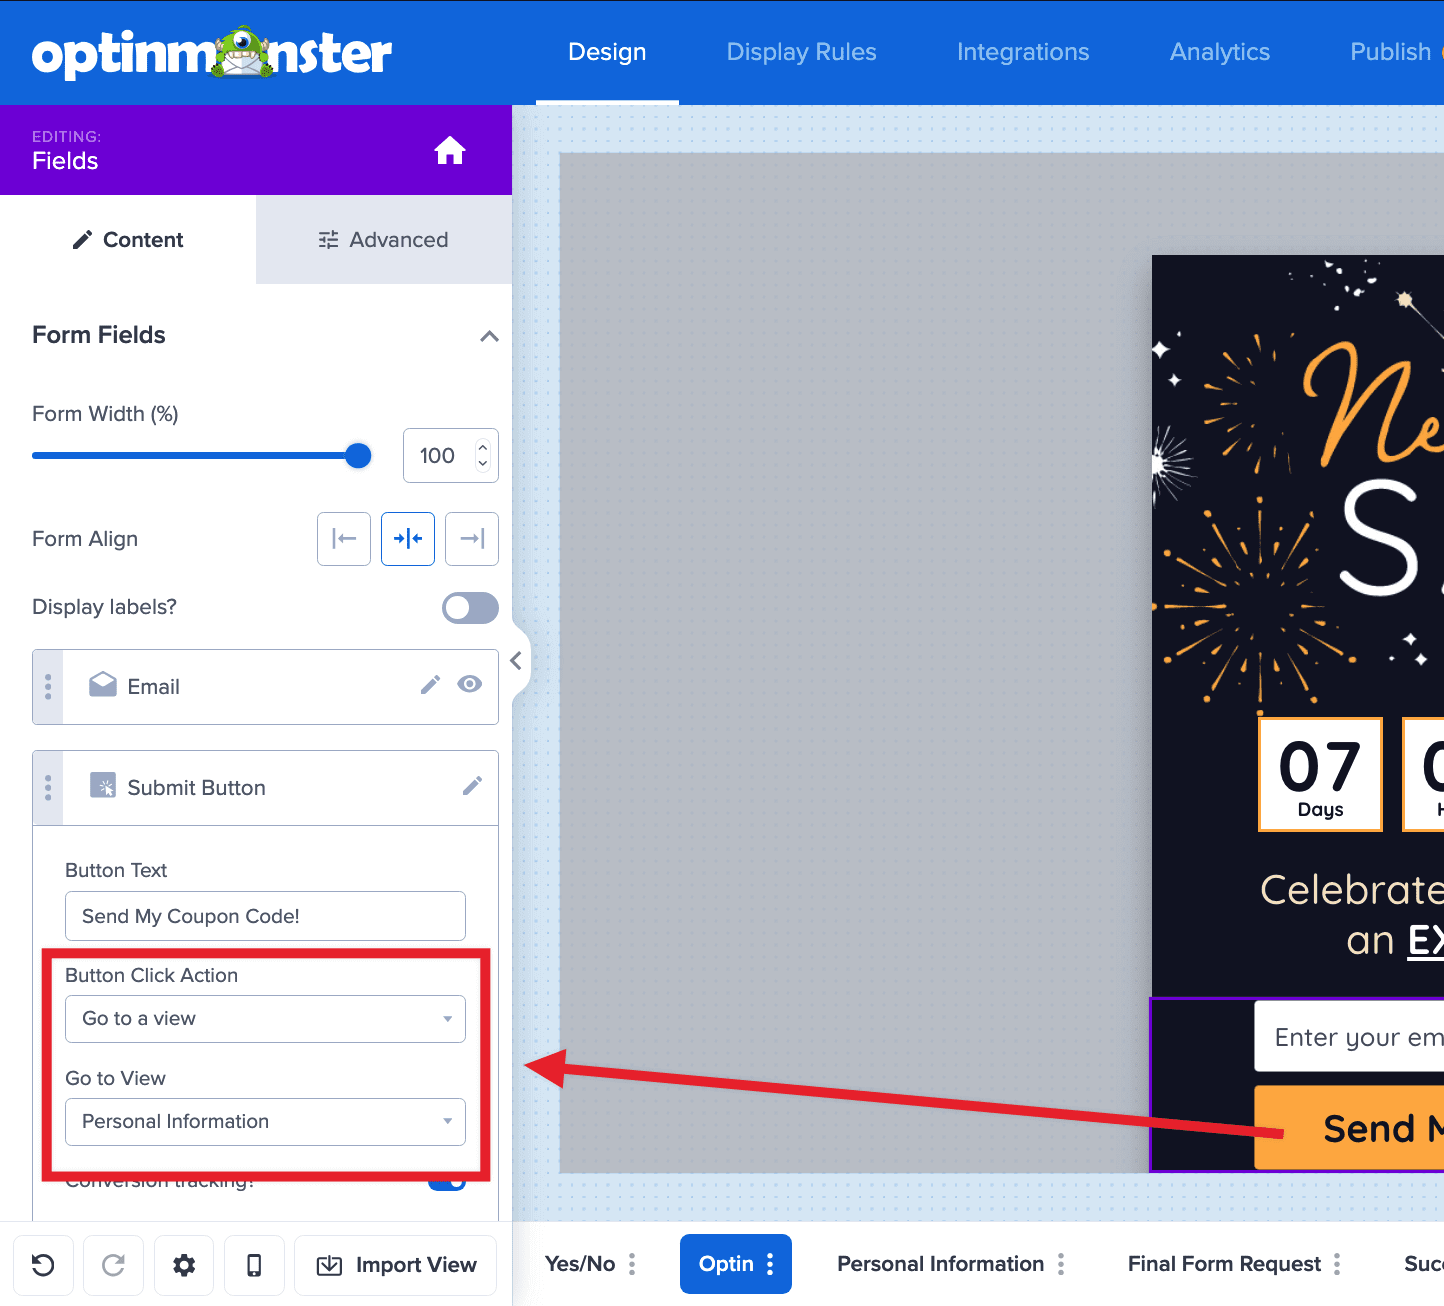
- In the left sidebar, from the Button Click Action dropdown select Go to a view, and from the Go to View dropdown select the second view of your progressive form (in this doc example it is “Personal Information”).
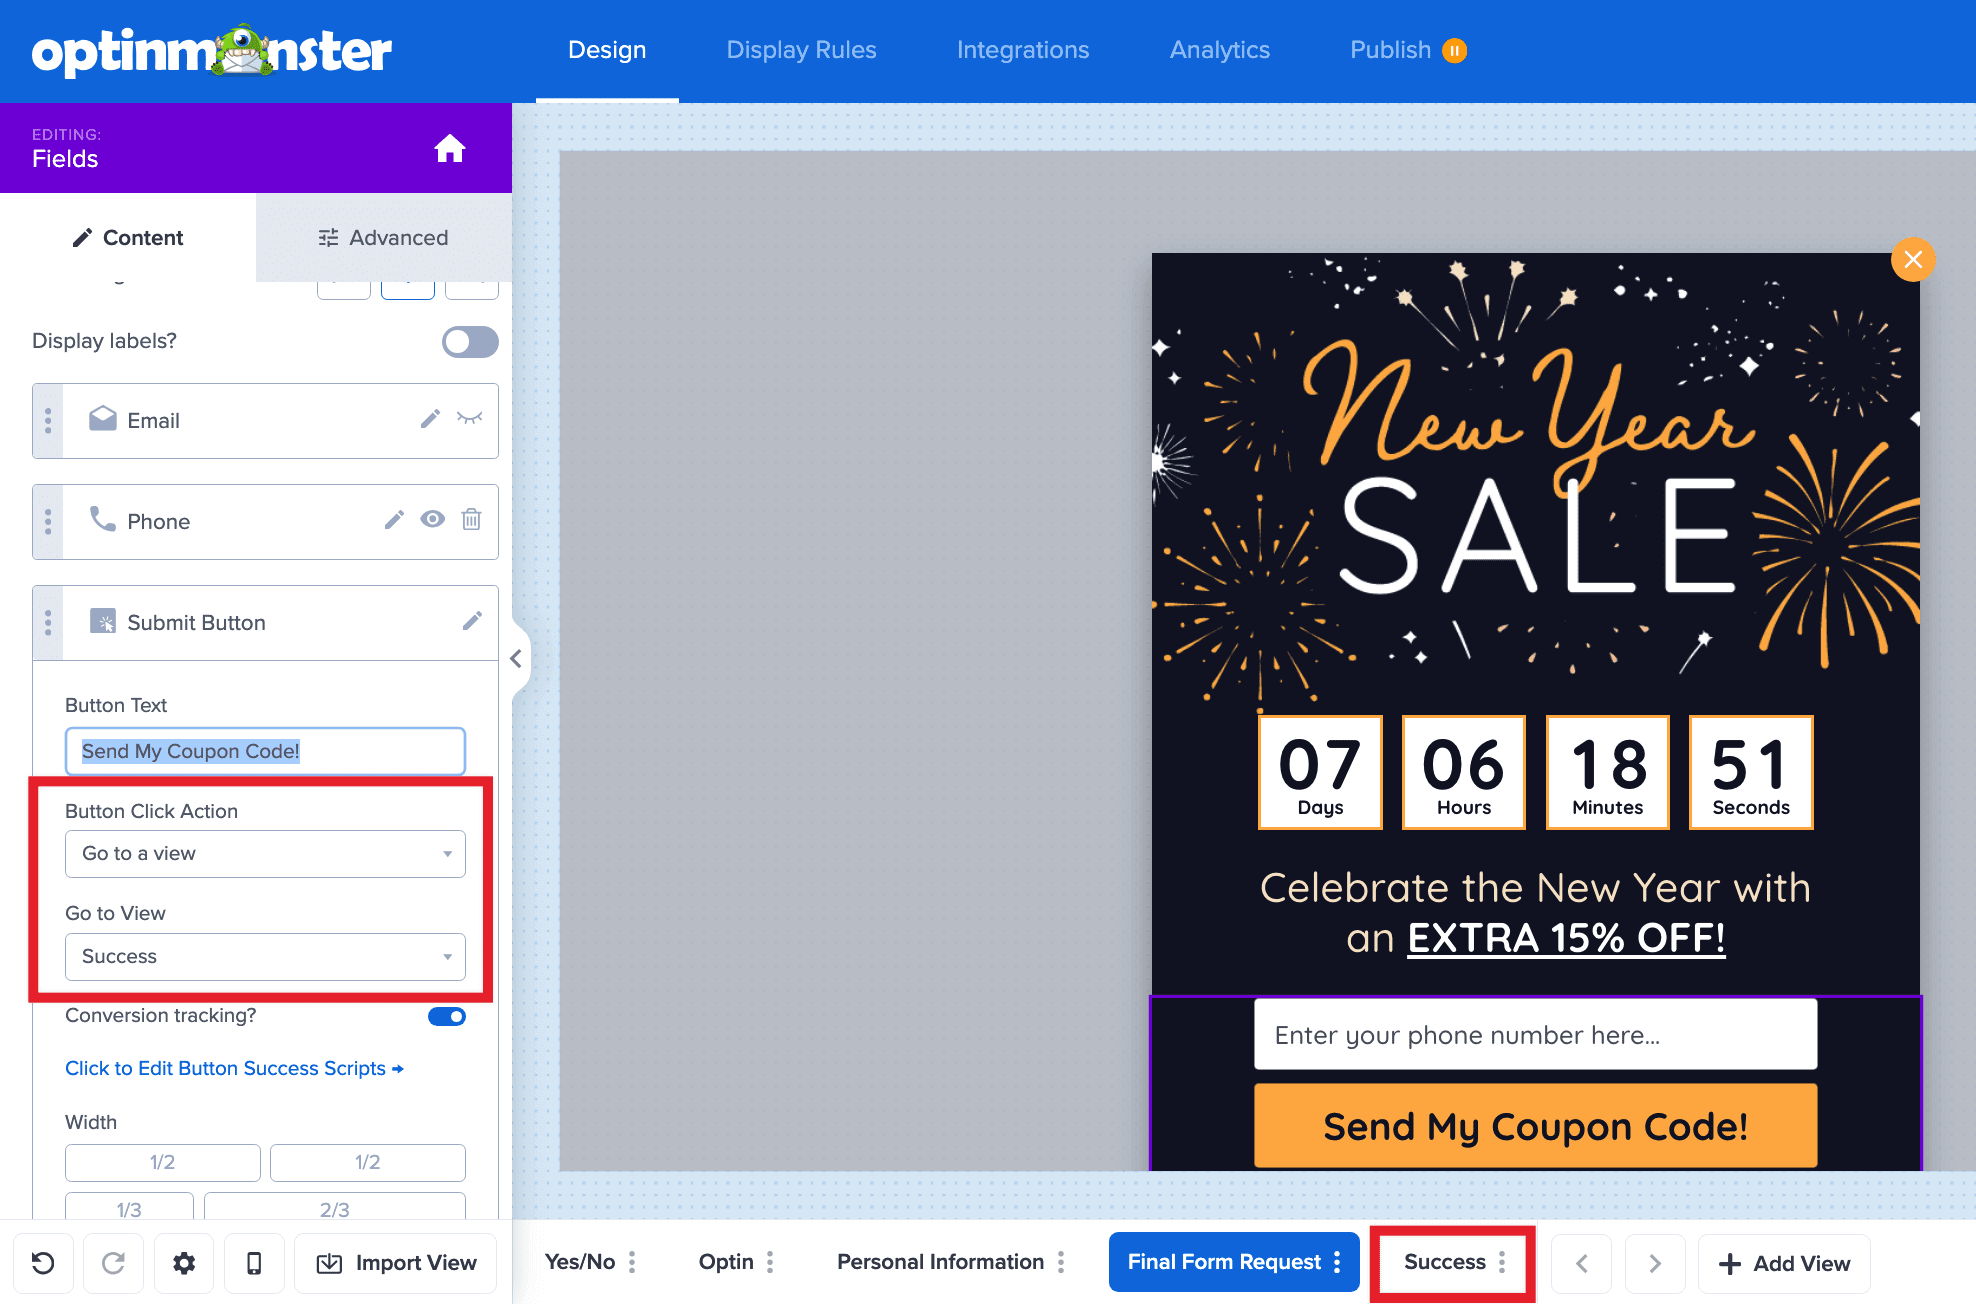
- Repeat this process for each view of your progressive form. On the final view of your progressive form, you may wish to show the Success view of the campaign or use an alternative Success Action like closing the campaign, redirecting to a URL, etc. Learn more about configuring Success Actions here.
FAQs
Why should I use progressive forms instead of a single long form?
Progressive forms help create a more user-friendly experience by breaking down information collection into smaller, more digestible steps. Even if all fields are requested in quick succession, presenting them across multiple views can feel less overwhelming than a single, cluttered form, encouraging better engagement and completion rates.
How does the {{form_email}} Smart Tag work?
The {{form_email}} Smart Tag automatically fills a form field with the email address previously submitted by the same user within that specific OptinMonster campaign. This lets you hide the email field on later views while ensuring the additional form data captured is correctly linked to the unique lead identifier (email address).
Can I use the values entered in earlier fields to personalize the experience in the following views?
Yes, you can. For example, you might collect the visitor’s name and email in the first view, and then use {{form_name}} Smart Tag in the next views to personalize the message and address the visitor by name anywhere within the campaign.
What happens if a user fills out only the first step of the form but doesn’t complete the remaining steps, will the submitted information be lost?
Any information entered in the initial form or completed views before the user closes the campaign will be instantly captured and sent to the connected integrations.
If you’re serious about jumpstarting your website business growth, then get started with OptinMonster today!
Get Started With OptinMonster Today!
BONUS: Done-For-You Campaign Setup ($297 value)
Our conversion experts will design 1 free campaign for you to get maximum results – absolutely FREE!
Troubleshooting
Collected fields aren’t appearing in my email marketing service.
Ensure that all fields in your OptinMonster form (from all views) are correctly mapped to corresponding fields in your email marketing service integration. Verify that the integration is active and authenticated.
The email field is still visible on subsequent views.
In the settings for the email field within your progressive views, make sure the Hide Field option is enabled. Also, confirm you’ve set the Default Value to {{form_email}} so OptinMonster pre-populates and hides it.


