OptinMonster makes it easy to add a countdown timer to your website. Countdown timer campaigns are one of the best ways to boost your sales and conversions by creating a sense of urgency for your visitors, and harness the power of “FOMO”: the fear of missing out.
In this article, you’ll learn how to use add a countdown timer to any OptinMonster campaign.
Before you start, this feature is available with a Pro and higher subscription.
Before you start, creating a sense of urgency for your visitors is one of the best ways to boost your conversion rate. When our purchasing decisions are based on urgency, we automatically lean towards the “take action” route, because we’re afraid of missing out.
Pre-Made Templates
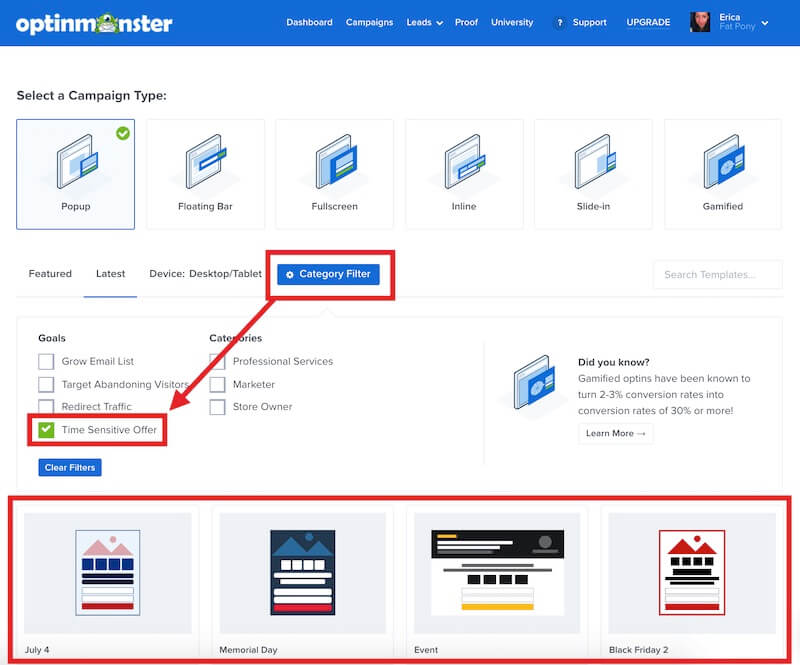
Many of our pre-made campaign templates already include a countdown timer block.
When creating a new campaign, use the Category Filter and toggle Time Sensitive Offer to quickly locate all pre-made templates that include a countdown timer.
Add Countdown Timer
To add a countdown timer to any new or existing campaign, follow these steps:
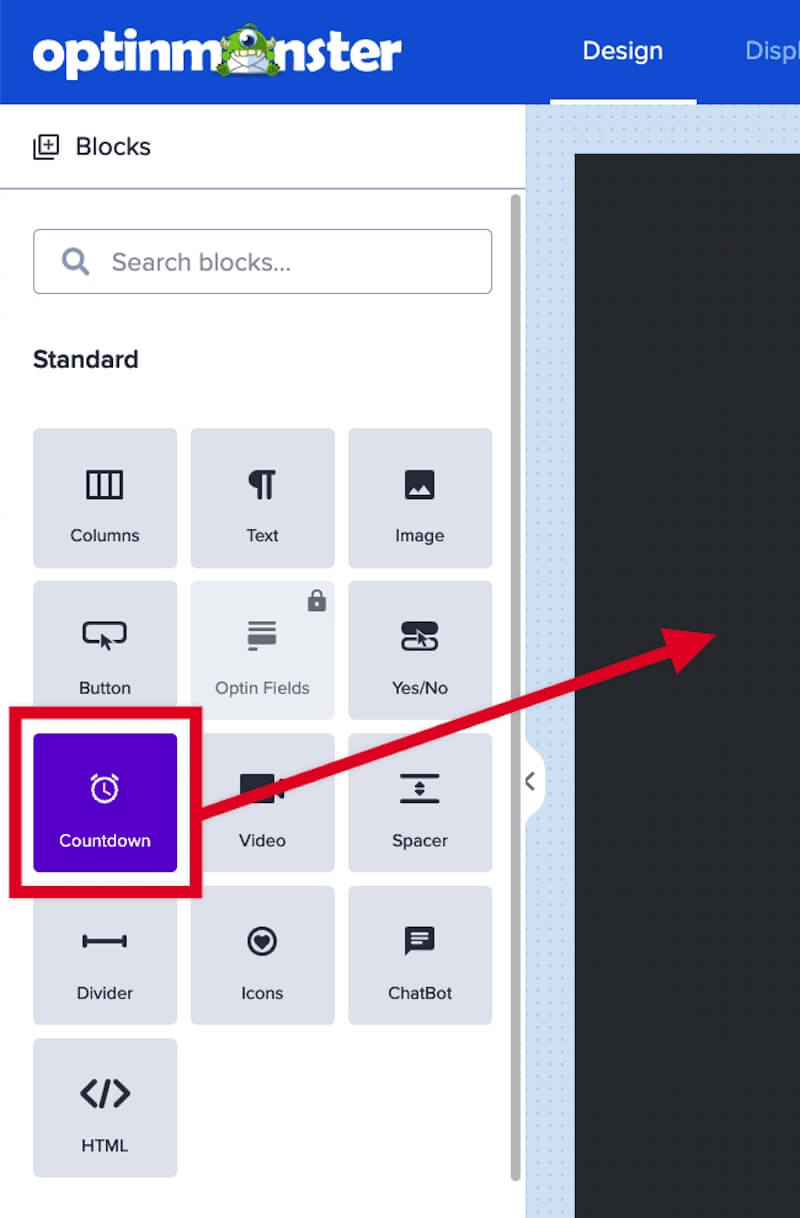
- In the campaign builder, drag and drop a Countdown block into your campaign where you want the countdown timer to appear.
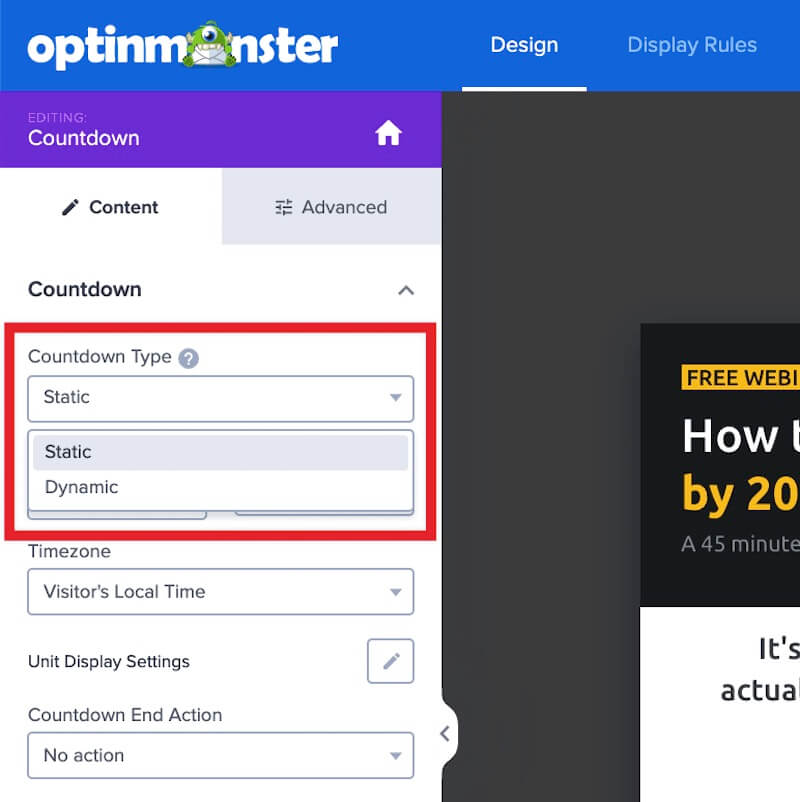
- Next, select the Countdown Type from the dropdown field in the sidebar panel. You can select Static or Dynamic.
- You’ll now be able to configure your timer based on the type you’ve selected.
- When you’re finished, click Save.
Available Settings
In the countdown timer menu, you can customize the timer in your campaign. Read on to see how to set the type and “end” time for your campaign, as well as what happens after your countdown reaches 0.
Countdown Type
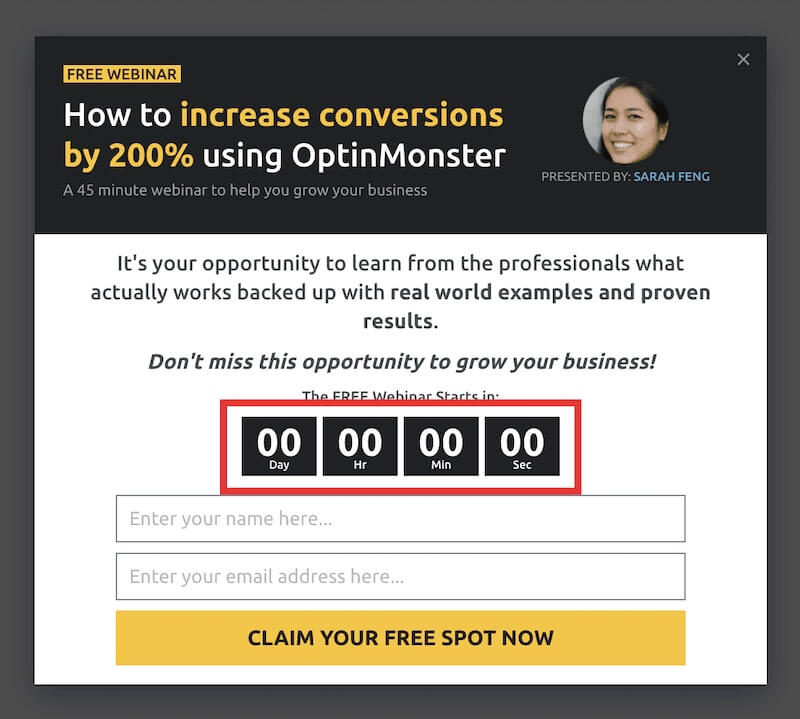
Static Countdown
Counts down to a specific date and time.
This type of countdown timer is often used for seasonal sales or product launches.
After the specified date and time have passed, the countdown timer displays 00 for all values.
Dynamic Countdown
Sometimes called an “Evergreen” countdown, starts with a pre-set amount of time for each visitor to countdown from.
Instead of selecting an end date, you’ll choose the length of time the timer shows by number of days, hours, minutes, and seconds.
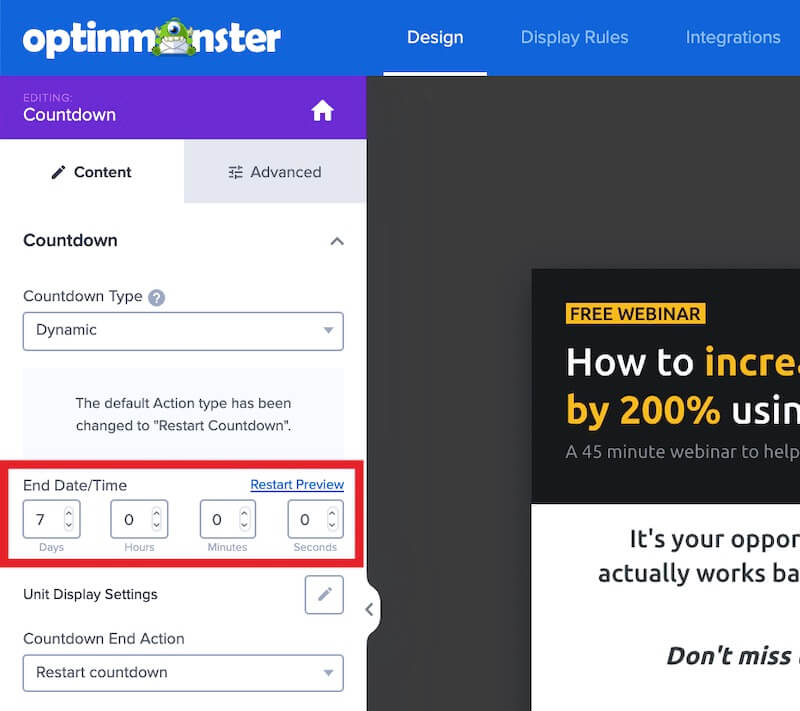
Countdown Action
Next, you can configure what action takes place when the countdown ends from the Countdown End Action dropdown.
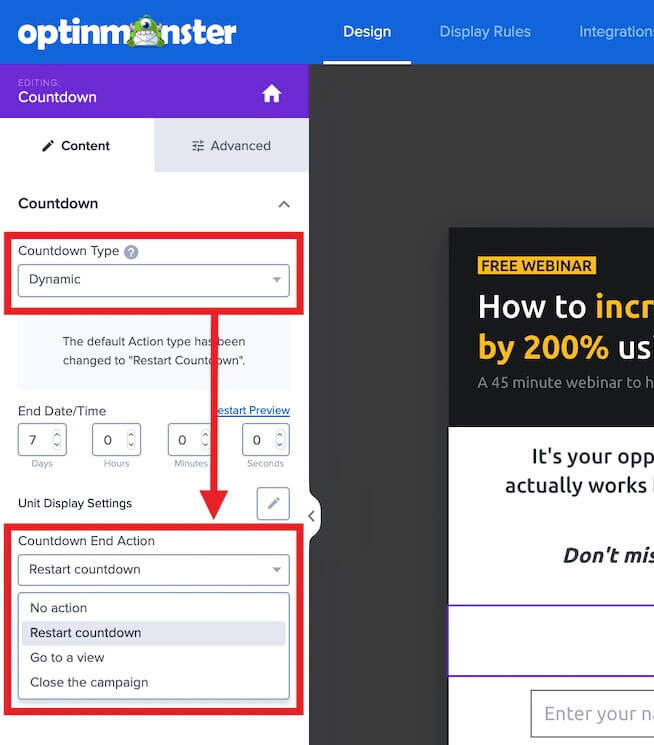
There are four action options:
- No action: if the countdown reaches 0 while a visitor is viewing it, nothing will happen, and the timer remains viewable
- *Restart the countdown: this action will restart the timer (only available for Dynamic countdown timers)
- Go to a view: allows you to choose a view, like the Success View, to show instead of the finished countdown
- Close the campaign: this action closes the campaign, so the countdown is no longer viewable
Next, configure your display rules to tell the campaign where to appear, or embed the campaign on your website directly.
FAQs
Can I add both a countdown timer and an optin fields block to the same campaign?
Yes, you can add an Optin Fields element to your campaign as well to configure an integration.
What campaign types support countdown timers?
All campaign types support the countdown timer element.
Can I track a conversion or run a script when the countdown ends?
Yes. See our guide on how to use success actions on your campaigns.
How do I translate the text ‘Days’, ‘Hours’, ‘Minutes’, and ‘Seconds’ into another language?
Yes, add the following code using our Custom CSS tool and edit as you require:

