With OptinMonster you can pass lead data to the redirect URL by enabling a single option in the campaign builder. Passing lead data to the redirect URL allows you to use that data for further customization on that page.
In this article, you’ll learn how to enable the option to pass lead data to the redirect URL in OptinMonster.
Our conversion experts will design 1 free campaign for you to get maximum results – absolutely FREE! Click here to get started →
Before You Start
Here are some things to know before you begin:
- Lead data is passed to the redirect URL as query arguments.
- The email address is passed to the query arg as
om_email. - The name is passed to the query arg as
om_name(if the name field is enabled). - The phone is passed to the query arg as
om_phone(if the phone field is enabled). - The query arguments used (as shown above) cannot be customized at this time.
Pass Lead Data to Redirect URL
When you’re looking to further customize and personalize your success / thank you page you can use lead data to do so.
To pass lead data to the redirect URL, follow these steps:
- From the Design view of the campaign builder, directly select the submit button of the optin form to edit the settings.
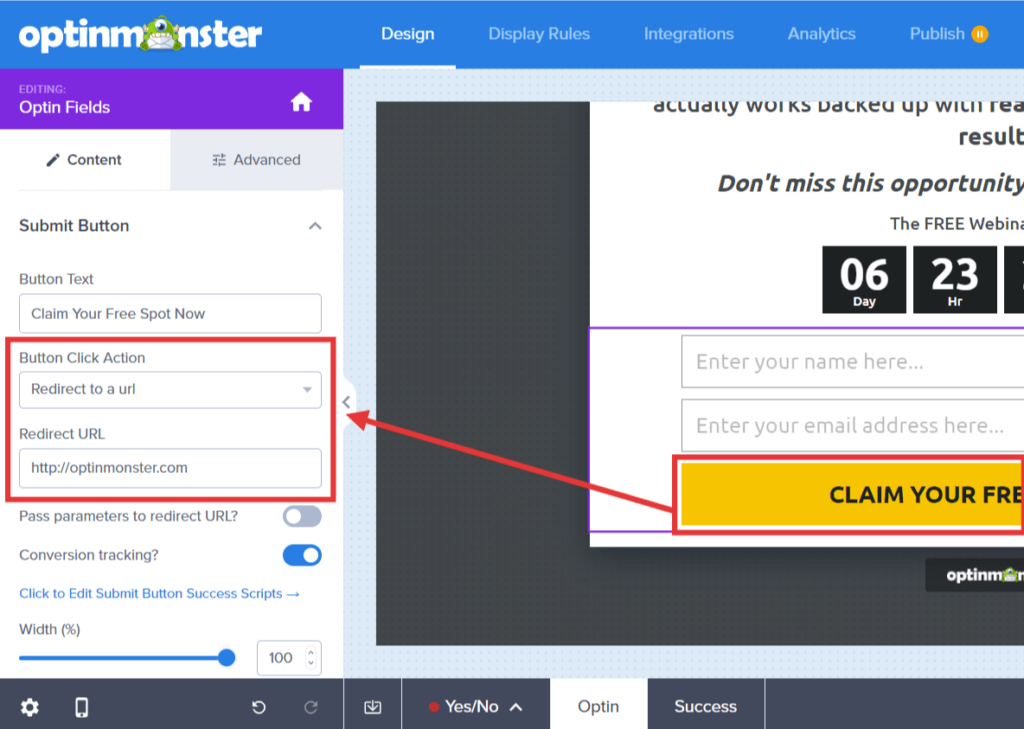
- Next, locate the Button Click Action setting in the sidebar panel and select Redirect to a URL or Open in new Window from the dropdown field.
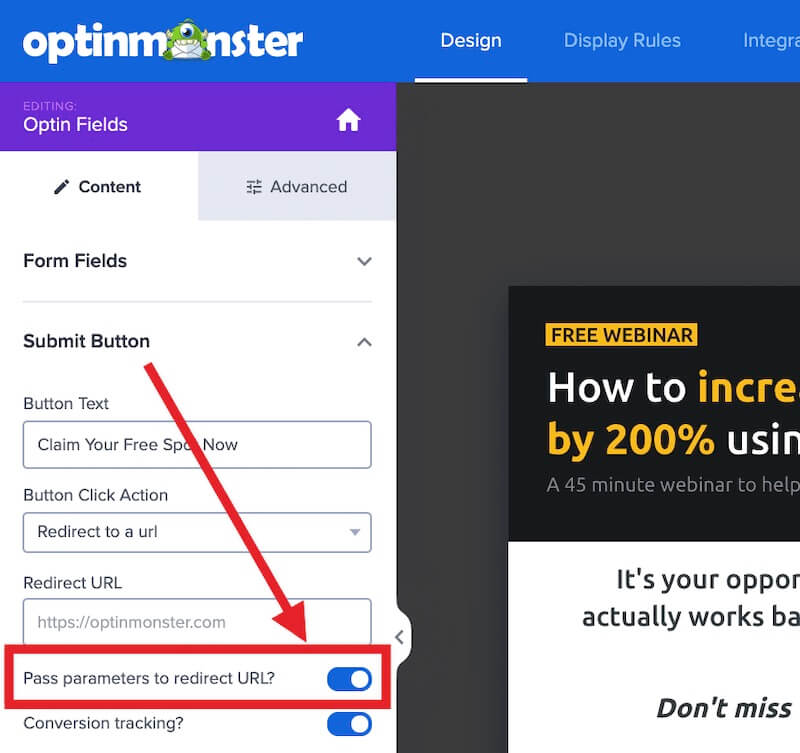
- You can now toggle the Pass parameters to redirect URL? option.
- When you’re finished, click Save.
FAQs
Can you provide an example of how the lead data is passed in the redirect URL?
Yes, an example of the formatting is:
https://optinmonster.com/[email protected]&om_name=John+Smith&om_phone=5555555555
Can I customize the query args?
No, the default query args (om_email,om_phone , and om_name) cannot be modified.
Can I capture the query args from the page and pass that to the redirect URL?
Yes, it is possible to capture the query args, like UTM Parameters, from the page your visitor is submitting the campaign on and pass it to the URL you are redirecting them to as per the below steps:
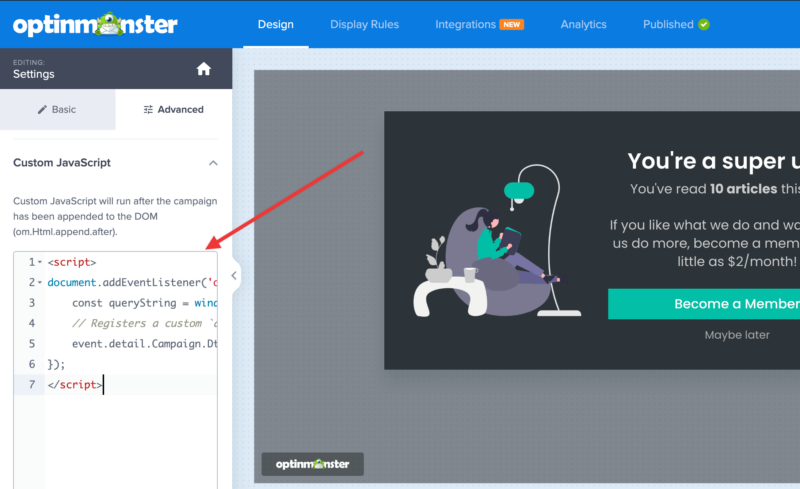
- The first step for any campaign you wish to add this functionality to, is to add the following code to the Custom Javascript field in the campaign builder:
<script>
document.addEventListener('om.Campaign.load', function(event) {
    const queryString = window.location.search; // capture all query args
    // Registers a custom `query_args` smart tag that outputs all query args from the current page.
    event.detail.Campaign.Dtr.setCustomVariable('query_args', queryString);
});
</script>
This will register a custom smart tag {{query_args}}, that will output all query args from the current page.
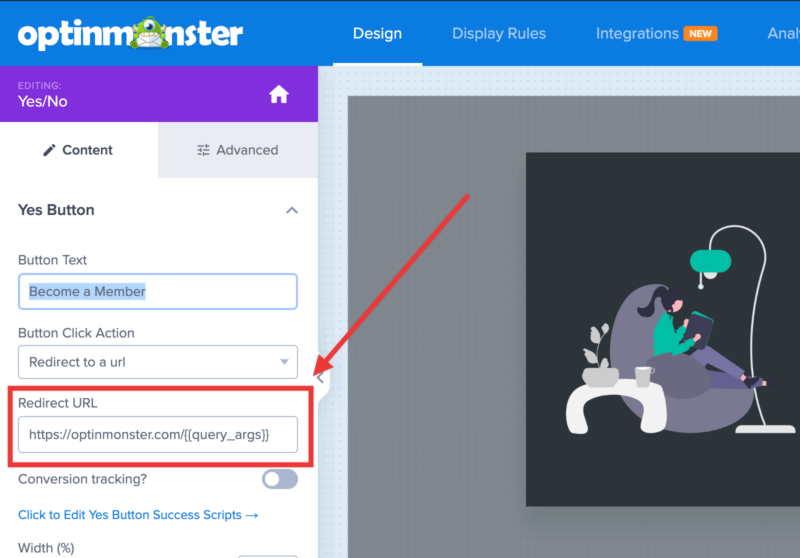
- Then, set the Success Action of your form or button to Redirect to a URL, and add this smart tag to the end of the URL: {{query_args}}
For example:
https://optinmonster.com/{{query_args}}
Save the Campaign and it will capture the query args from the page the campaign is displayed on and pass them on to the URL you are redirecting the users to.
How can I learn more about using lead data in the redirect URL?
If you’re new to using query string values and want to learn more check out the following resources:
Our conversion experts will design 1 free campaign for you to get maximum results – absolutely FREE! Click here to get started →


