Creating accessible campaigns ensures that all visitors, including those with disabilities, can engage effectively with your content. While OptinMonster offers features to support accessibility, achieving full compliance with the Americans with Disabilities Act (ADA) depends on how you configure your campaigns.
In this article, you’ll learn the best practices and features you can use to make your OptinMonster campaigns ADA-compliant.
Before you start, ADA compliance requirements can vary based on your specific situation and audience. We recommend using external accessibility testing tools to evaluate your campaigns. This guide from W3 is a great place to start.
Important:
If specific compliance issues are identified during testing, our support team can assist on a case-by-case basis. This might involve adjusting existing settings or, in some cases, providing custom code.
However, we cannot guarantee that all compliance issues can be resolved.
While OptinMonster doesn’t guarantee ADA compliance, you can leverage its features to design campaigns that are more accessible. Here’s a breakdown of functionalities you can utilize:
Colors
Ensuring your campaign’s colors are visually appealing and accessible is essential for creating a great user experience for everyone, including users with visual impairments. This helps improve readability, which is critical for ADA compliance.
OptinMonster makes it easy to customize the colors of various campaign elements, such as backgrounds, text, links, buttons, and close icons.
You can also customize the design of your campaigns to align with your site’s branding by creating a color profile.
Test your campaign’s color combinations using a tool like WebAIM’s Contrast Checker to ensure your campaigns are accessible and readable for everyone, including users with visual impairments or color blindness.
Background Color
To adjust your campaign’s background color, follow these steps:
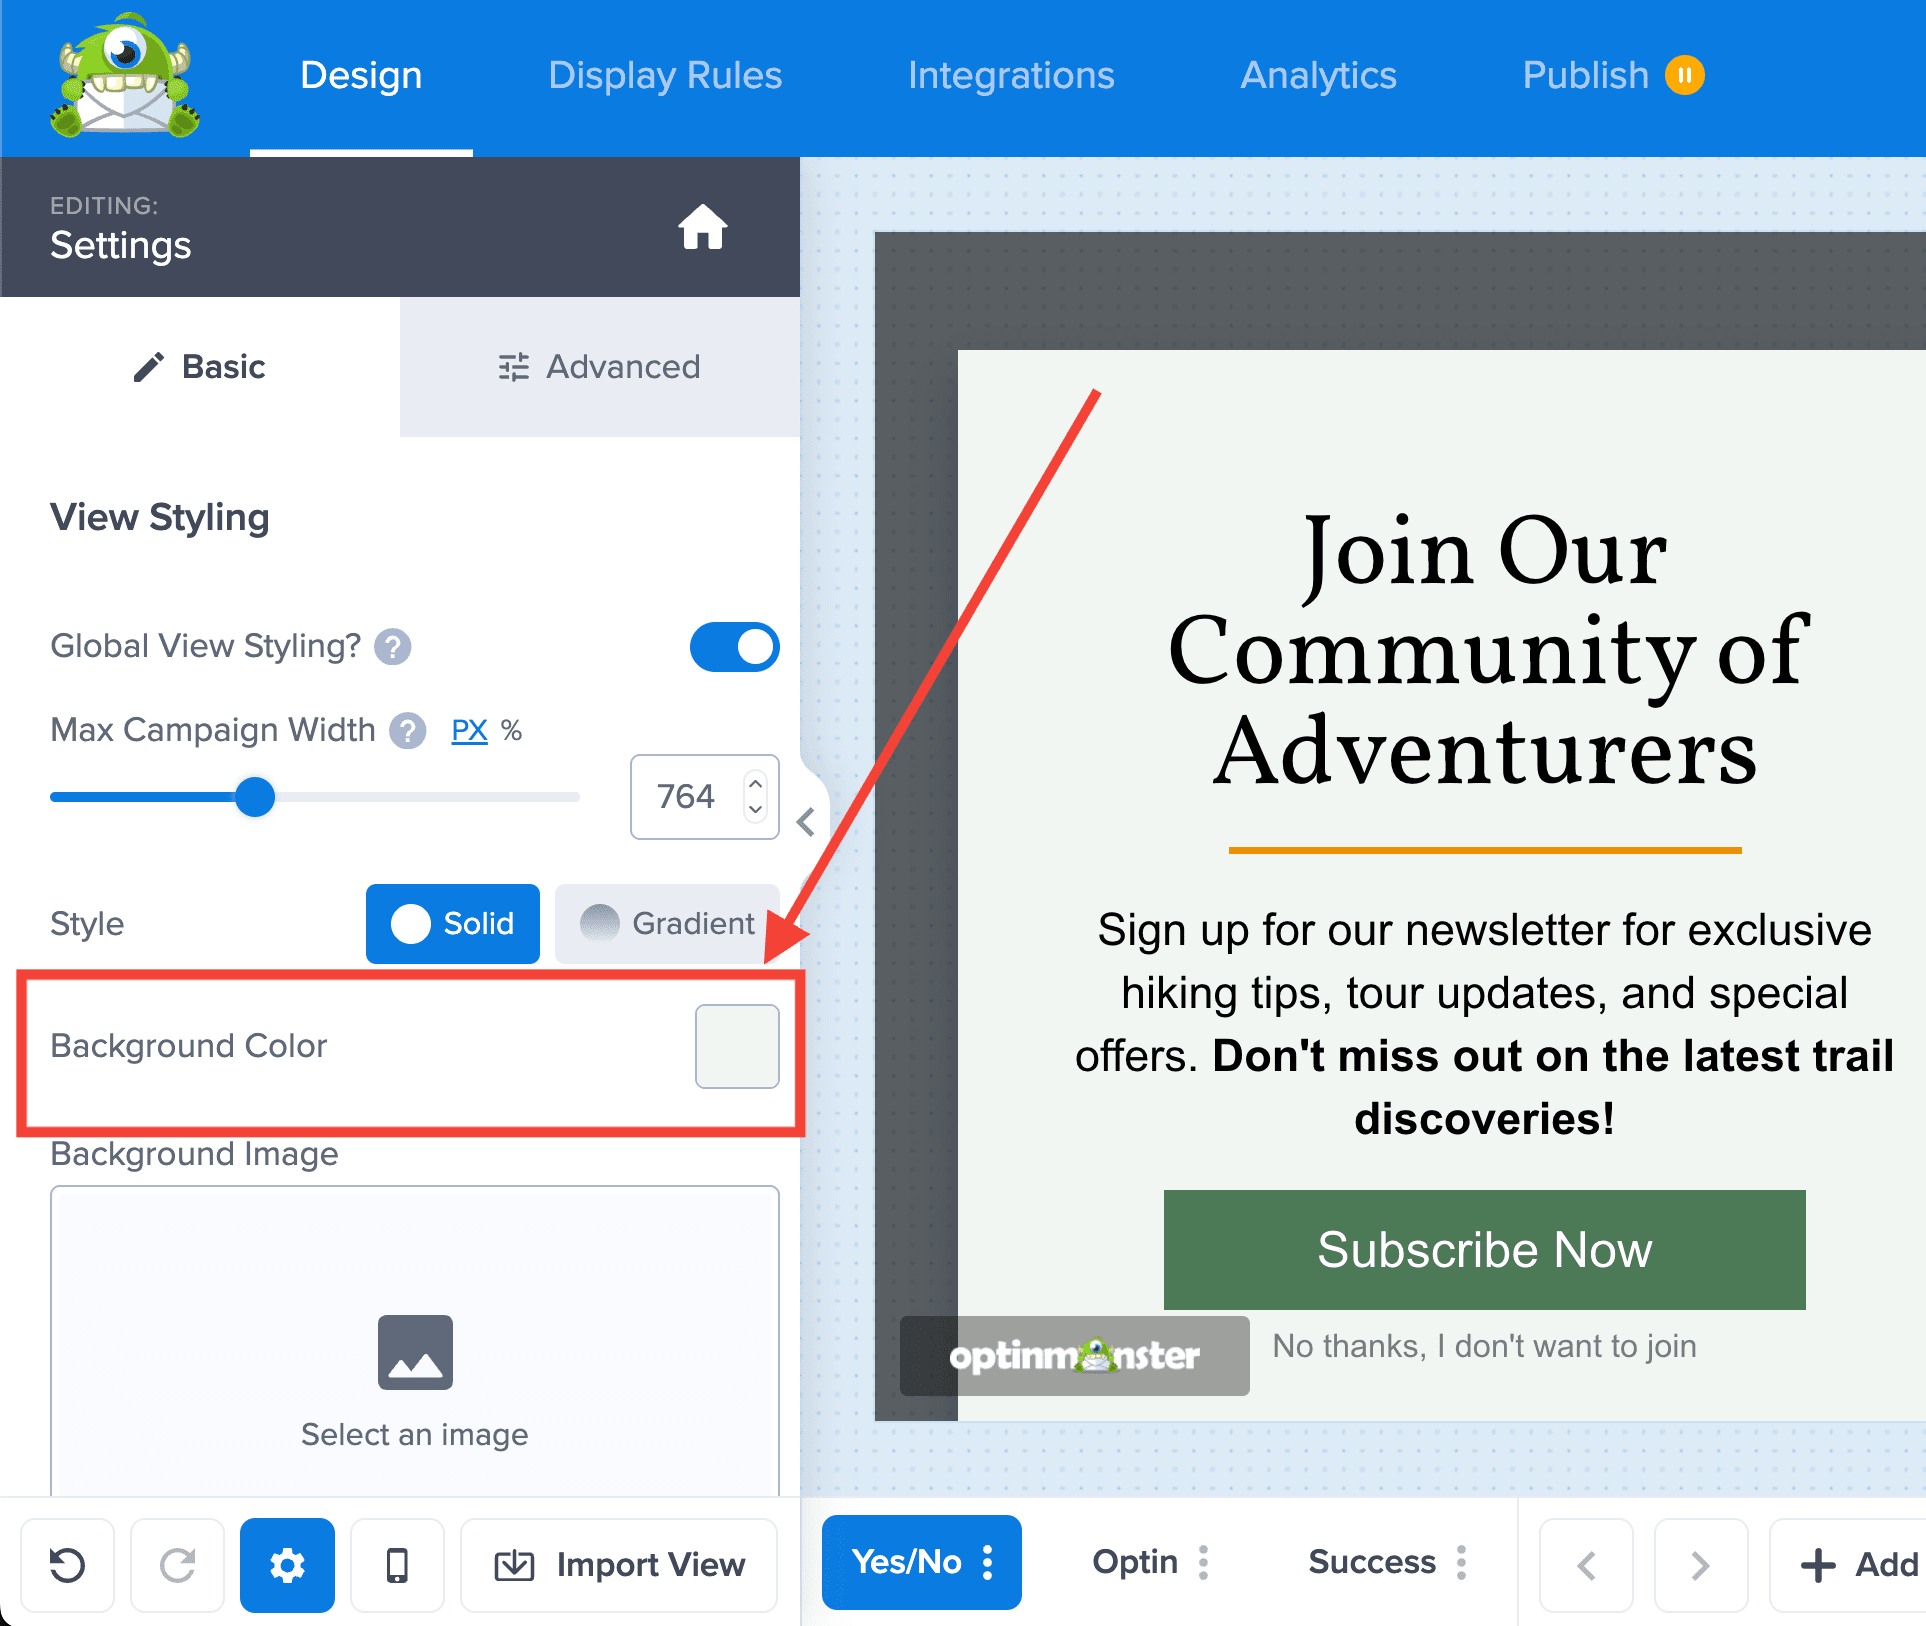
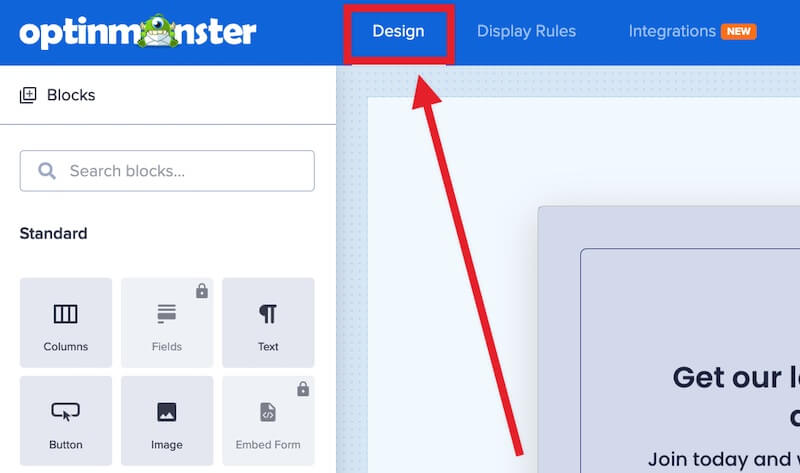
- In the Design view of the campaign builder, select the Settings icon.
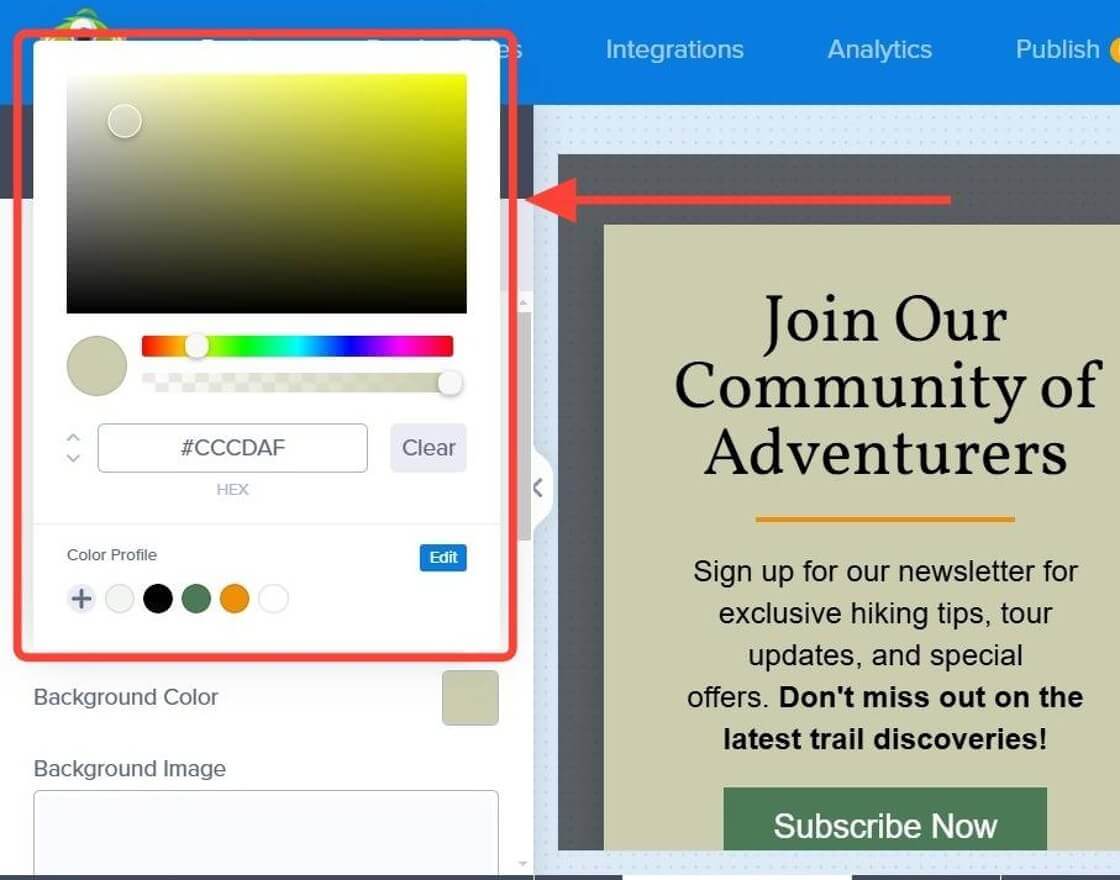
- Next, from the Basic tab in the sidebar, select the Background Color swatch to open the color editor.
- Here, you can select a color and change the background.
- When you are finished, Save the campaign.
To adjust your campaign’s background overlay color, please refer to our detailed guide here.
Text Color
To adjust your campaign’s text color, follow these steps:
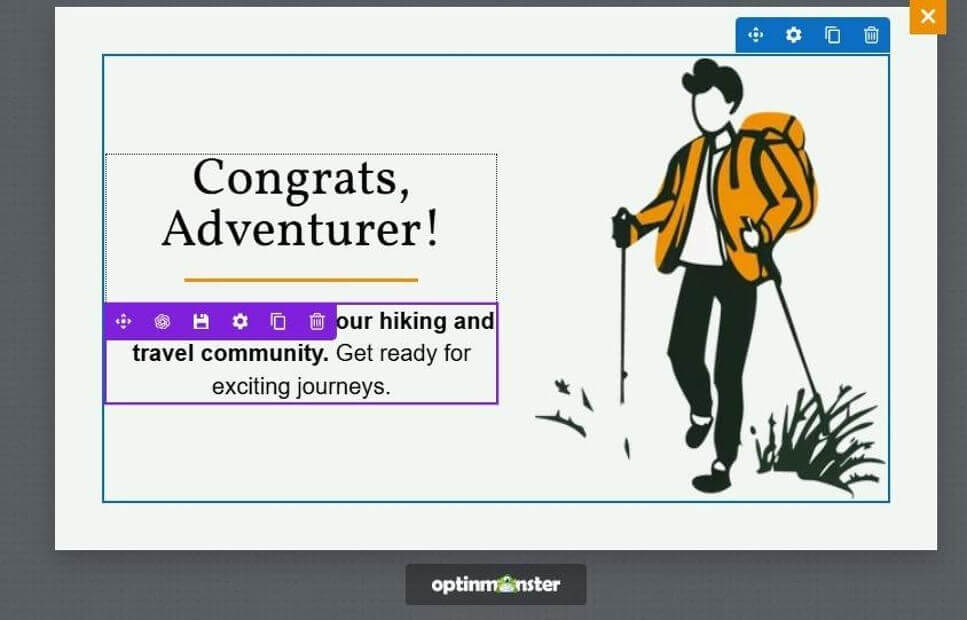
- In the Design view of the campaign builder, locate the Text block you want to edit.
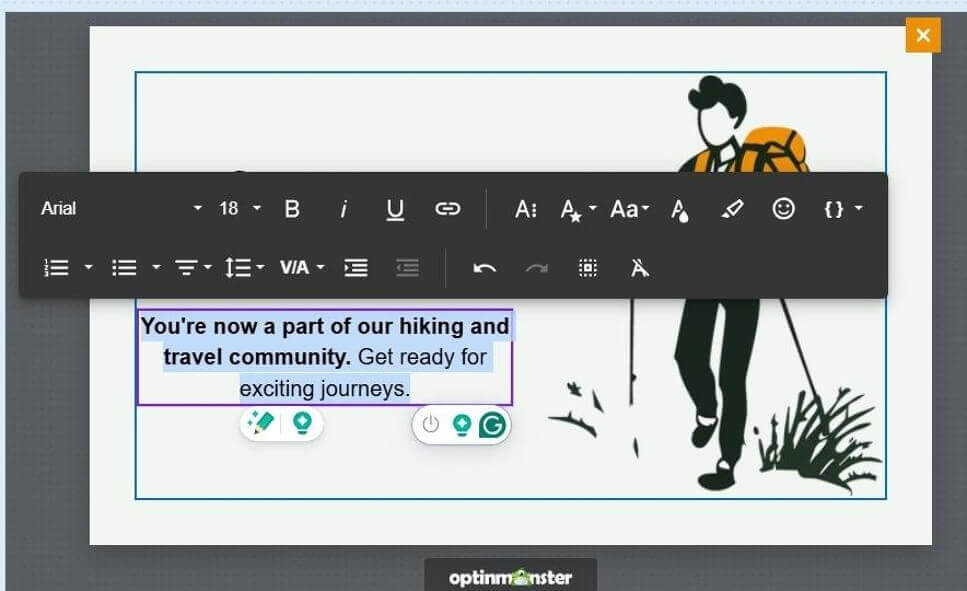
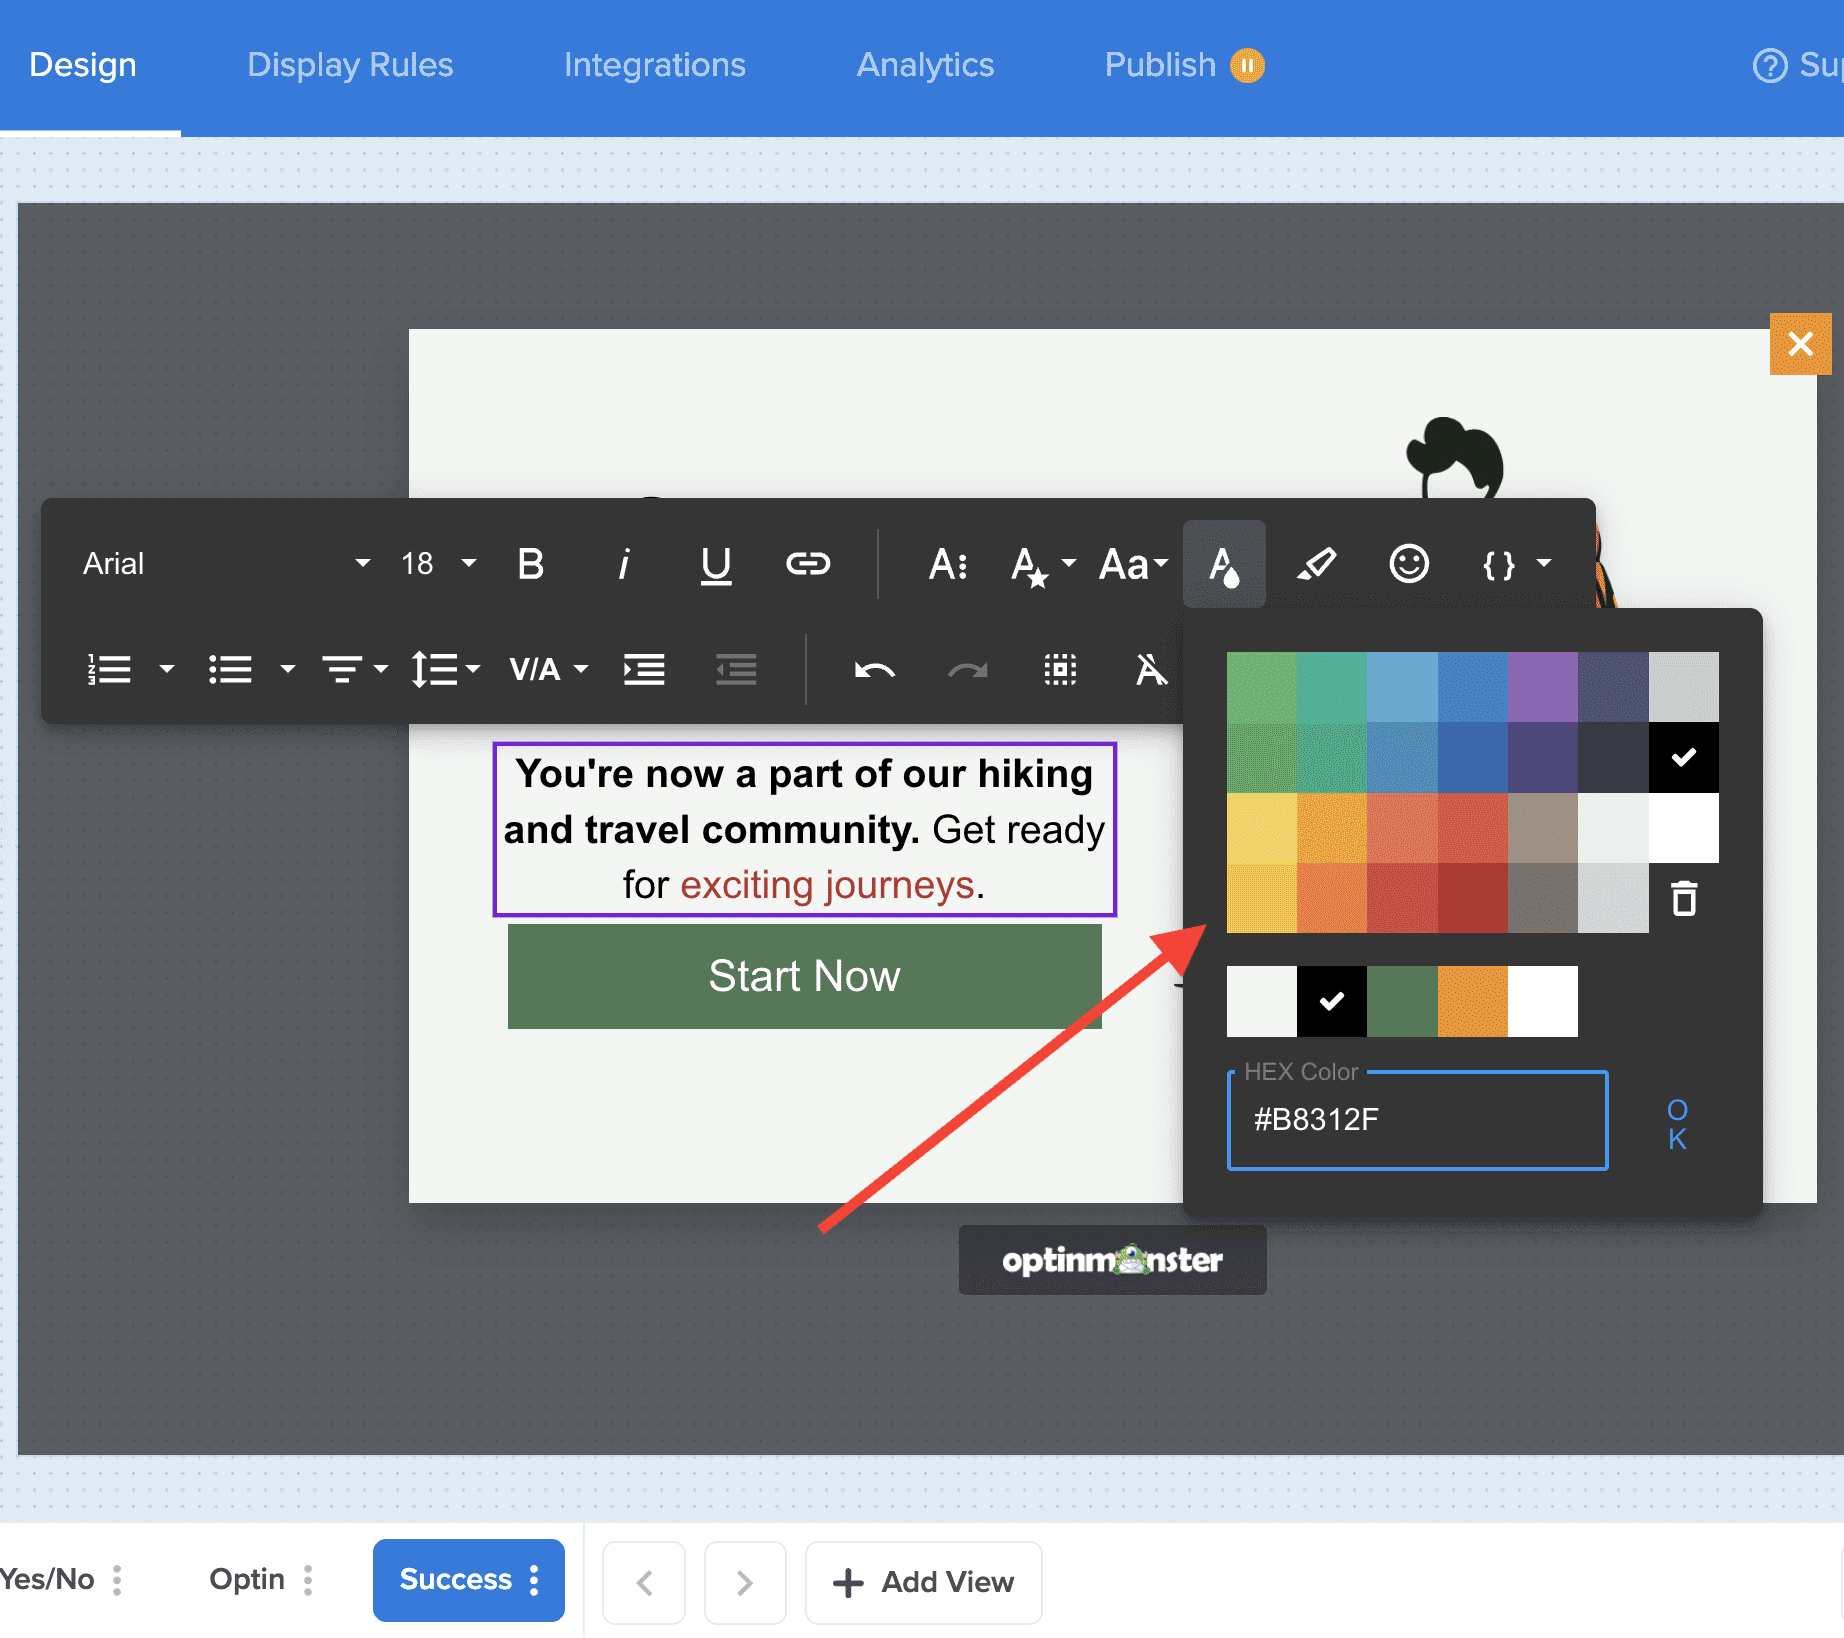
- Next, double-click the text to select a single word or triple-click to select all the text within the block.
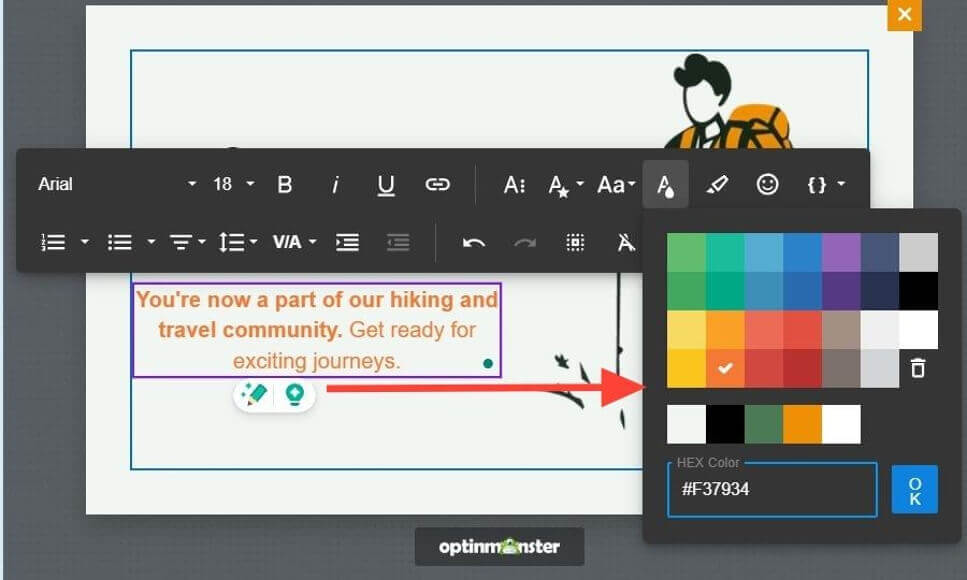
- Select the Text Color icon to open the color picker.
- From here, you can select a new color for your text.
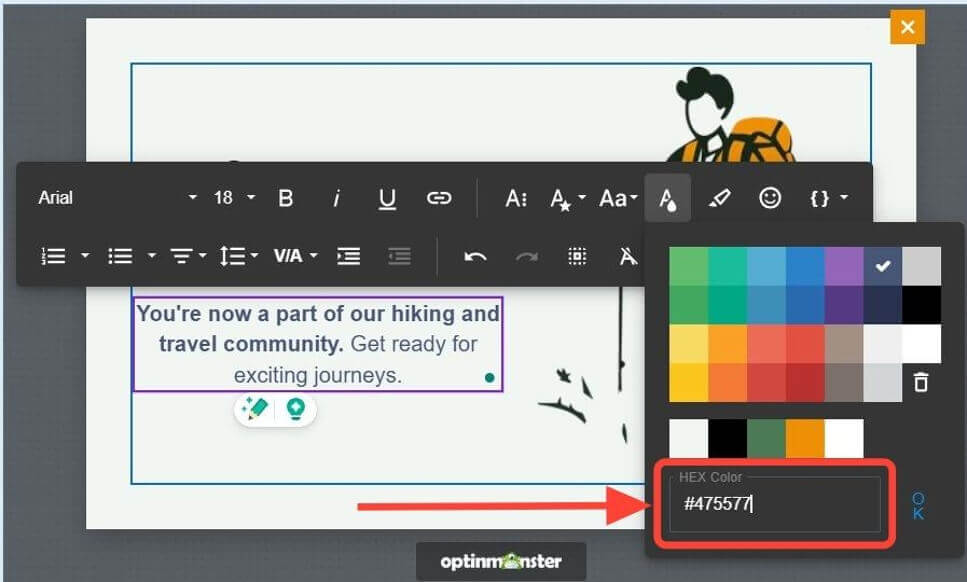
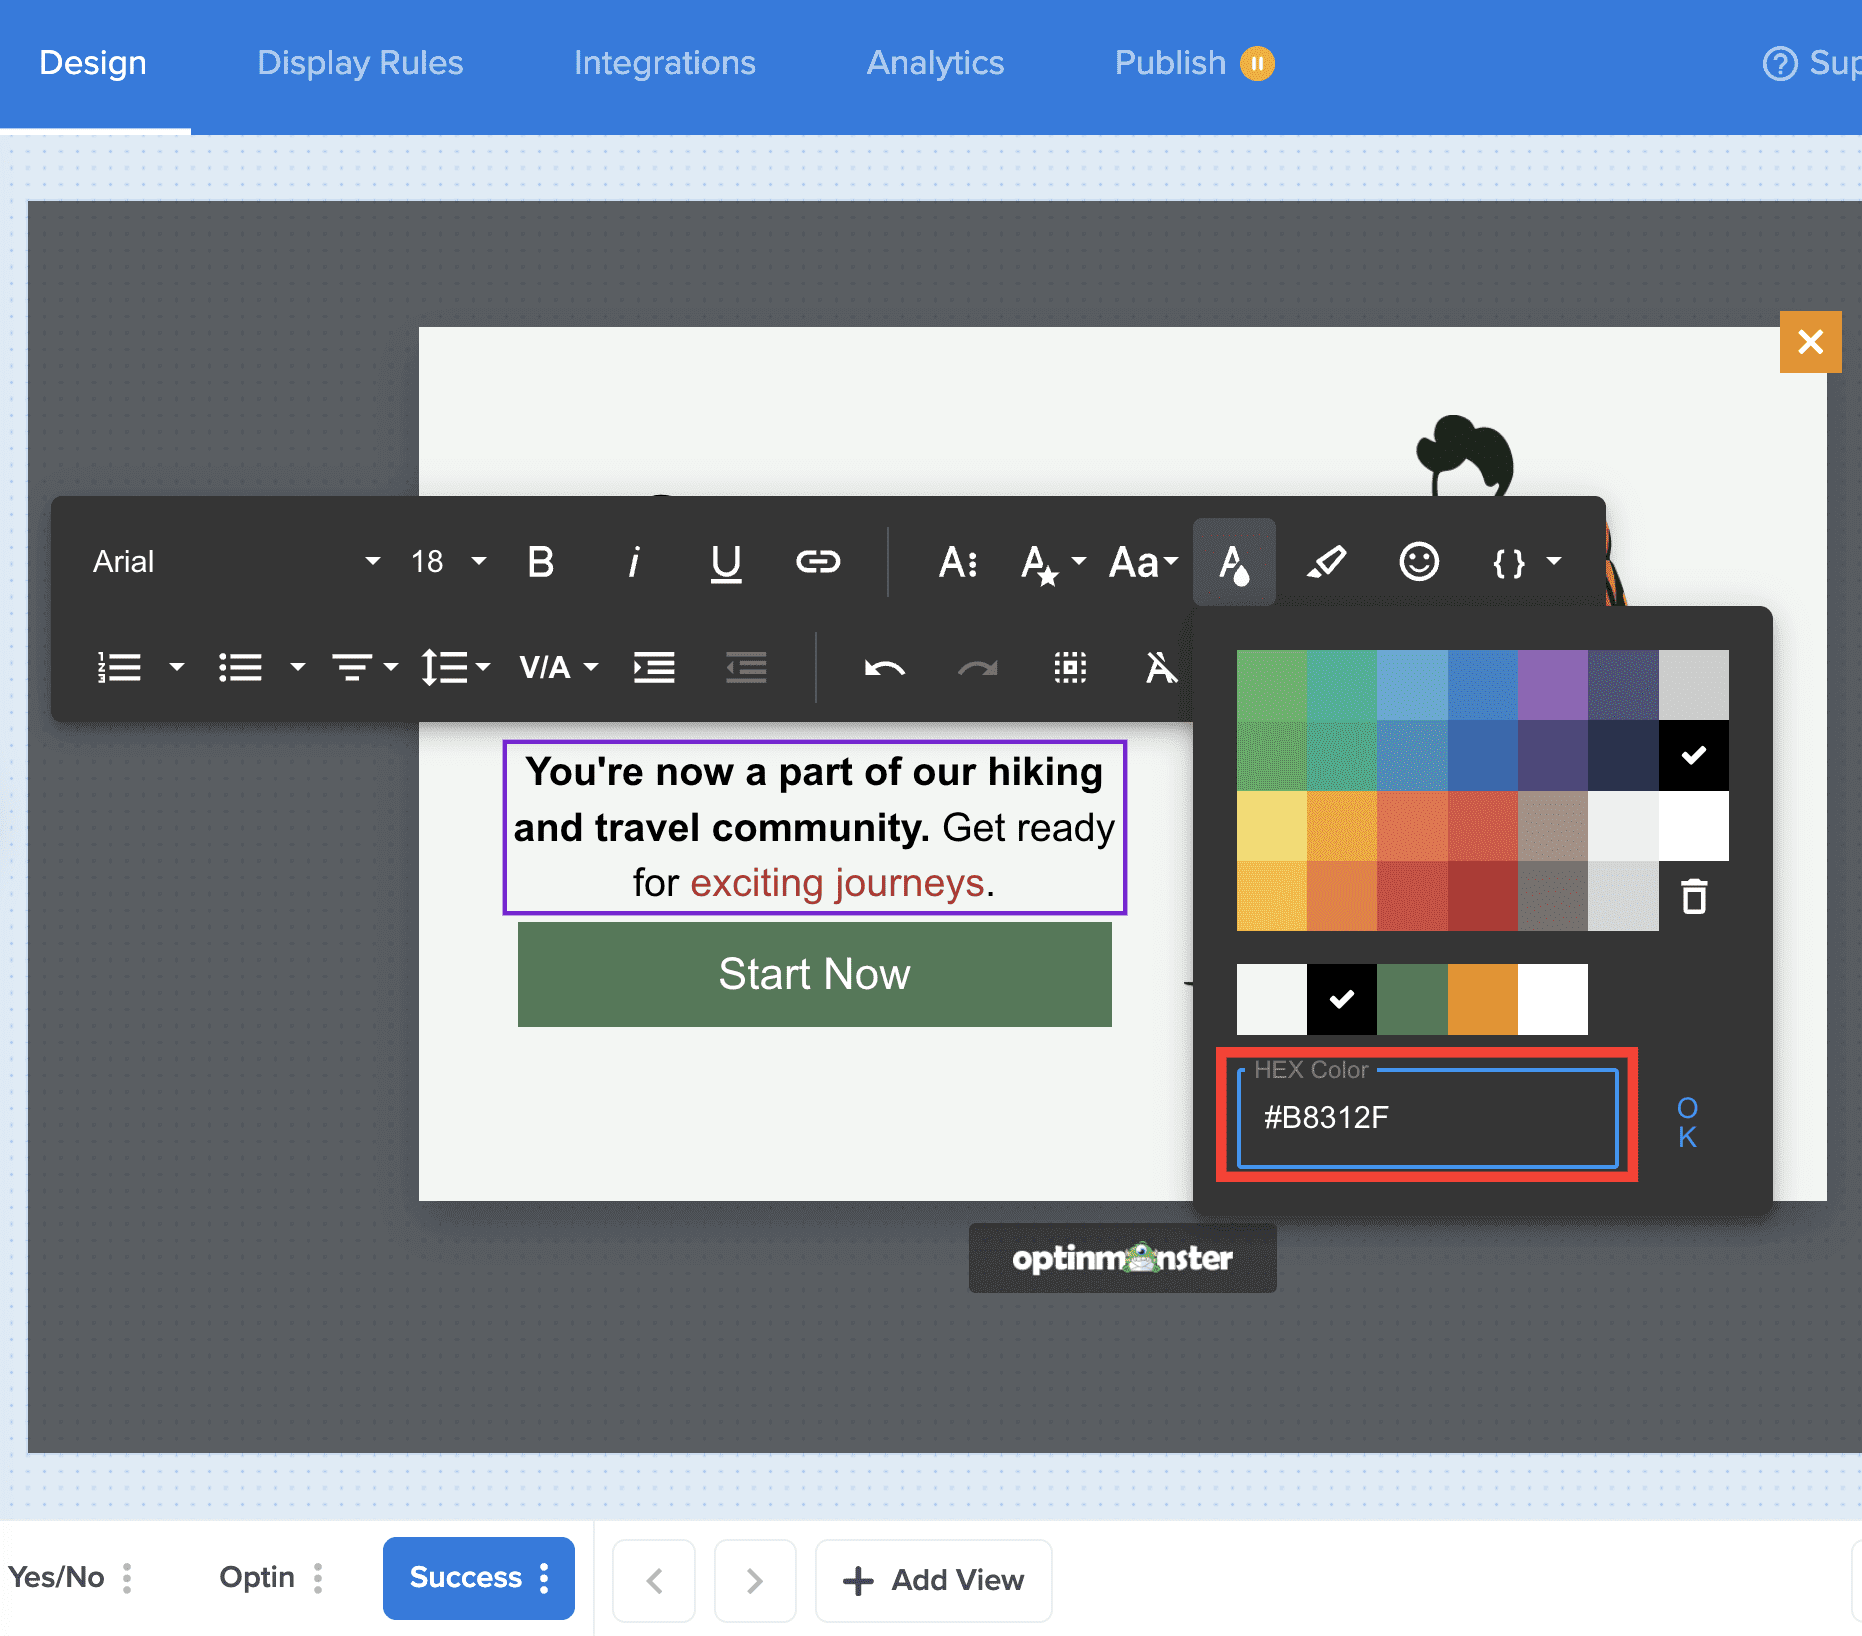
- Or you can enter a HEX color code to set a custom color.
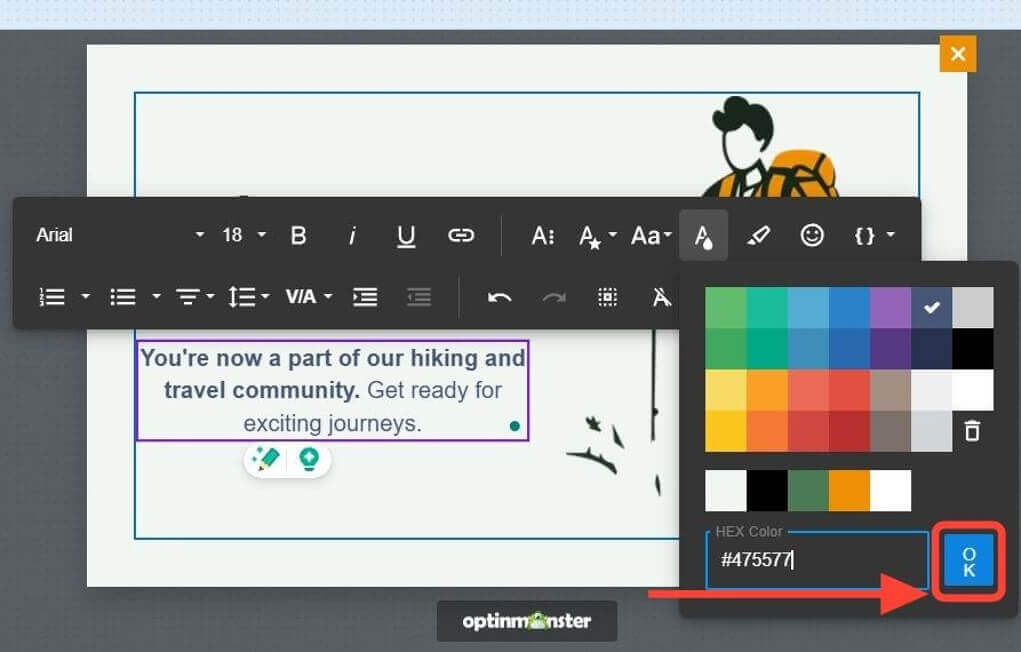
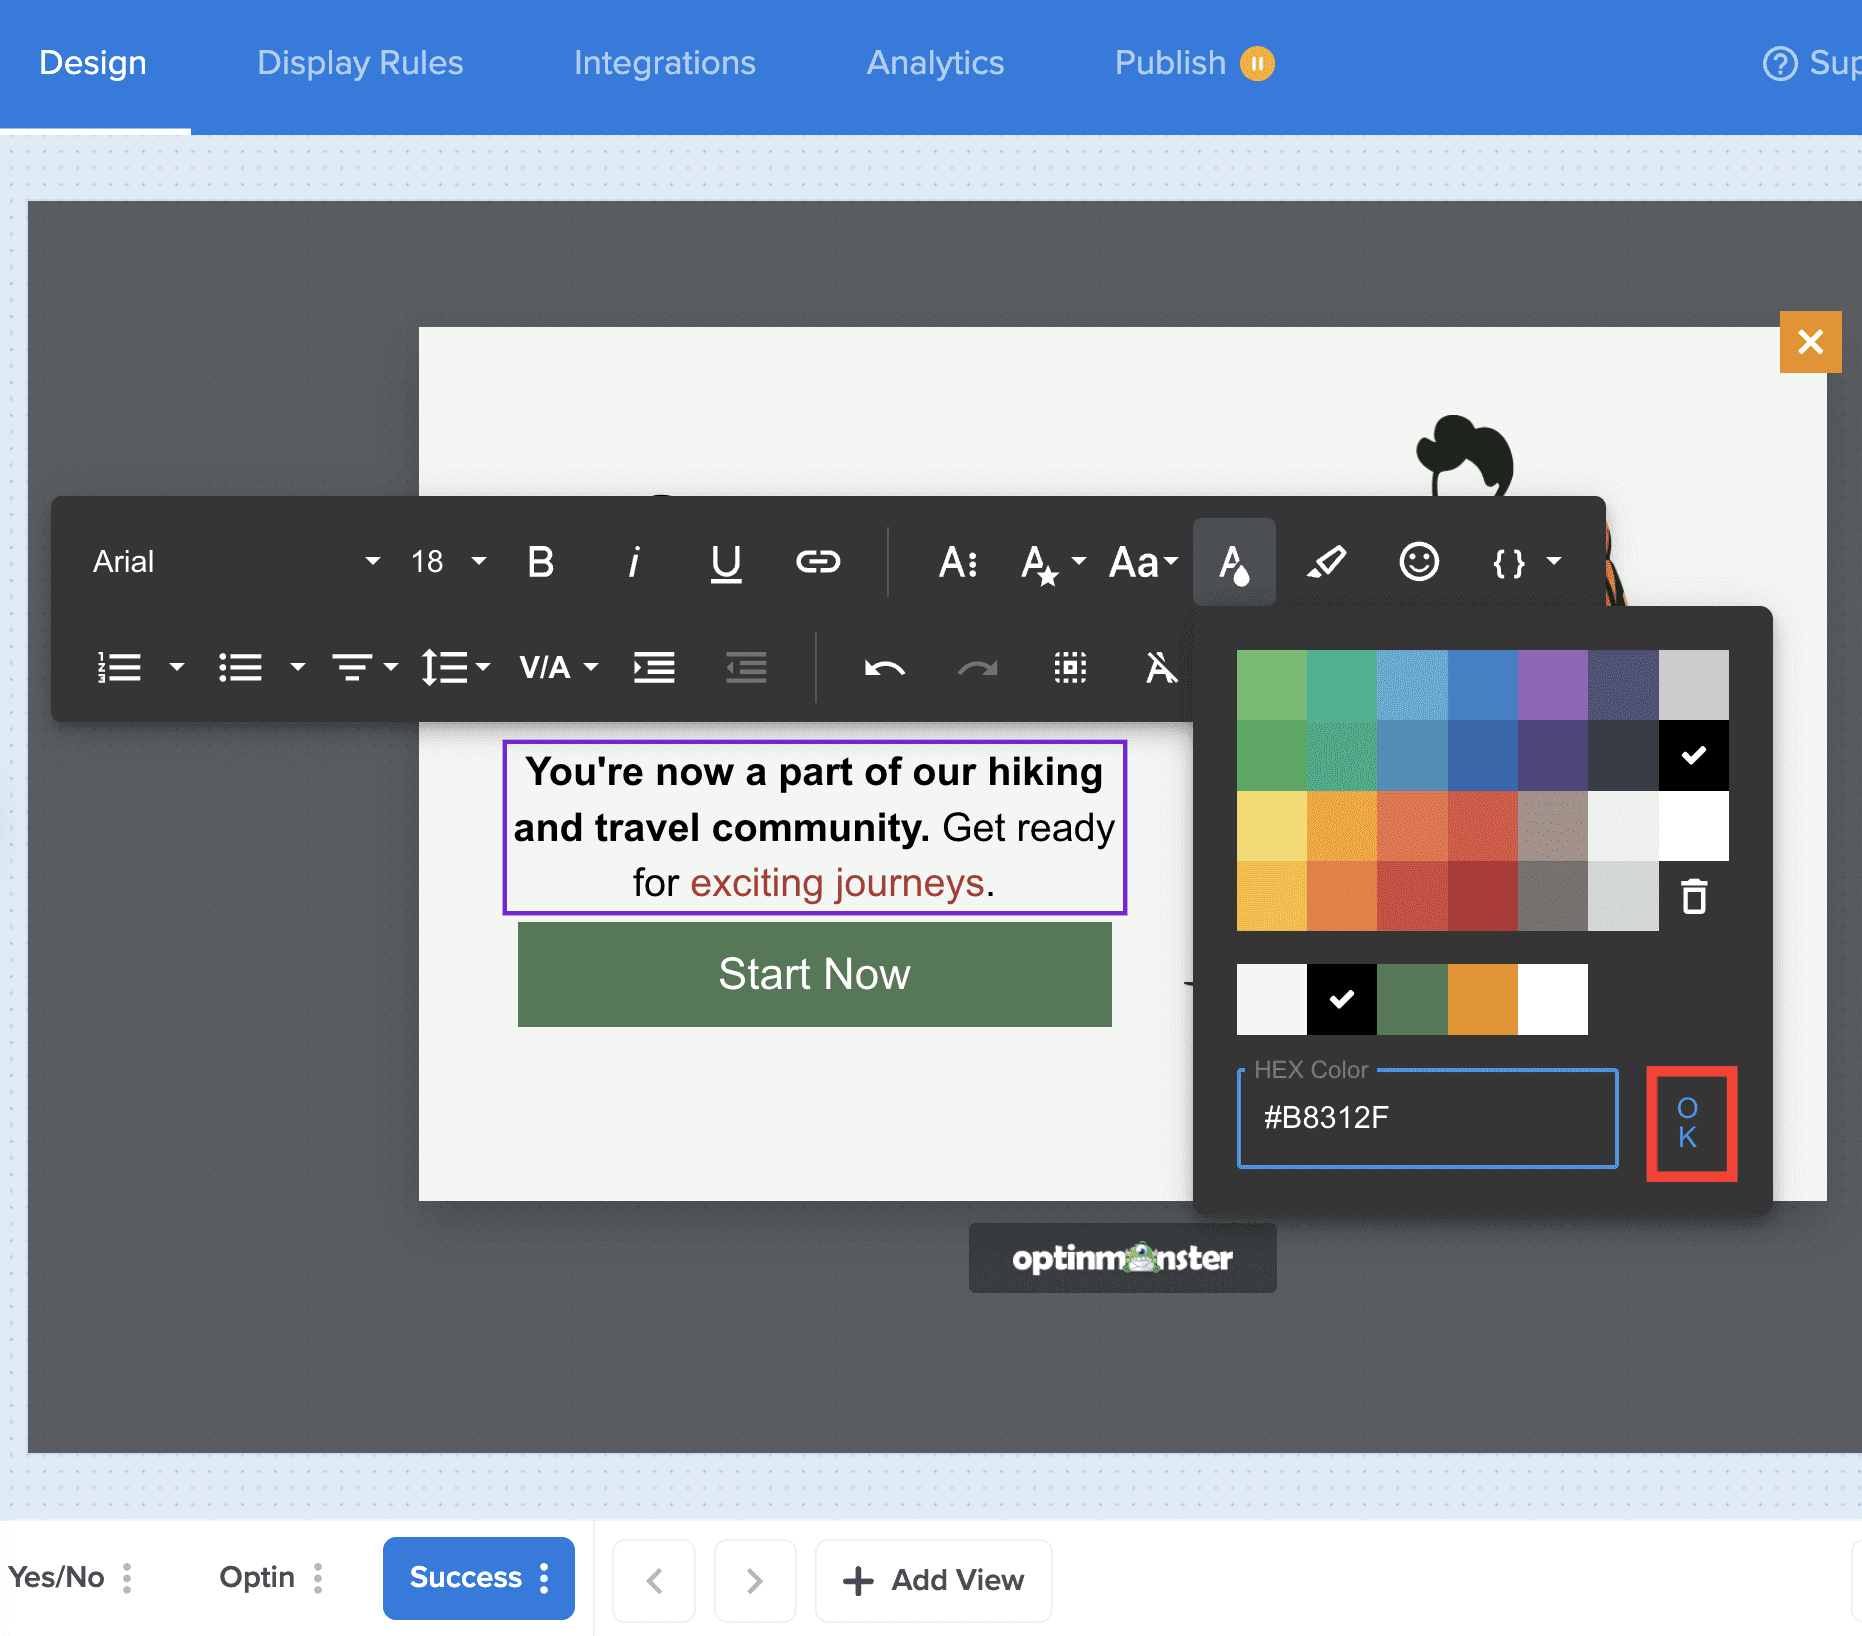
- When you are finished, click OK to apply the changes.
Button Color
To adjust your campaign’s button color, follow these steps:
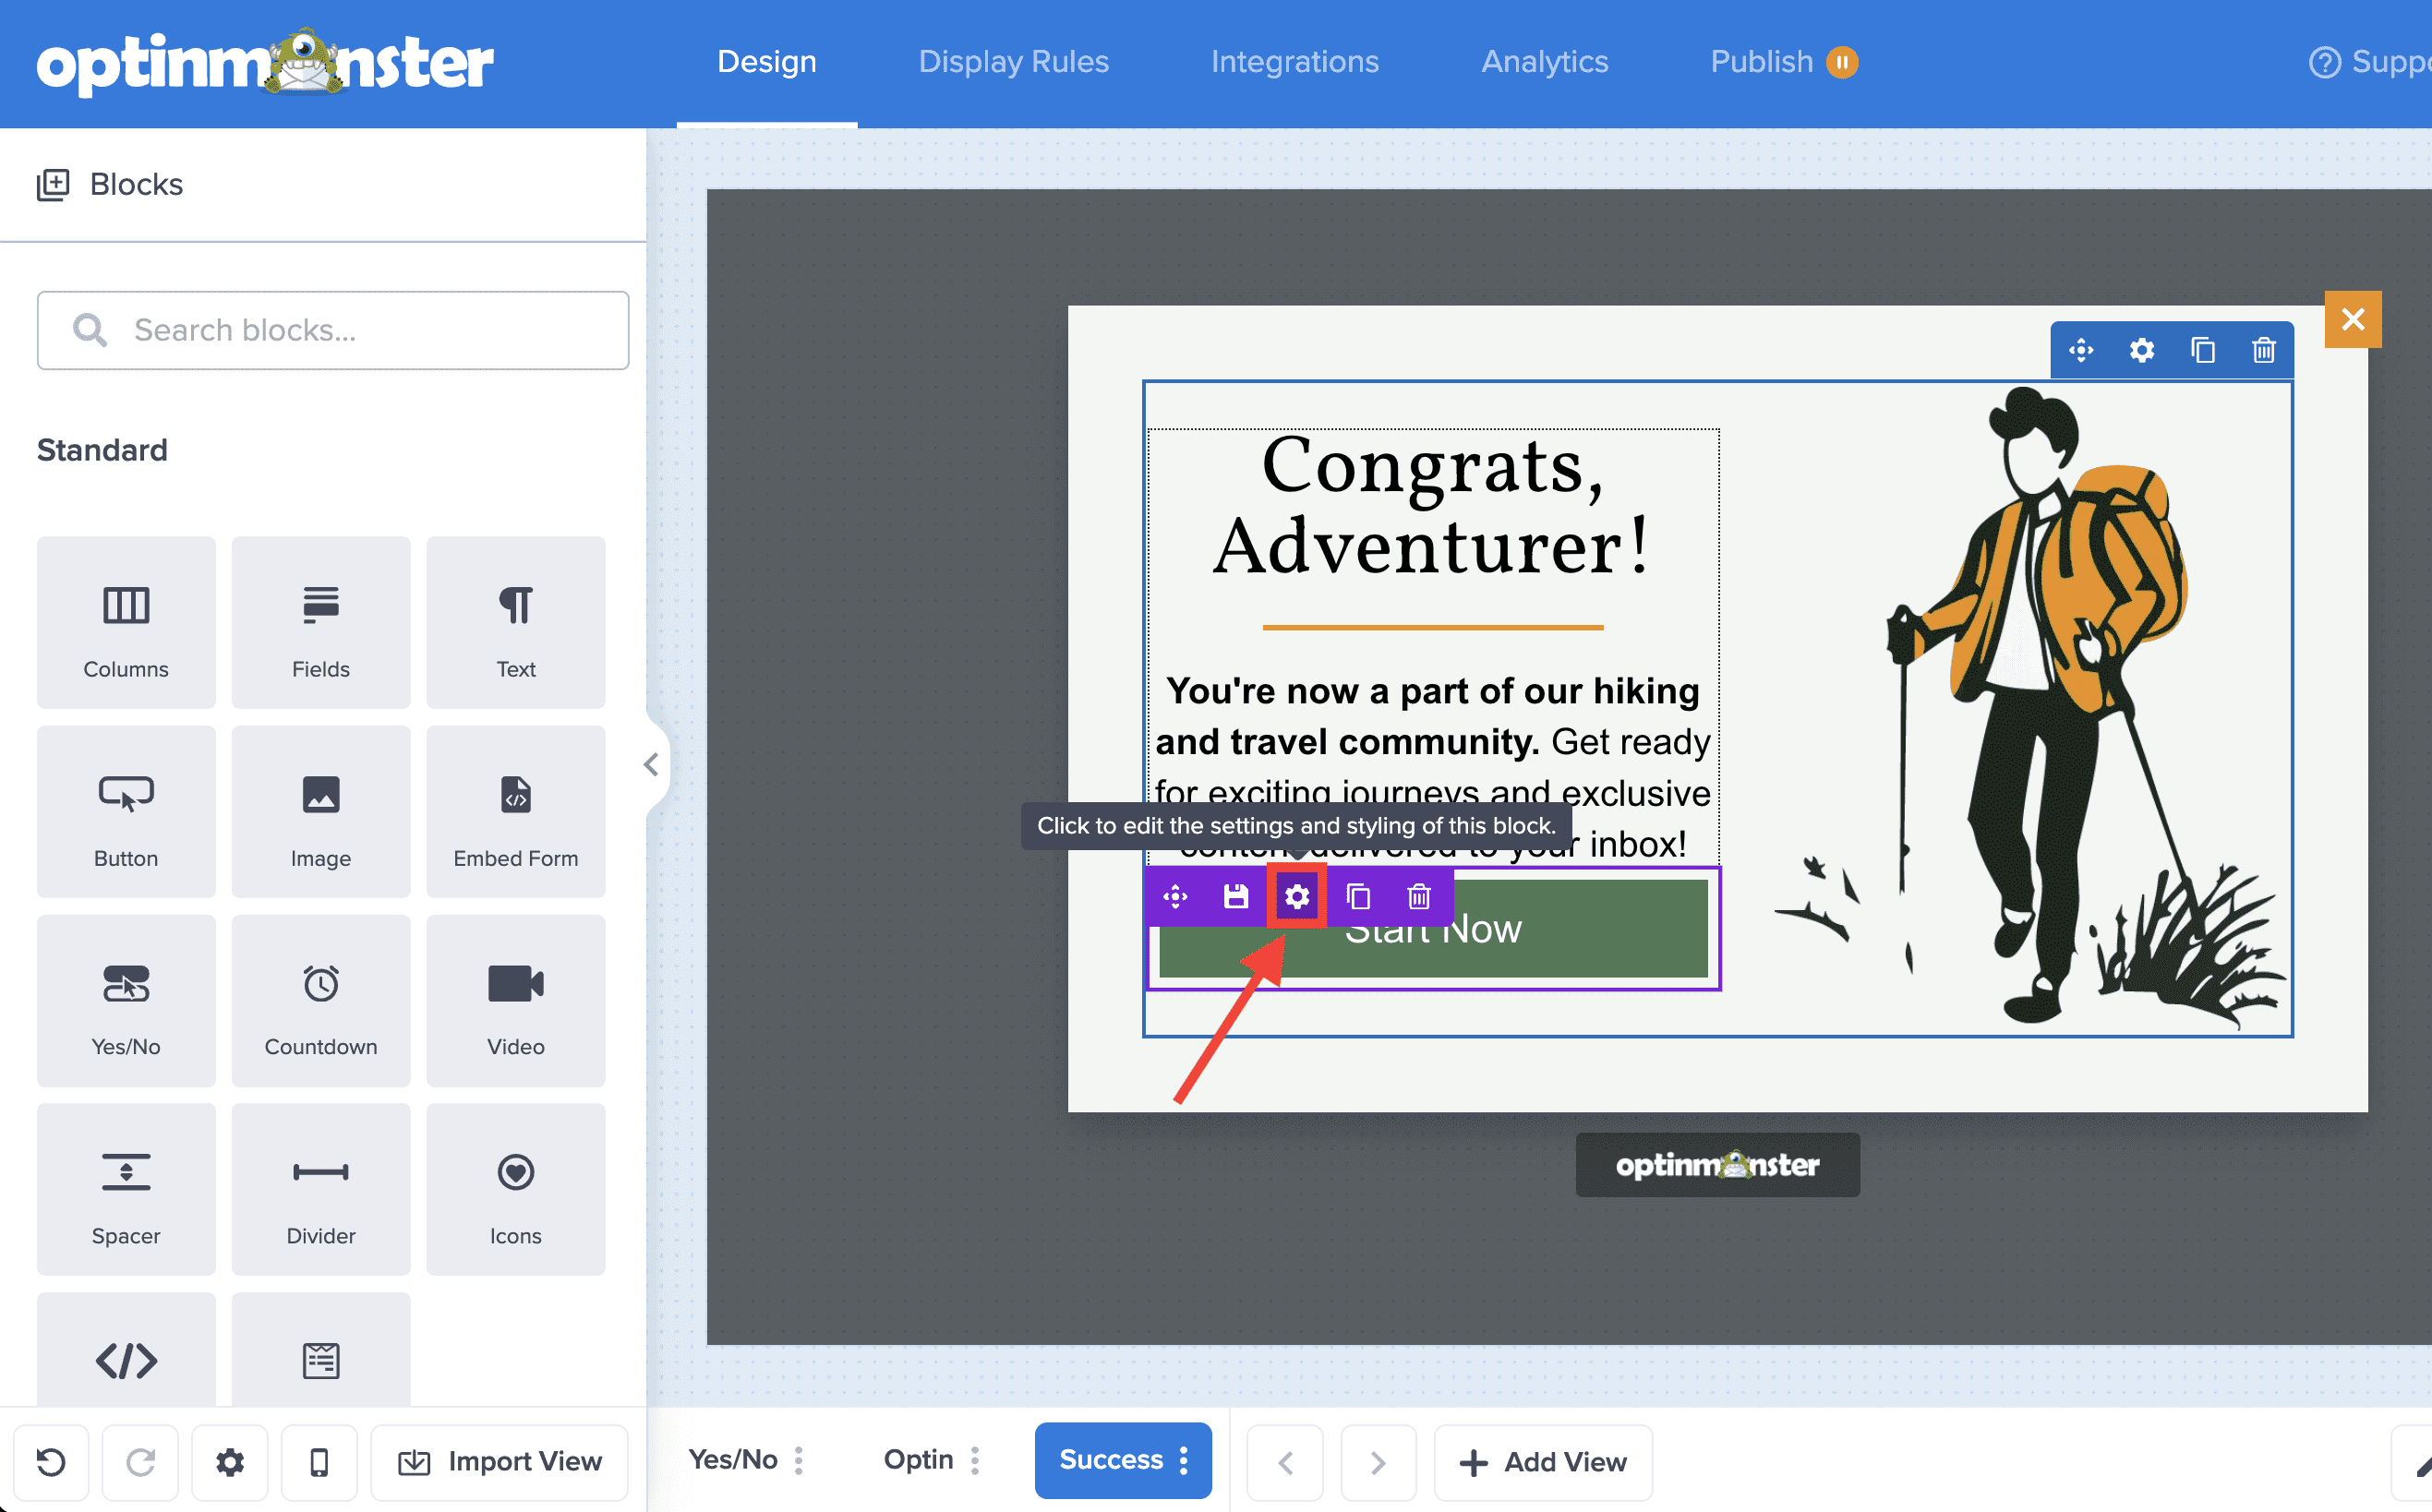
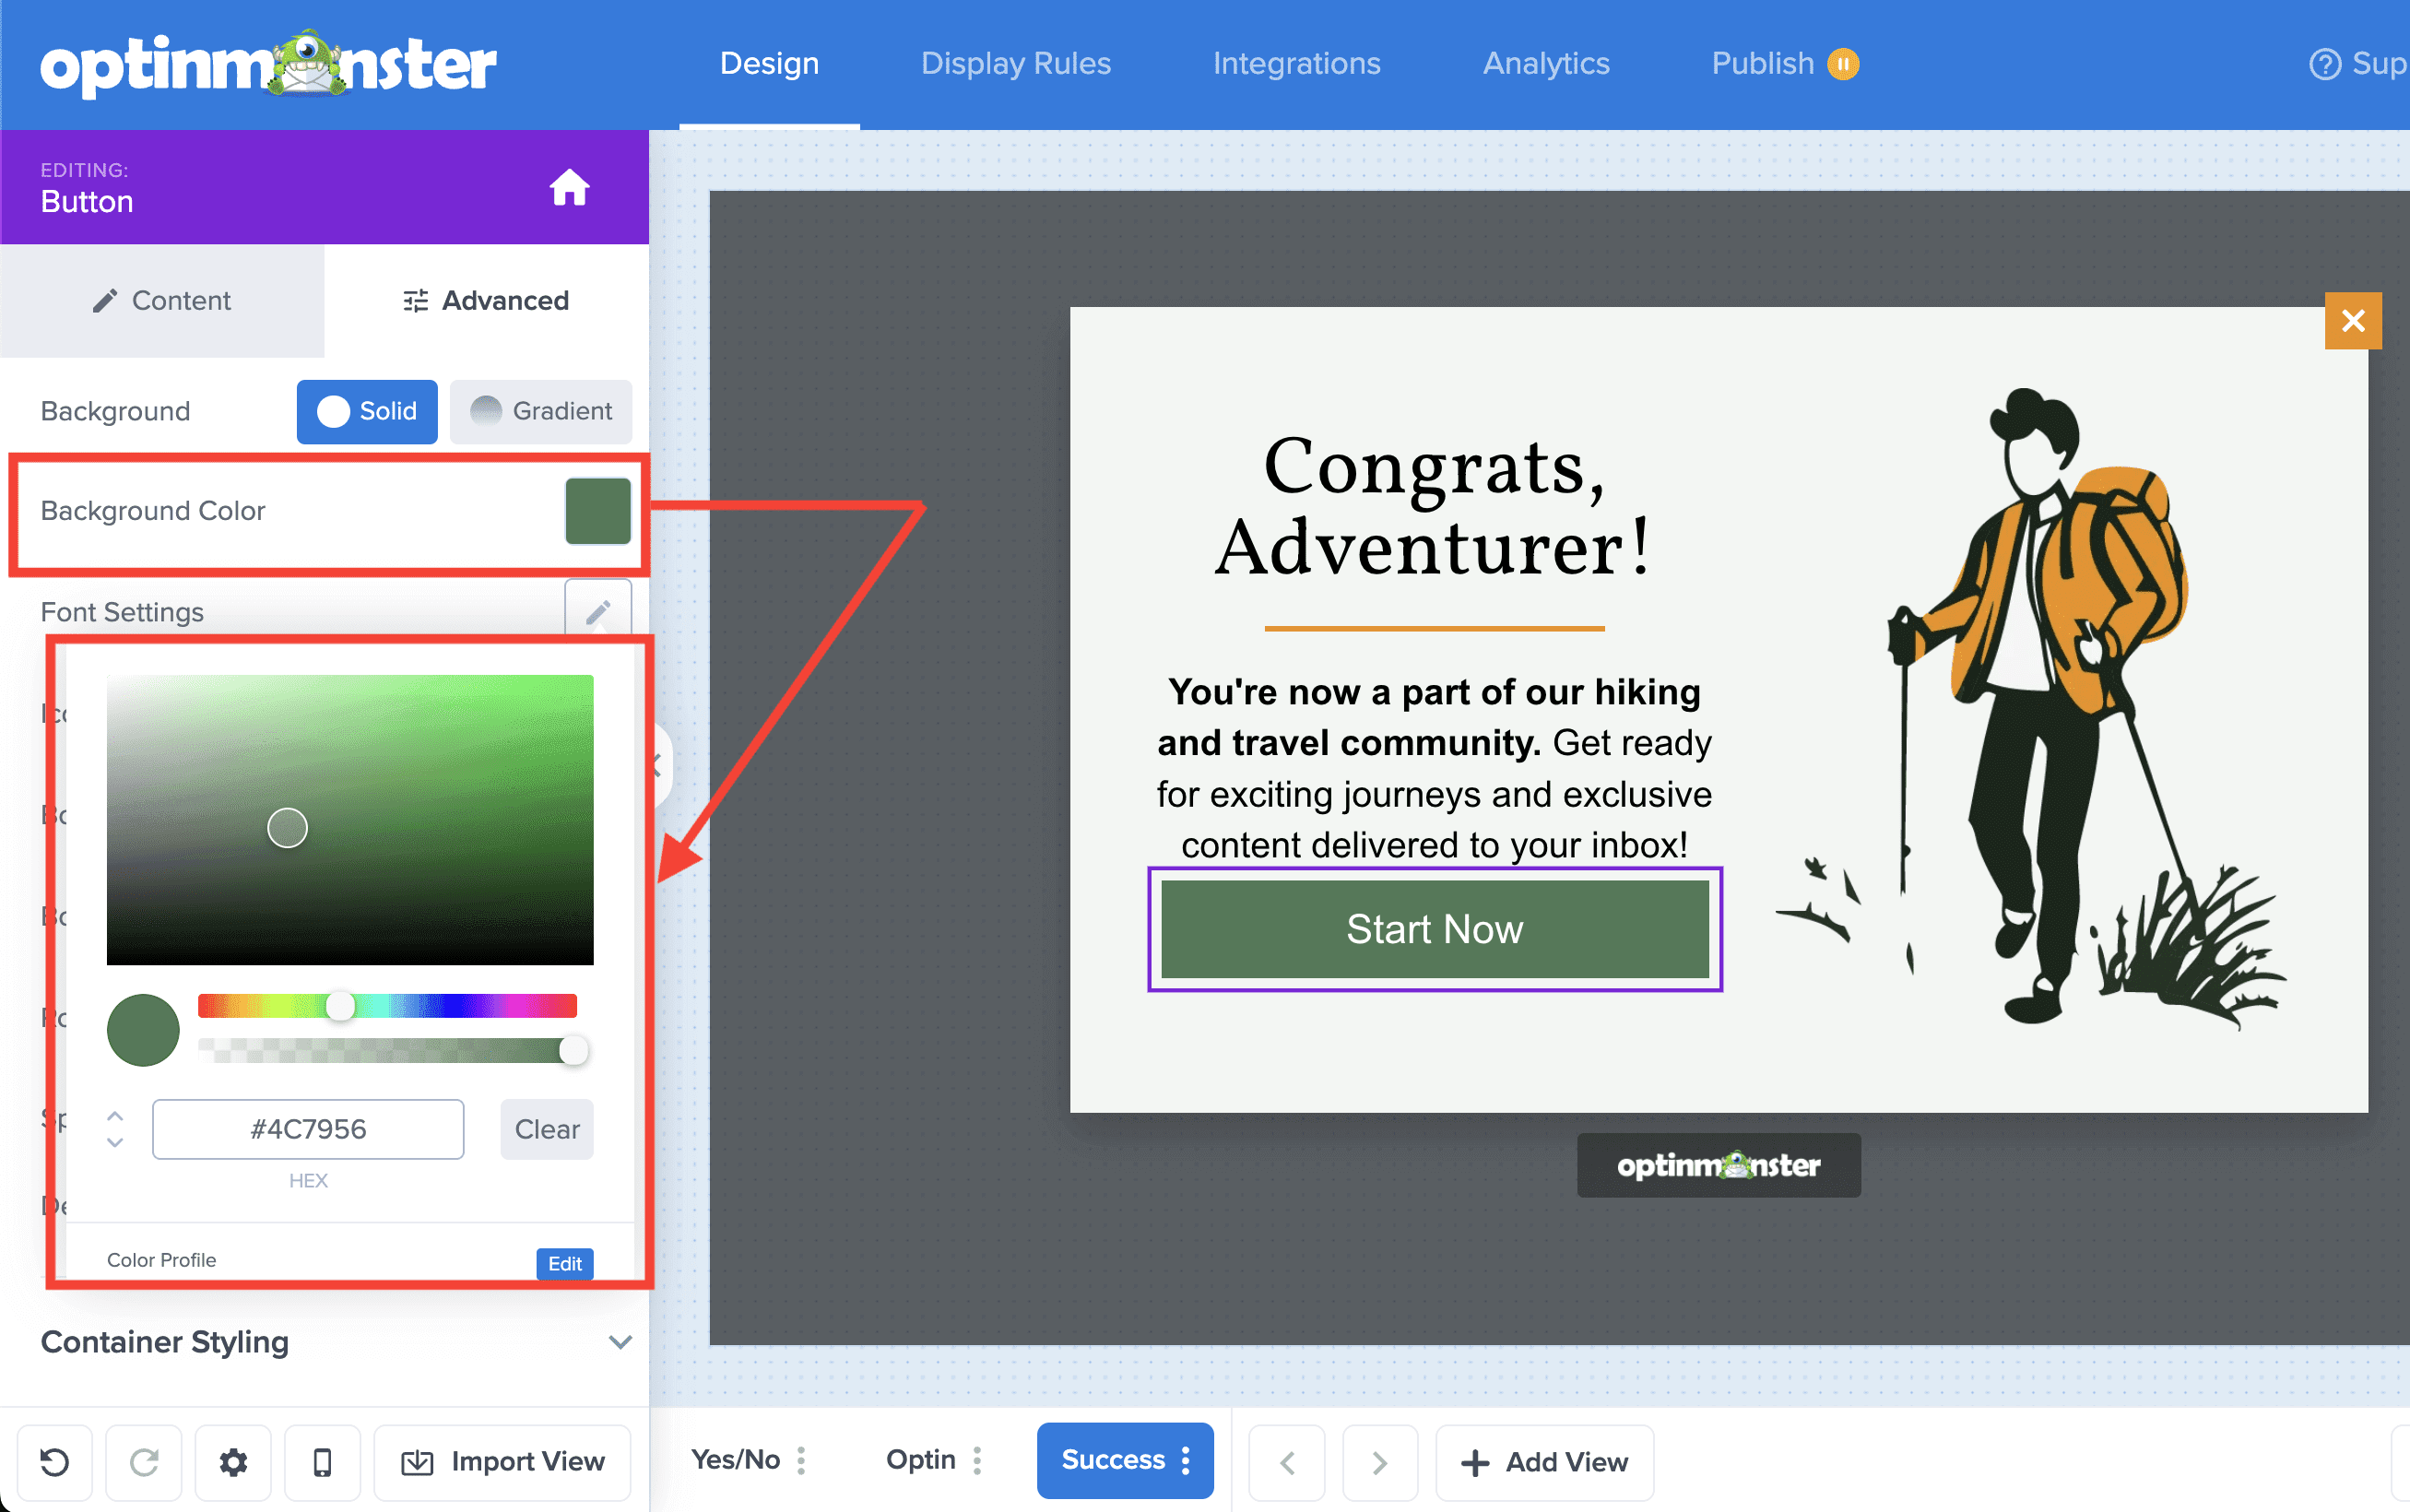
- In the Design view of the campaign builder, locate the Button block you want to edit.
- Select the settings icon.
- From the Advanced tab in the sidebar,
- Select the Background Color swatch to open the color editor and adjust the button’s background color.
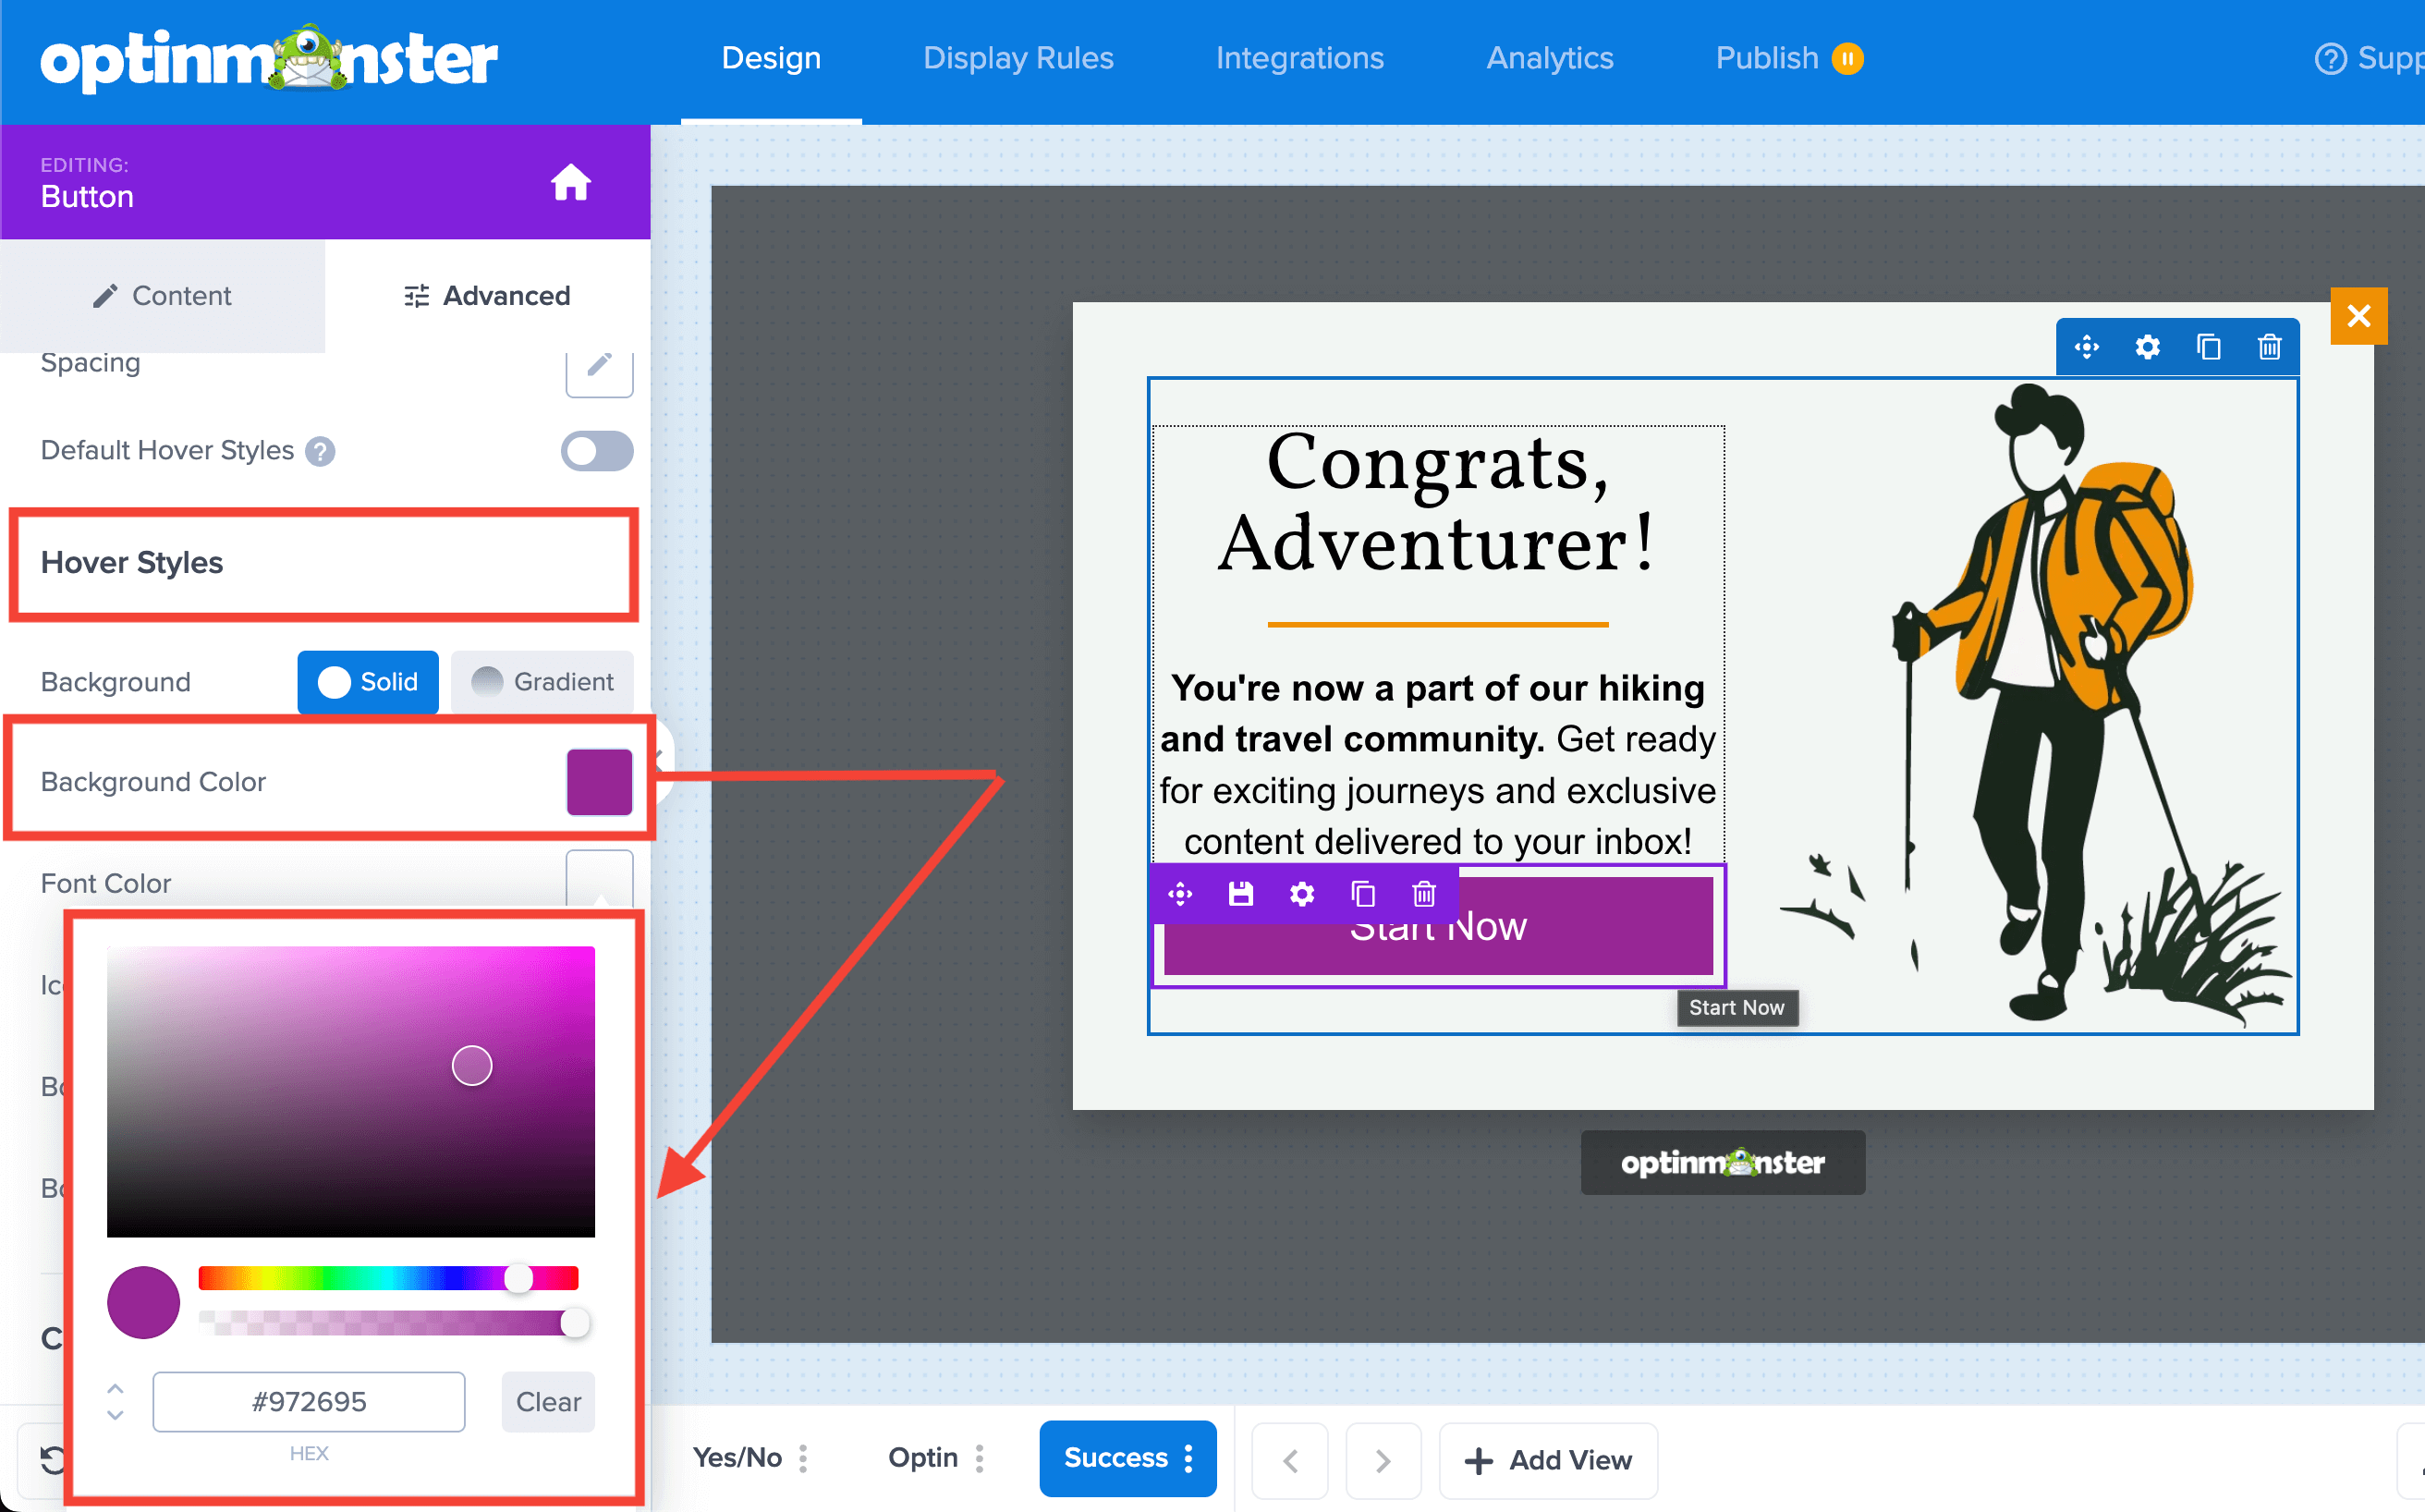
- To change the hover state color, locate the Hover Styles section and select the Background Color swatch to open the color editor and edit the button’s background color.
- Select the Background Color swatch to open the color editor and adjust the button’s background color.
- When you are finished, Save the campaign.
Link Color
To adjust your campaign’s link text color, follow these steps:
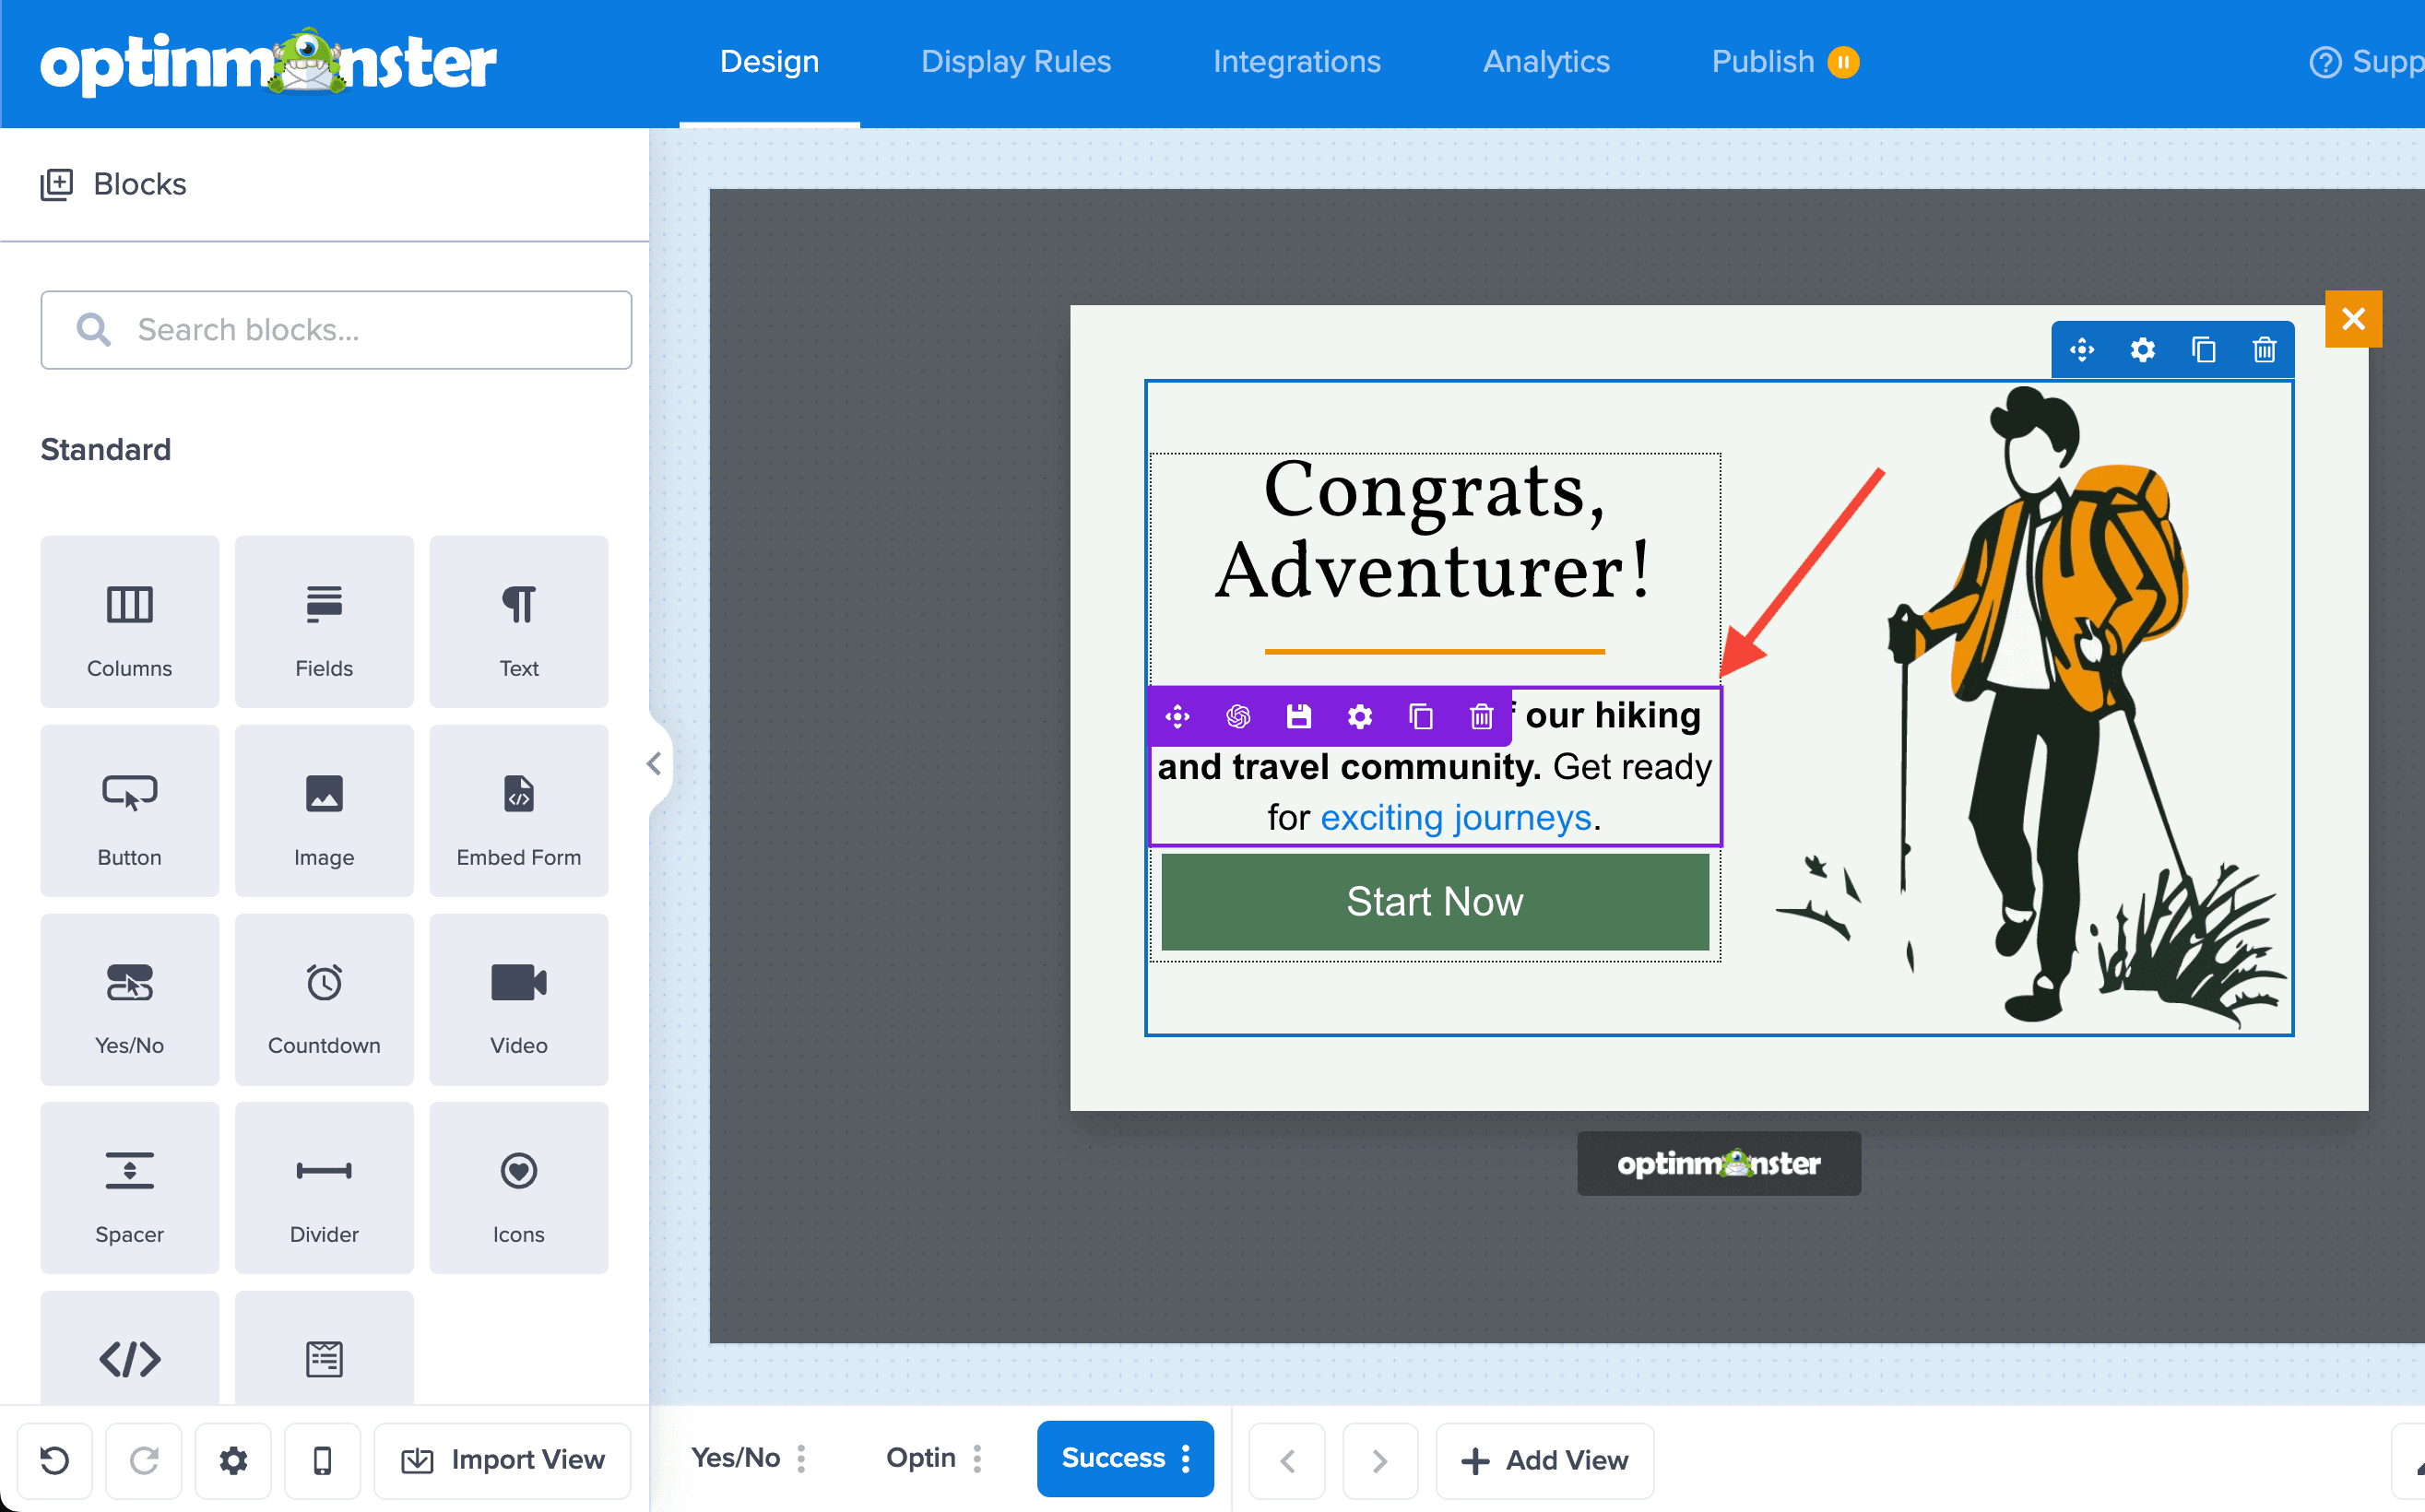
- In the Design view of the campaign builder, locate the text block containing the link you want to edit.
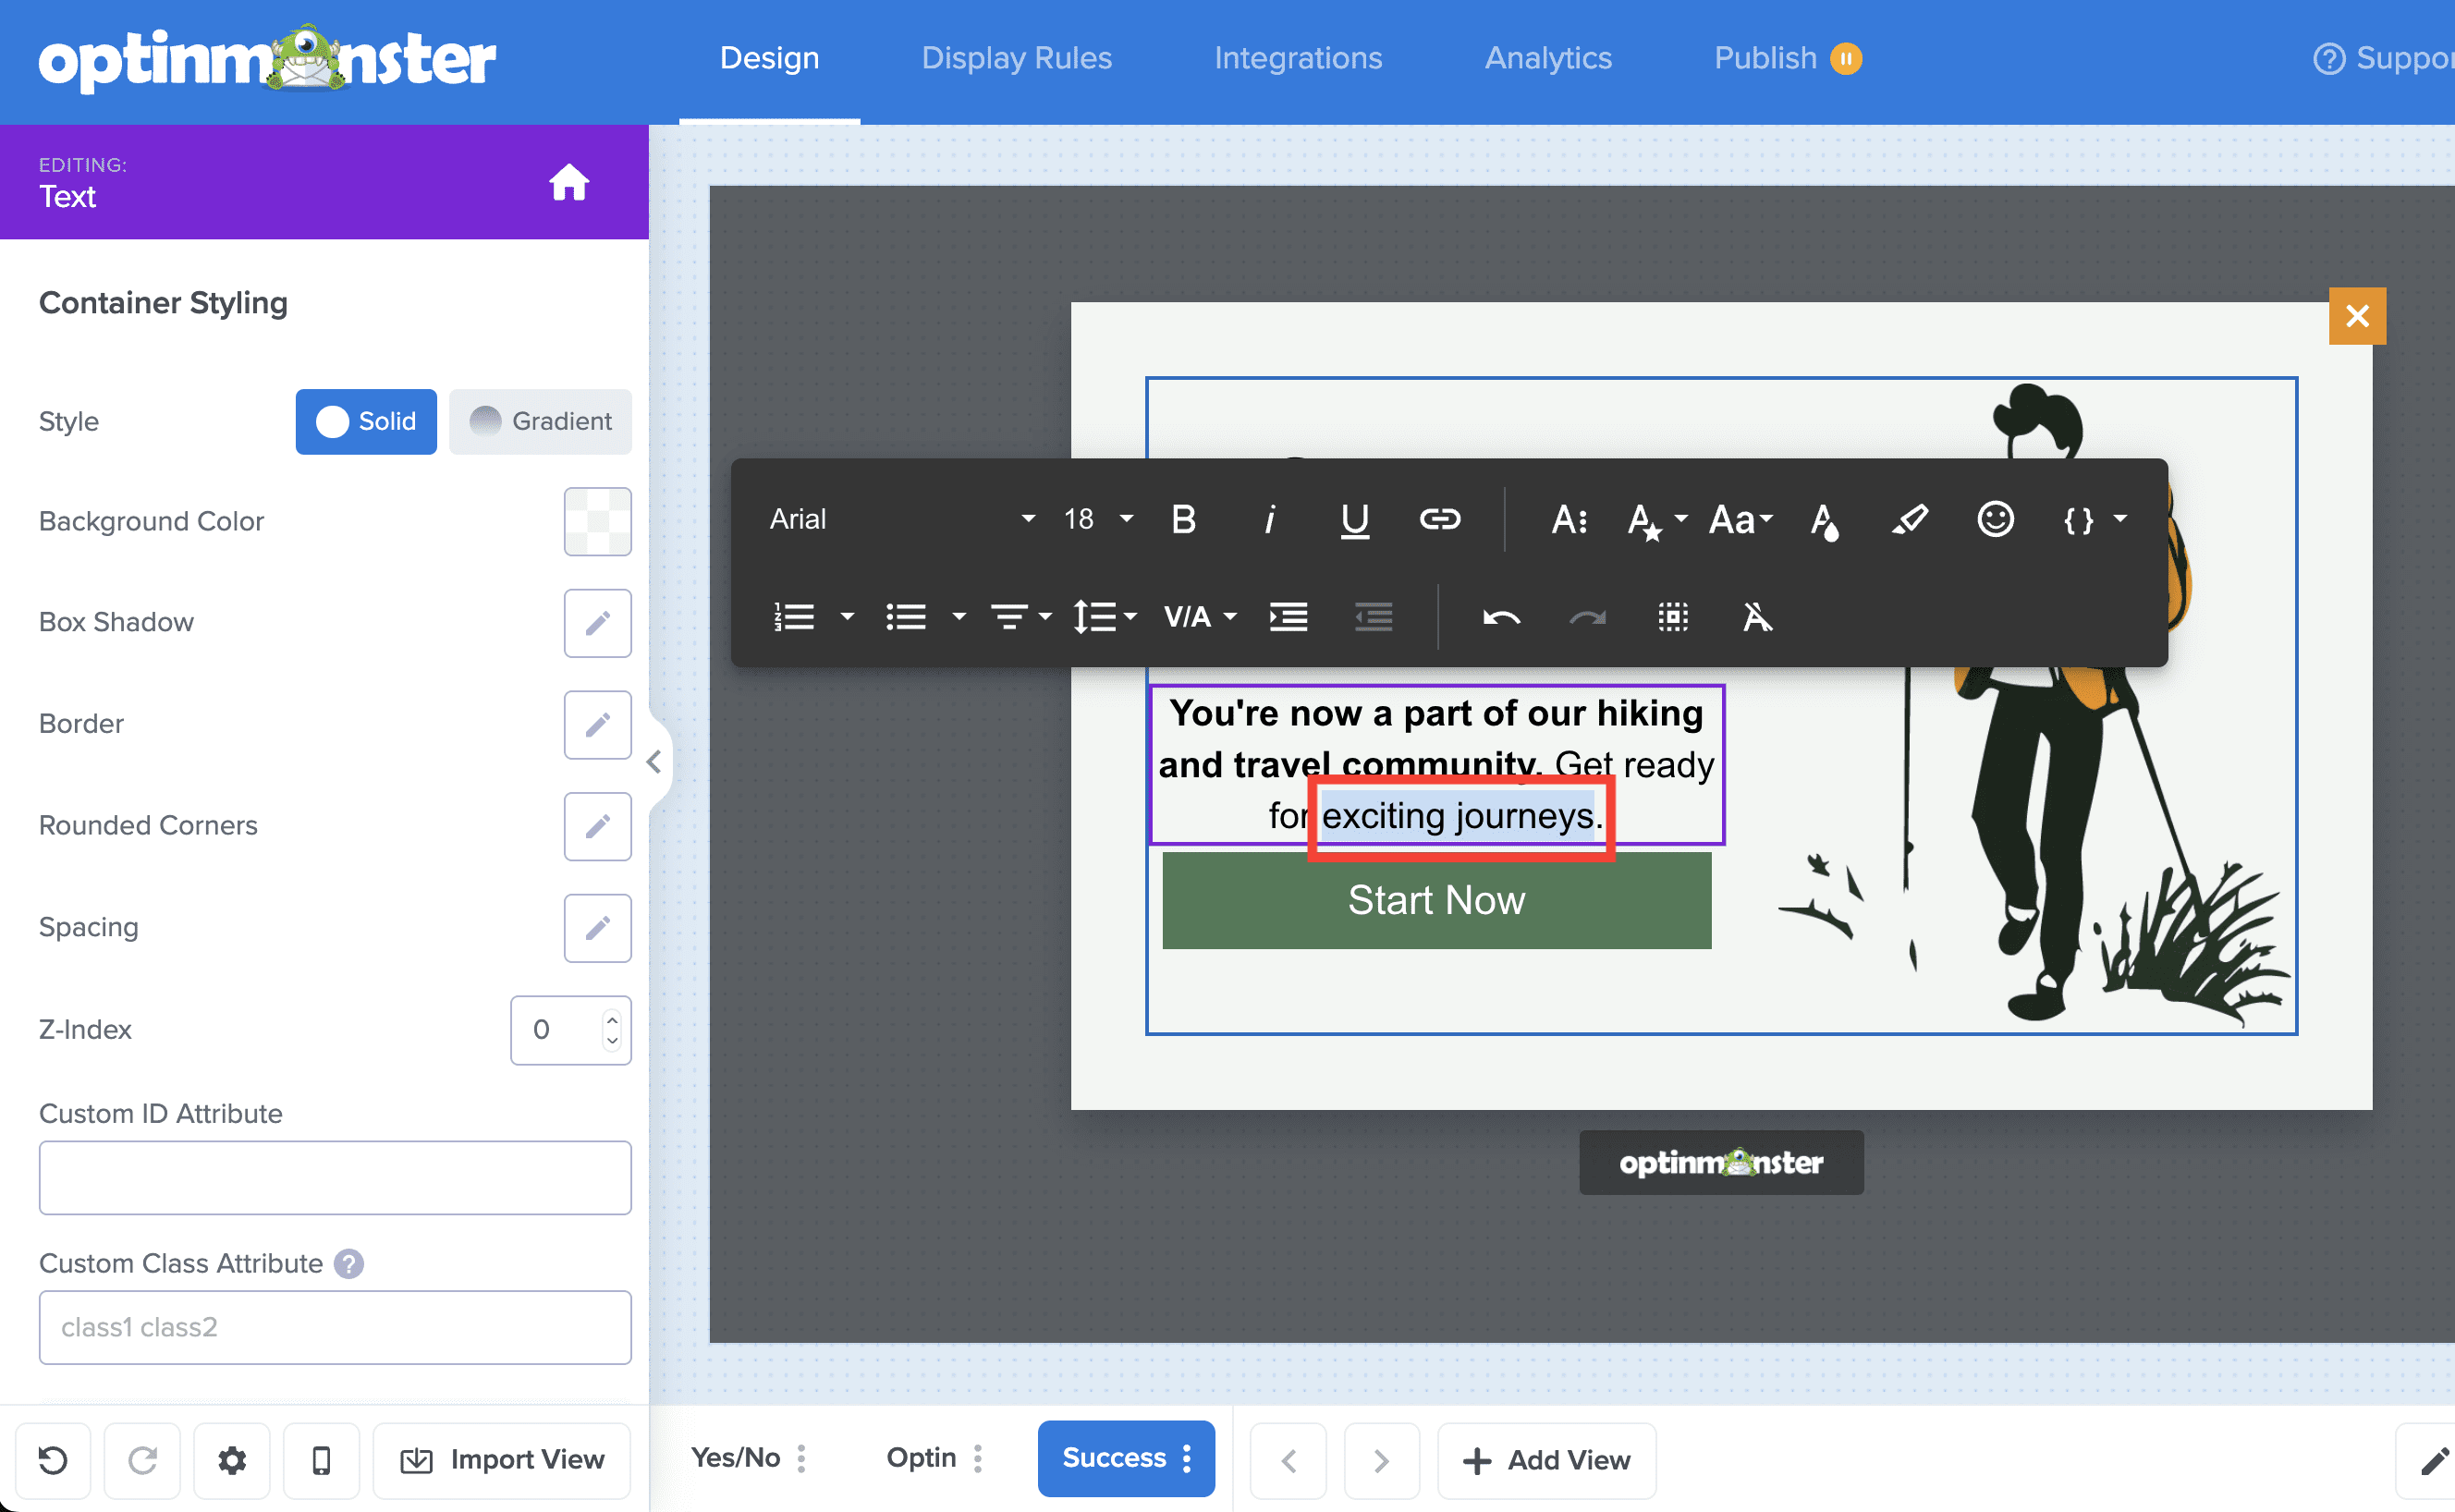
- Next, highlight the link text you want to edit.
- Select the Text Color icon to open the color picker.
- From here, you can select a new color for your link text.
- Or, you can enter a HEX color code to set a custom color.
- When you are finished, click OK to apply the changes.
Close Button Color
To adjust your campaign’s close button color, please refer to our detailed guide here.
Fonts
Customizing the text size and font family in your OptinMonster campaign can improve the readability and accessibility of your content.
Font Size
Text Block
To adjust the font size of a text block, follow these steps:
- In the Design view of the campaign builder, locate the Text block you want to edit.
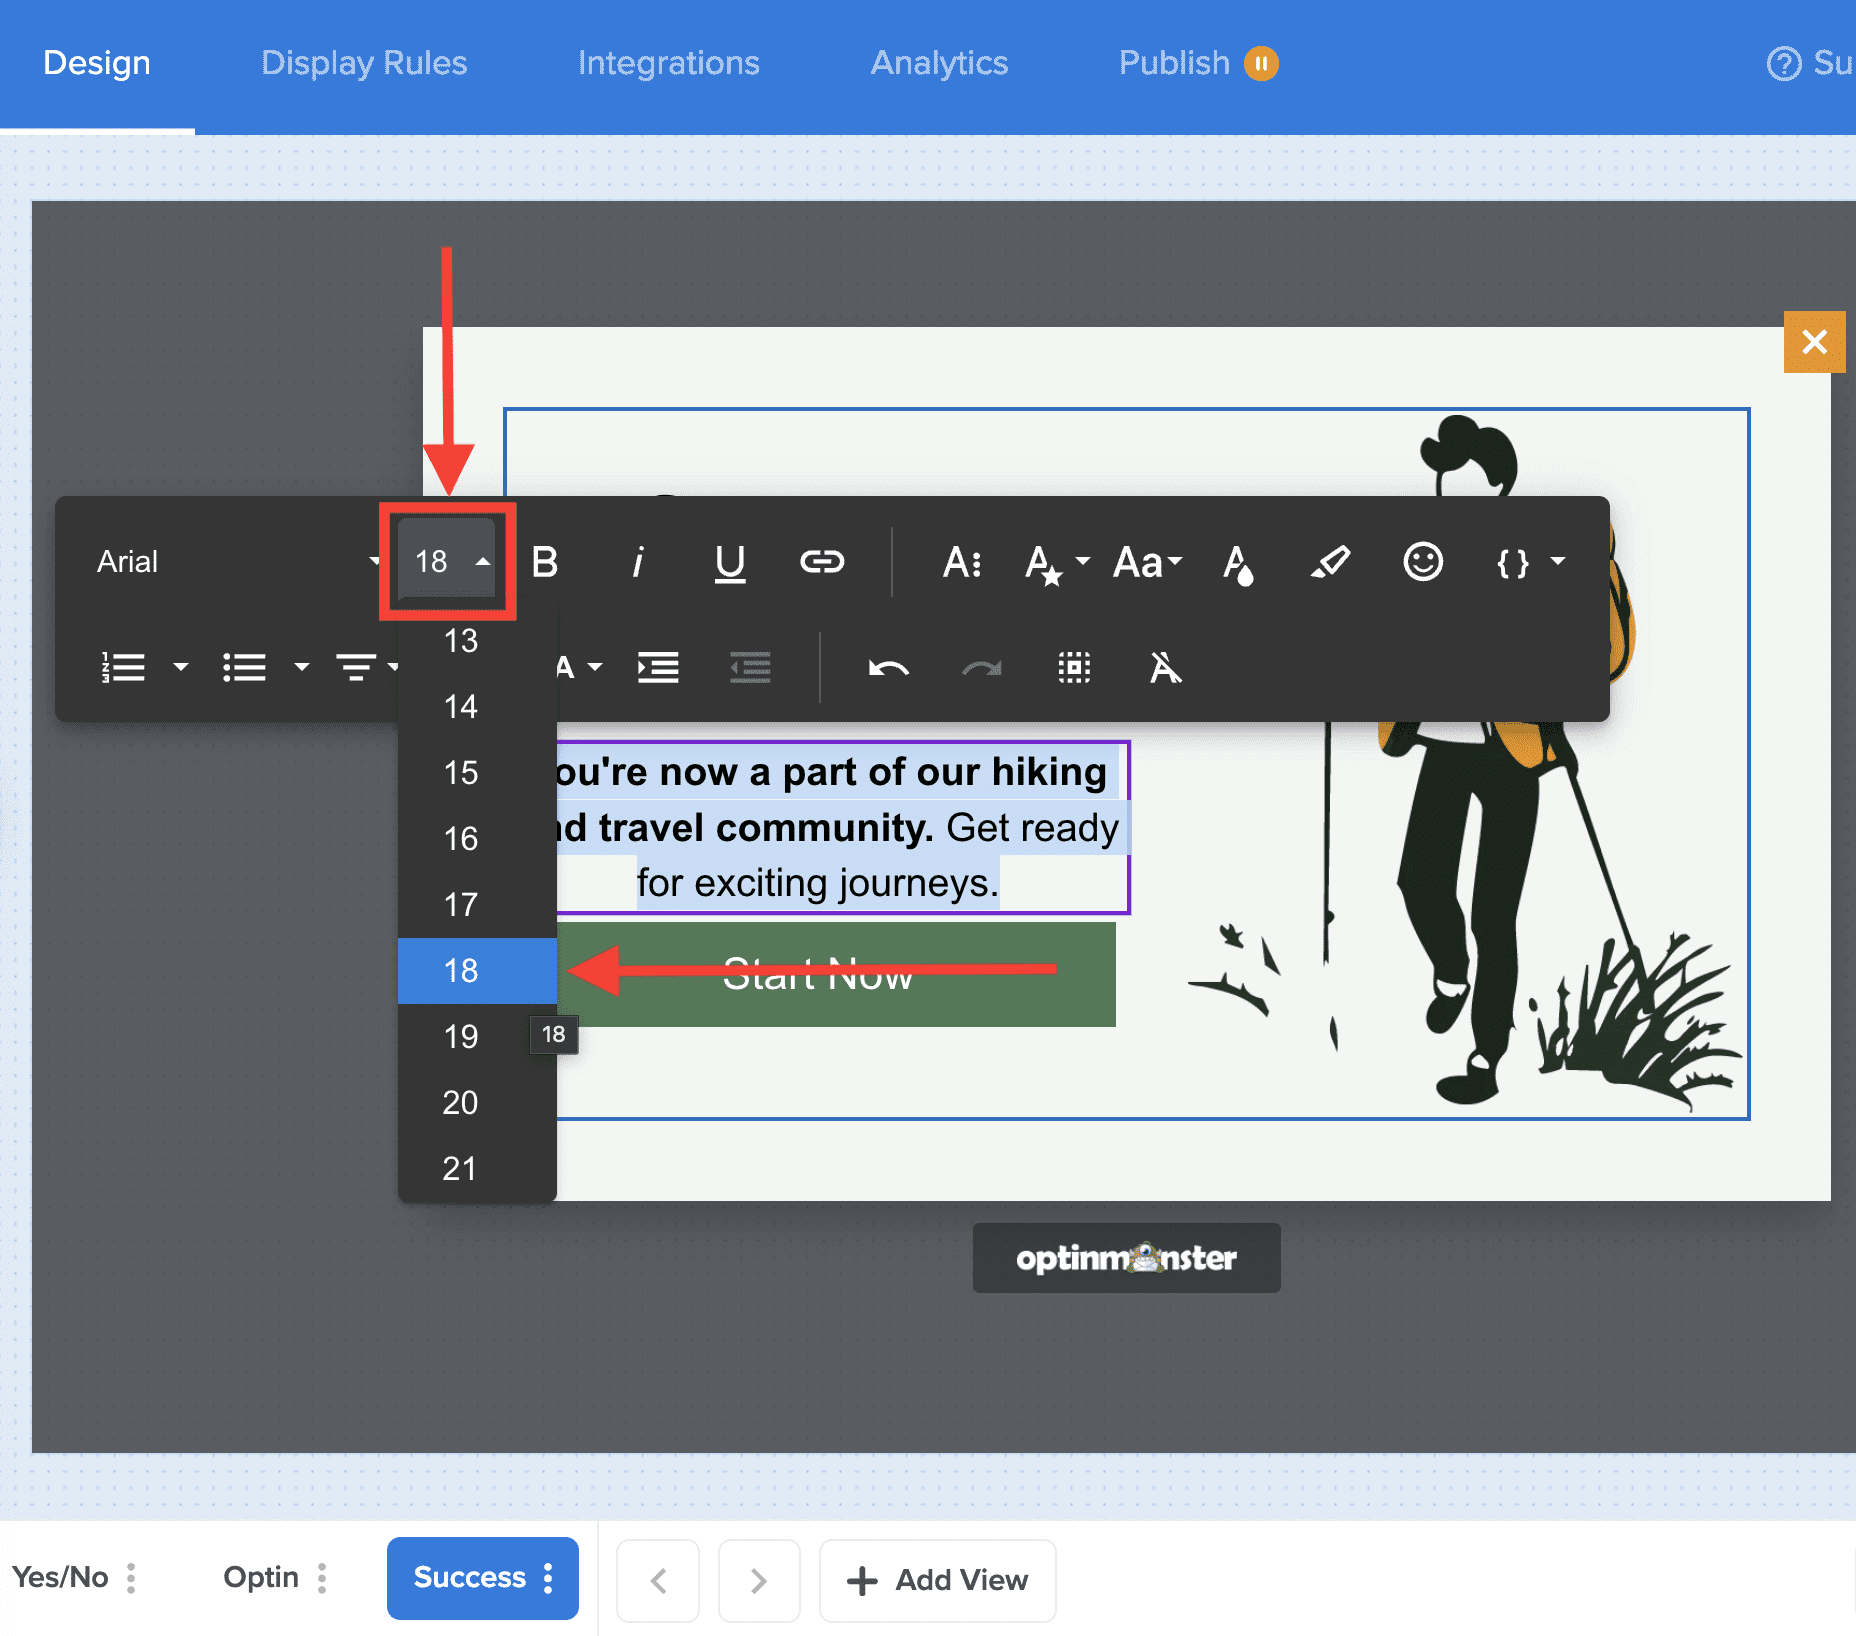
- Next, double-click the text to select a single word or triple-click to select all the text within the block.
- Select the Font Size icon and choose a value from the dropdown.
- When you are finished, Save the campaign.
Button Block
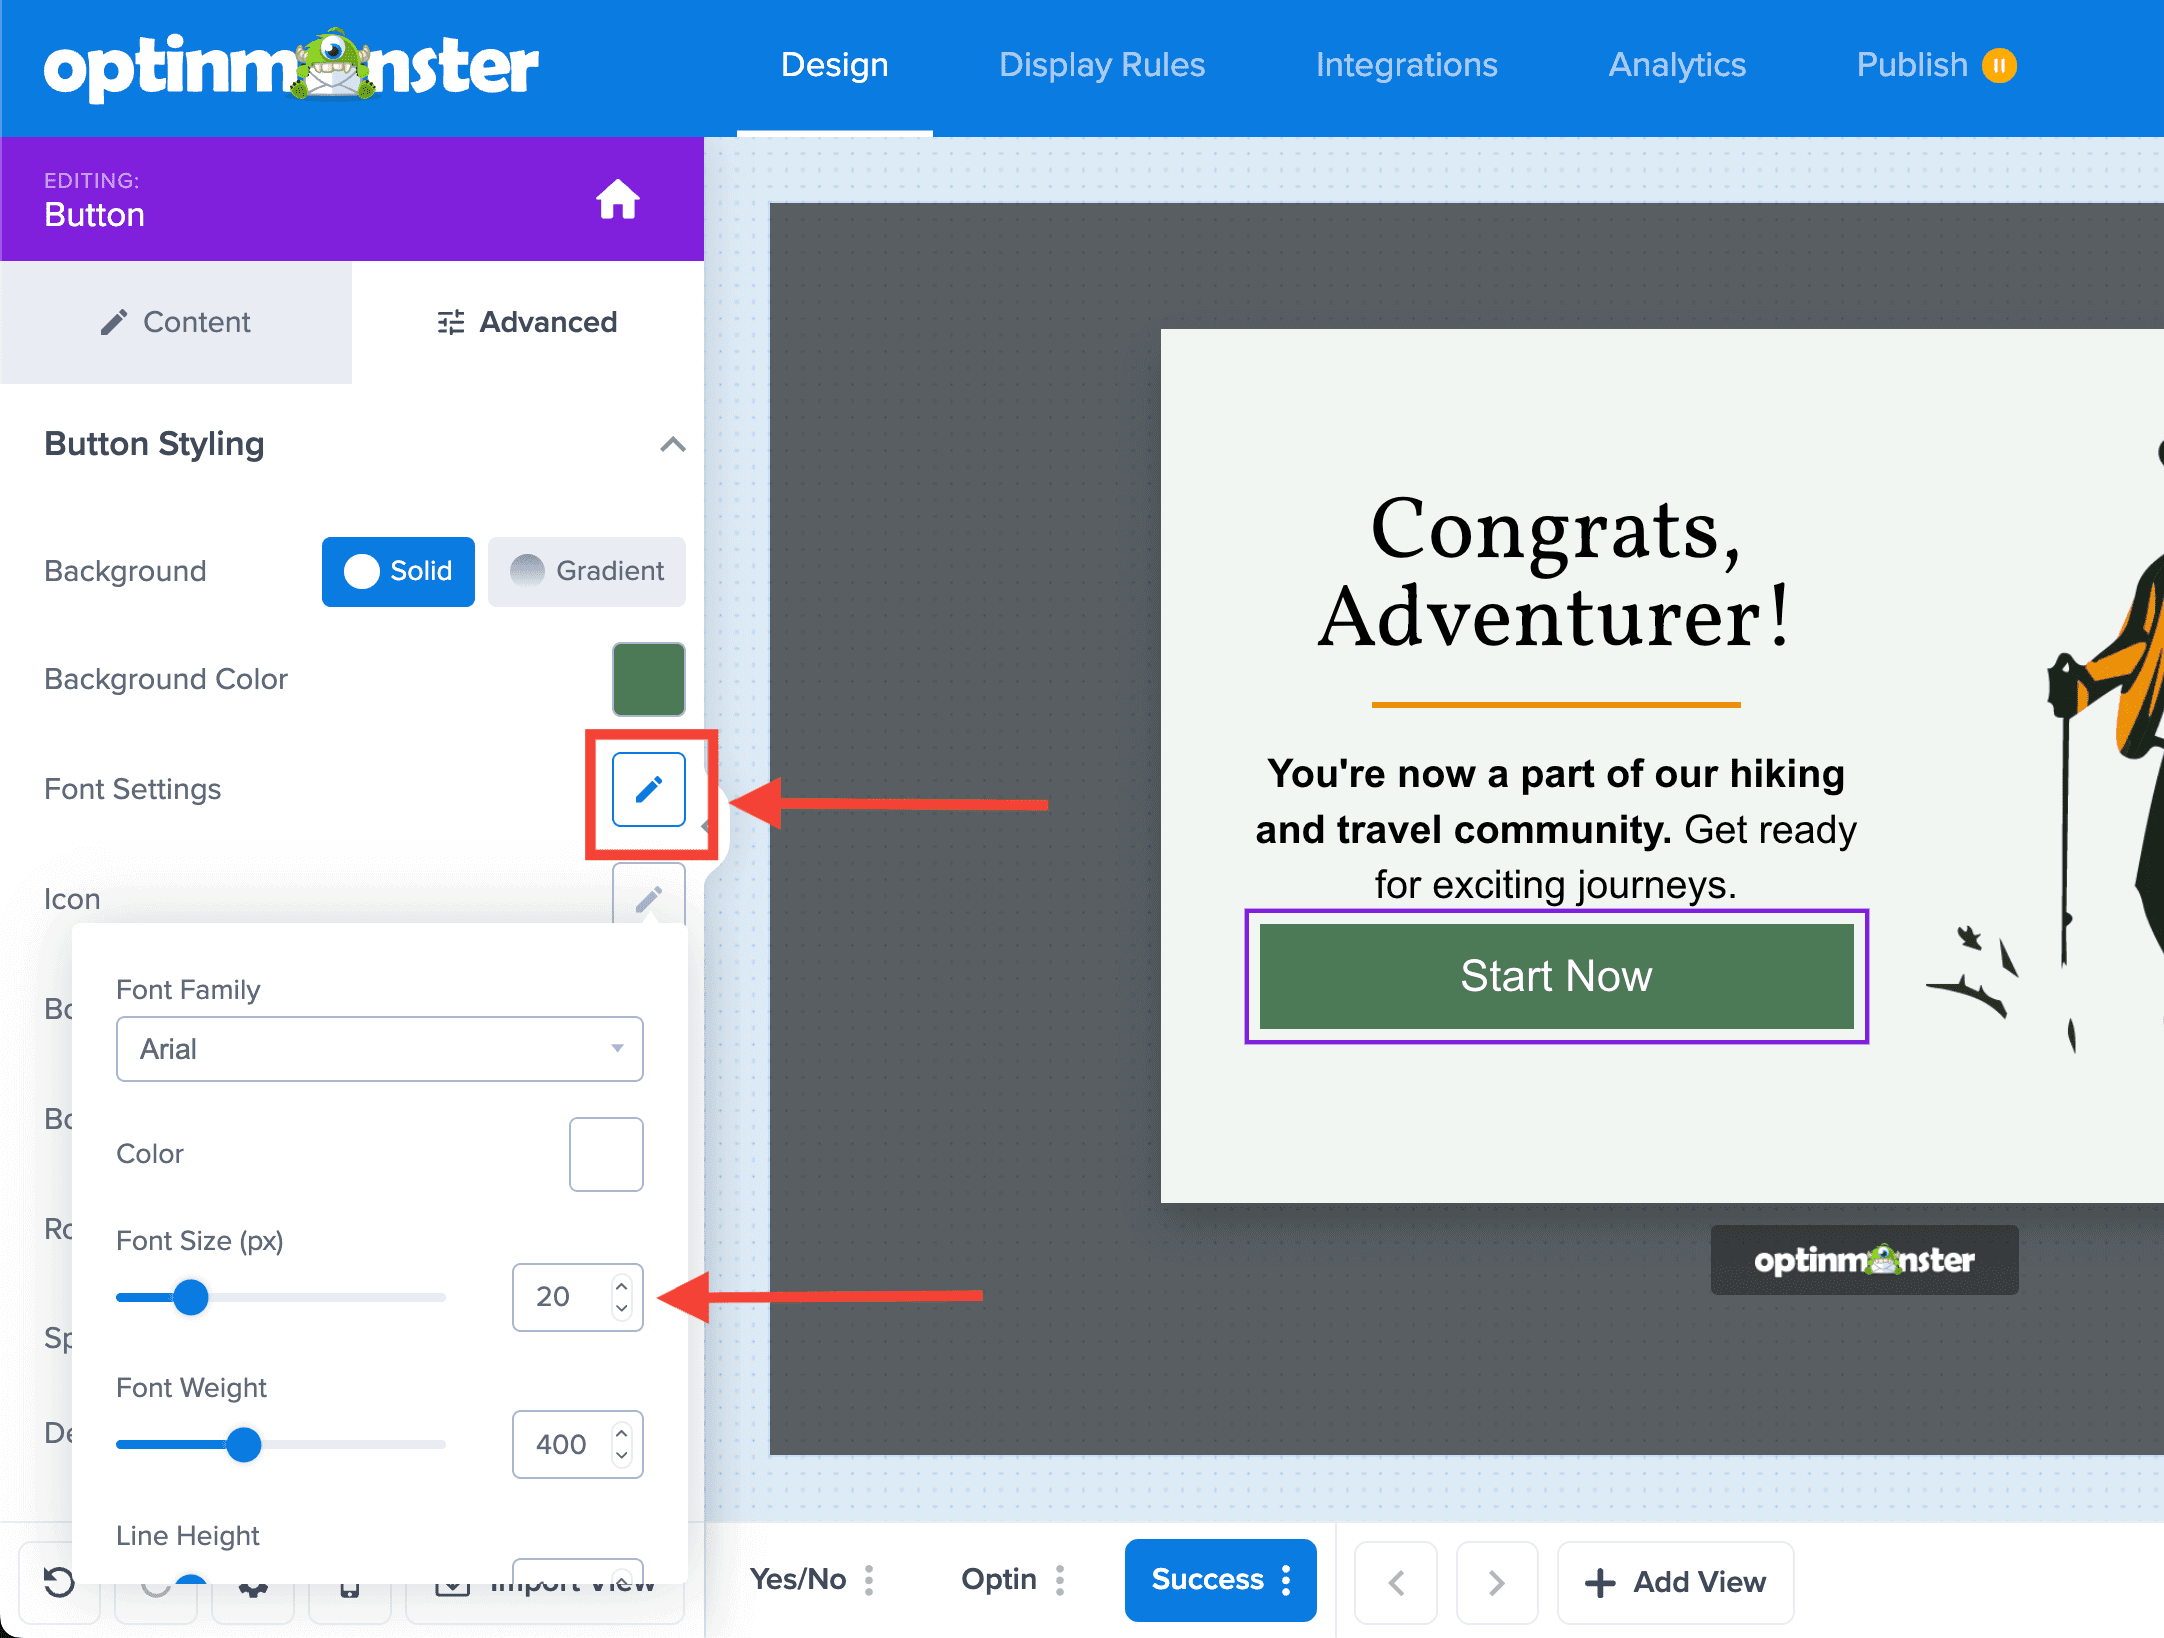
To adjust the font size of a button block, follow these steps:
- In the Design view of the campaign builder, locate the Button block you want to edit.
- Select the settings icon.
- From the Advanced tab in the sidebar, select the pencil icon for the Font Settings option and edit the Font Size as desired.
- When you are finished, Save the campaign.
Font Family
Text Block
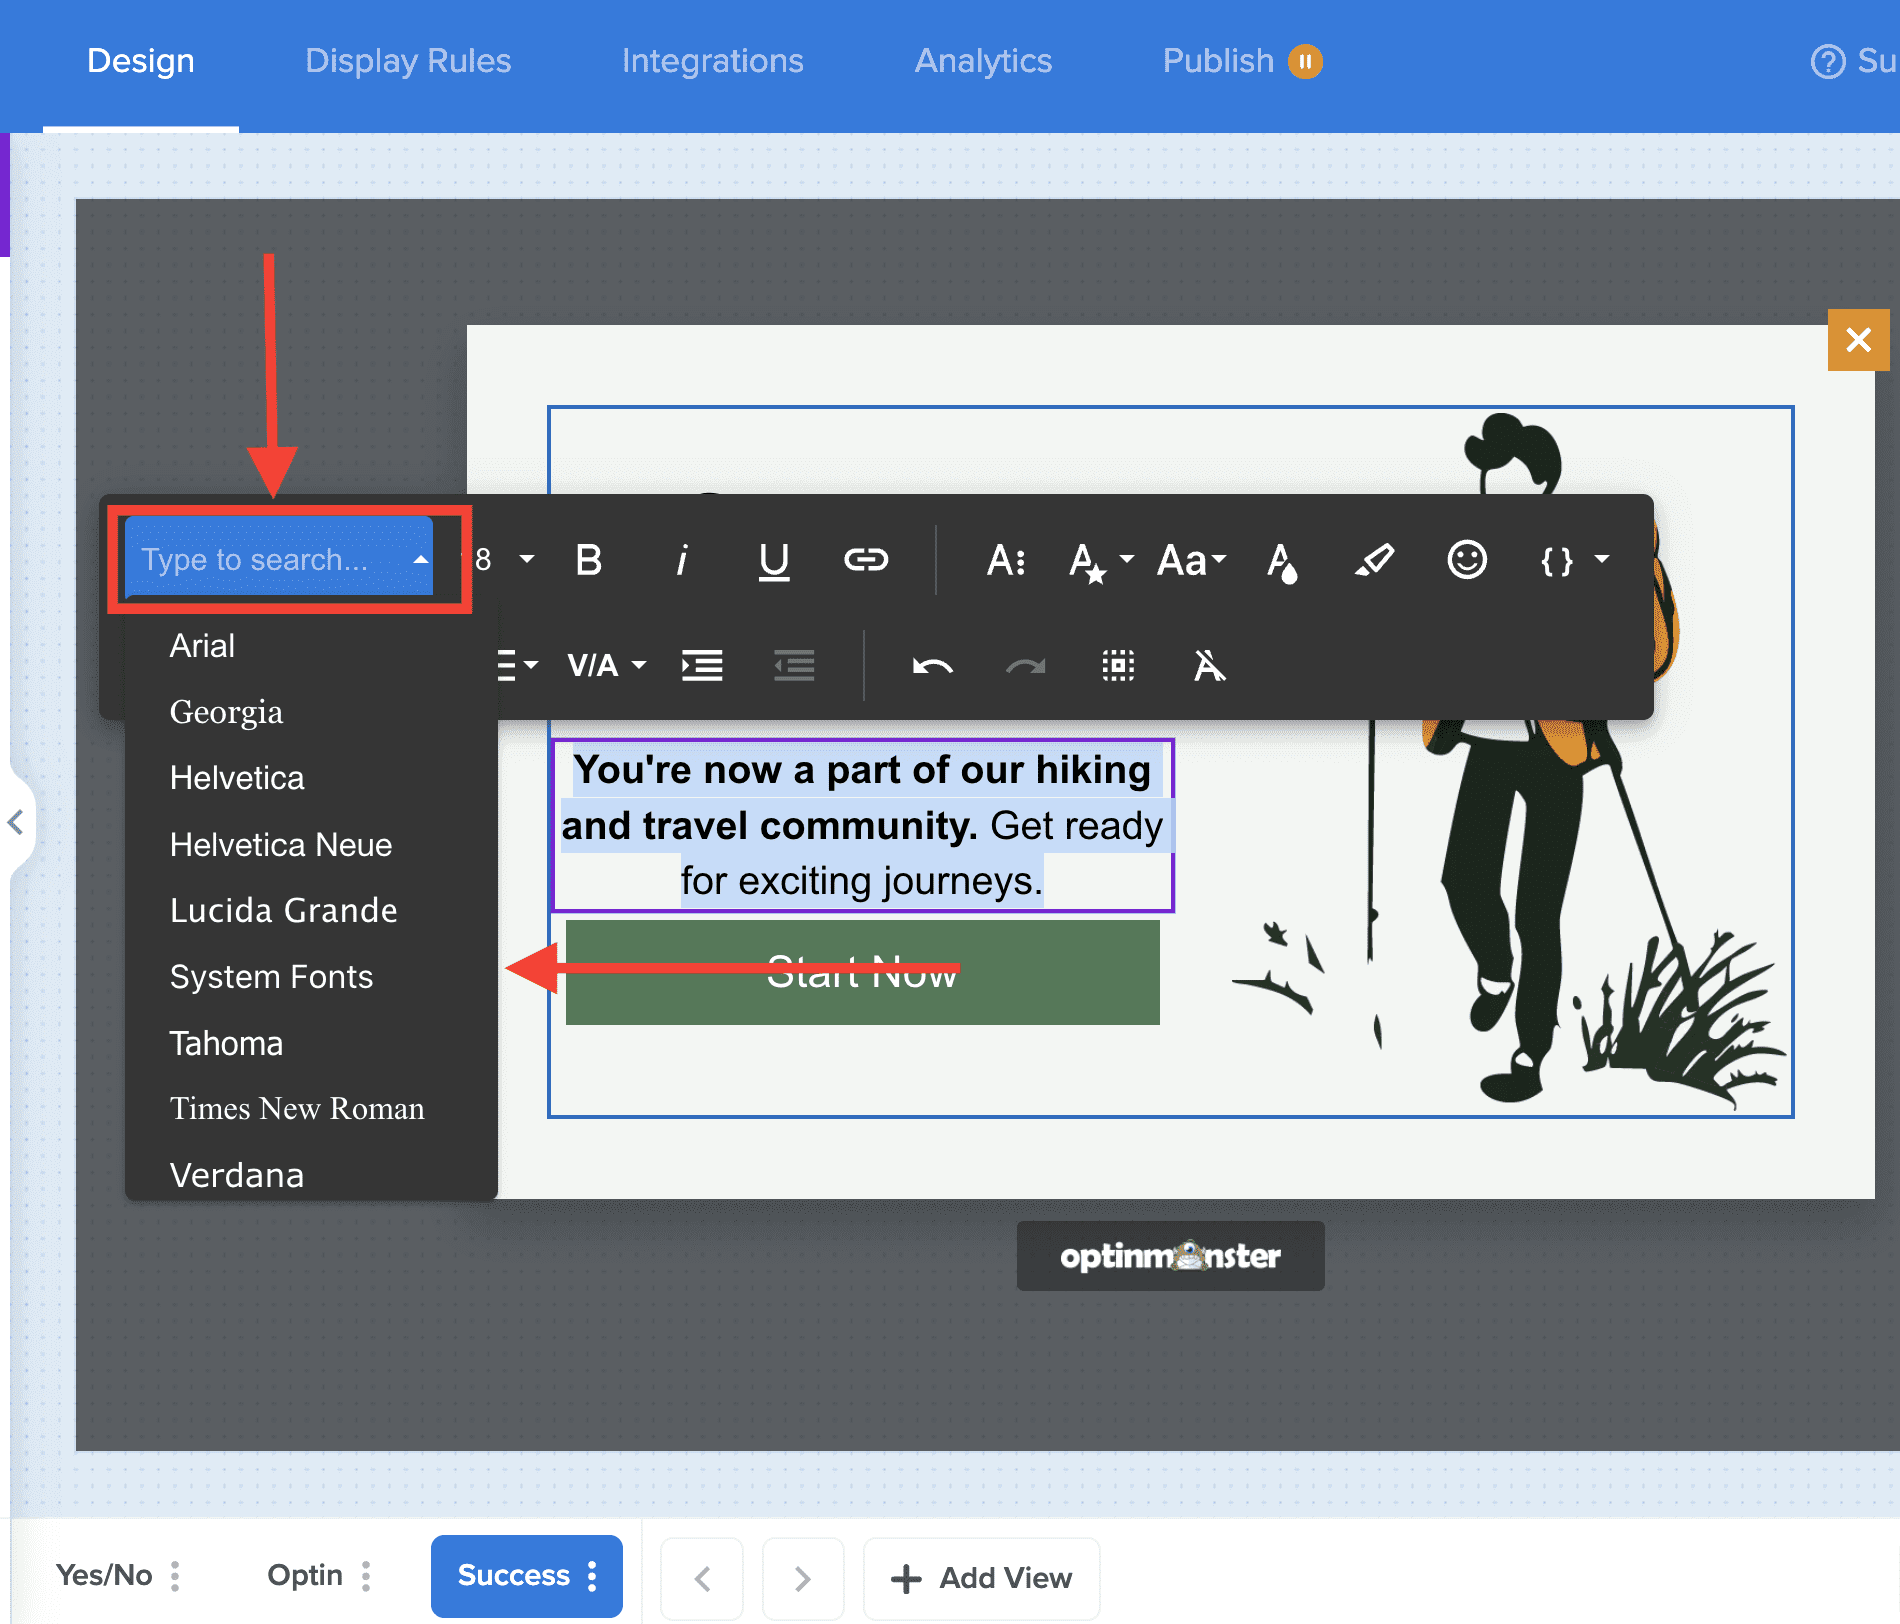
To adjust the font family of a text block, follow these steps:
- In the Design view of the campaign builder, locate the Text block you want to edit.
- Next, double-click the text to select a single word or triple-click to select all the text within the block.
- Select the Font Family icon and choose your desired font from the dropdown.
- When you are finished, Save the campaign.
Button Block
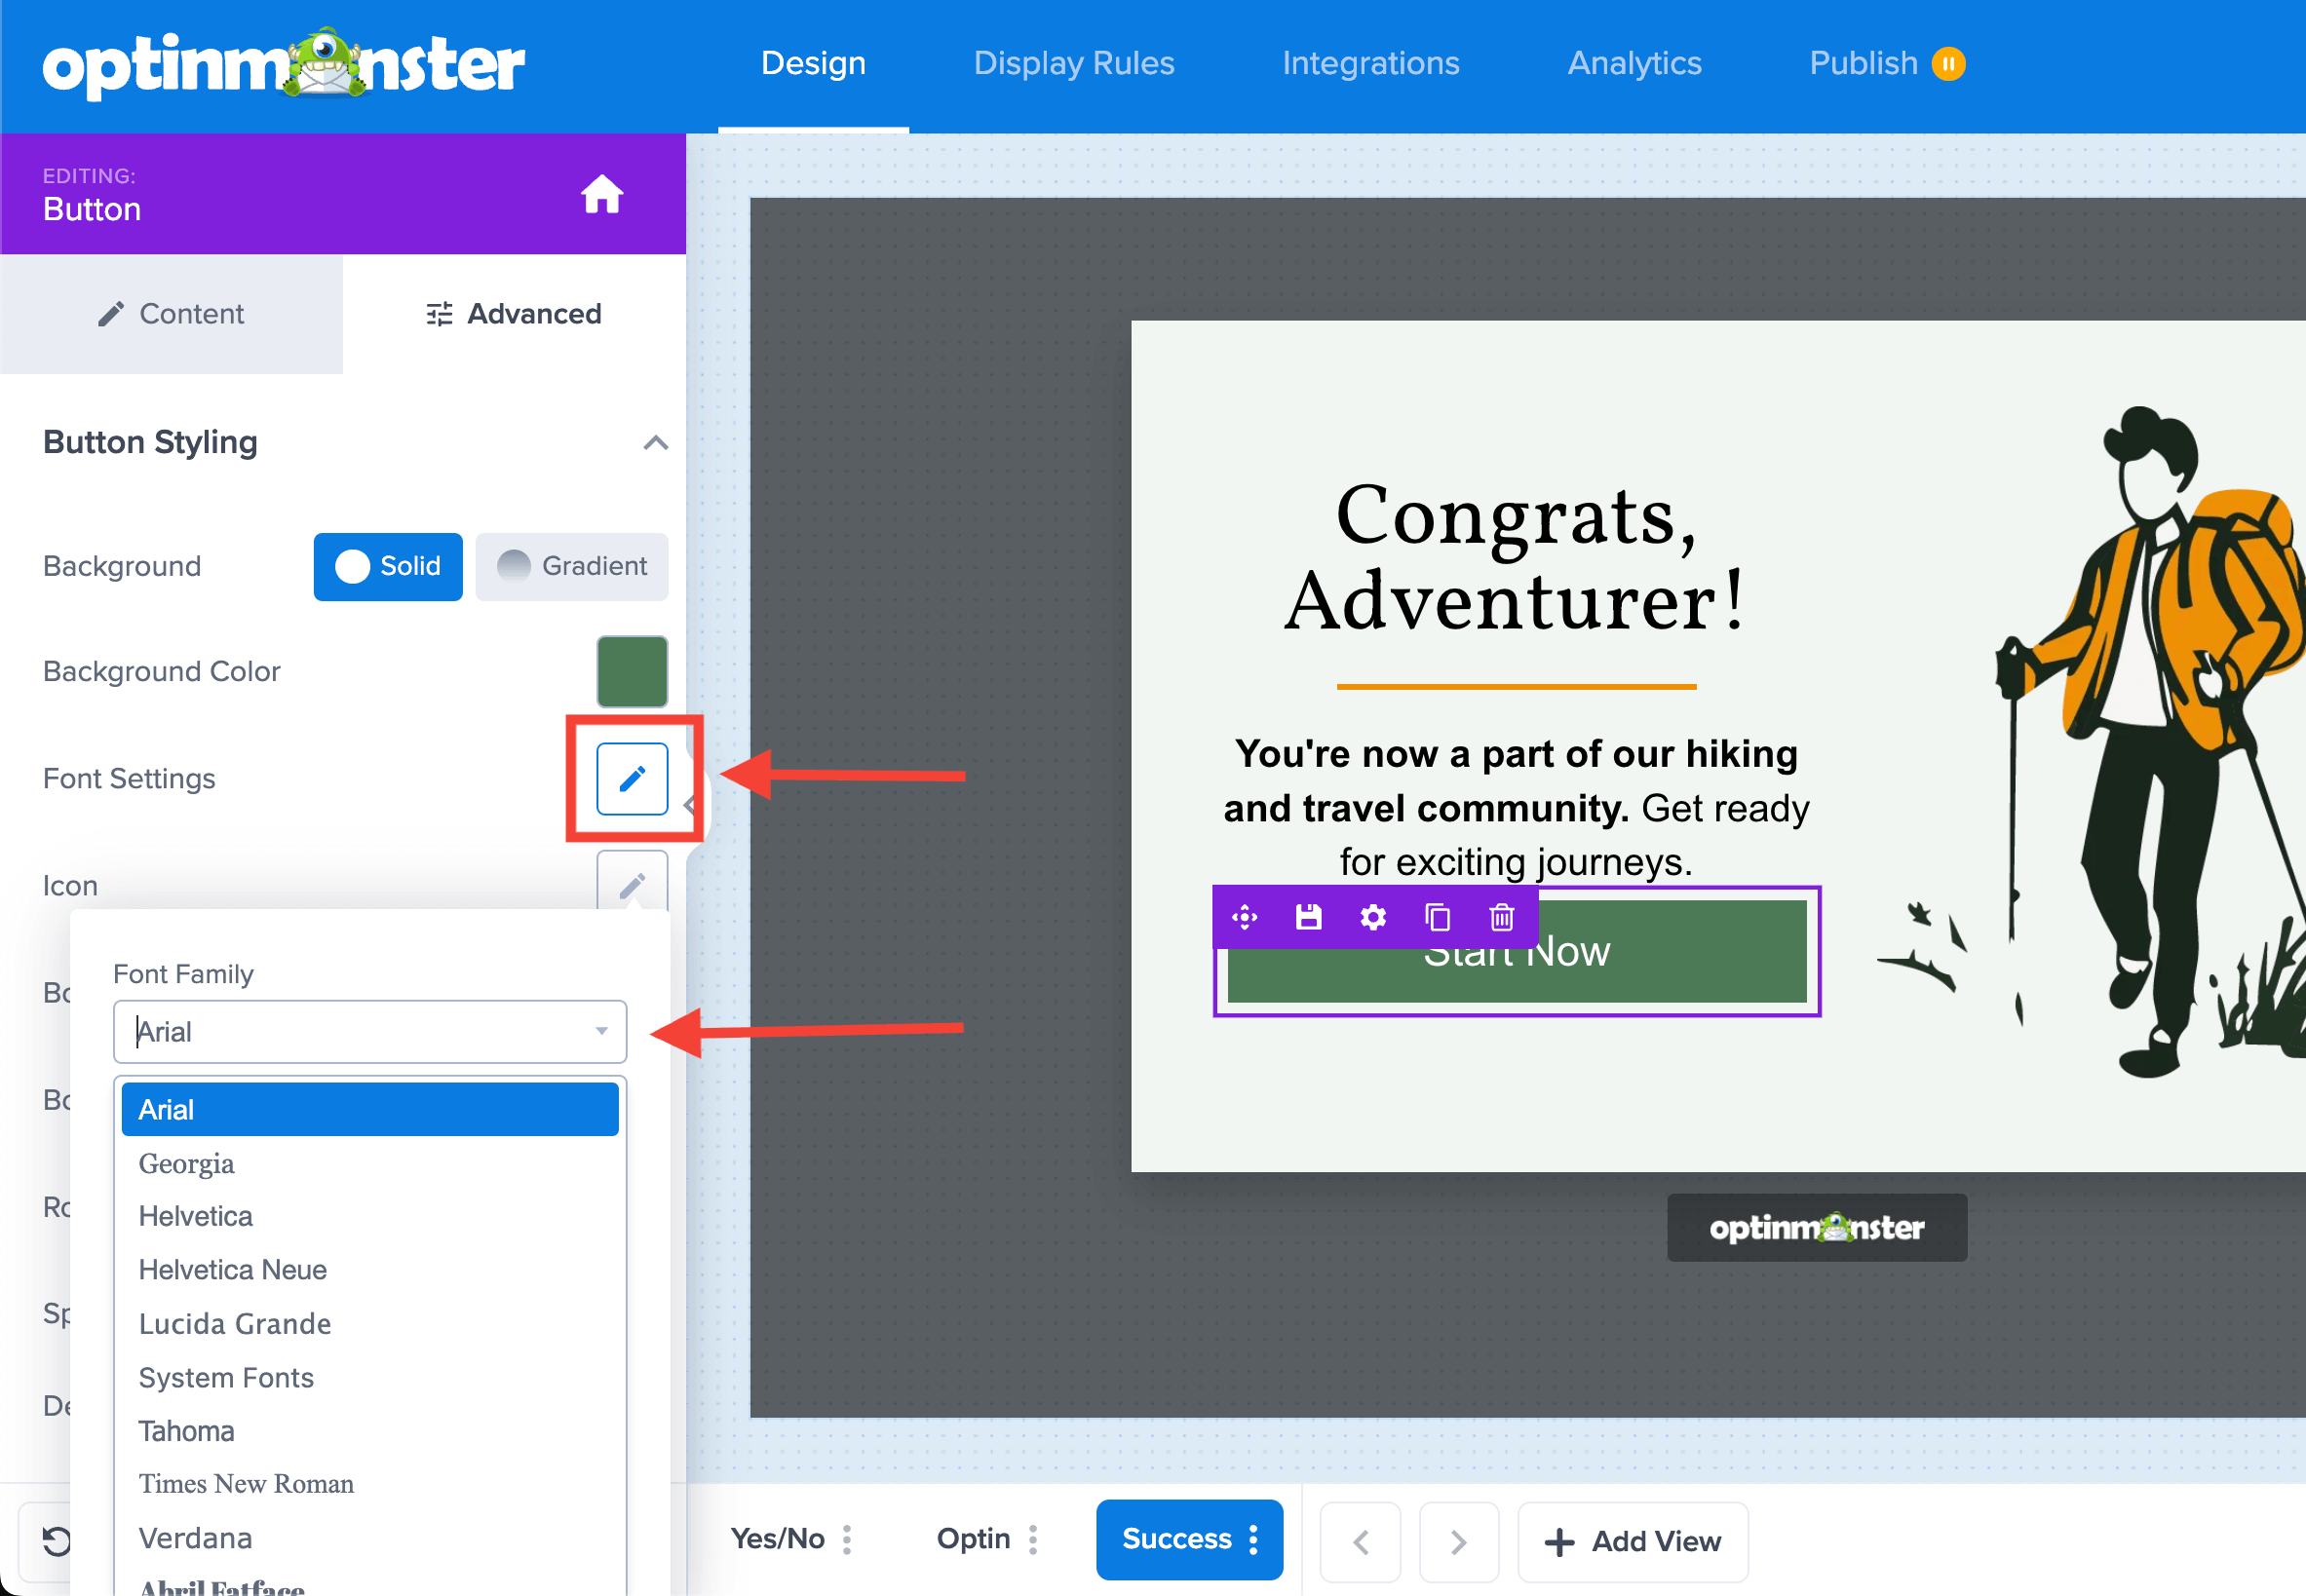
To adjust the font family of a button block, follow these steps:
- In the Design view of the campaign builder, locate the Button block you want to edit.
- Select the settings icon.
- From the Advanced tab in the sidebar, select the pencil icon for the Font Settings option and edit the Font Family as desired.
- When you are finished, Save the campaign.
Images
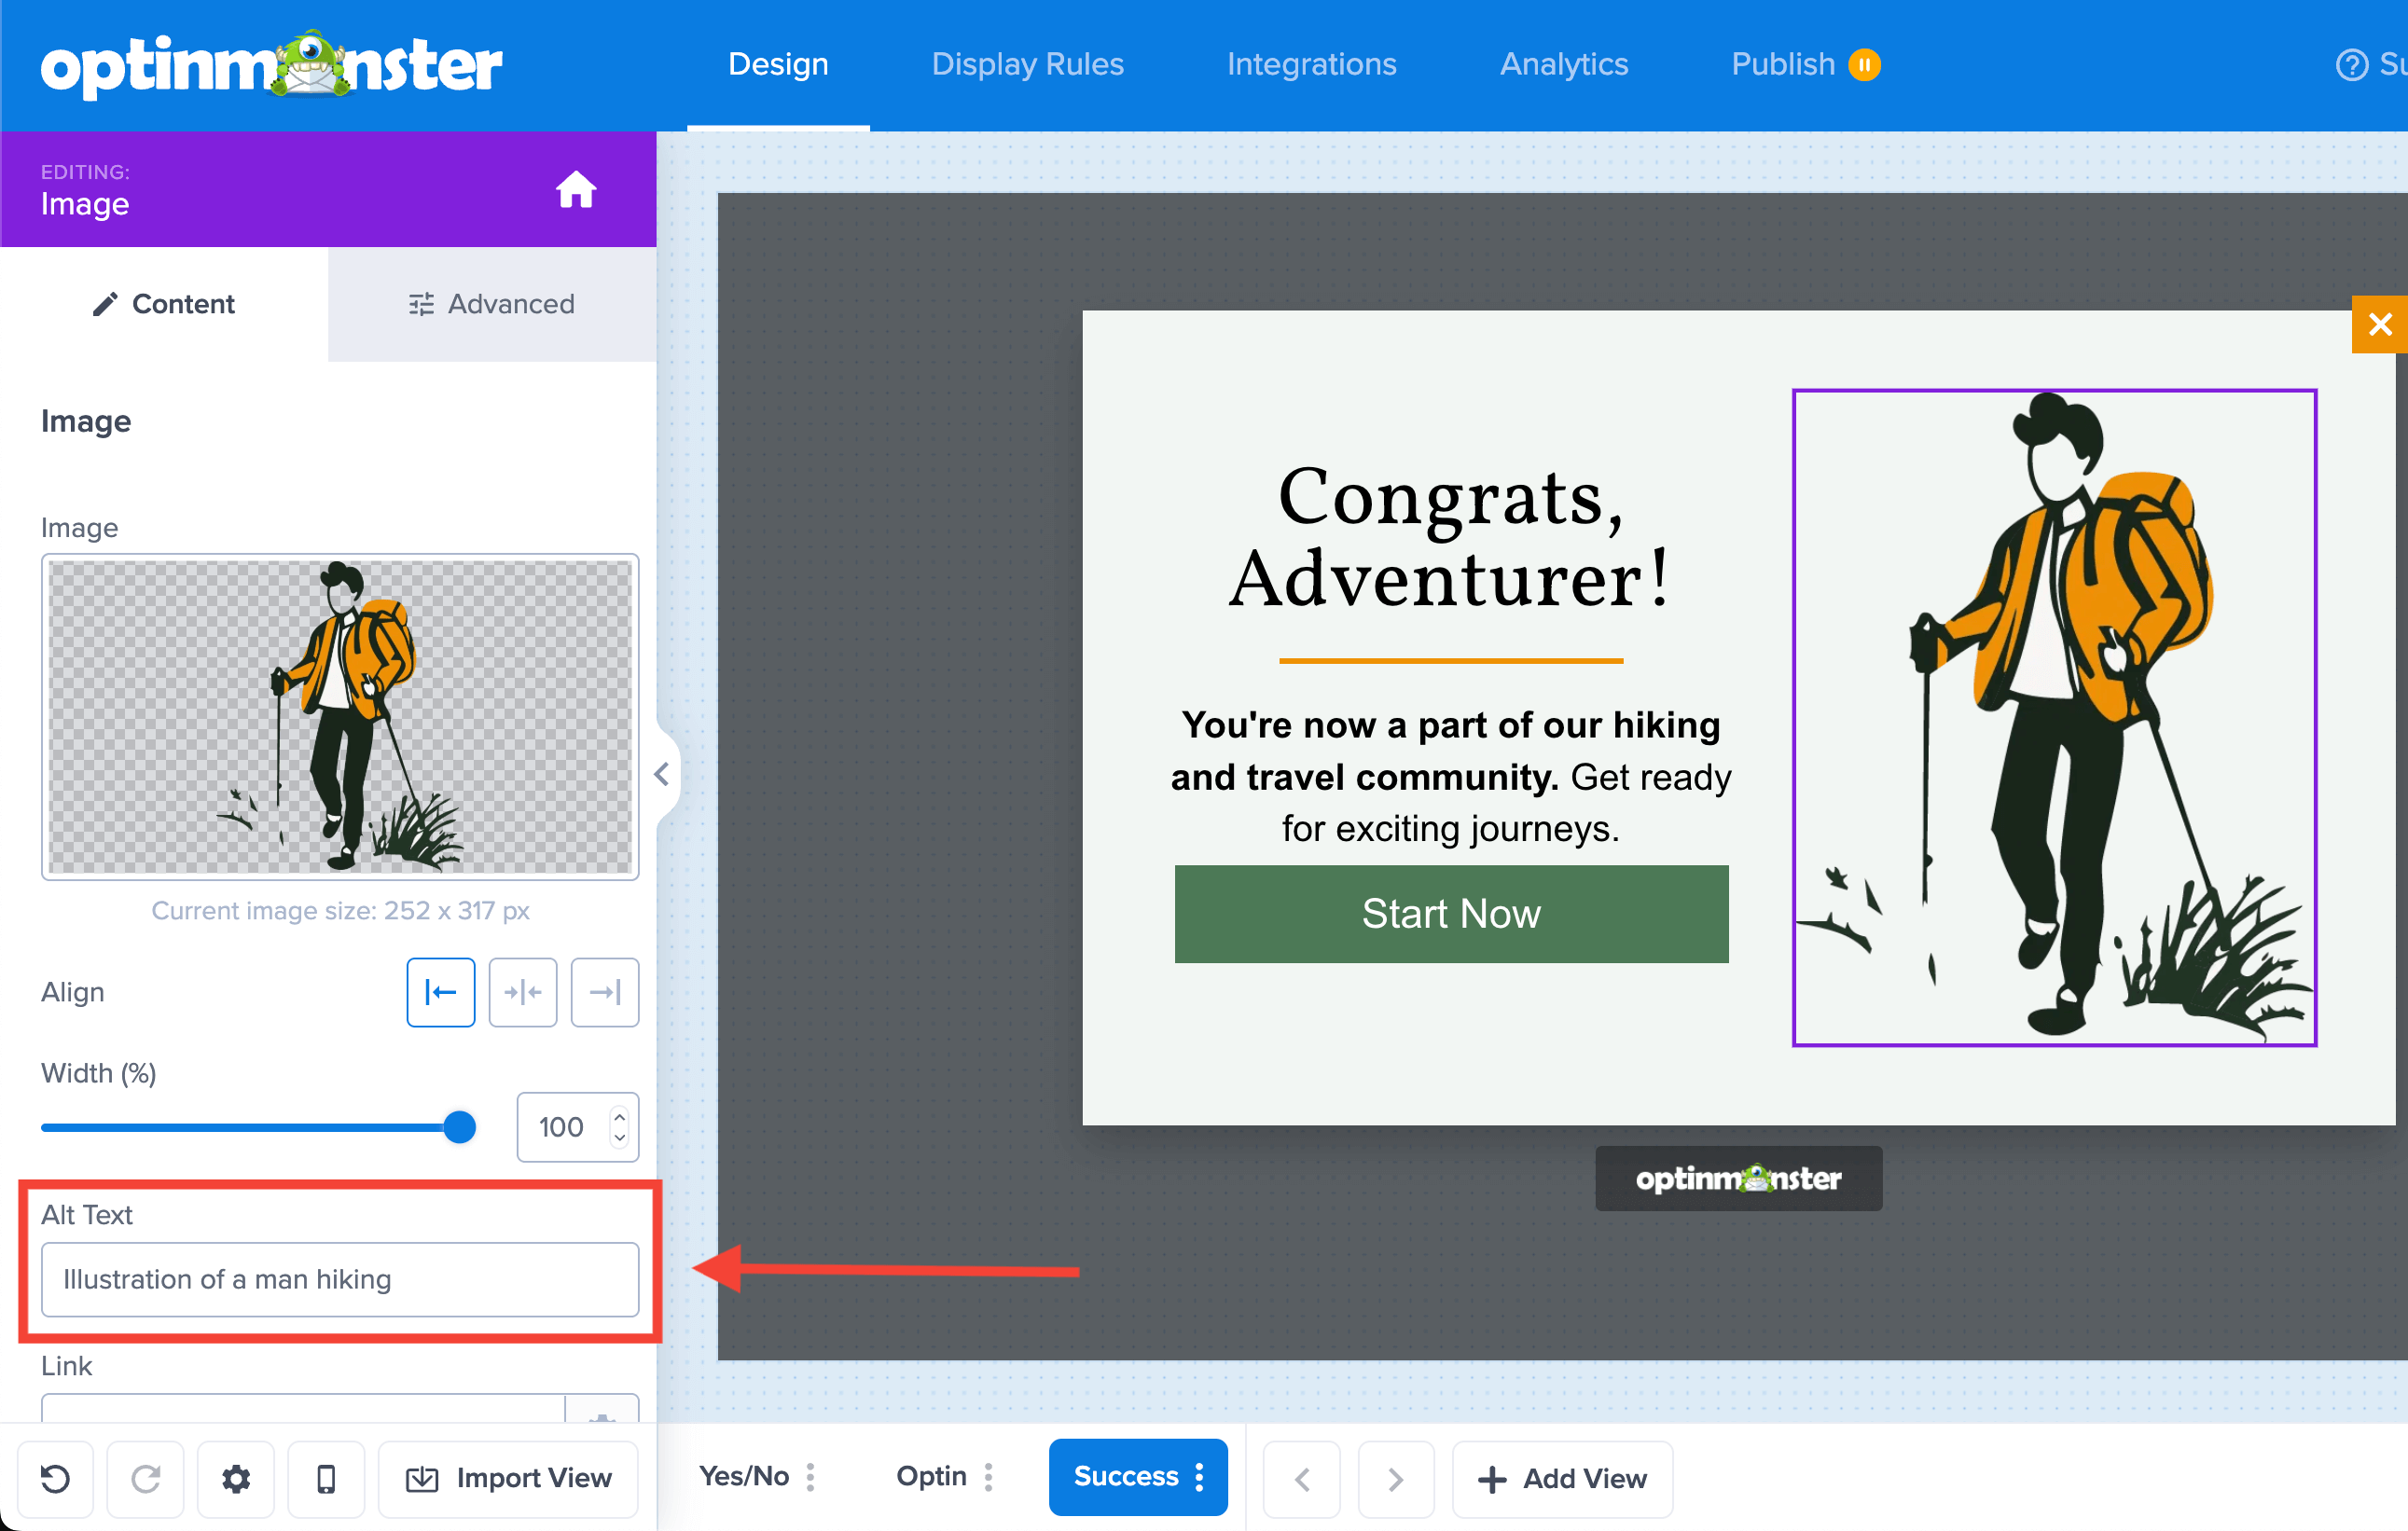
Adding an Alt text attribute to images in your campaign is essential as it provides a description of the image, which is read aloud by screen readers for visually impaired users.
The Alt text also displays if an image fails to load, providing context for the user. When adding images to your campaign, be sure to use meaningful descriptions for all images.
Learn how to add an image to your campaign
To add an Alt text to your campaign image, follow these steps:
- From the Design view of the campaign builder, directly select the image block you would like to edit.
- Next, in the sidebar panel, locate the Alt Text field and add your text.
- When you are finished, Save the campaign.
Forms
ARIA Labels
ARIA (Accessible Rich Internet Applications) labels make your campaigns more accessible to users with screen readers. Associating a <label> with a form control, like <input> or <textarea>, ensures the label is visually and programmatically connected to the field.
When a screen reader encounters the element, the ARIA label text is read aloud, helping the user understand what the element is for. You can use field mapping to add labels and configure form fields to your OptinMonster campaign form.
Learn how to use Field Mapping to add extra fields to your OptinMonster campaign form
To add a label to your campaign form field, follow these steps:
- Navigate to the Design screen of the campaign builder to begin customizing your campaign.
- Be sure you are editing the campaign view containing your optin form.
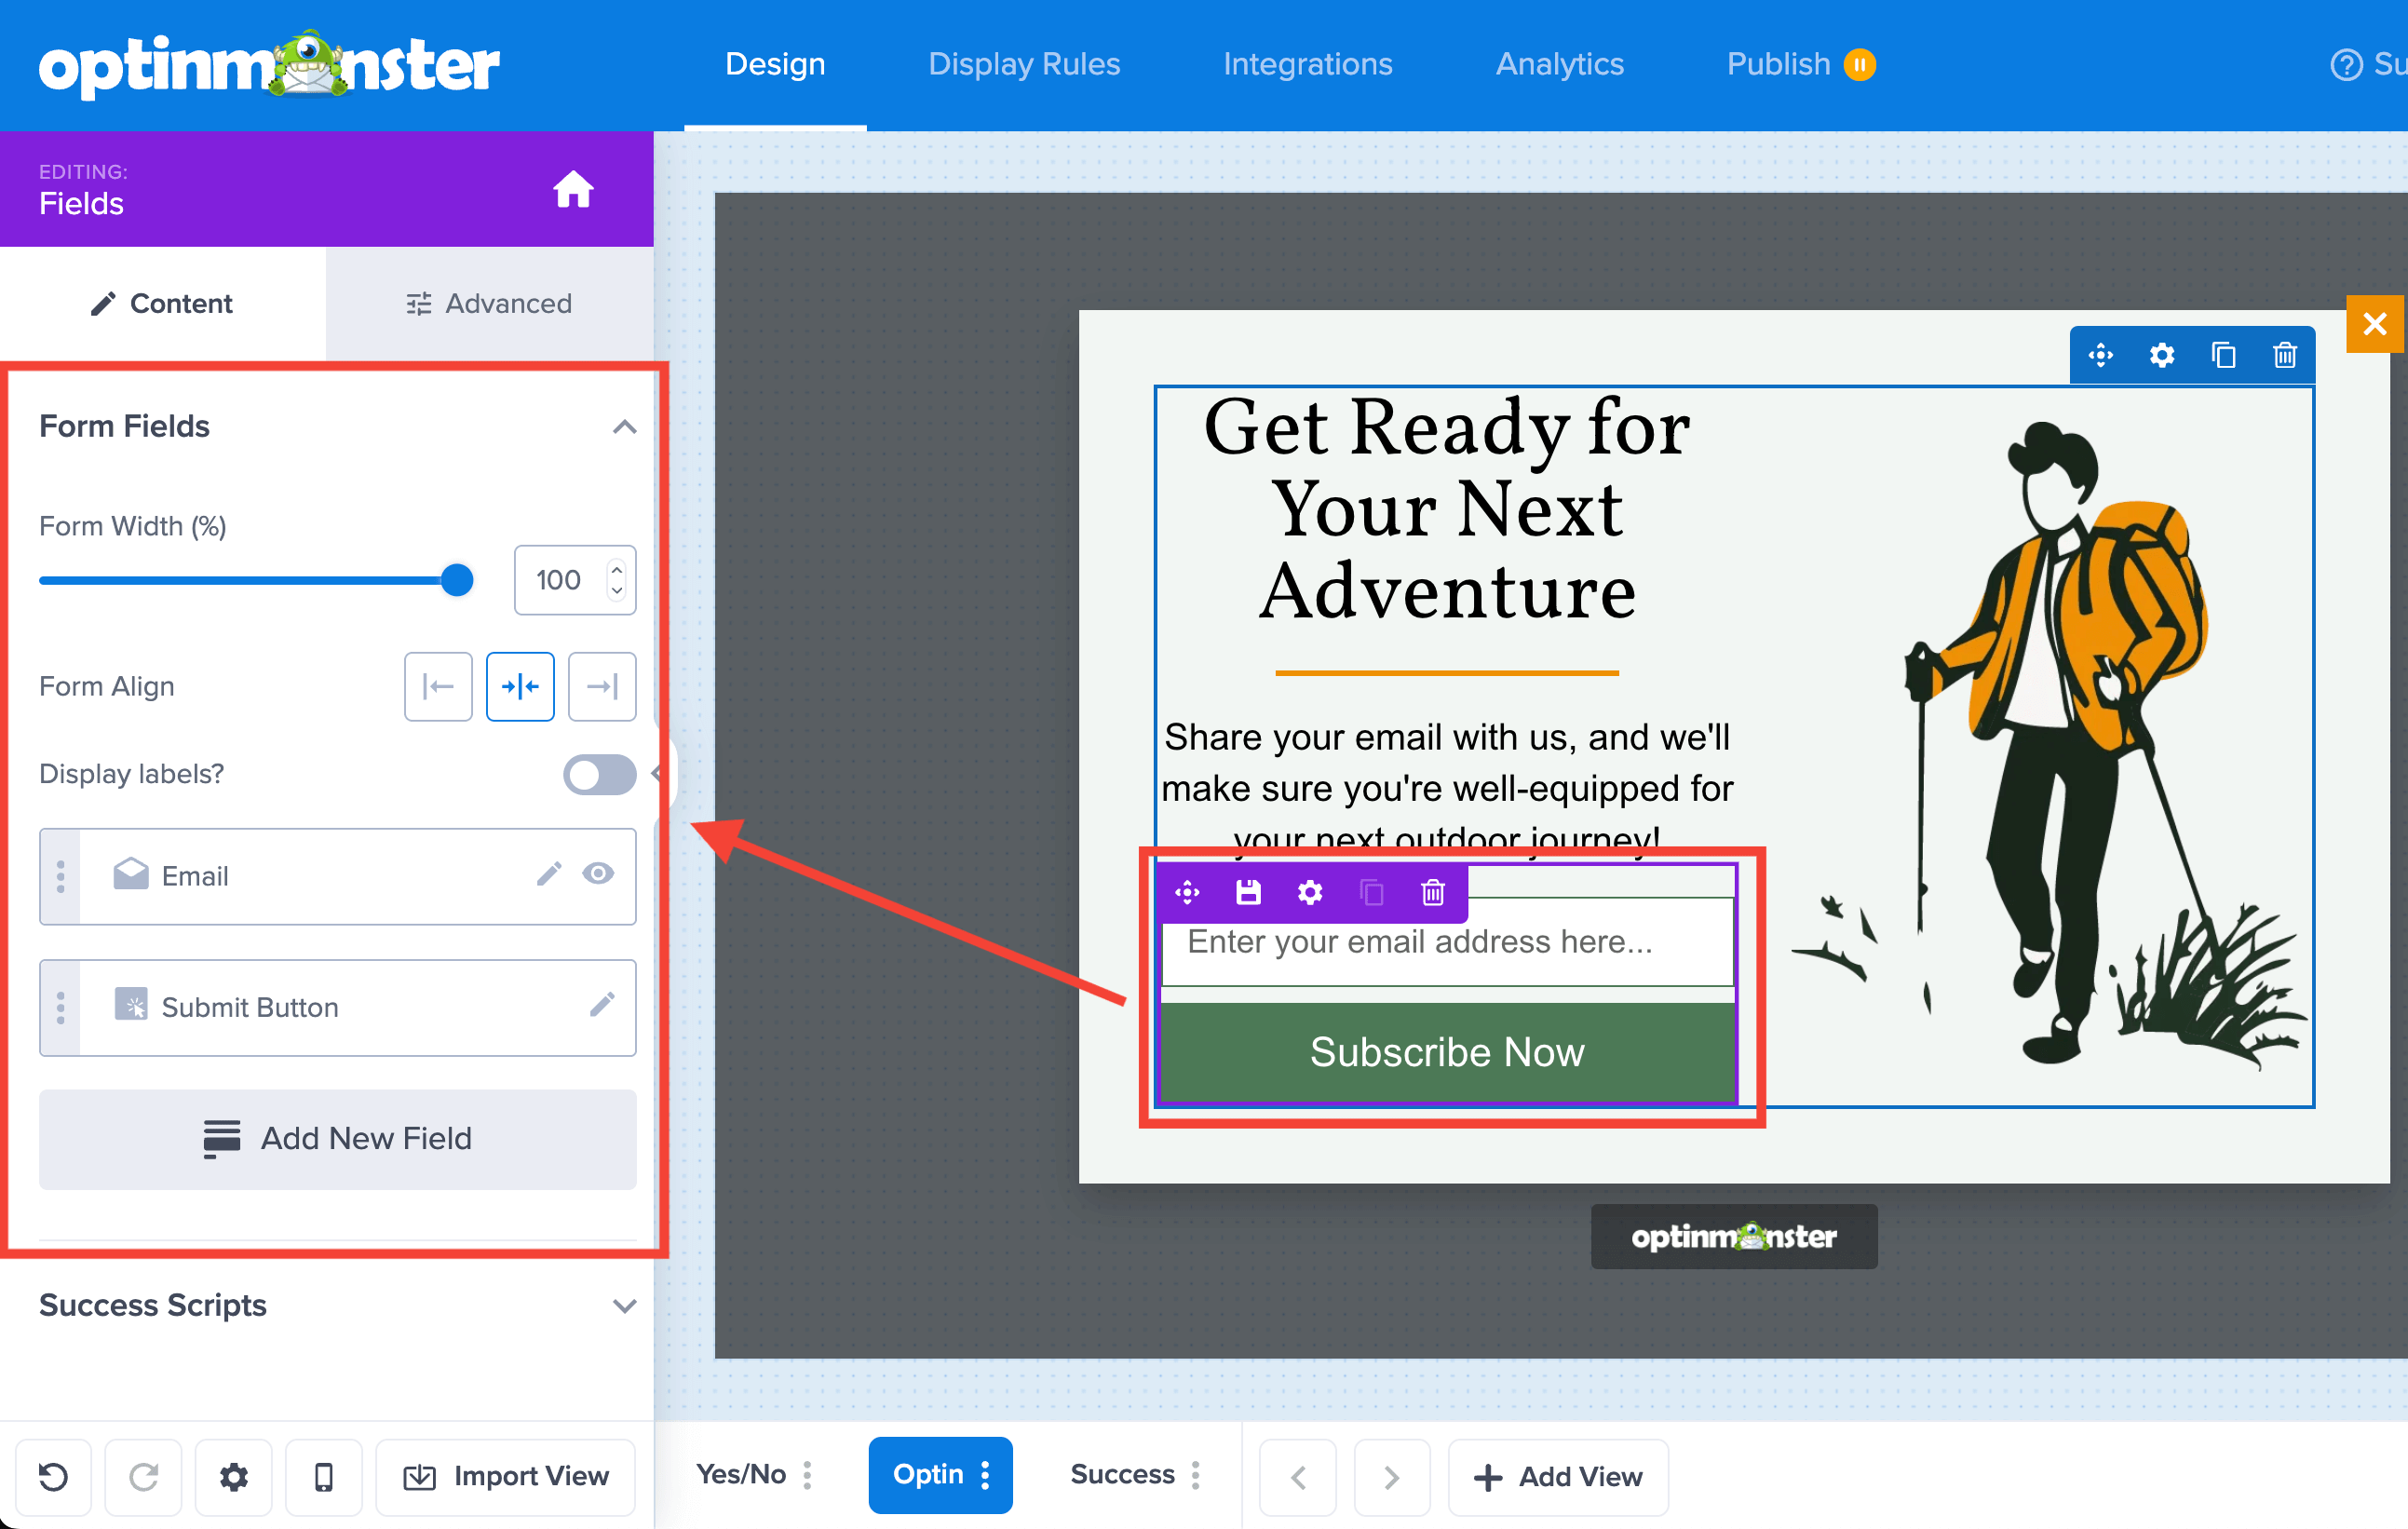
- To edit the fields of your opt-in form, click anywhere within the Fields block in the design pane of the builder. The options for editing will appear in the left sidebar panel.
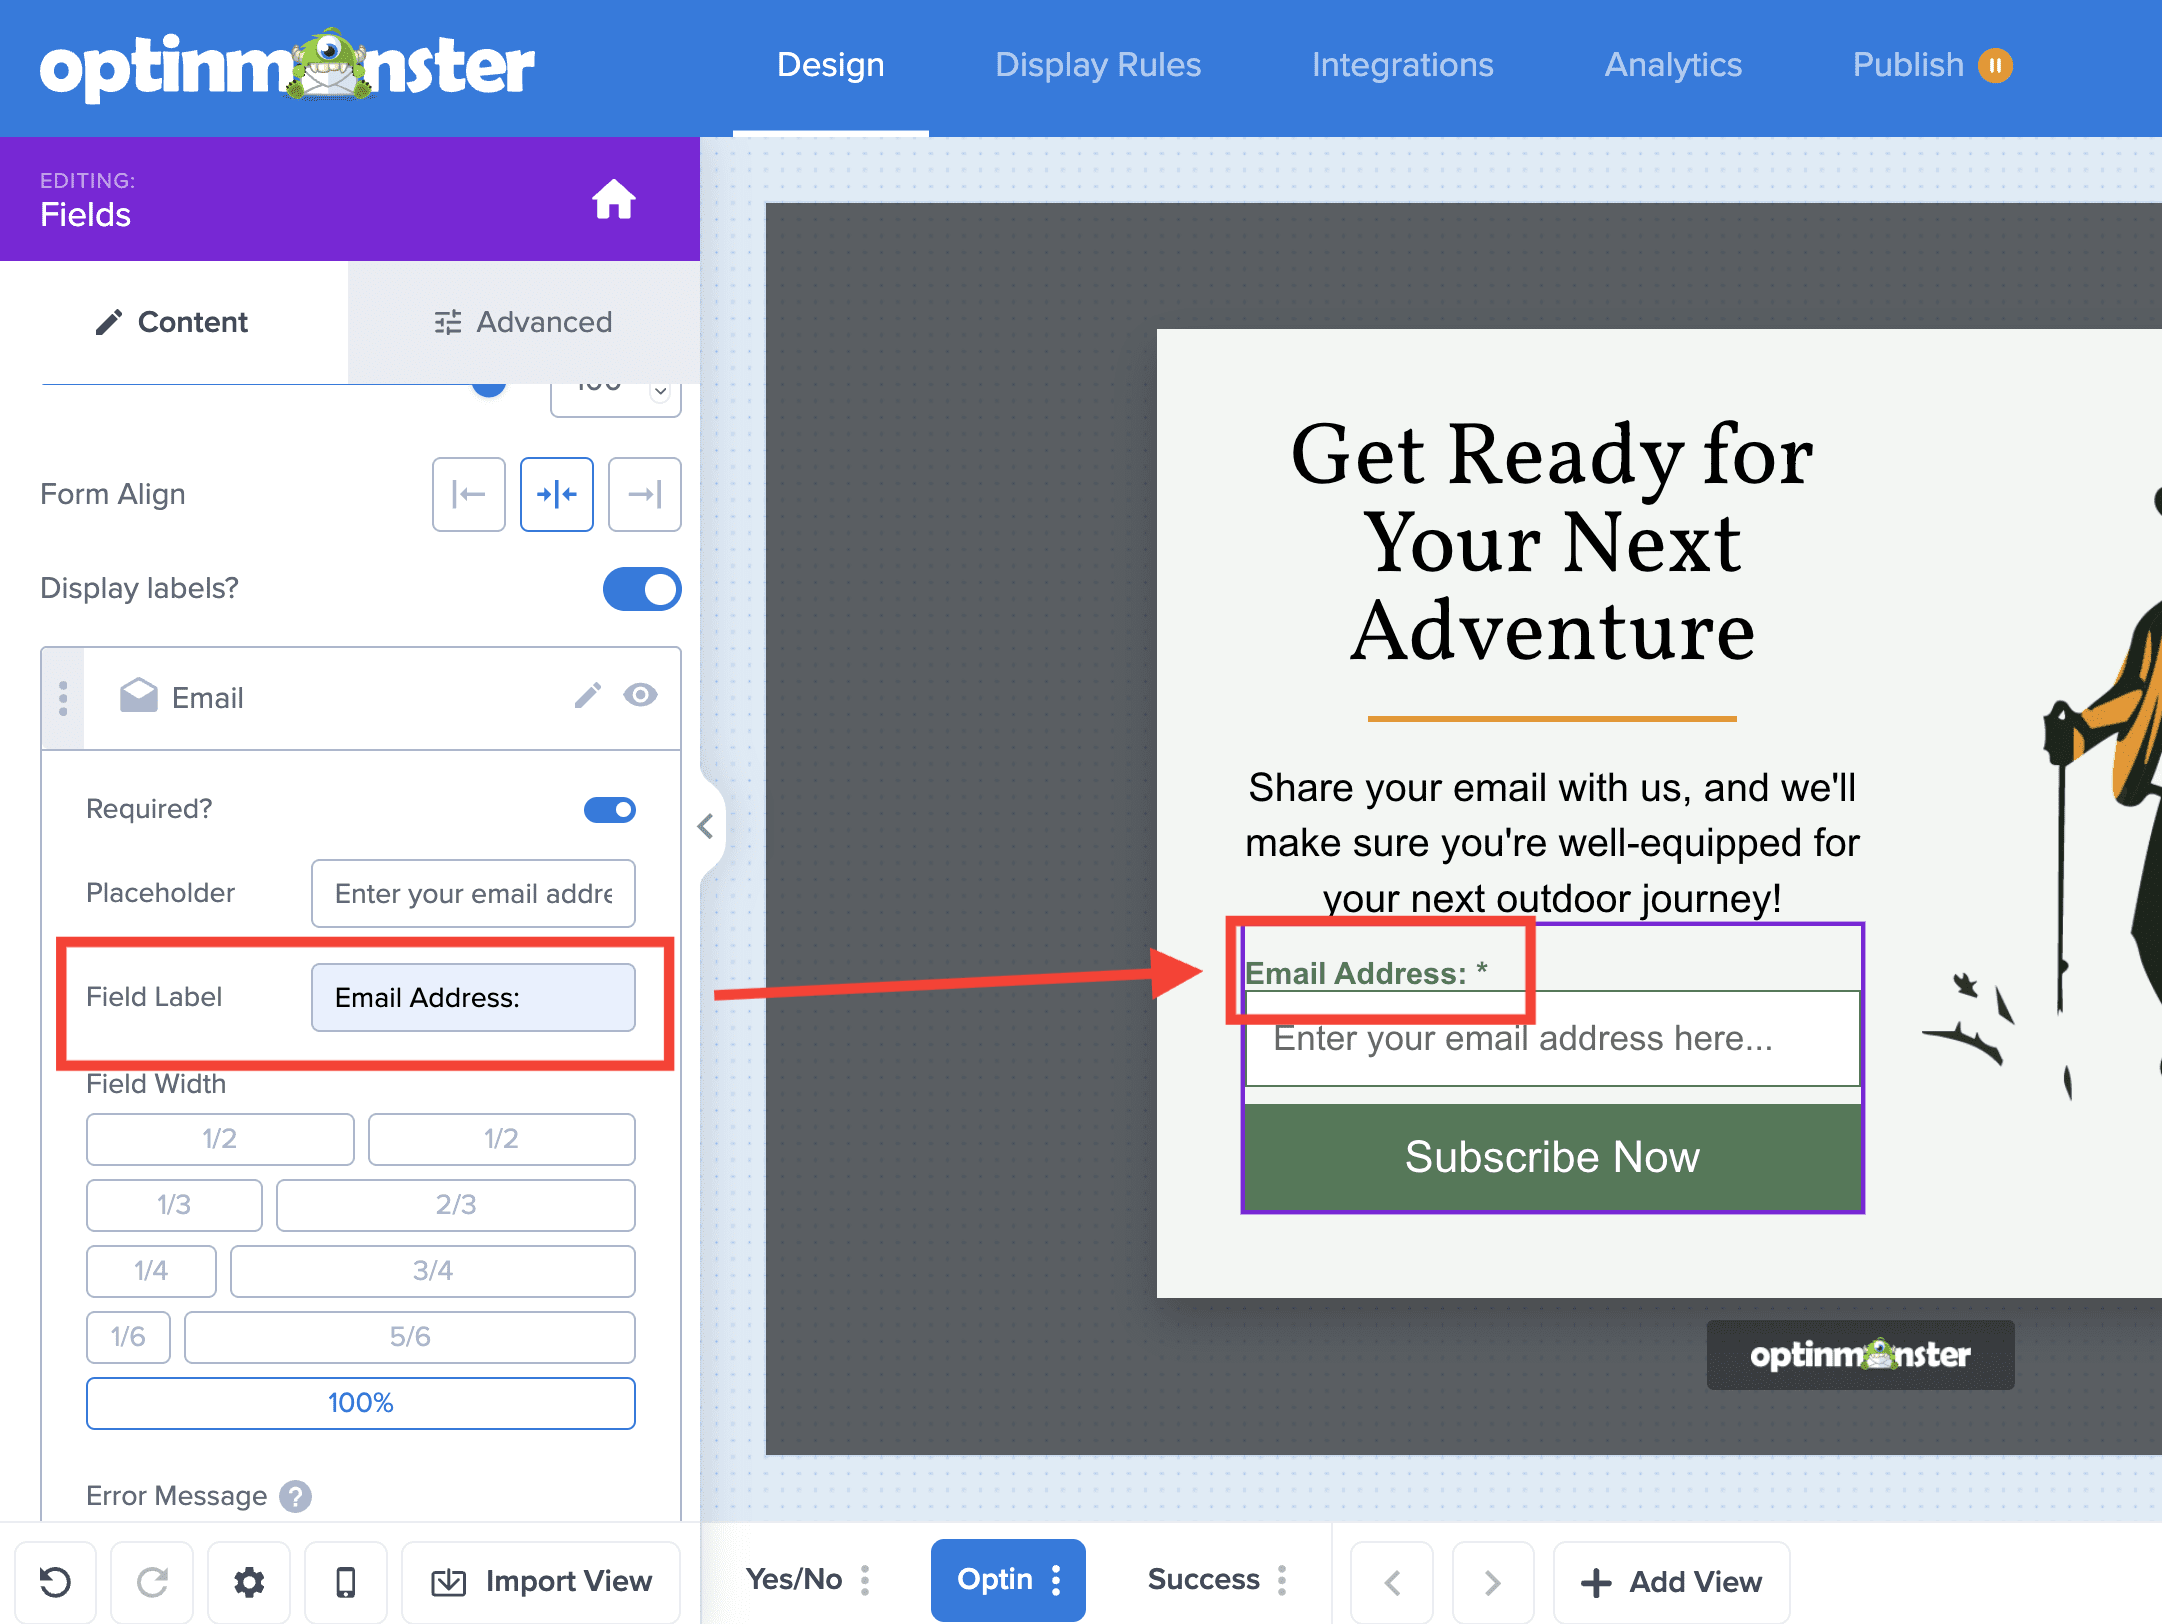
- Next, select the field you wish to configure in the left sidebar panel, locate the Field Label option, and add your text.
- When you’re finished, Save your campaign.
Form Control
Do you need more control over your forms? OptinMonster’s Custom HTML feature allows you to embed forms you designed that are compliant to your campaign. This approach offers flexibility for creating accessible designs tailored to your needs.
Smart Tags
OptinMonster’s Smart Tags can contribute to ADA compliance by enabling dynamic, personalized content that aligns with accessibility best practices.
Smart Tags allow you to dynamically replace placeholders with specific user or campaign data, ensuring clarity and relevance in your campaigns. This makes the updated content seamlessly accessible to screen readers.


