OptinMonster can work with any website and makes it easy to use with WooCommerce.
In this article, you’ll learn how to integrate OptinMonster with WooCommerce.
Before you start, this feature requires a Growth subscription.
Before you start, this guide assumes you already have the WooCommerce and OptinMonster plugins installed on your WordPress website.
Important:
To access and configure the WooCommerce targeting options in OptinMonster, you need to have either a Shop Manager or Administrator role in WooCommerce.
Integrate with WooCommerce
OptinMonster makes it easy to integrate with WooCommerce for more advanced eCommerce targeting options.
To integrate with your WooCommerce site, follow these steps:
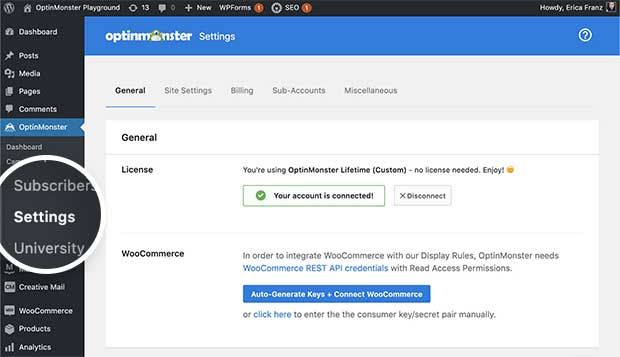
- In the WordPress admin navigate to the OptinMonster > Settings screen.
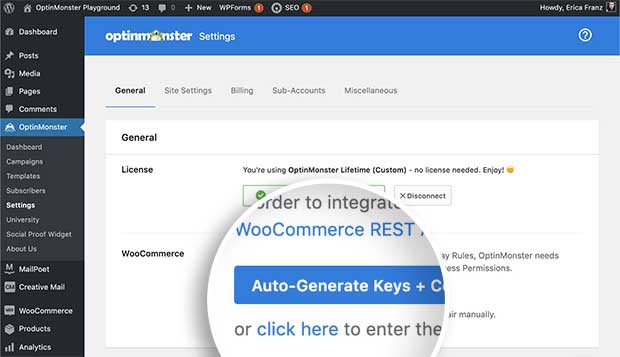
- Next, select the Auto-Generate Keys + Connect WooCommerce button.
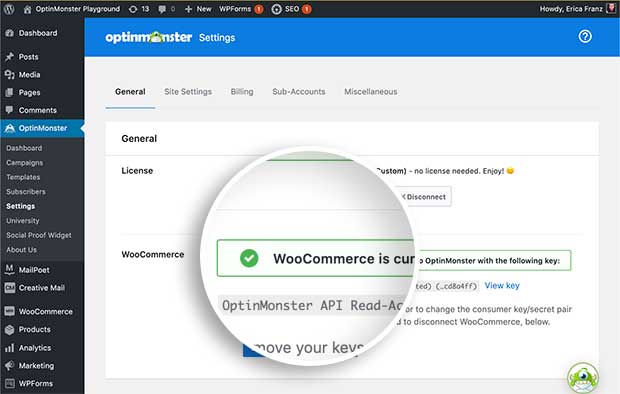
- WooCommerce will automatically generate Keys and connect with OptinMonster. You should see a success message like this:
Targeting Options
Once you’ve connected WooCommerce with OptinMonster, you’ll have additional options available through the OptinMonster plugin and in the campaign builder’s Display Rules.
You can use these additional options to hide or show campaigns based on WooCommerce-specific conditions.
Plugin Output Settings
The following options are available through the Output Settings in the OptinMonster plugin:
- Show on all WooCommerce Products
- Show on WooCommerce Pages
- Single Product
- Cart
- Checkout Page
- Customer Account Page
- Show on all WooCommerce Endpoints
- Order Pay Endpoint
- Order Received Endpoint
- View Order Endpoint
- Edit Account Endpoint
- Edit Address Endpoint
- Lost Password Endpoint
- Logout Endpoint
- Add Payment Method Endpoint
- Show on WooCommerce Product Categories (dropdown option)
- Show on WooCommerce Product Tags (checkbox option)
Campaign Builder Display Rules
The following Display Rules are available through the campaign builder:
- WooCommerce Product Targeting
Show if your visitor is viewing a specific product - WooCommerce Product Category Targeting
Show if your visitor is viewing a specific product category - WooCommerce Product Tag Targeting
Show if your visitor is viewing a specific product tag archive - # of Items in WooCommerce Cart
Show if your visitor has a specific number of items in their cart - WooCommerce Cart Total
Show based on the total cost of the items in your visitor’s cart - WooCommerce Cart Subtotal
Show based on the subtotal cost of the items in your visitor’s cart - WooCommerce Cart Contains
Show if your visitor has specific products in their cart - WooCommerce Cart Does Not Contain
Show if your visitor does not have specific products in their cart
FAQs
How can I manually connect WooCommerce with OptinMonster?
You can manually generate your own Keys in WooCommerce following these steps:
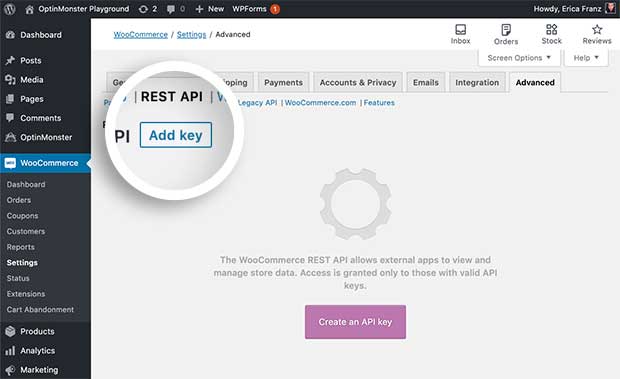
- In the WordPress admin navigate to the WooCommerce > Settings > Advanced > Rest API screen.
- Select the Add key button.
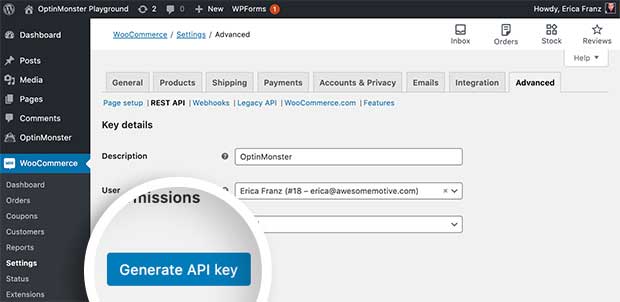
- Give the Key an identifiable description, we recommend “OptinMonster”, then select the Generate Key button.
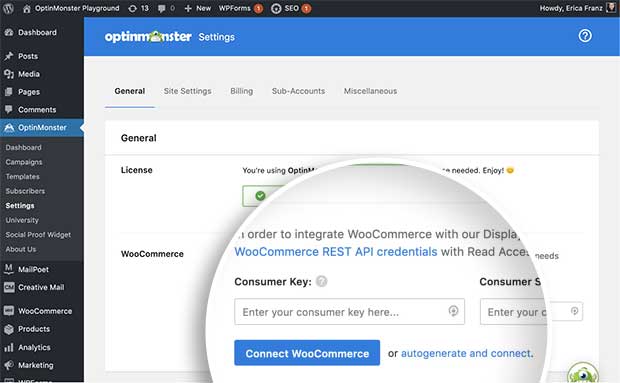
You’ll be provided a Consumer key and Consumer secret to add to OptinMonster.
- Next, navigate to the OptinMonster > Settings screen in a new tab and select the click here text link below the Auto-Generate Keys[…] button.
- Enter the Consumer Key and Consumer Secret you were provided in step 3 and select the Connect WooCommerce button.
- Once connected you should see a success message like this:
What is the difference between the “WooCommerce Cart Total” and “WooCommerce Cart Subtotal” display rules?
That is a great question! Understanding the difference between these two rules is key to targeting your campaigns effectively based on the customer’s cart value.
- The WooCommerce Cart Subtotal rule targets the total price of all the products currently in the shopping cart. This value includes any taxes applied to the products themselves but excludes shipping costs, additional fees, or discounts.
- The WooCommerce Cart Total rule targets the final amount the customer will pay. This value includes the product prices (with tax), plus any shipping costs and additional fees, and then subtracts any discounts applied to the cart.

 You’ll be provided a Consumer key and Consumer secret to add to OptinMonster.