OptinMonster makes it easy to fully customize your campaign design, including the ability to add a Click to Call button.
In this article, you’ll learn how to add a simple Click to Call button to your OptinMonster campaign.
Before You Start
Here are some things to know before you begin:
- We recommend you include the full international dialing code with the number to ensure the call will be placed regardless of where the visitor is located (e.g. “+15555555555”).
- It can be helpful to display the phone number in the button text (e.g. “Call Us Now at +15555555555”). This provides your phone number for visitors who aren’t able to make calls from the device they are using, like desktop computers and tablets. It also provides transparency for visitors to know what the button will do when clicked.
Click to Call
To add a Click to Call button to your campaign, follow these steps:
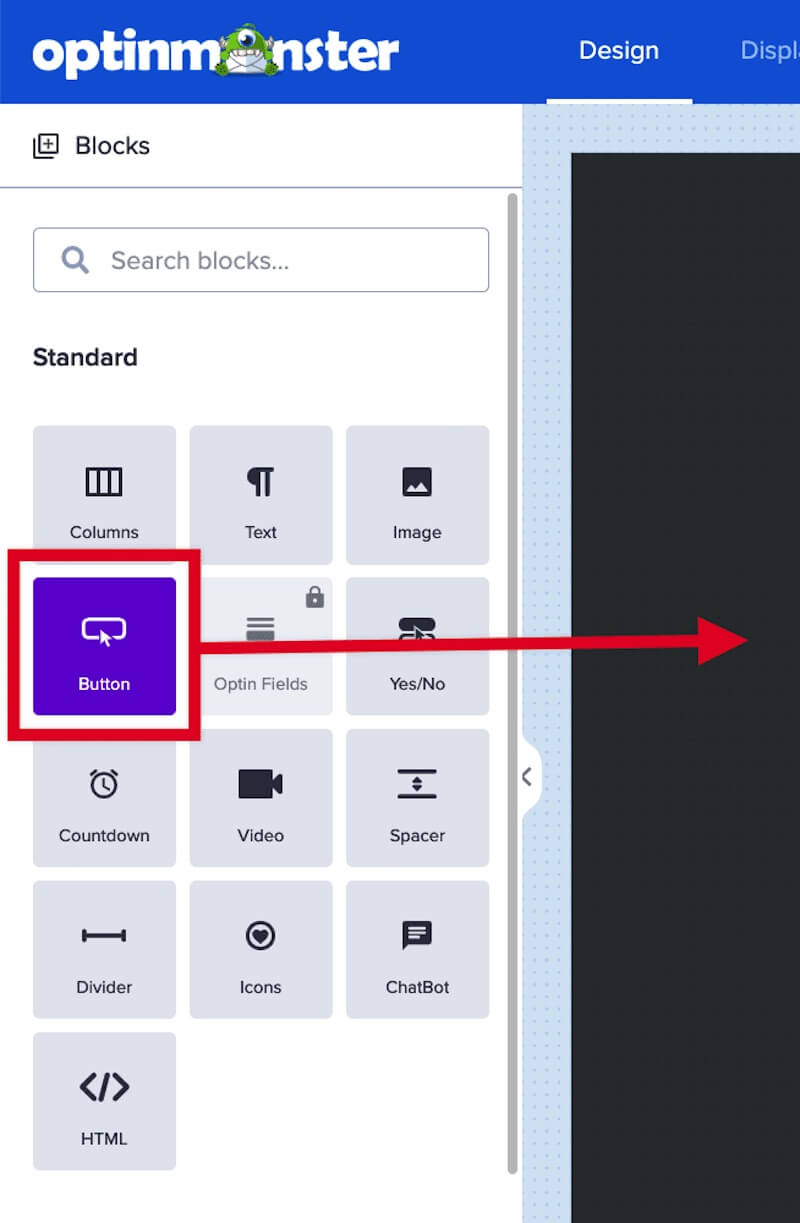
- In the campaign builder, drag and drop a Button block into your campaign where you want the Click to Call button to appear.
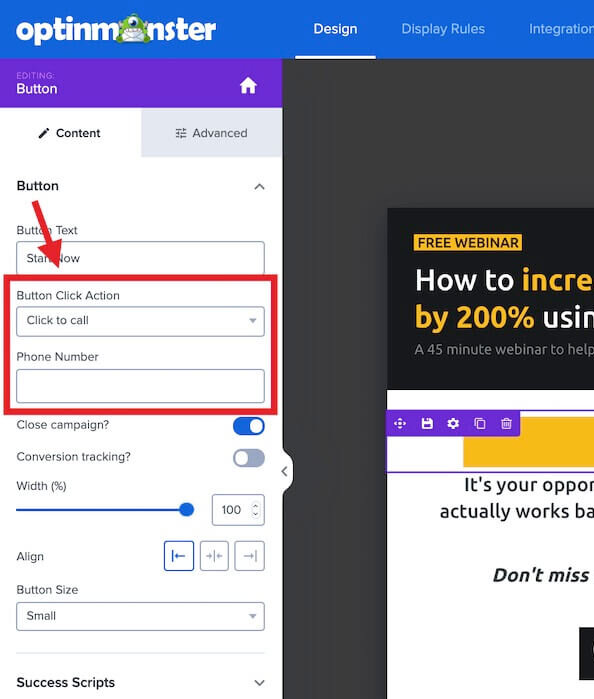
- In the sidebar configuration options for the button, choose Click to call from the Button Click Actions dropdown and a Phone Number field will appear.
- In the provided Phone Number field enter the telephone number with no spaces, dashes or other special characters (except a “+” to indicate the country code).
- When you’re finished, click Save.


