OptinMonster makes it easy to remove or adjust the padding and margin when customizing the appearance of your campaign.
In this article, you’ll learn how to remove the padding or margins from any element in your campaign.
Before You Start
Here are some things to know before you begin:
- Padding and margin can be adjusted or removed from any element, block, column, row, or campaign background. Each is edited in a similar way.
- Padding and margin are using to control the spacing around and within elements of the campaign.
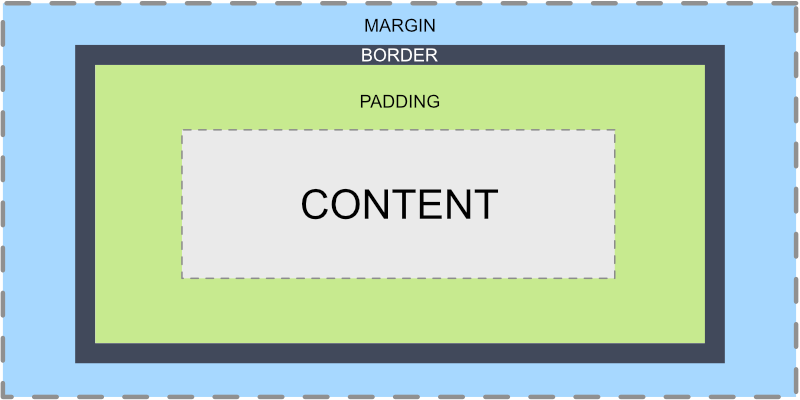
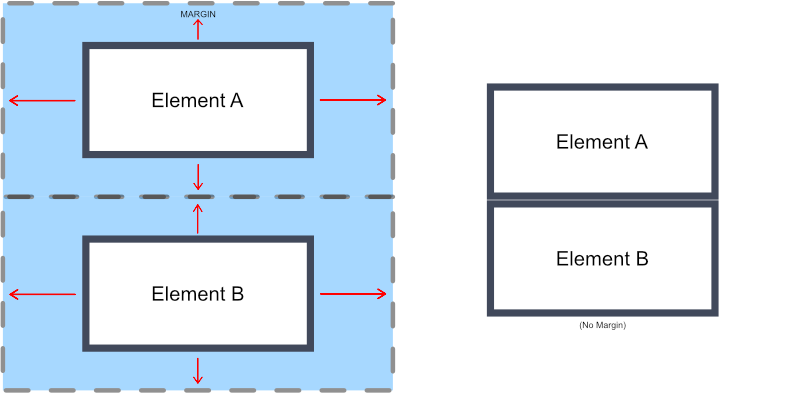
- Padding is inside of the border (or edge) of your element.
If you increase the padding, it will “push” your content into the middle of your box, away from your borders. If you remove the padding, your content will take up the entire box. - Margin is on the outside of the border of your element.
If you increase the margin, it will increase the space between this element and the ones next to it. If you remove your margin, there will be no extra space between your elements.
Element Spacing
To edit the spacing for individual block elements, follow these steps:
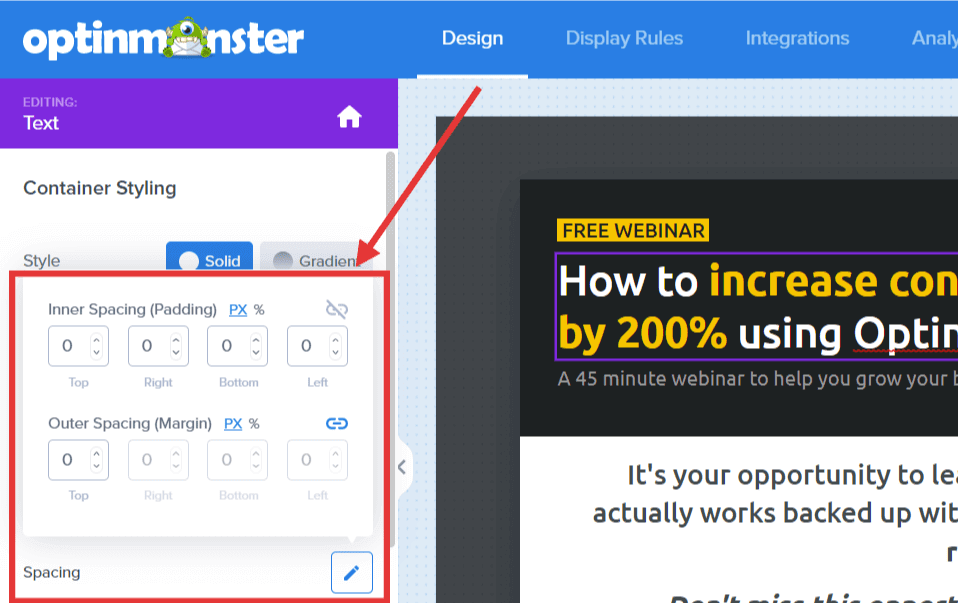
- From the Design view of the campaign builder click on the element you would like to edit then select the pencil icon for the Spacing option.
- Next, edit the Inner Spacing (Padding) and/or Outer Spacing (Margin) as desired.
- When you are finished, click Save.
Column or Row Spacing
To edit the spacing for columns or rows, follow these steps:
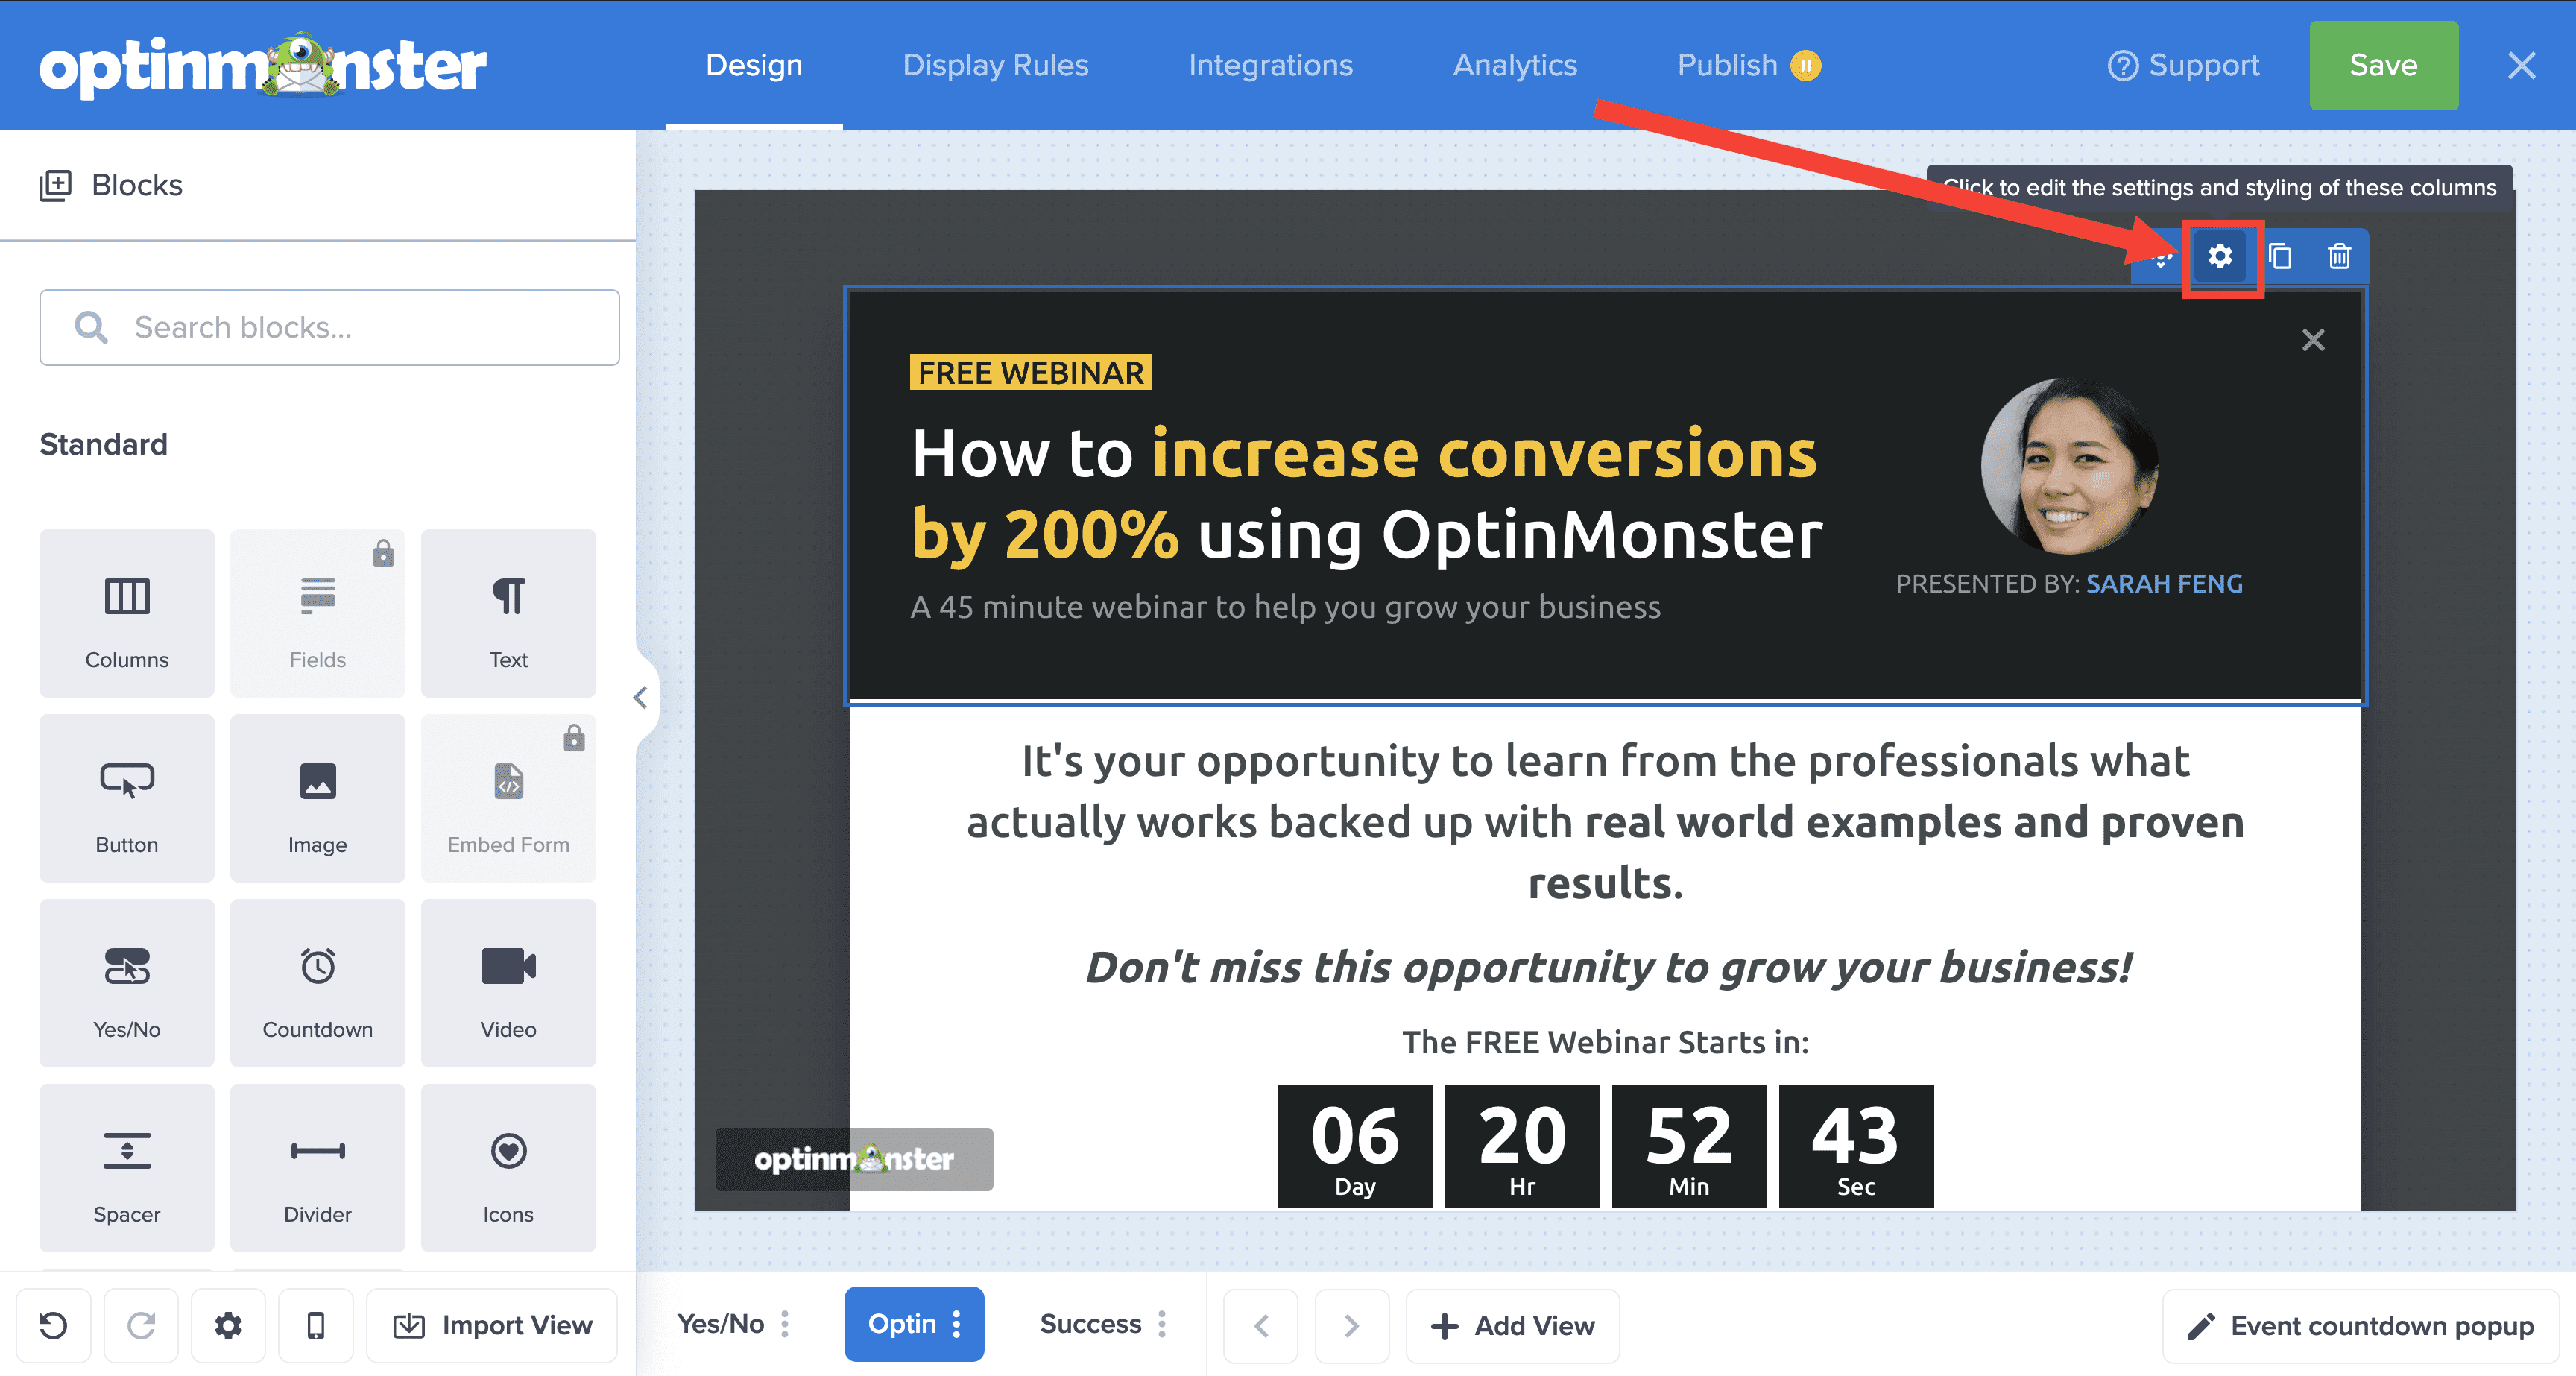
- In the Design View of the builder, hover over the column or row you would like to edit and select the gear icon.
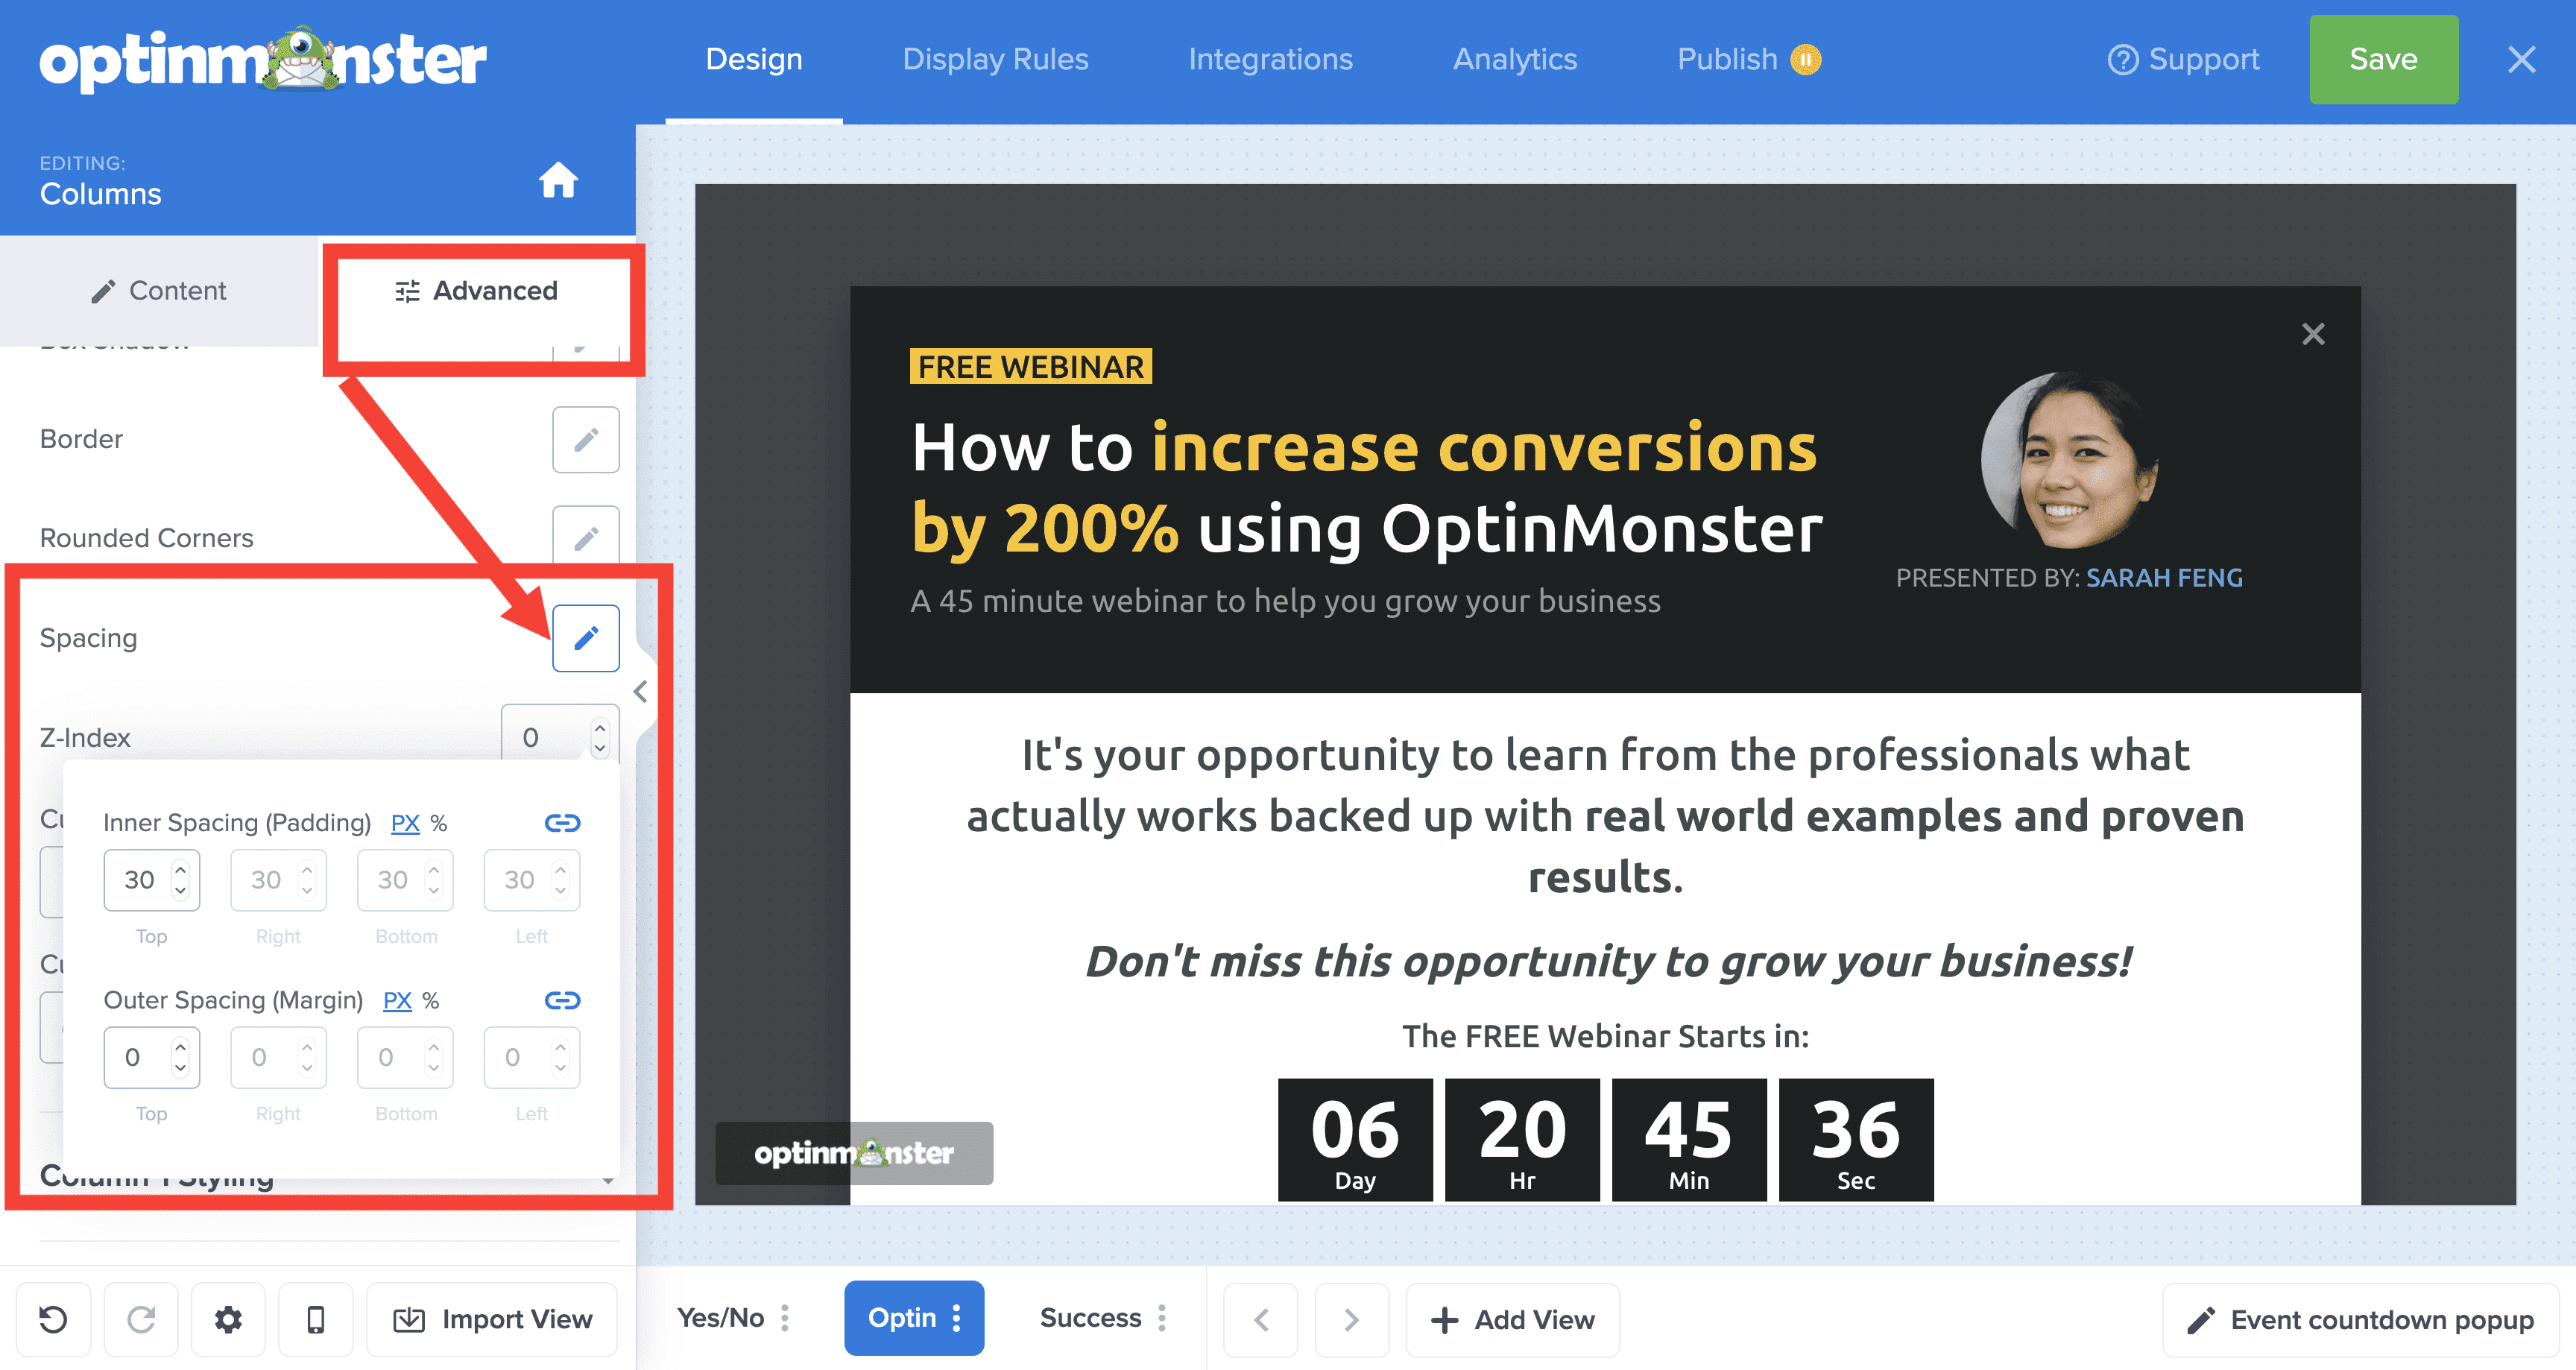
- Within the Advanced tab select the pencil icon for the Spacing option and adjust the Inner Spacing (Padding) and/or Outer Spacing (Margin) as desired.
- When you are finished, click Save.
Campaign Container Spacing
You can also apply Outer Spacing (Padding) to the main campaign container. This is what gives your campaign space around the edges, or removing the padding allows you to have your content completely fill the campaign.
To edit the spacing for your campaign container, follow these steps:
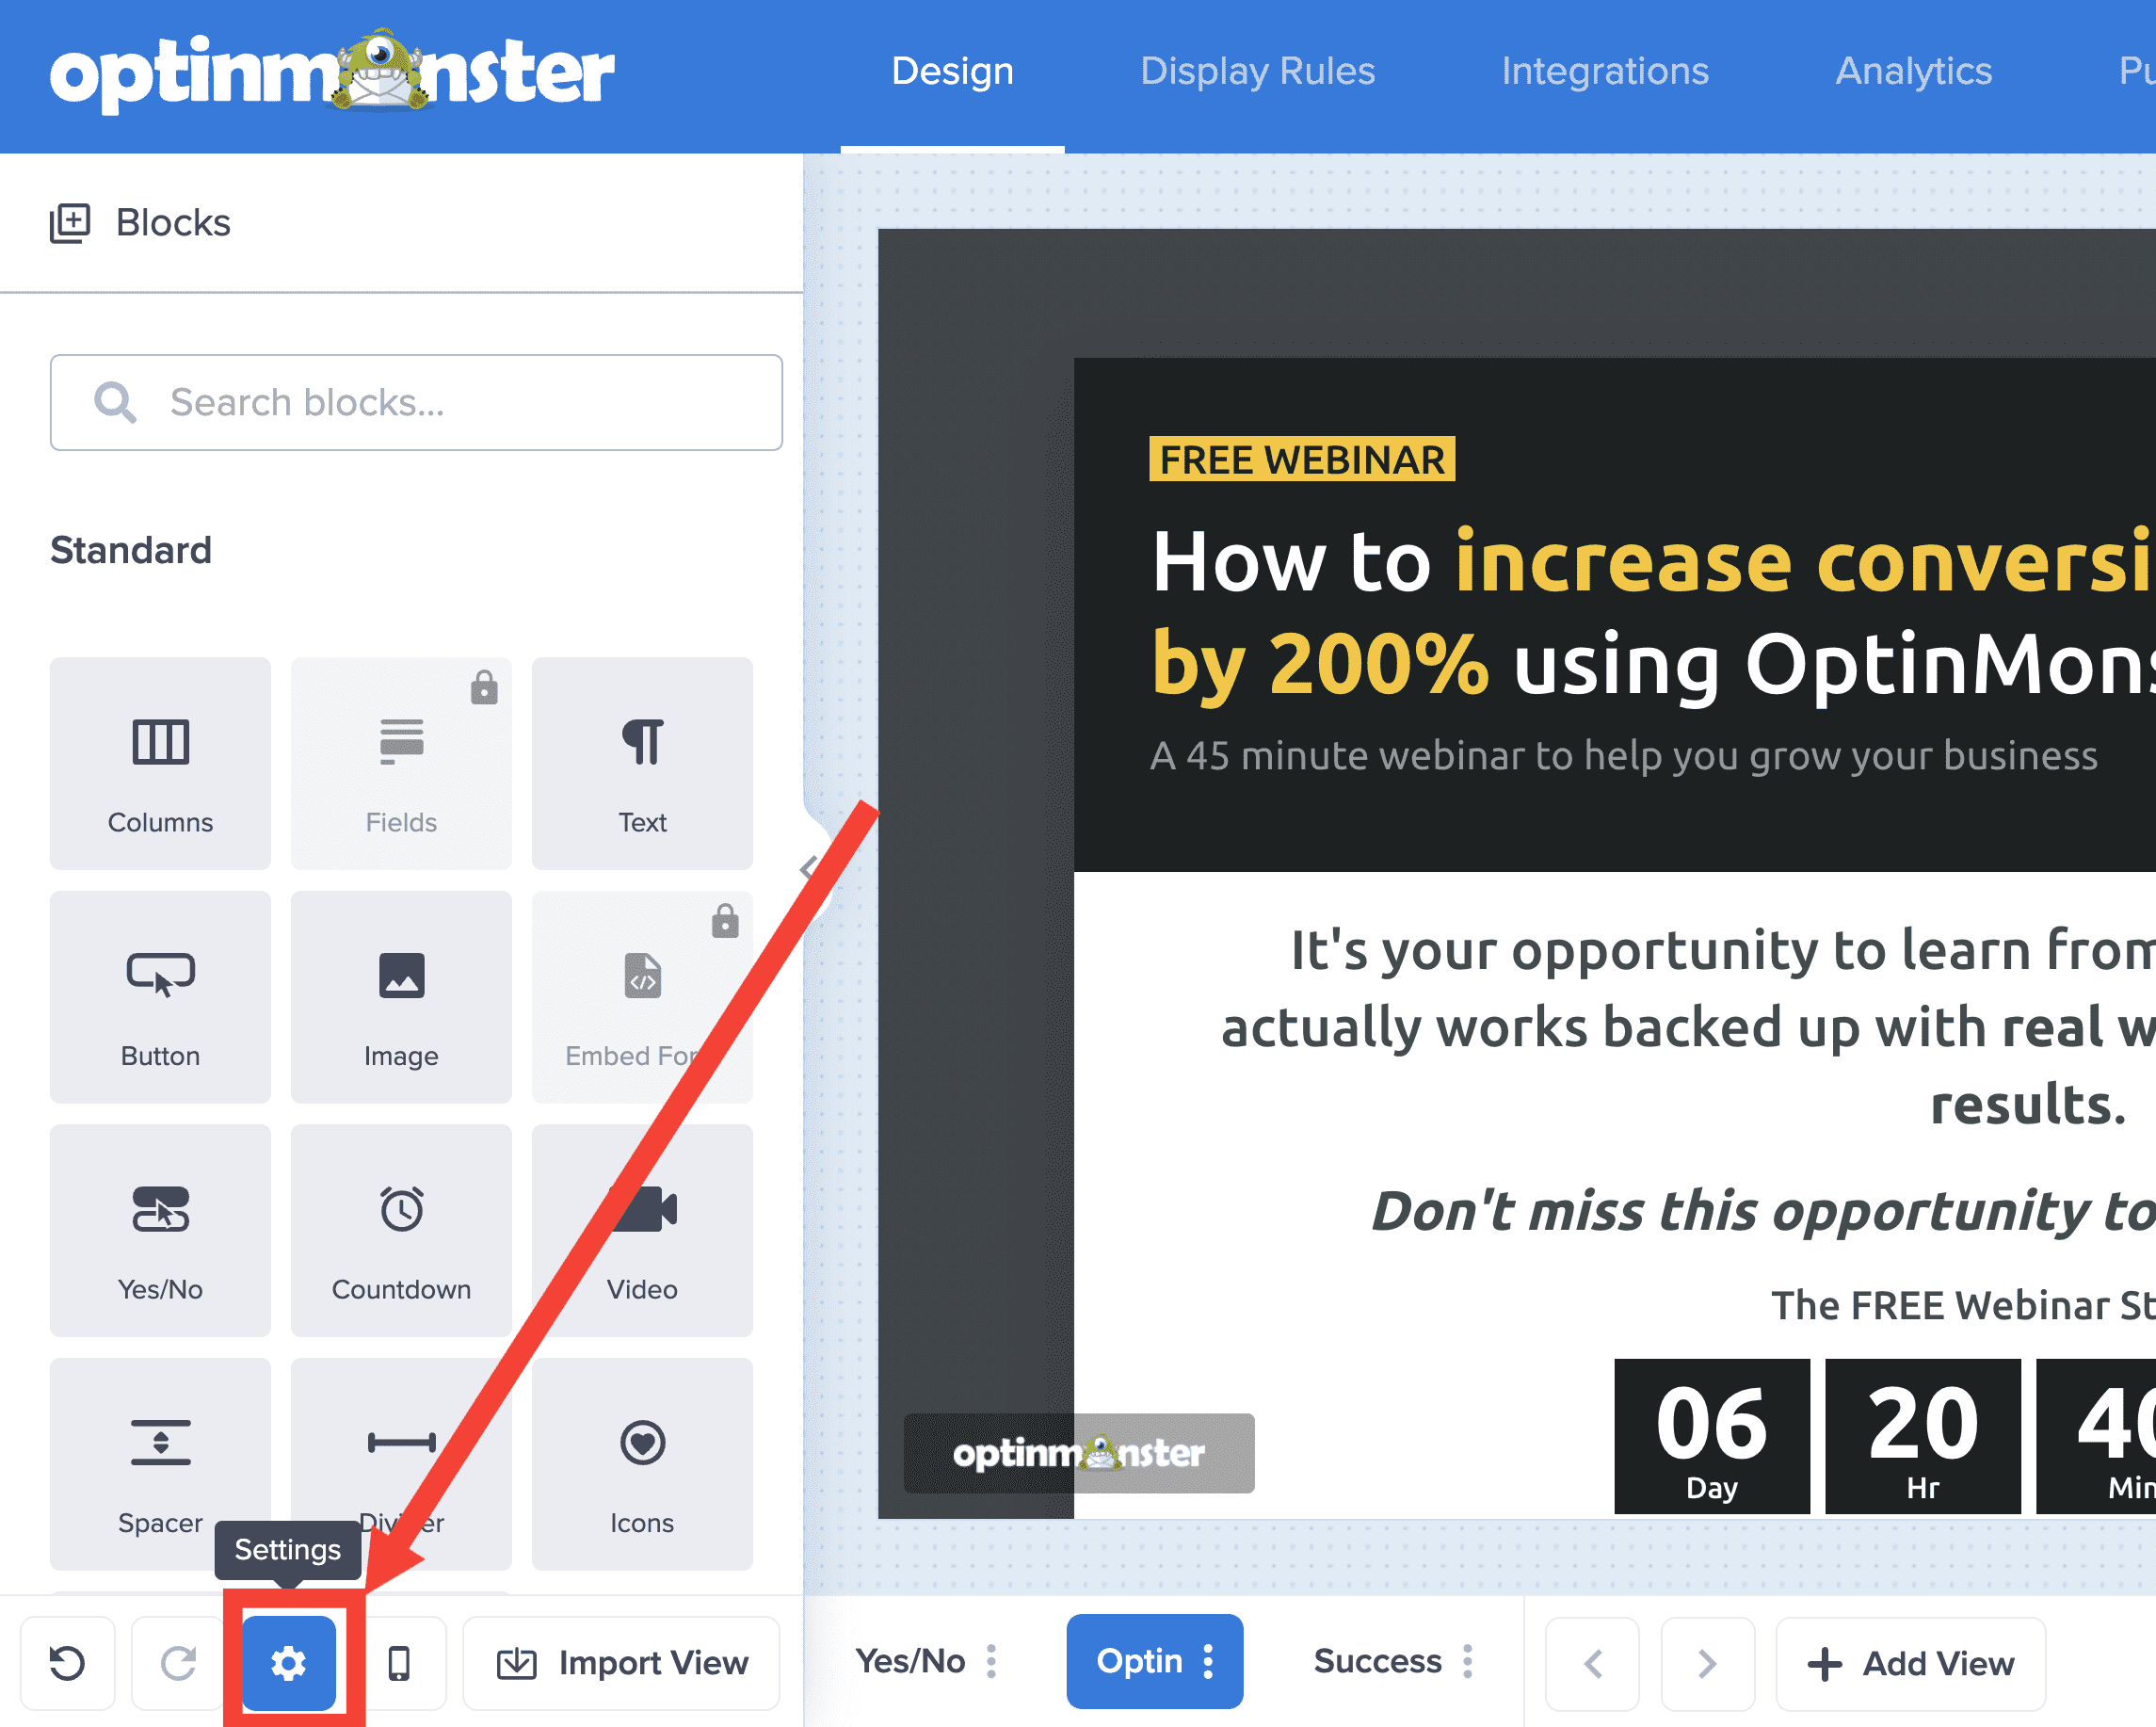
- In the Design view of the campaign builder, select the Settings icon.
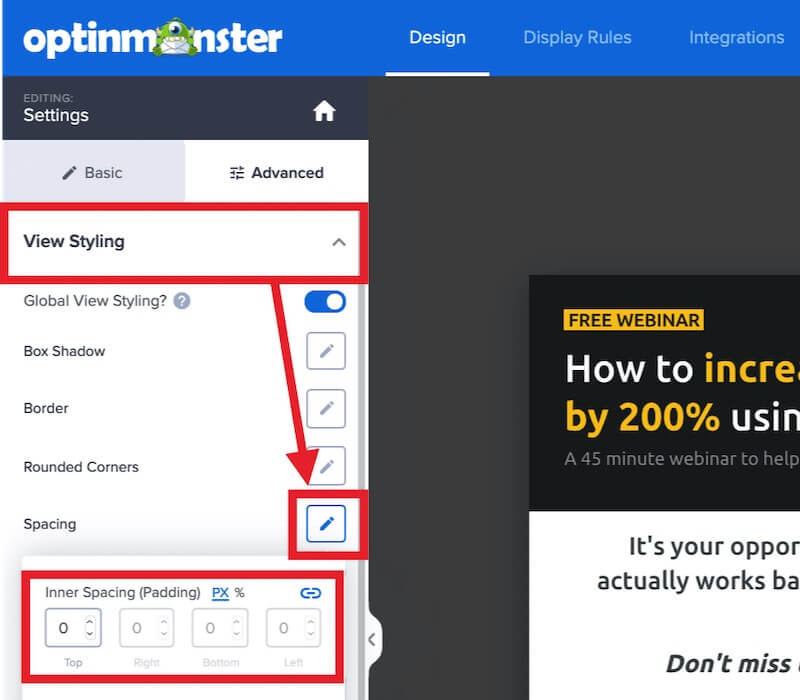
- Within the Advanced tab expand the View Styling option and select the pencil icon for the Spacing setting and edit the Inner Spacing (Padding) as desired.
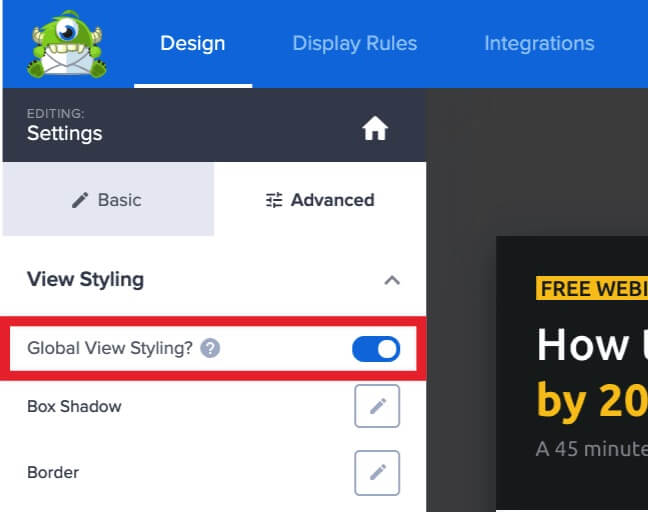
- (Optional) You can choose to apply the styling to all views (Yes/No, Optin, Success) by toggling the Global View Styling? option from the same section.
- When you are finished, click Save.


