OptinMonster makes it easy to archive campaigns for use at a later date, or delete campaigns altogether when you are done using them.
In this article, you’ll learn how to archive or delete a campaign.
Before You Start
Here are some things to know before you begin:
- Archiving a campaign will keep your campaign and its conversion data intact, and move it to a separate Archives folder in your Campaign Dashboard. The campaign will stay there until you choose to restore or delete it.
- Deleting a campaign will send your campaign and its conversion data to a separate Trash folder, which is accessible from your Campaign Dashboard. The campaign will be permanently deleted from your account after 90-days, and will no longer be accessible.
- Looking for information on how to Archive your OptinMonster account (not a particular campaign)? See this guide.
Archive Campaign
Archiving a campaign is useful for when you would like to file a campaign away to use or reference later. After seasonal marketing (like Black Friday) is complete, you can archive your campaigns so that they are saved, but without them cluttering your main campaign dashboard during the rest of the year.
To archive a campaign, follow these steps:
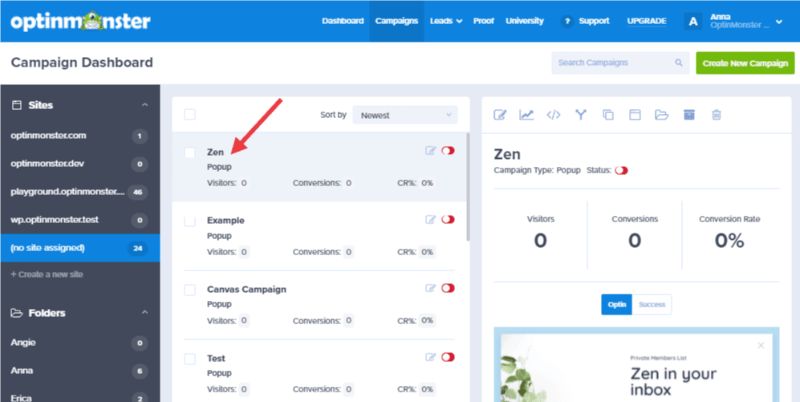
- From the Campaign Dashboard select the campaign you would like to archive in the center column.
- Next, from the right column select the Archive icon.
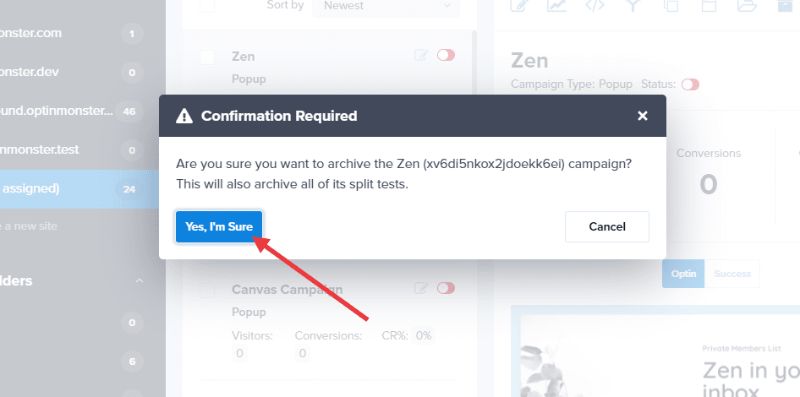
- A popup window will appear to confirm the action. Select the Yes, I’m Sure button to archive the campaign.
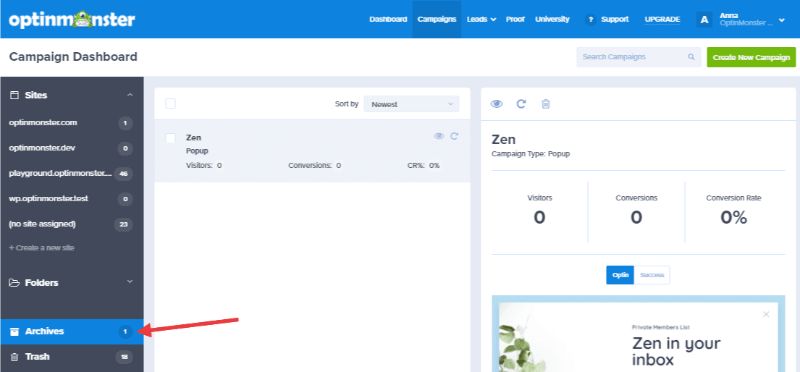
- The campaign is now moved to the Archives folder in the left-most column.
Bulk Archive Campaigns
If you’d like to archive more than one campaign at a time, you can follow these steps:
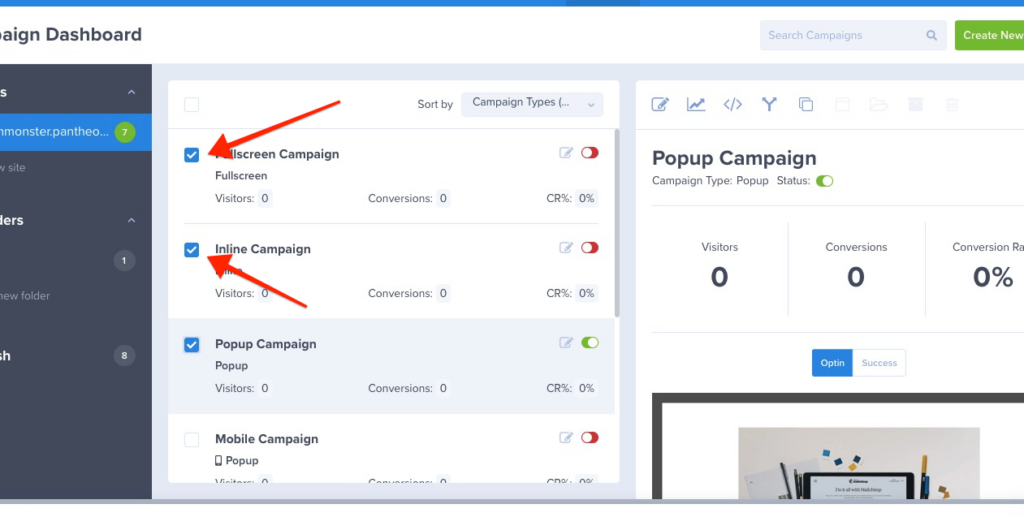
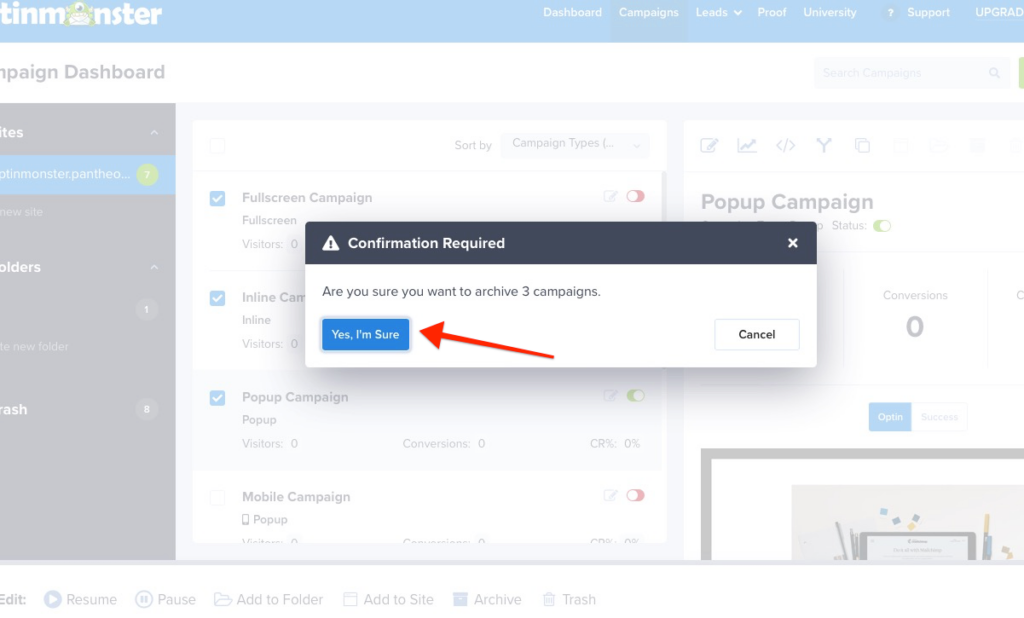
- From the Campaign Dashboard, select the campaigns you would like to archive by clicking multiple checkboxes:
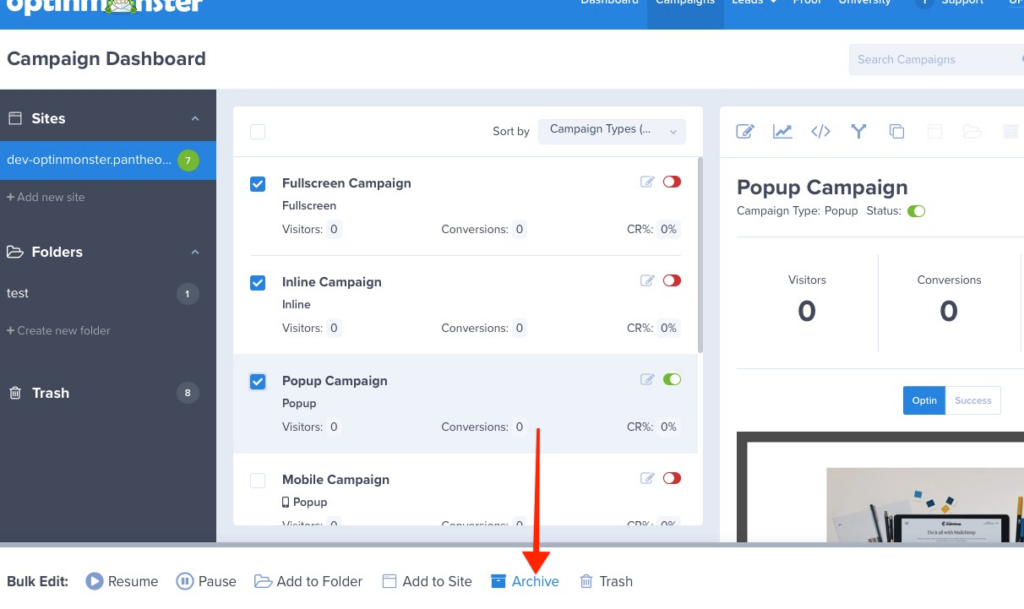
- Next, you’ll see a panel at the bottom of the screen, click on Archive
- A popup window will appear to confirm the action. Select the Yes, I’m Sure button to archive the campaign.
- The campaign is now moved to the Archives folder in the left-most column.
Restore Archived Campaign
Any archived campaign can be restored to use again.
To restore an archived campaign, follow these steps:
- From the Campaign Dashboard select the Archives folder in the left column.
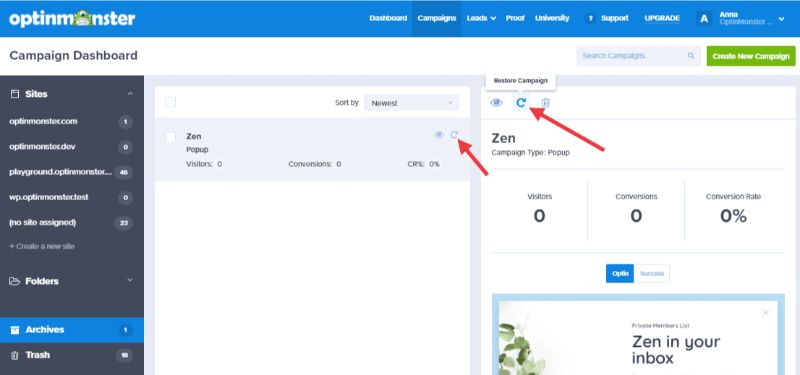
- Next, click the Restore icon for the campaign you would like to take out of the archive for use.
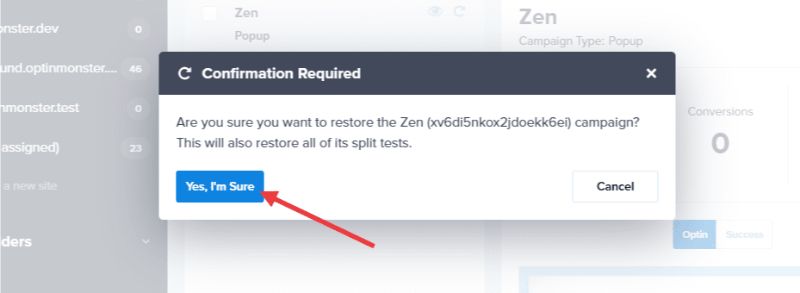
- A popup window will appear to confirm the action. Select the Yes, I’m Sure button to restore the campaign.
- The campaign is now moved back to the campaign dashboard under the website(s) it was previously assigned to.
Delete Campaign
When you no longer need a campaign you can delete it and the associated data from your account. When a campaign is moved to the Trash folder, it will stay there for 90-days before it is permanently deleted. This is similar to the “Recycle Bin” on your computer.
Once the campaign is fully deleted following the 90-day period, it cannot be restored or recovered.
To delete a campaign, follow these steps:
- From the Campaign Dashboard select the campaign you would like to delete in the center column.
- At the top of the right column, click the Trash icon.
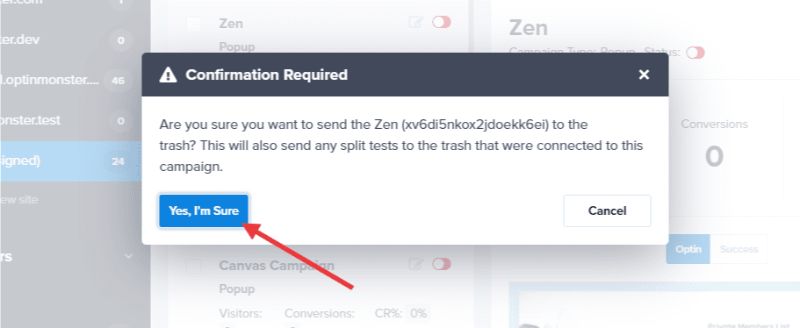
- A popup window will appear to confirm the action. Click “Yes, I’m Sure” to delete the campaign.
- The campaign is now moved to the Trash folder.
Bulk Delete Campaigns
Multiple campaigns can be deleted by following these steps:
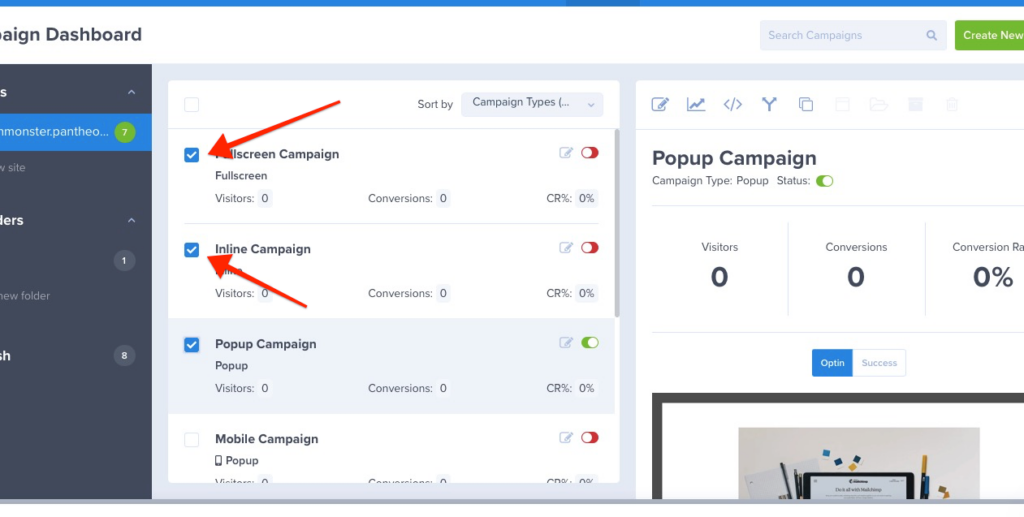
- From the Campaign Dashboard, select the campaigns you would like to delete by using checkboxes.
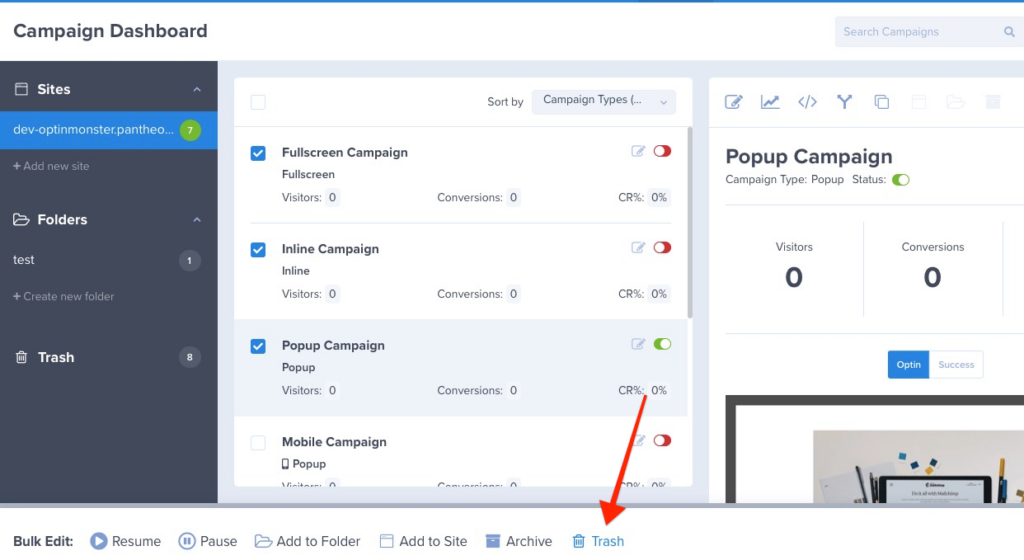
- Next, you’ll see a panel at the bottom of the screen, click on Trash
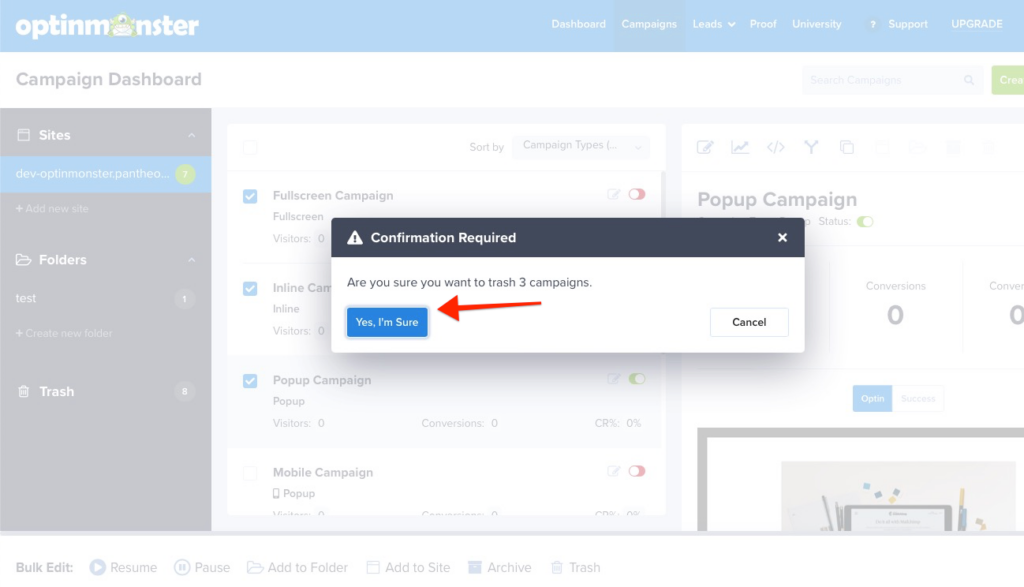
- A popup window will appear to confirm the action. Click “Yes, I’m Sure” to delete the campaign.
- The campaigns are now moved to the Trash folder.
Restore Deleted Campaign
If you have accidentally sent a campaign to the Trash folder it can be restored anytime within 90-days.
To restore a deleted campaign, follow these steps:
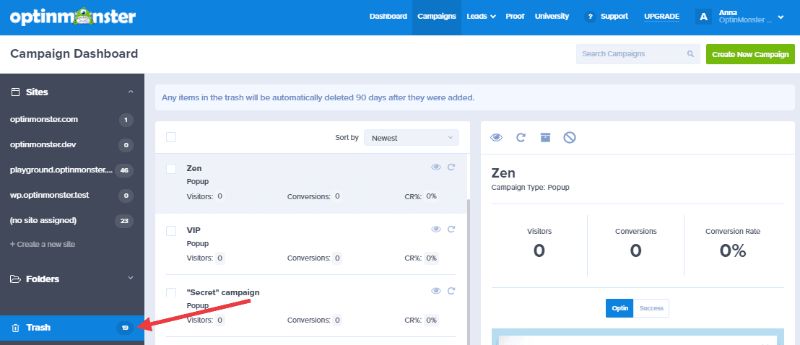
- From the Campaign Dashboard select the Trash folder in the left column.
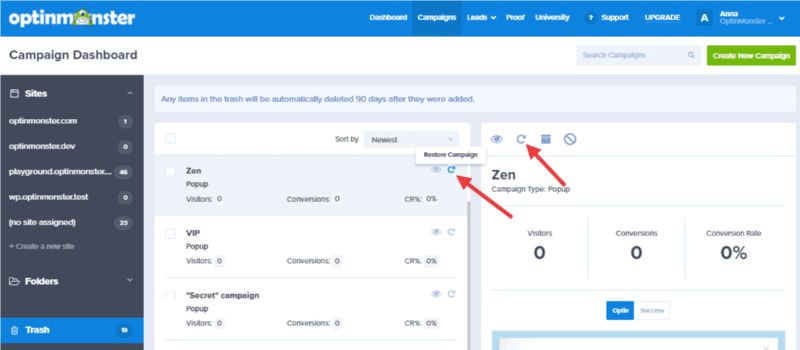
- Next, click the Restore icon for your campaign.
- A popup window will appear to confirm the action. Select the Yes, I’m Sure button to restore the campaign.
- The campaign is now moved back to the campaign dashboard under the website(s) it was previously assigned to.
Archive Deleted Campaign
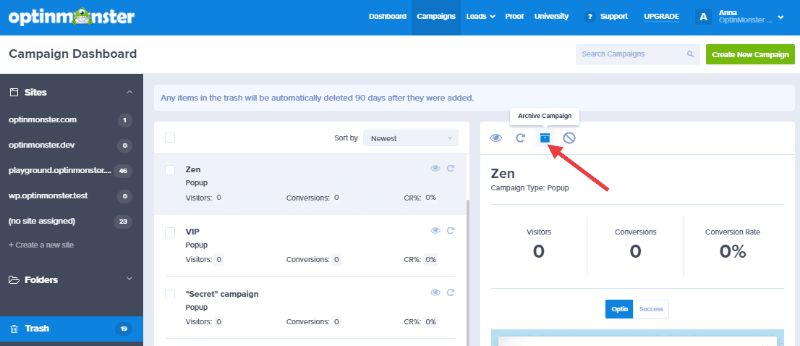
To move a campaign from the Trash folder to your Archives folder (where it will not be automatically deleted after 90-days), follow these steps:
- From the Trash folder select the Archive Campaign icon above your campaign.
- A popup window will appear to confirm the action. Select the Yes, I’m Sure button to archive the campaign.
- The campaign is now moved to the Archives folder.
FAQs
Will the campaign show on my site while it is archived or deleted?
No. When a campaign is archived or deleted it will automatically be paused and removed from the site that it was assigned to.
When a campaign is restored, it will return to its assigned site in the Campaign Dashboard but will remain paused until you manually publish it.
I don’t see the Archives or Trash folders on my dashboard. Where are they?
The Archives and Trash folders will only show if they have campaigns in them. If there are no deleted or archived campaigns the folders will be hidden.
When there are campaigns in the Archives or Trash folders they will appear at the bottom of the left column in the Campaign Dashboard; below all connected sites and user-created folders.

