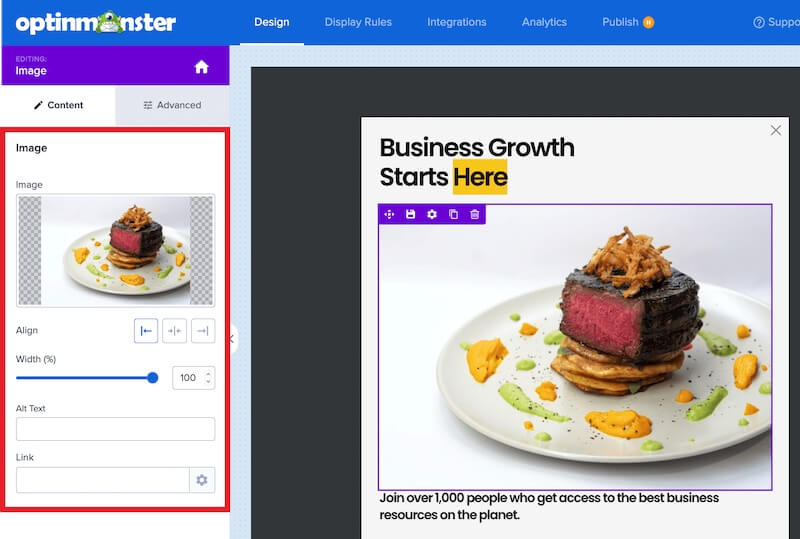
OptinMonster makes it easy to customize the design of your campaign, including the option to add an image to your campaign.
In this article, you’ll learn how to add an image to any OptinMonster campaign.
Before You Start
Here are some things to know before you begin:
- You can upload your own images to OptinMonster, or use our Unsplash stock image feature.
- When adding your own images:
- they are automatically optimized for the web when uploaded to OptinMonster; and
- we recommend you resize the image to the same dimensions it will appear within your campaign’s unique design before uploading to OptinMonster. Because your campaign can be fully customized there are no default image size recommendations; and
- if you are optimizing your campaigns for Retina displays the image dimensions should be twice the display dimensions. For example, if the image will be displayed at 100 x 100 pixels, the image file size dimensions should be 200 x 200 pixels.
Add Image Block
Some campaign templates already include an image block, but one (or more) can be added to any template, anywhere you like.
To add a new image block to a campaign, follow these steps:
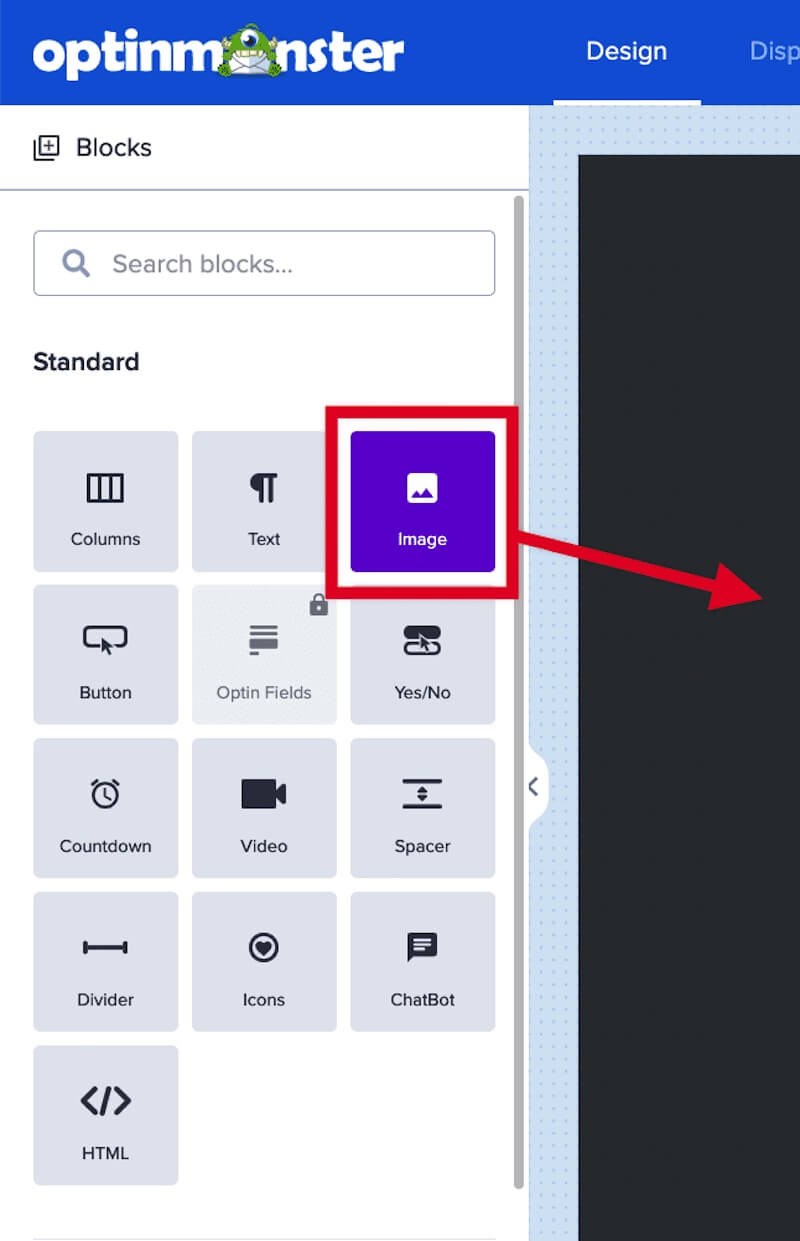
- From the Design view of the campaign builder drag and drop an Image block into your campaign design where you would like it to appear.
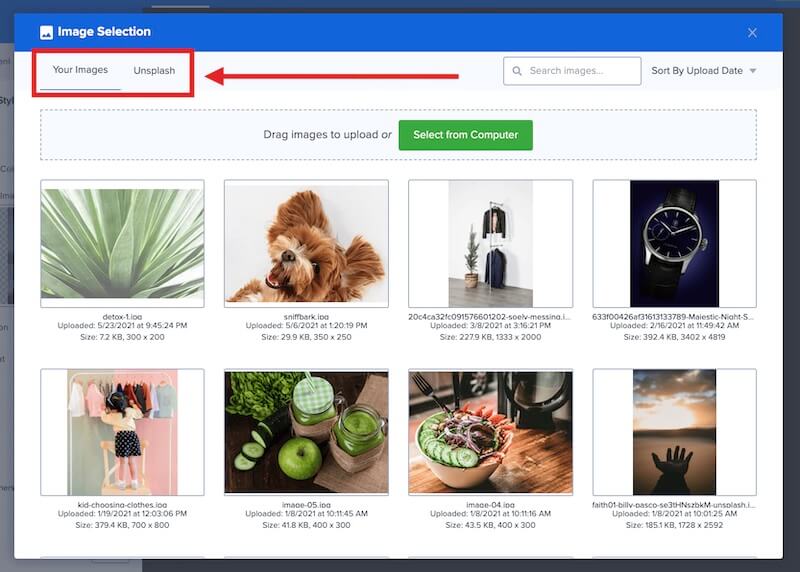
- The Image Selection window will open where you can upload or select from Your Images, or add an Unsplash stock image.
- To add your own image, proceed to the next section below.
- To add an Unsplash stock image follow this guide.
Add Your Own Image
To add your own image to the campaign, follow these steps:
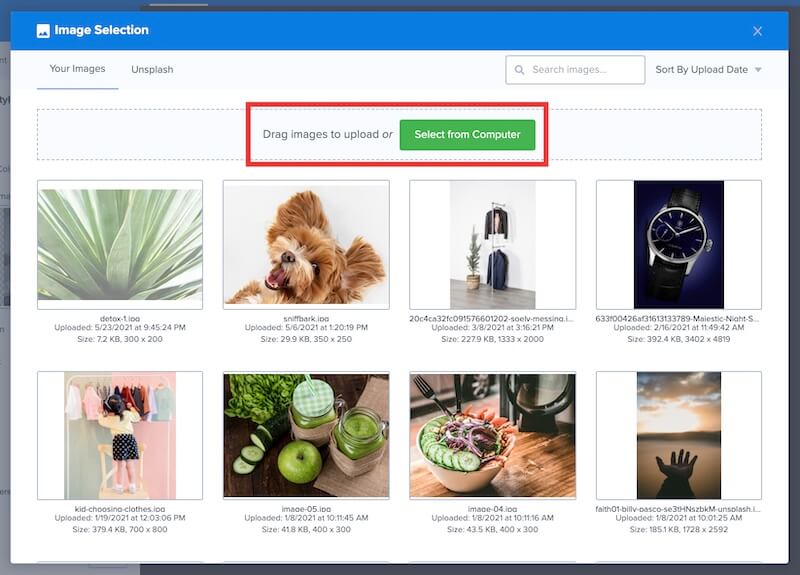
- From the Image Selection window reached in the last section, to add your own image you can upload from your computer, or select a previously uploaded image. To upload a new image click on the Select from Computer button.
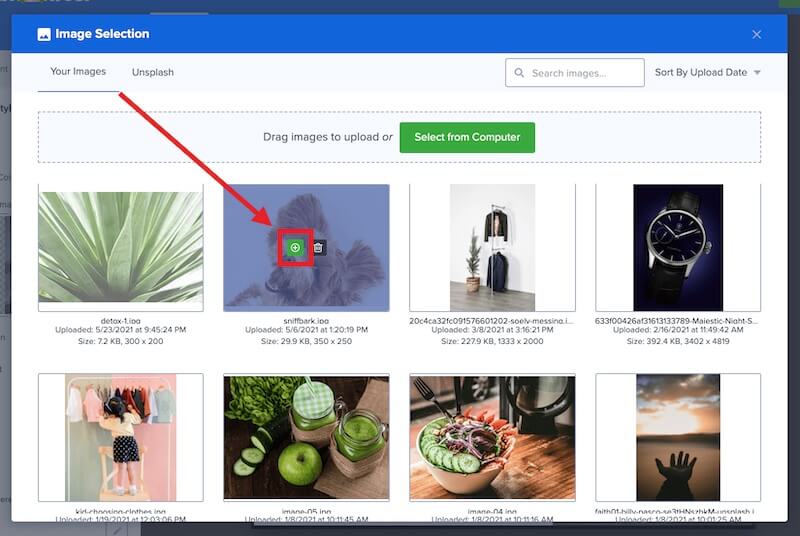
- Or, select a previously uploaded image by hovering over the image and selecting the green (+) icon.
- You can now configure any design settings for your image block in the sidebar panel.
- When you are finished, Save the campaign.
Replace Image
To replace the image in an existing image block, follow these steps:
- From the Design view of the campaign builder, directly select the image block you would like to edit.
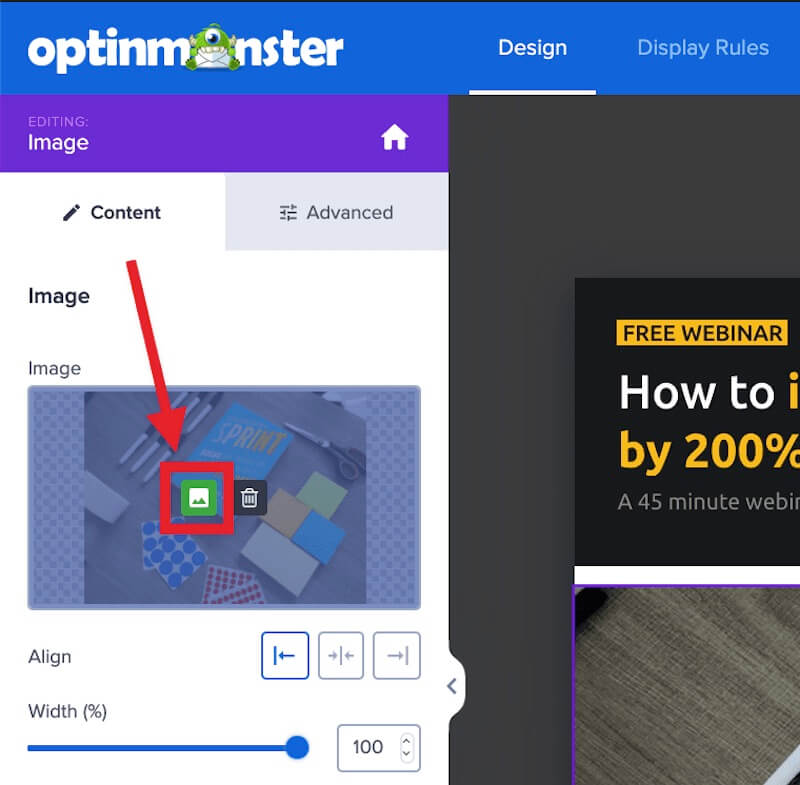
- Next, select the image icon from the sidebar panel.
- The Image Selection window will open where you can add your own image or an Unsplash stock image.
- When you are finished, Save the campaign.
Image Link
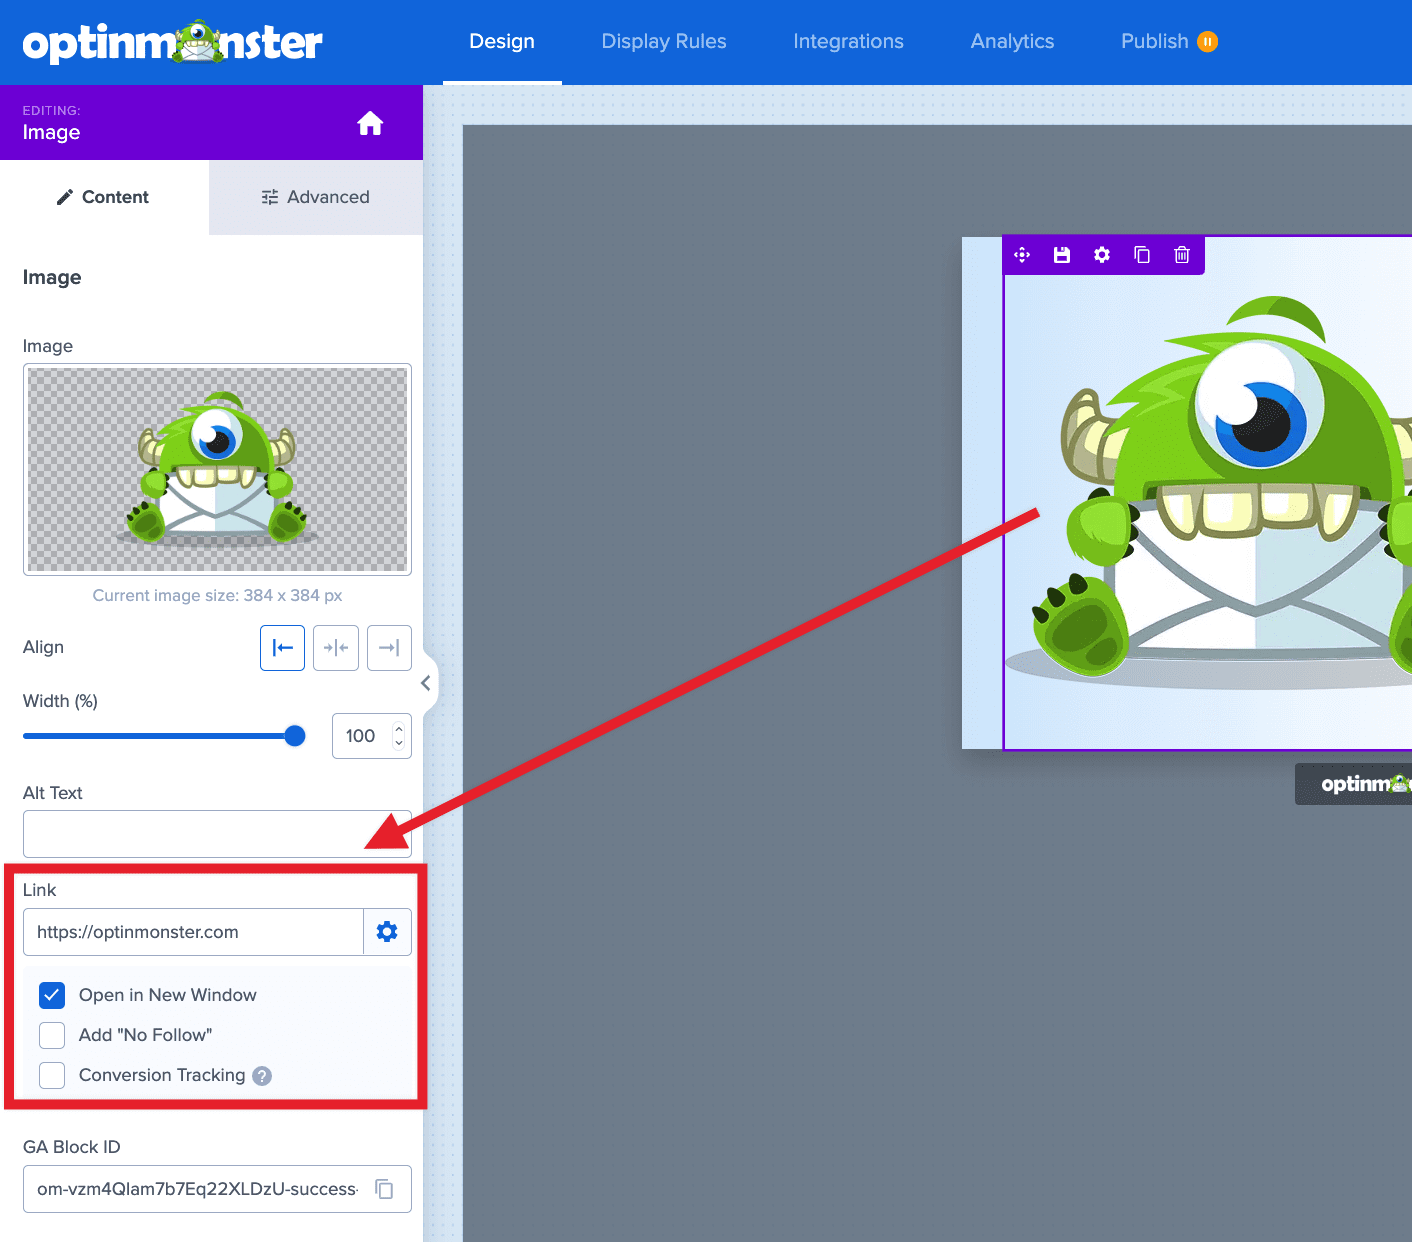
To make your image block a clickable link, follow these steps:
- From the Design view of the campaign builder, directly select the image block you would like to edit.
- Next, in the sidebar panel locate the Link field and add your URL.
- When you are finished, Save the campaign.
Image Block Styling
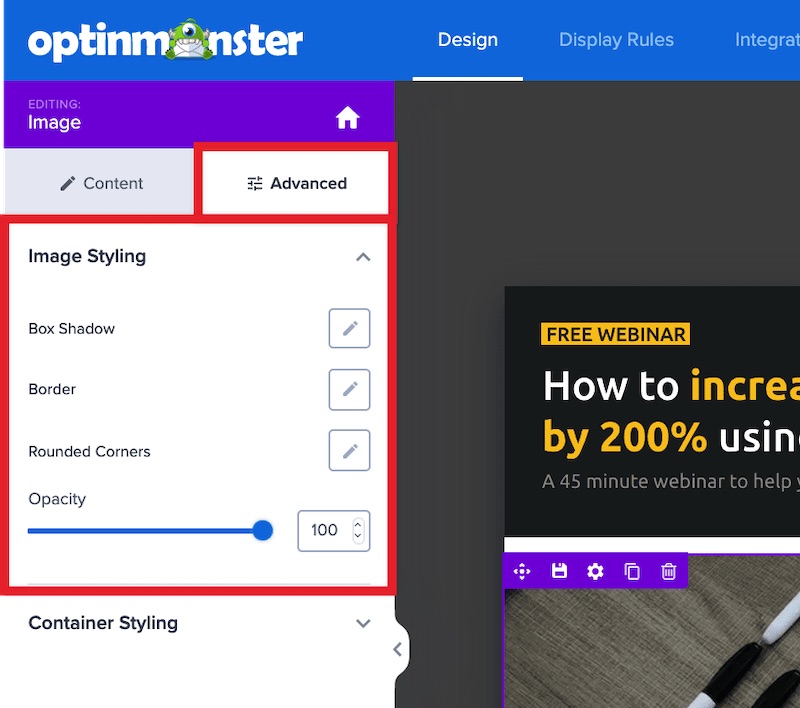
When editing your image block, select the Advanced tab for additional style options.
FAQs
Can I save an image block once I customize it to re-use it later on?
Yes! Learn how to create and use saved blocks.
What image size should I use for my campaign?
Because your campaign can be fully customized in appearance and layout, we do not have specific image dimension recommendations. The exact dimensions will depend on your own campaign design.
To give some context that may be helpful – our campaign templates are generally between 550-750px wide, and the height is based on what content you put inside. For any images you create, you might create them to match that width if you would like them to show across the full width, or if you want to be extra sure they will appear crisp on retina devices, you can double the dimensions.
If your campaign is 600px wide, you would create an image that is 1200px wide for retina devices.
Our mobile templates are usually between 300-400px wide, to fit and look the best on smaller mobile screens.
You can also customize the width of your campaigns, which can impact how the image(s) within are displayed.
How do I find good images for my campaigns?
You can easily add Unsplash stock images to your campaigns, or see our post on places to find images for better conversions.
Troubleshooting
My images on Retina devices are blurry, why?
To ensure your images look sharp on retina displays, double the dimensions of the image before uploading to OptinMonster.
For example, if your image will be displayed with the dimensions 300 x 300px the actual image file dimensions should be 600 x 600px to appear crisp on Retina devices.

