
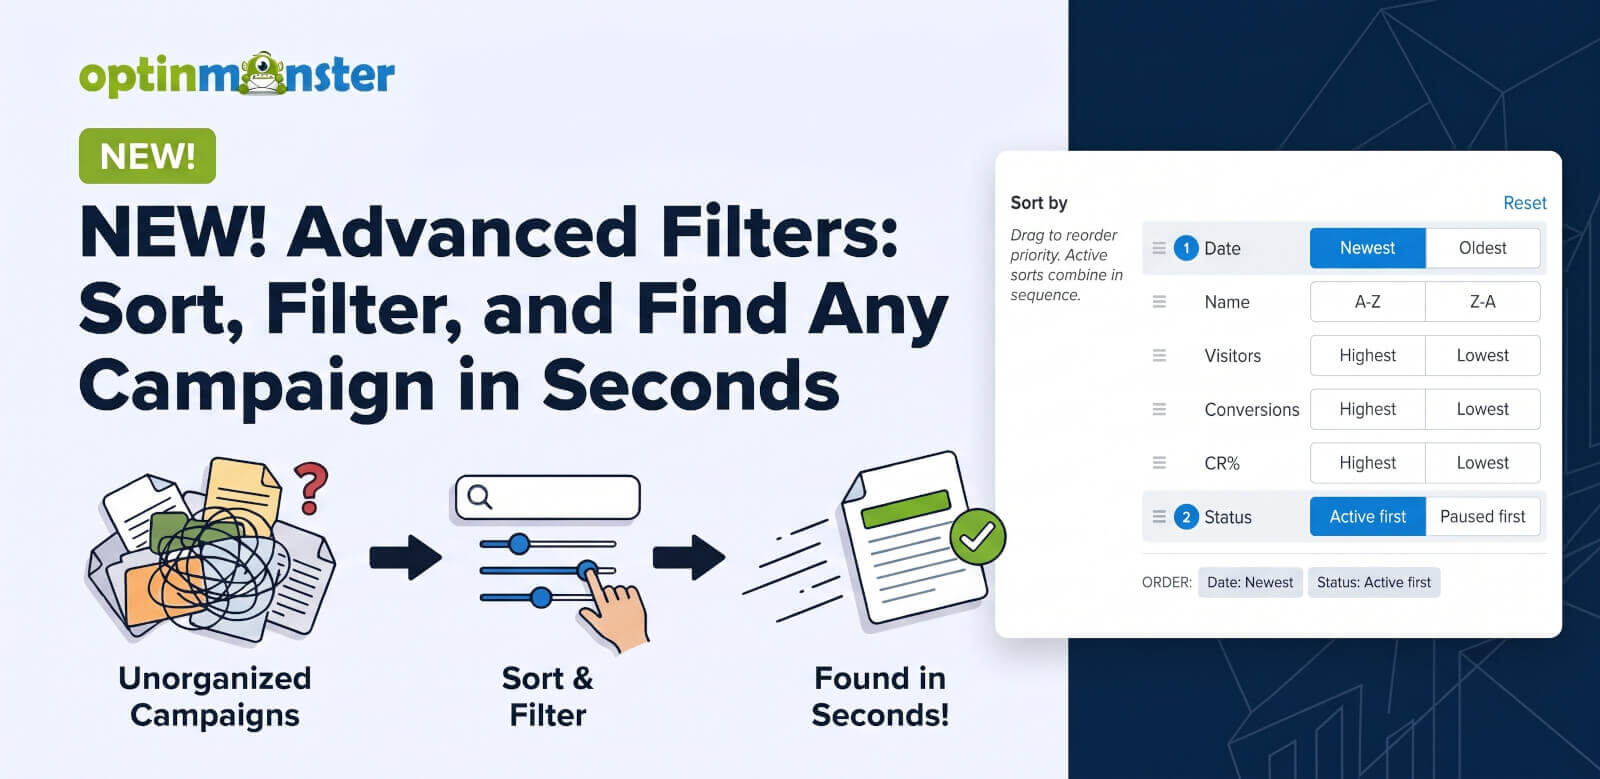
Are you tired of scrolling through your whole dashboard just to find one campaign?
We’ve heard this from agencies a lot, and from anyone whose account runs to dozens of campaigns across several websites and folders. You know exactly which campaign you want to open, but the list still makes you search for it.
The old filter only let you sort by one thing at a time. You couldn’t combine it with a second filter, and you couldn’t put one sorting option ahead of another. So, if you only wanted to see your Popups, you still had to scroll past every Floating Bar to reach them.
That changes now.
We’ve launched Advanced Filters, available now on all plans. You can now find every filter and sort option on your Campaign Dashboard in one panel and sort them in the order you choose.
And you can now favorite templates. Heart the ones you build from most in the template library, and they’ll be just one click away the next time you need them.
What Are Advanced Filters?
Advanced Filters is the new panel that controls which campaigns appear on your OptinMonster campaign dashboard, and in what order.
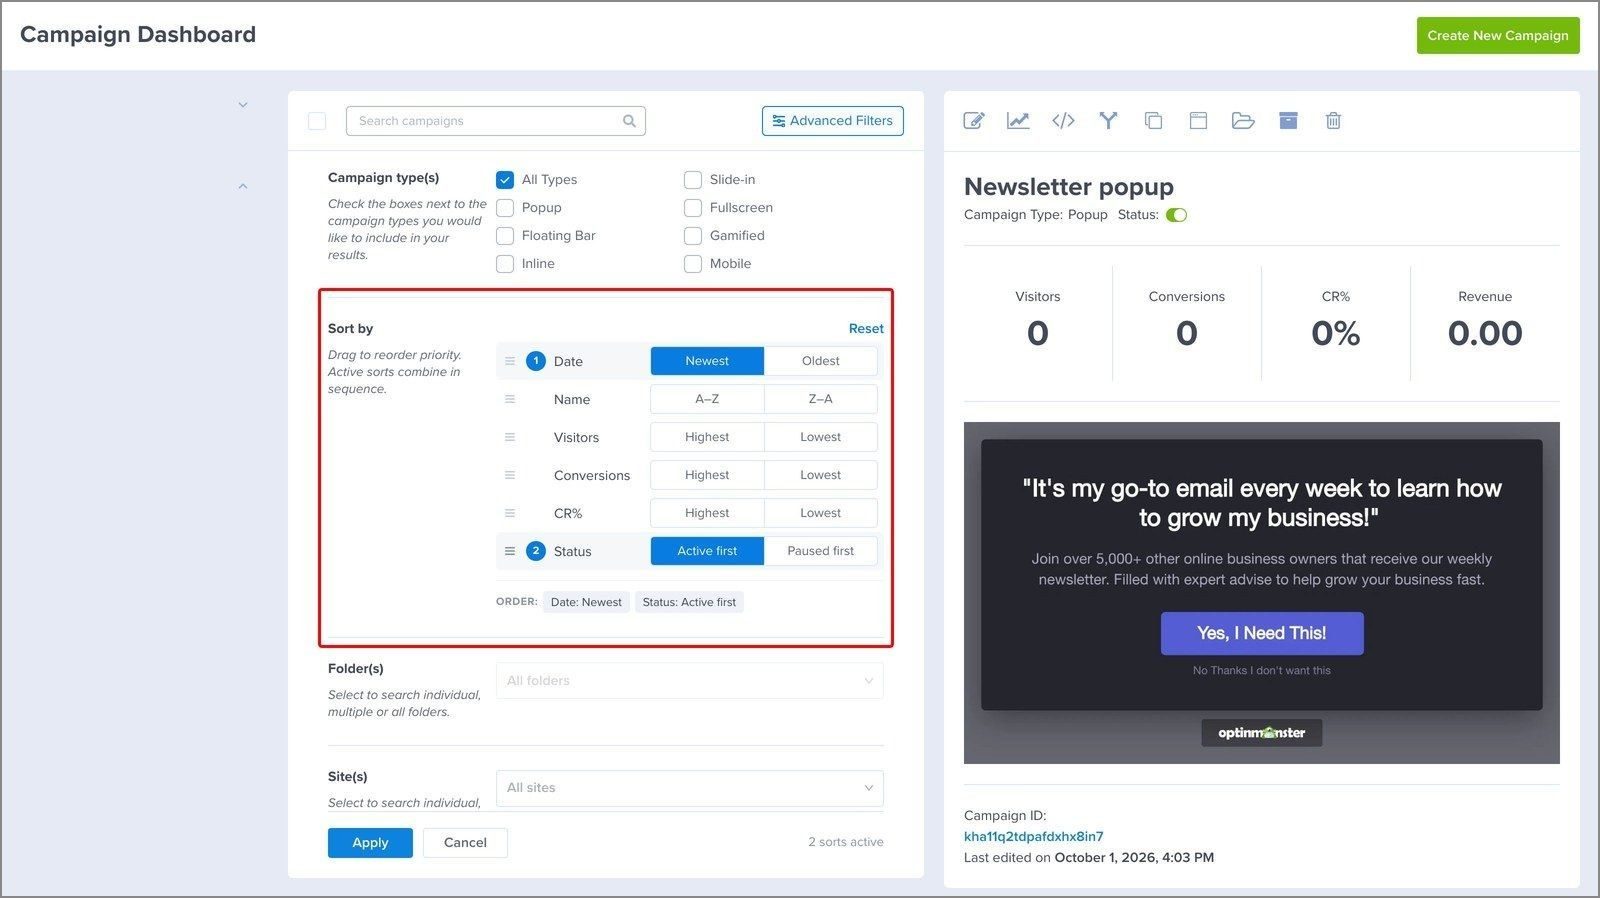
You’ll find it by clicking on the Advanced Filters button above your campaign list. Every filter and sort option opens together in one place.
Set the list up the way you’d rank it yourself, then select Apply, and your campaign list will update to match.
Sort in the Order You Choose
You can now sort your list by more than one thing at once.
There are 6 options:
- Date (Newest or Oldest)
- Name (A to Z or Z to A)
- Visitors
- Conversions
- CR% (Highest or Lowest)
- Status (Active first or Paused first)
Sorting options stack. The first one you turn on groups your campaigns and the second ranks them inside each group, so you decide what matters most and what comes second.
For example, let’s say you want your live campaigns at the top, ranked by how many conversions each one is getting. Set Status to Active first, then Conversions to Highest.
Your active campaigns will sit at the top in order of results, with the paused ones underneath in the same order. So, the campaigns that matter most are the first ones you see.
Changed your mind? Select Reset and the list will go back to its default order.
Filter by Campaign Type, Website, or Folder
Advanced Filters also narrow the list to only the campaigns you’re working on. If you run campaigns for more than one client, then this is the part we built for you.
Simply select a client’s website or folder in the sidebar and the settings panel starts there, so every filter you add applies to that client alone, never across all of them.
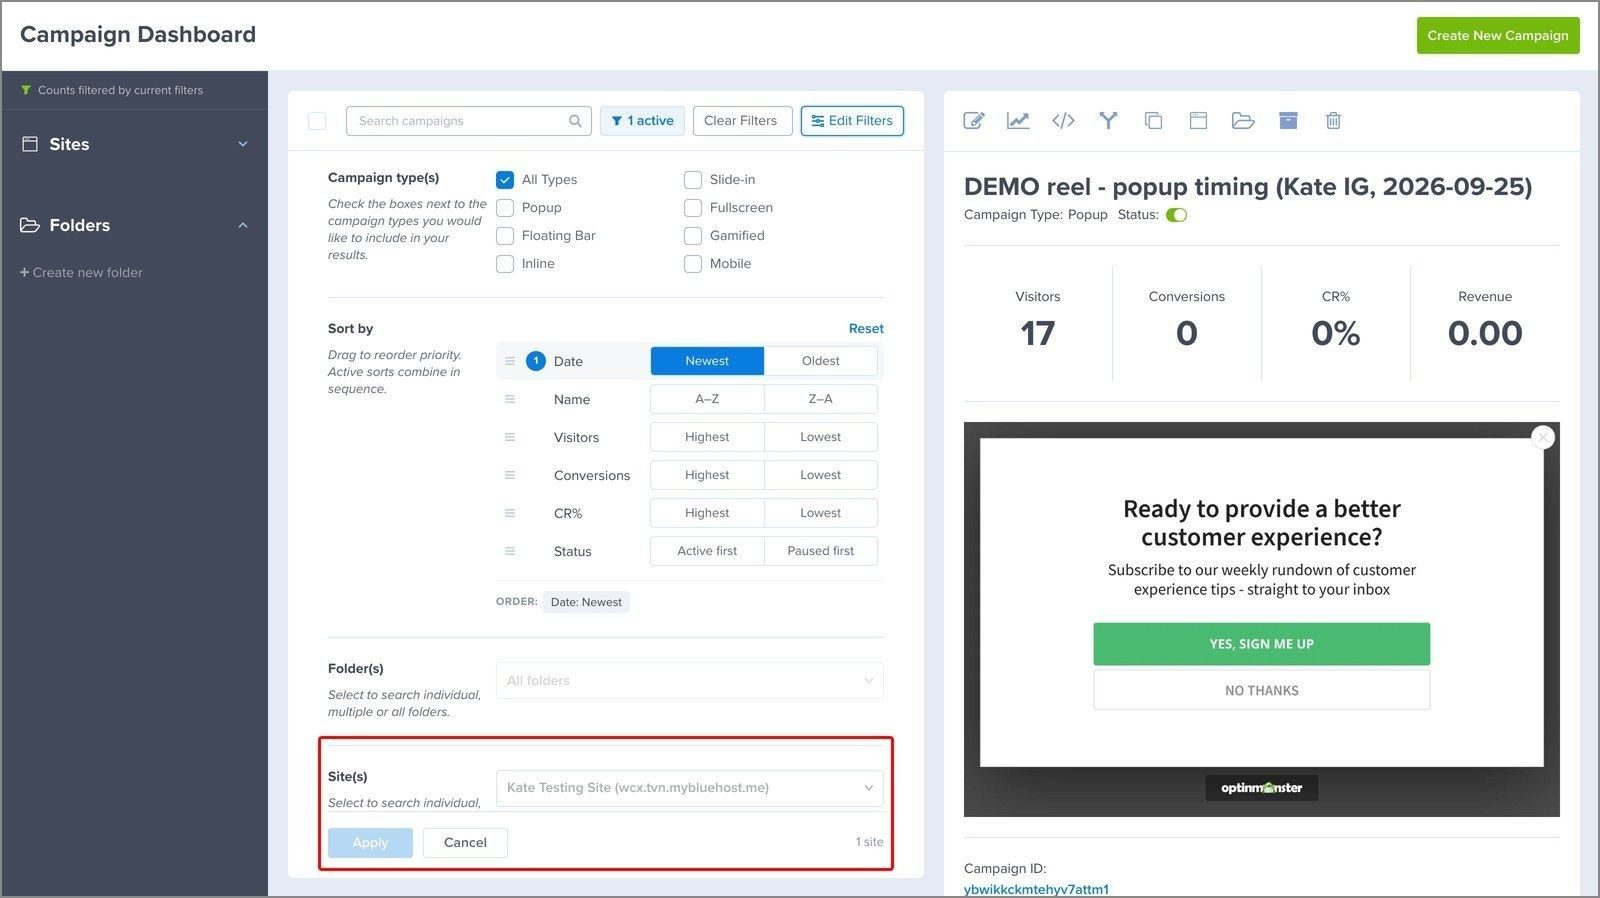
The sidebar also shows how many of each website’s or folder’s campaigns match your filters, so you can see where the campaigns you want are before you click into them.
Advanced Filters vs. the Search Box: What’s the Difference?
The Search campaigns box above your list of campaigns hasn’t gone anywhere. It searches based on campaign name, so it’s still the fastest route when you already know what you called the campaign.
Advanced Filters is for everything else, including the campaigns of one type, in one client’s folder, ranked by how they’re performing.
In short, use the search box when you know the name, and the panel when you know the type, the client, or the results you’re after.
Also Featuring: Favorite Templates
If you build from the same two or three templates again and again, then every new campaign has started with the same search for them.
Now, you can select the heart beside any template to favorite it, on any campaign type. Then, select My Favorites at the top of the filters column, and the templates you actually use are the only ones on the screen.
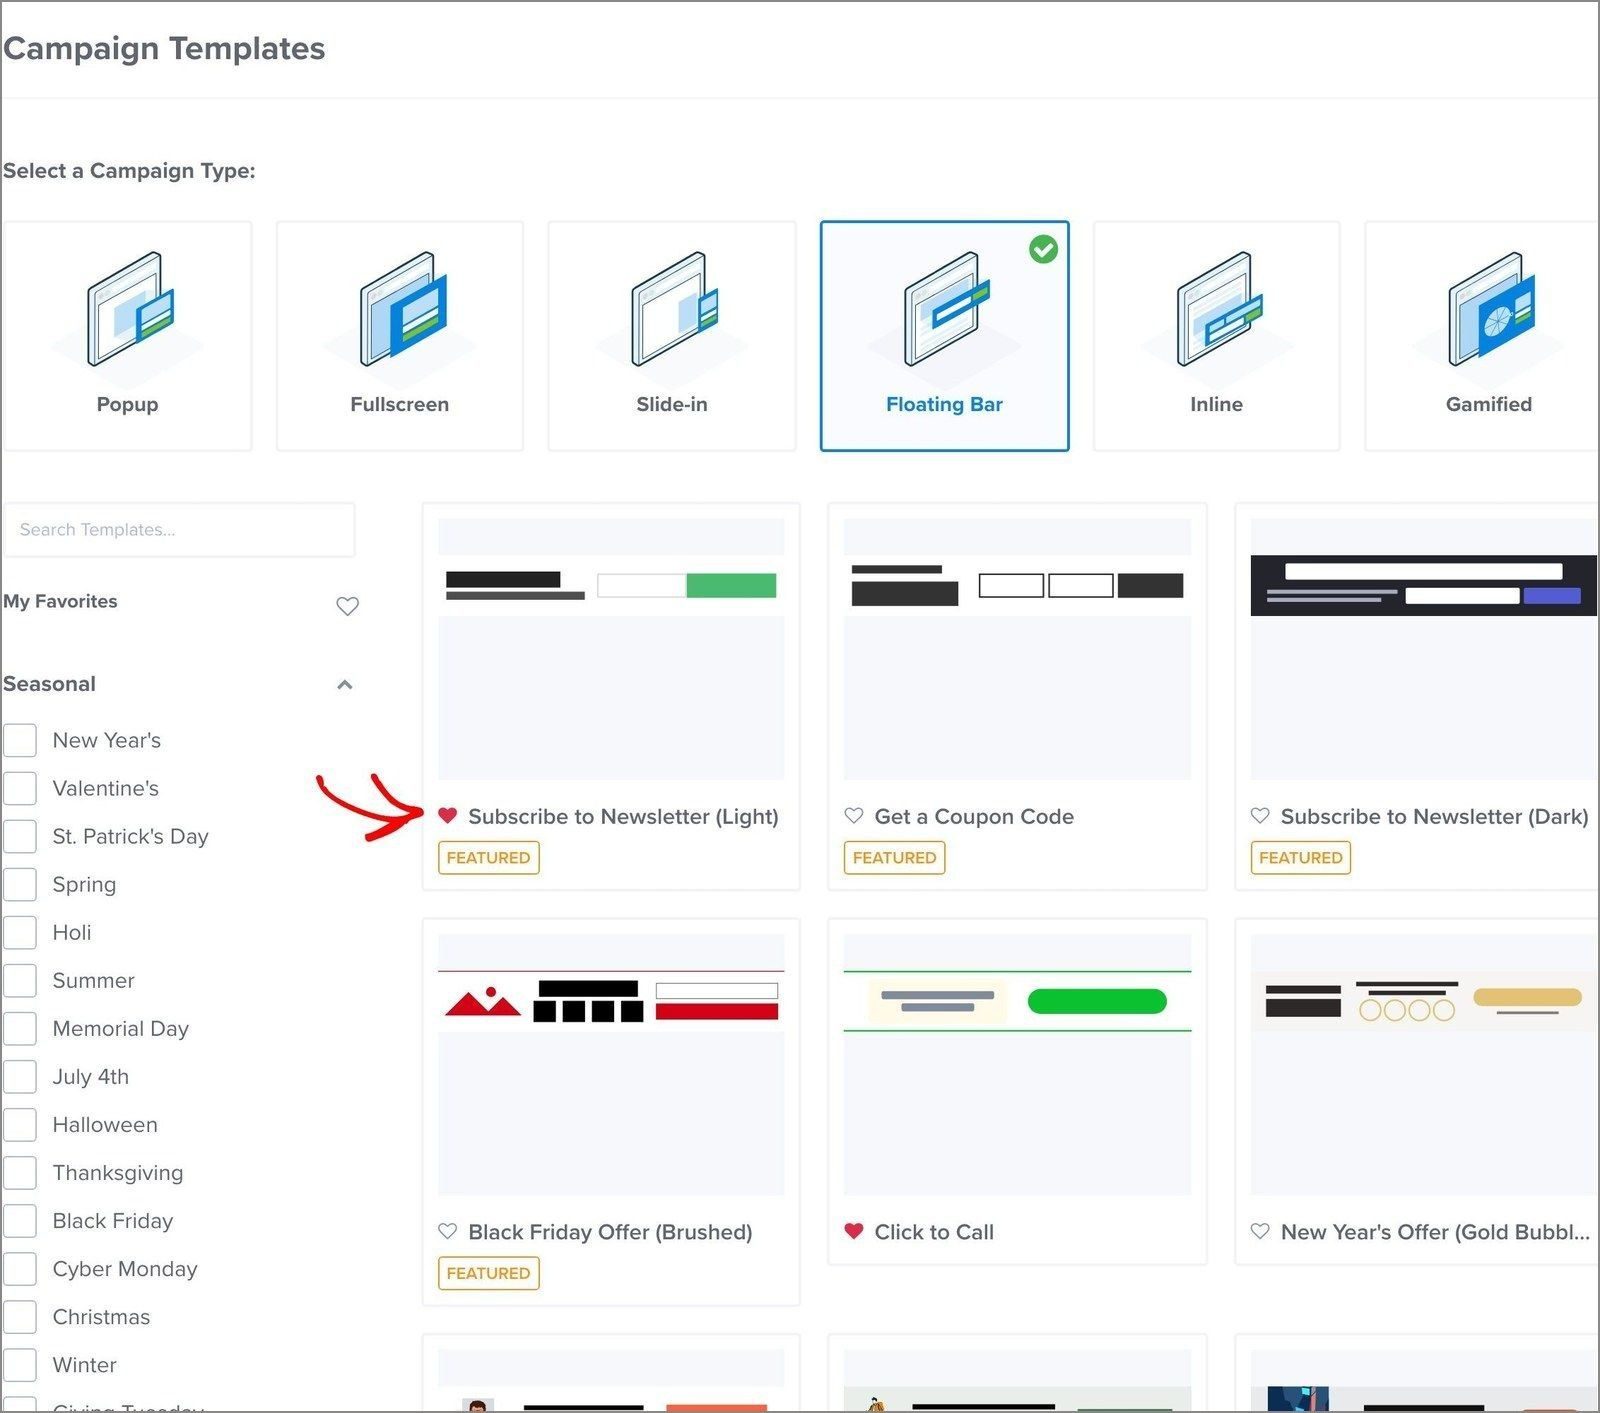
Keep in mind that favorites belong to you as a user, and they aren’t shared across your account. So, if a teammate builds from the same templates, then they’ll want to heart them, too.
Build the Next Campaign Faster with Saved Blocks and Saved Rulesets
Advanced Filters help you find your campaigns more quickly. Two other features, Saved Blocks and Saved Rulesets, help you build the next one faster.
- Saved Blocks: style a form, a button, or a countdown once, save it, and drag it into the next campaign. You never have to restyle the same block twice, and every campaign matches your branding.
- Saved Rulesets: save a set of Display Rules once and import it into any campaign. This lets you put identical display rules and schedules on dozens of marketing campaigns in minutes rather than hours.
3 Ways to Use Advanced Filters Right Now
1. Review a Client’s Campaigns, Ranked by Results
Select the client’s website or folder in the sidebar, then set Status to Active first and Conversions to Highest.
You’ll see their live campaigns ranked by results, which helps when putting together monthly client reports.
2. Find the Campaigns to Fix Before Holiday Traffic Arrives
Filter to one campaign type, then sort Visitors to Highest and CR% to Lowest.
The campaigns at the top are getting plenty of traffic and converting the least of it, so they’re the ones to rework or pause first.
3. Start Every New Client From a Template You Trust
Favorite the two or three templates you use for every new client. Then, when the next client signs, open My Favorites and start from one of them instead of searching the library.
If you’ve also saved the form block and the display rules from your last client, then the design and the targeting are already done.
Available Now on All Plans
Advanced Filters and favorite templates are available on every OptinMonster plan, and they’re already in your account. The button is above your campaign list and the hearts are in your template library.
Filter and Sort Your Campaigns in 4 Steps
You can try this on the campaigns you already have:
- Log in to your OptinMonster dashboard and select the Advanced Filters button above your campaign list.
- Check the campaign types you want to see, and pick your websites or folders under Site(s) and Folder(s).
- Turn on the sorting options you want, then drag the most important one to the top and check the ORDER line.
- Select Apply, and your list will update.
For the full walkthrough, see our guide on filtering and sorting campaigns.
You’ve scrolled past enough campaigns to find the one you wanted. Go and set up your list now.
Ready to find your campaigns faster? Log in and open your Campaign Dashboard.
Until next time,

Angie and the OptinMonster Team
P.S. Black Friday is only weeks away, and our template library has designs ready for Black Friday, Cyber Monday, Giving Tuesday, Christmas, and more. Heart the ones you’ll use this season now so they’re one click away when the campaigns need building. And if you don’t have OptinMonster yet, you can get started here.