
Adding OptinMonster to your site is easy, you can even use Google Tag Manager to implement our embed code.
In this article, you’ll learn how to embed OptinMonster on your site using Google Tag Manager.
Before You Start
- Google Tag Manager is just one option for adding OptinMonster’s embed code to your site. We offer many platform-specific guides to help you get started quickly.
Configure Google Tag Manager
When you create a campaign in OptinMonster you’ll want to embed it on your website.
To embed your campaigns on your website using Google Tag Manager, follow these steps:
- Log into Google Tag Manager.
- From the Workspace screen, select Add New Tag to create a new Tag.

- Add a title for your tag.

- Next, select the Tag Configuration section to view the Tag Type menu. Scroll down and select Custom HTML.

- In a new browser tab, edit the campaign you want to embed and navigate to the Publish view. Choose the Any Website embed option and copy the account-wide embed code provided.

- Return to Google Tag Manager and paste the embed code into the Custom HTML field.

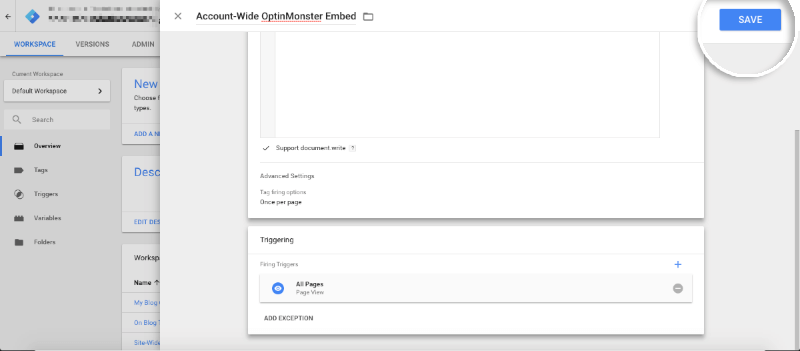
- Expand the Advanced Settings section and select the Tag firing option you wish to use. In this example, we’ll fire the Tag once per page load.

- Select the Triggering section.


Because you’re using the account-wide embed code we recommend you configure the Tag to fire on All Pages of your site and control where on your site the campaign appears through the campaign builder’s Display Rules.

- After you review your setup, click Save on the top right to save your new tag.

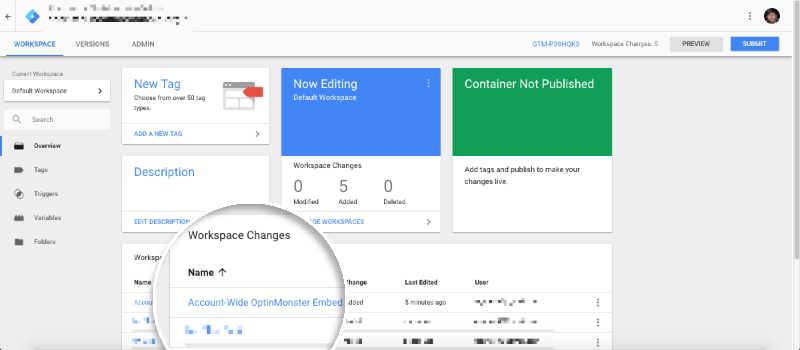
- You’ll now see the Tag you’ve created in the Workspace view of Google Tag Manager.
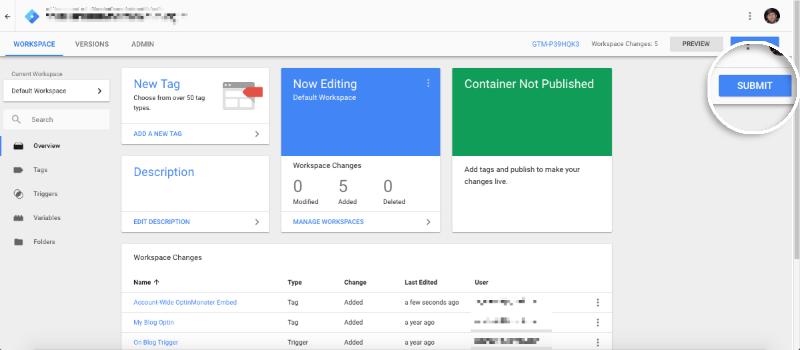
- Once you’ve created your Tag you can either Preview or Submit (Publish) it. To make this campaign live, go ahead and click Submit.
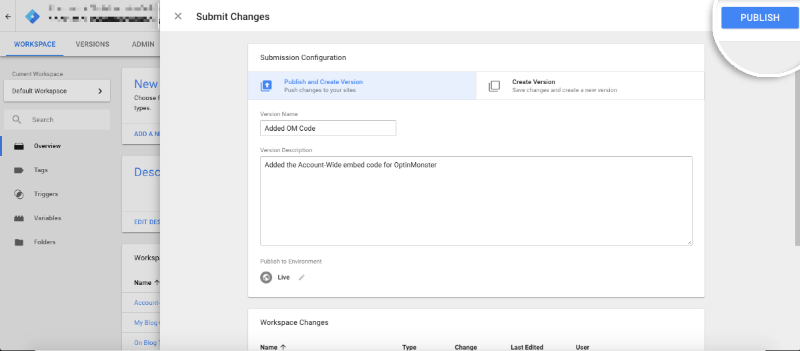
New Tags added will indicate a new version of Google Tags loading on your site. To help track changes, you should add a version name, including what you changed. Specifically, you’ve added the account-wide OptinMonster embed code so you can mention that. - When you’re finished, select Publish.
If you’re serious about jumpstarting your website business growth, then get started with OptinMonster today!
Get Started With OptinMonster Today!BONUS: Done-For-You Campaign Setup ($297 value)
Our conversion experts will design 1 free campaign for you to get maximum results – absolutely FREE!
Click here to get started →
Troubleshooting
I’ve added the OptinMonster embed code using Google Tag Manager but my site still shows as “Not Connected”.
Due to how Google Tag Manager includes our script you may need to manually verify the site.
To do this, add ?om-verify-site=true to the end of the URL to a specific page containing our embed code and you should see a green “Verified” badge appear for a moment in the lower left-hand corner of the browser window.
For example: https://optinmonster.com?om-verify-site=true
Your site should then show as “Connected”.
Why is my campaign not showing in Safari’s private browsing mode?
If your campaign is not showing in Safari’s private browsing mode and your site has the OptinMonster embed code loaded via Google Tag Manager (GTM), it is likely due to Apple’s new Advanced Tracking and Fingerprinting Protection, which is enabled by default in Safari’s private browsing mode on iOS 17.
This protection appears to block Google Tag Manager, preventing the OptinMonster embed script from loading and causing campaigns to fail to display. You can Reduce Protections in a private browsing tab, and your OptinMonster campaigns should appear as Google Tag Manager is unblocked.
To avoid this issue, we recommend adding your OptinMonster global embed code directly to your site. This approach bypasses Safari’s privacy restrictions entirely and ensures campaigns will load, even when the default protections are enabled.


