Do you host your business website on WordPress? Want to know what your visitors secretly think of your site, products, and services?
The best way to find out: add a survey popup on your site!
If people land on your site, don’t like what they see, and go away, you could be losing a lot of business.
As per SuperOffice research, only 1 in 25 customers complain directly to the brand if they are unhappy about their experience. But 91% of unhappy customers who don’t complain simply leave your site.
That means there’s a large majority of customers who might be turning away from your brand, perhaps never to come back again. And if you could just understand what they were upset about and give them what they expected, they might turn into buyers and perhaps repeat customers!
So what if you could become a mind reader, gain insight into your visitors’ secret thoughts, and regain some of that lost business?
The best way to do that is to ask, and using a WordPress survey popup plugin can help. A WordPress survey popup plugin can help you create a popup that lets your visitors share their feedback about what they liked or didn’t like about your website.
And that’s exactly what you’re going to learn to do today.
In this article, I’m going to show you how you can use a WordPress survey popup plugin to create a survey popup for your website.
Here is a list of topics we’ll cover in this post:
- Why a WordPress Survey Popup?
- Best Practices to Ask the Right Questions on WordPress Survey Popup
- Which Tool to Use to Create WordPress Survey Popup
- How to Create a Survey Form Popup with WPForms
- How to Create a WordPress Survey Popup with OptinMonster
Why a WordPress Survey Popup?
There are lots of ways a WordPress popup survey can help your business. For example, you can use the popup or modal box to:
- Discover how visitors are interacting with your website.
- Figure out issues slowing down your lead generation, conversions, and sales.
- Get real-time feedback from visitors and customers.
- Reduce cart abandonment and increase conversion rates by engaging with visitors before they leave your site.
- Segment your visitors into different groups to give them a personalized customer experience.
- Grow your email list.
LearnVisualStudio.NET offers a great example of this. They used a WordPress survey popup plugin to research their website visitors’ preferences, they increased the conversion for their online course by up to 23.9%.
Best Practices to Ask the Right Questions on WordPress Survey Popup
Need some help creating survey questions? Here are a few best practices to follow:
- Ideally, keep survey questions short so that the survey is easy to understand and complete.
- If you have multiple questions, put them in a logical order.
- Make sure the questions are direct and don’t lead respondents to the answer you’d like to hear.
- Ask open-ended questions rather than yes/no questions that will make respondents think.
Here are the different types of questions you could ask for different business scenarios:
Survey Question Ideas for Getting Feedback on a Website Design
- What did you like best about our website?
- What did you dislike most about our website?
- How can we improve your experience on our site?
Survey Question Ideas for eCommerce Site Feedback
- How easy was it for you to find the products you were looking for?
- How can we improve your experience the next time you visit our site?
- Would you like to find out about new deals? If so, please enter your email below.
Survey Question Ideas to Generate Leads for Real Estate Businesses
- Did you find the properties you were looking for?
- Where are you looking for a property?
- What is your price range?
- Are there any other must-haves for your new home?
Once you’ve chosen your questions, you’ll need to decide how to implement the survey on your site.
Want the full details on how to build the best online survey? Check out these survey best practices.
Also, read our guide about the best online survey tools. The post also includes many WordPress survey popup plugins.
Which Tool to Use to Create WordPress Survey Popup
There are plenty of WordPress survey popup plugins that can help you create a survey on your website, such as Formidable Forms or Gravity Forms.
Some WordPress survey popup plugins are hard to use for non-tech users and others are expensive.
But which is the best WordPress survey plugin?
I personally recommend using WPForms in combination with OptinMonster, the best WordPress popup plugin.
WPForms is the best drag-and-drop WordPress form plugin because it:
- Is flexible, allowing you to create all kinds of forms.
- Stores the survey responses so you can access them easily from your WordPress dashboard.
- Integrates with all major email service providers (ESPs) so you can easily collect leads for your email marketing.
- Sends notifications of survey results so you can follow up with respondents, or take immediate actions to implement user feedback.
However, using a WordPress survey maker to create the survey form is only half the battle. You also have to find a popup tool so you can control who to show it to on your site, when to show it, and where to show it. That’s where OptinMonster comes in.
With OptinMonster’s user-friendly popup builder plugin, you can:
- Create popups from 100+ templates for most business use cases you can think of.
- Schedule the popup’s timing so you don’t annoy visitors by showing it too soon.
- Collect page-specific data with its page-level targeting functionality to show the survey only to people on certain pages.
- Trigger different popups to visitors based on referral source, location, or their past behavior on your site.
- Apply its Exit Intent® Technology to show popups to people who are about to leave your site, possibly stopping them from churning.
In the next section, I’ll show you how to use WPForms and OptinMonster to create an interactive survey popup for your site.
How to Create a Survey Form Popup with WPForms
First, we’ll go over the steps you need to create the survey form. Then in the section that follows, I’ll show you how to embed the form into a popup and trigger it on your site.
- Step 1: Create a New Form
- Step 2: Design the Form
- Step 3: Integrate With Your Email Marketing Software
Step 1: Create a New Form
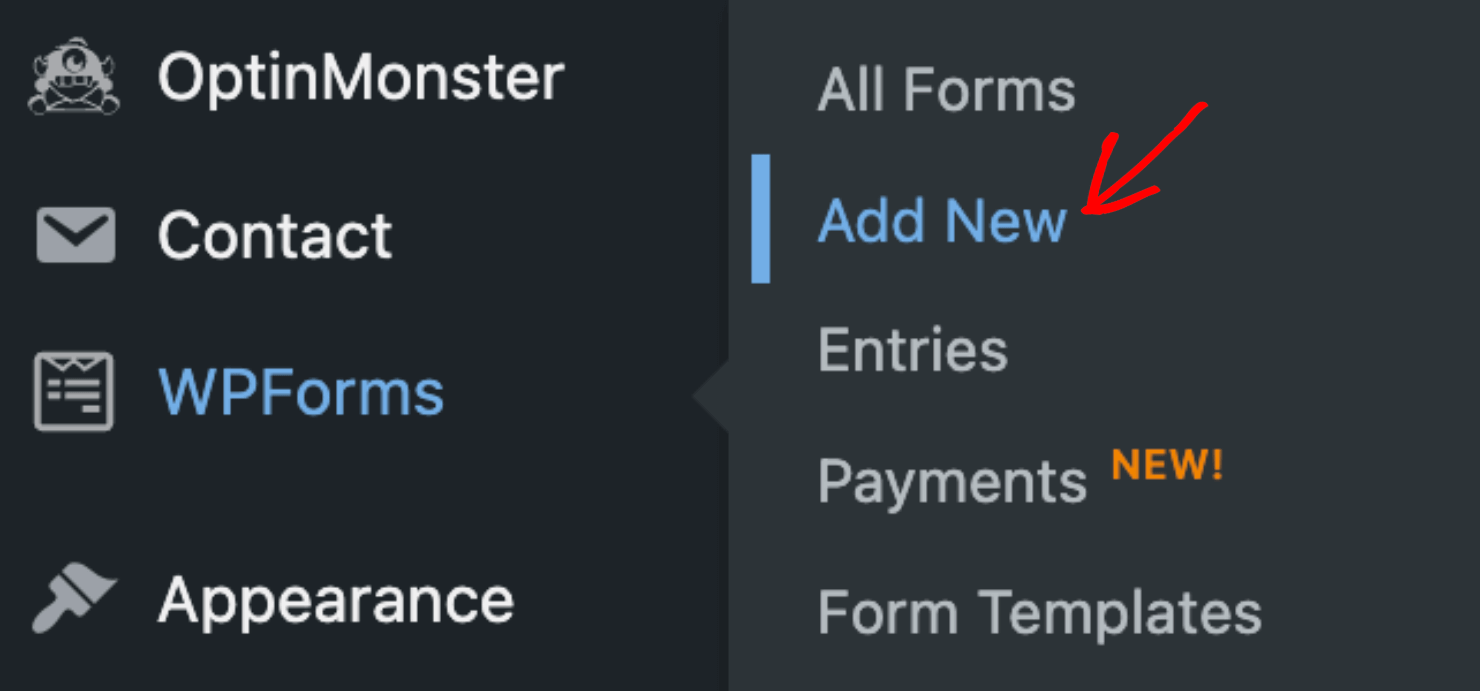
Login to your WordPress dashboard. Next, go to WPForms and click on Add New:
WPForms offers more than 1680 form templates, such as:
For today’s tutorial, we’re going to use the Survey Form. Type ‘survey’ in the search box and click on the Survey Form template:
Step 2: Design the Form
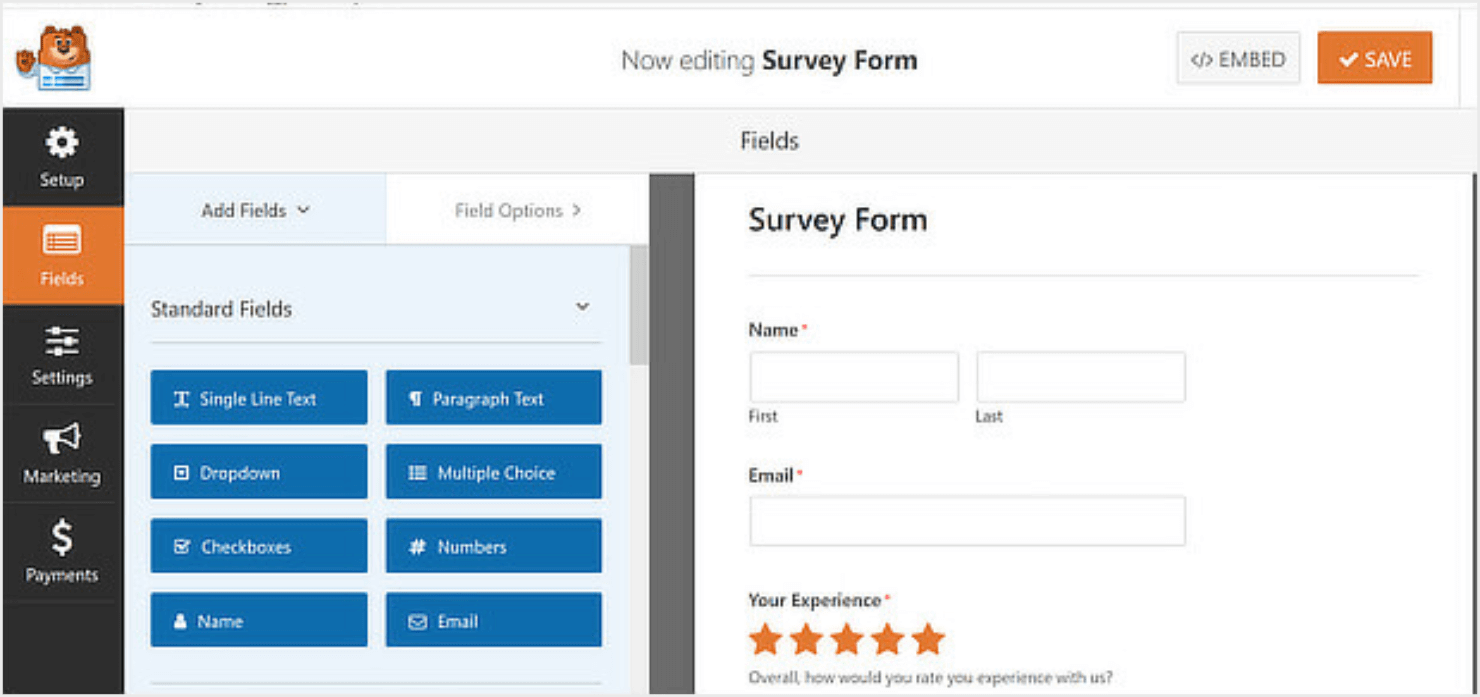
Once you click to create your survey form, you’ll land in the form builder. Here, you can see the default survey form on the right of your screen.
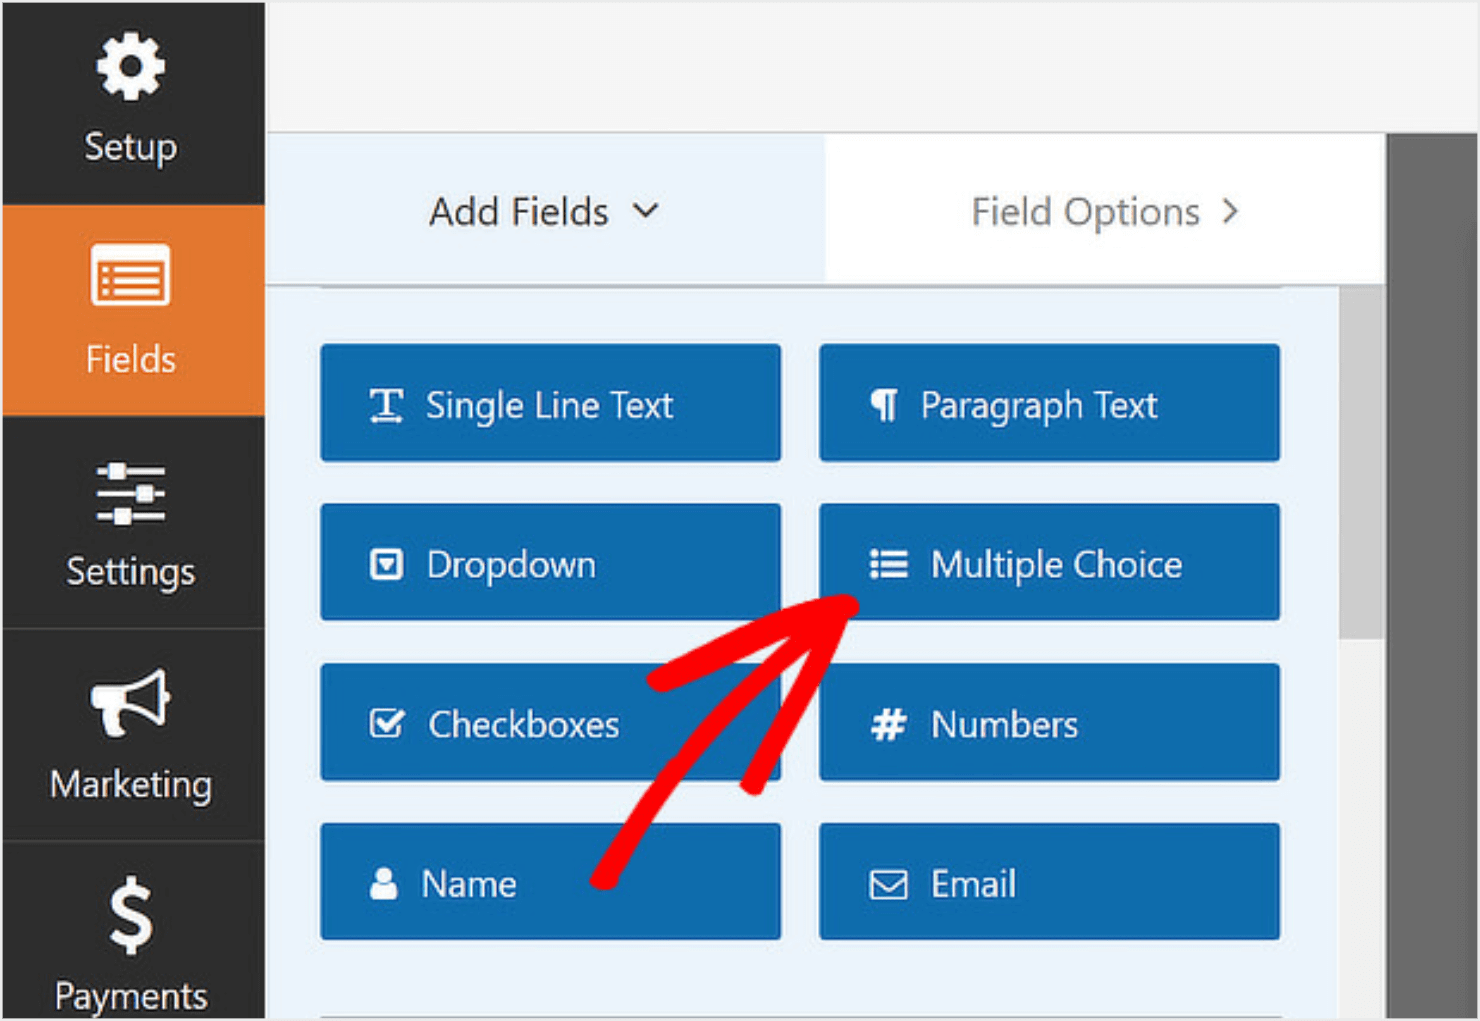
You’ll see different form fields on the left, such as text field, numbers-only field, and dropdown field:
The default form includes a name and email field, as well as several common survey questions.
Hover your mouse over any group of survey fields and click the ones you like to add to the form:
You can add or edit fields at any time:
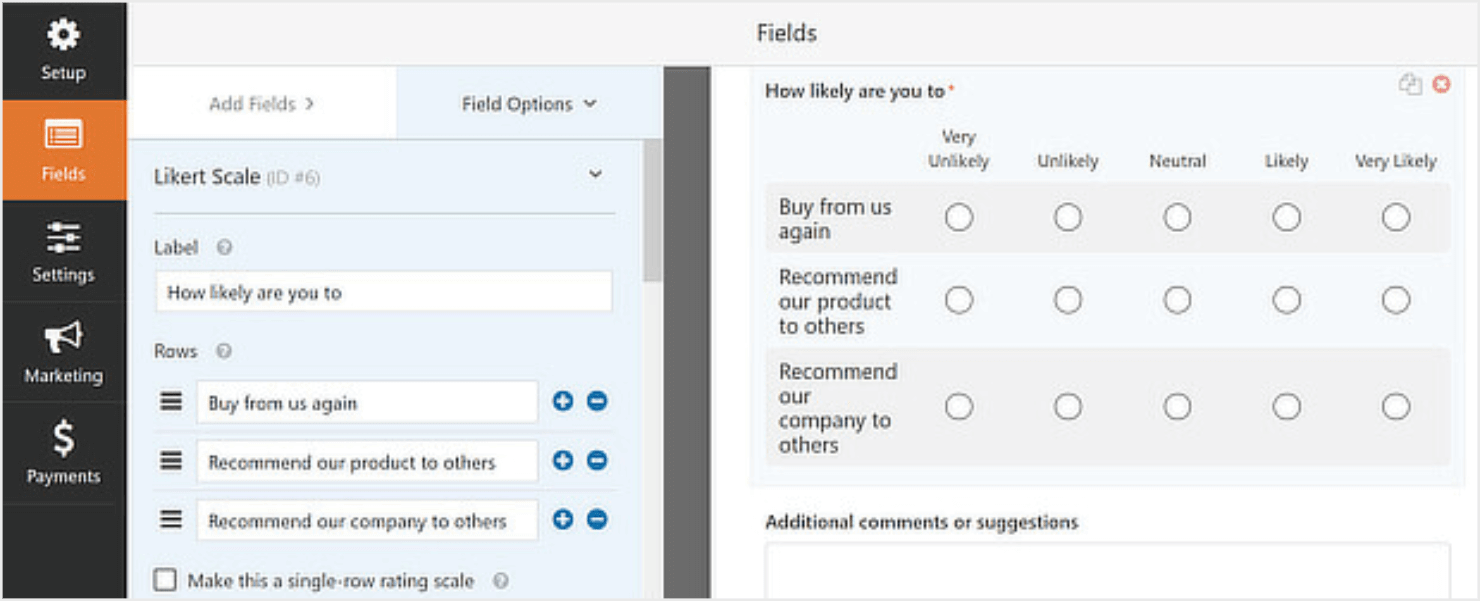
For example, you can add multiple choice questionnaires, or a Likert scale for users to give your site a star rating.
To do this, simply click on the Multiple Choice block:
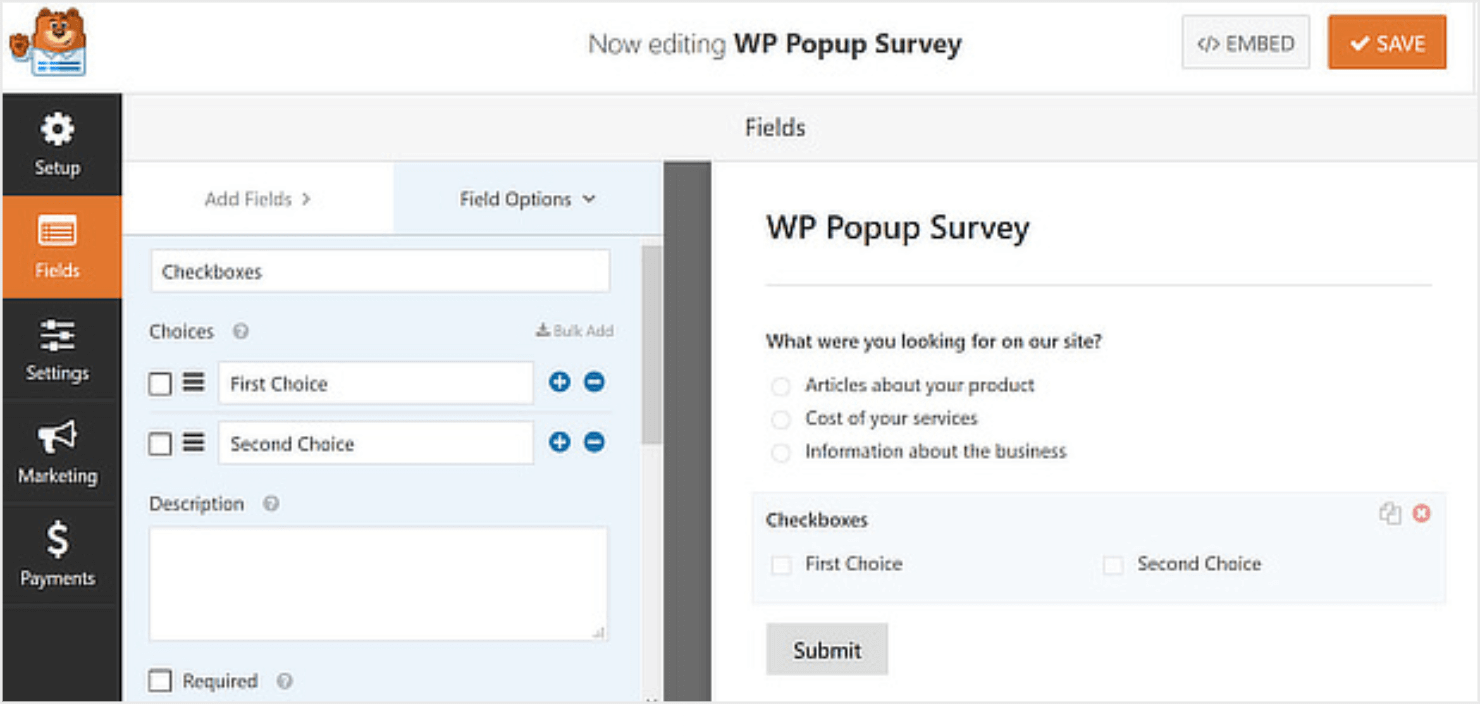
Here’s how the multiple-choice questionnaire looks after I added it to the form:
You can edit the default form fields and add new ones as per your requirements.
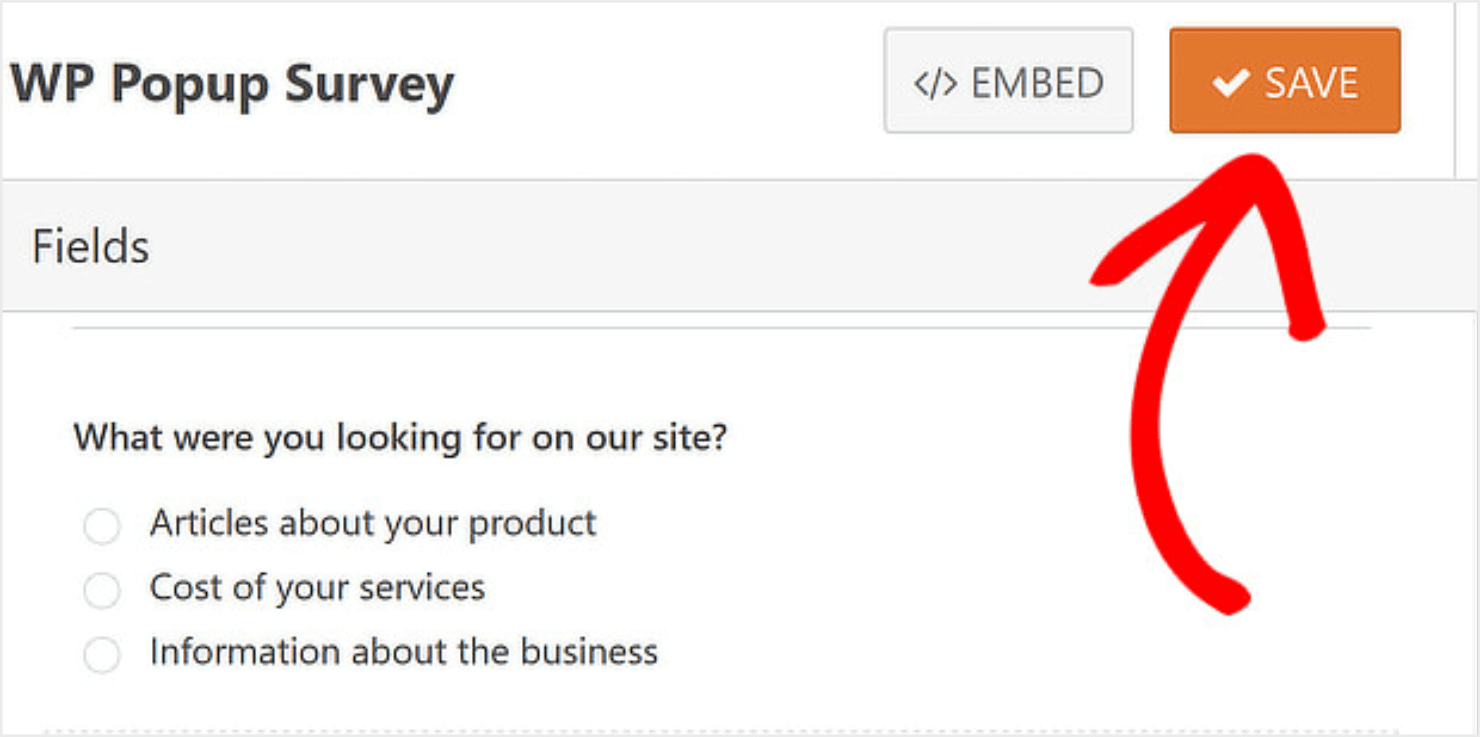
Save your form to make sure you don’t lose the changes you have made so far:
Step 3: Integrate With Your Email Marketing Software
After website visitors make their submissions, you might want to manage the email addresses collected from the survey campaign in a customer relationship management (CRM) software or email marketing software.
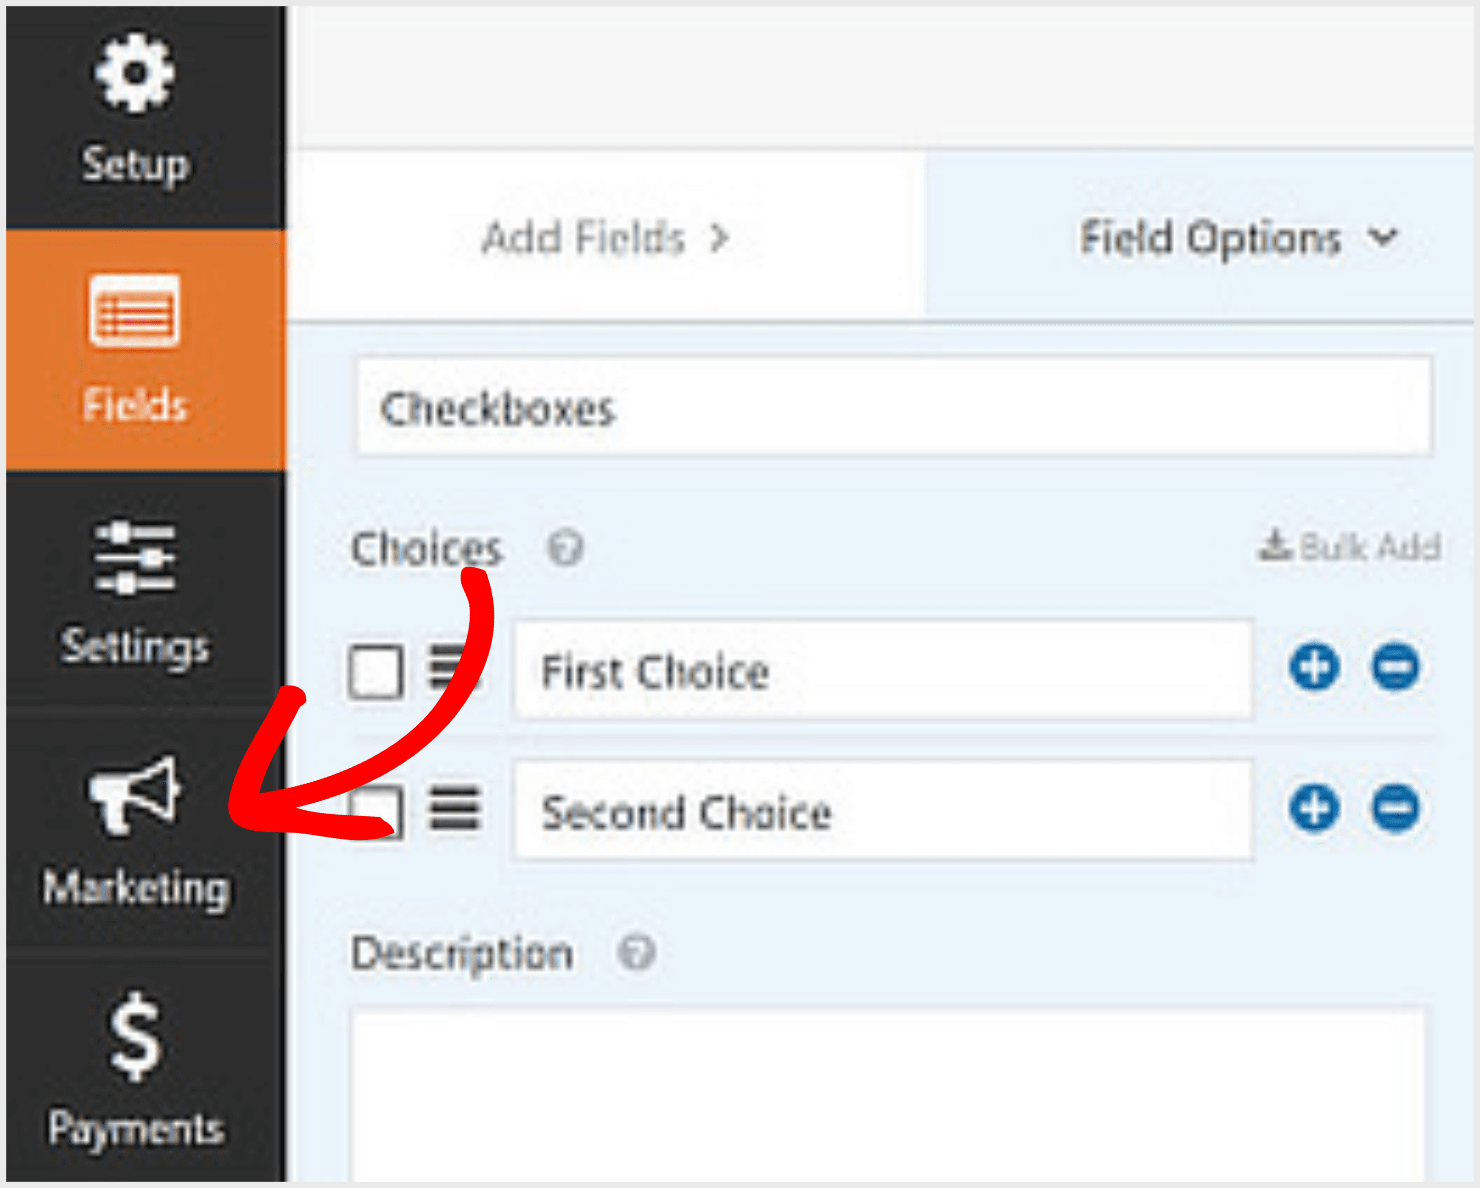
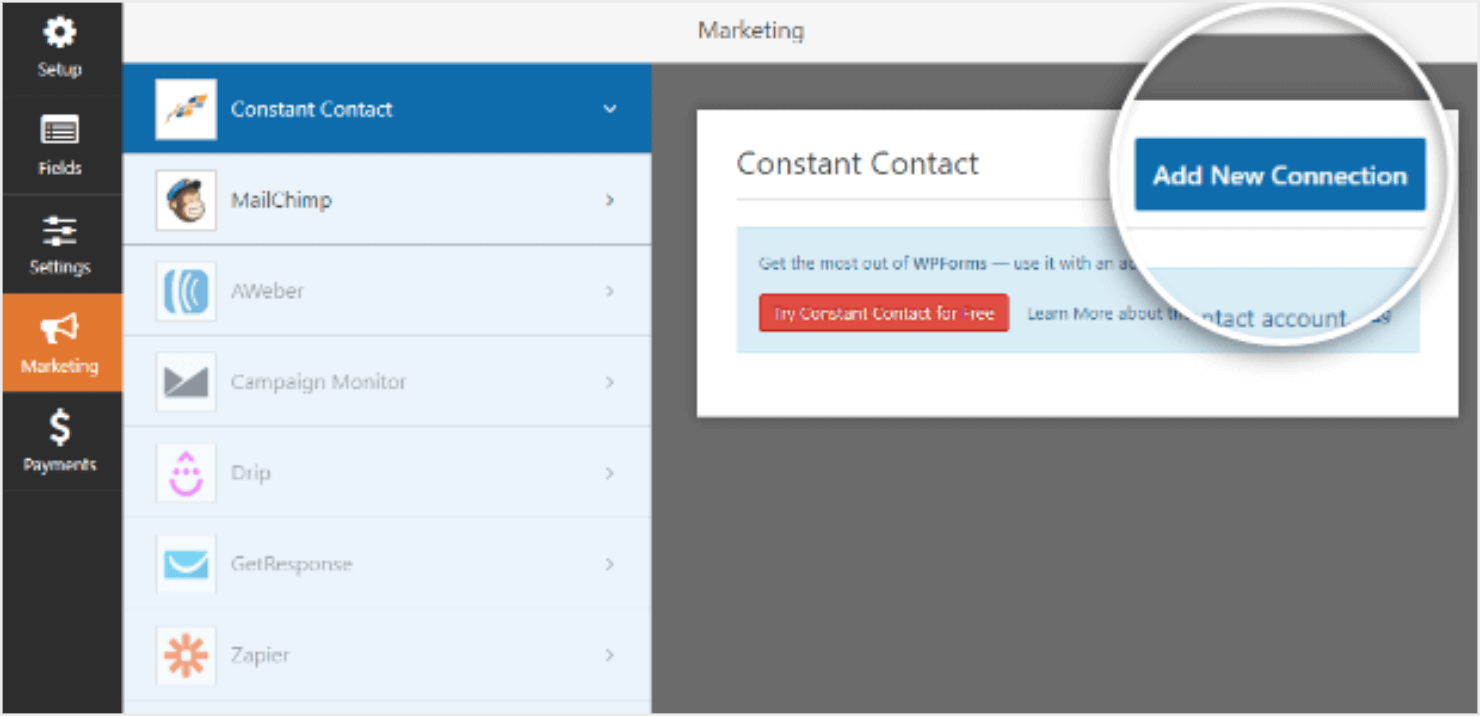
To enable this, go to the Marketing menu on the left-hand panel:
This will show you all the ESP integrations WPForms offers:
I’ll be using Constant Contact because that’s what we use at OptinMonster.
To integrate with your ESP, click on Add New Connection. Give the connection a name, save, and then the page will fill with your integration data:
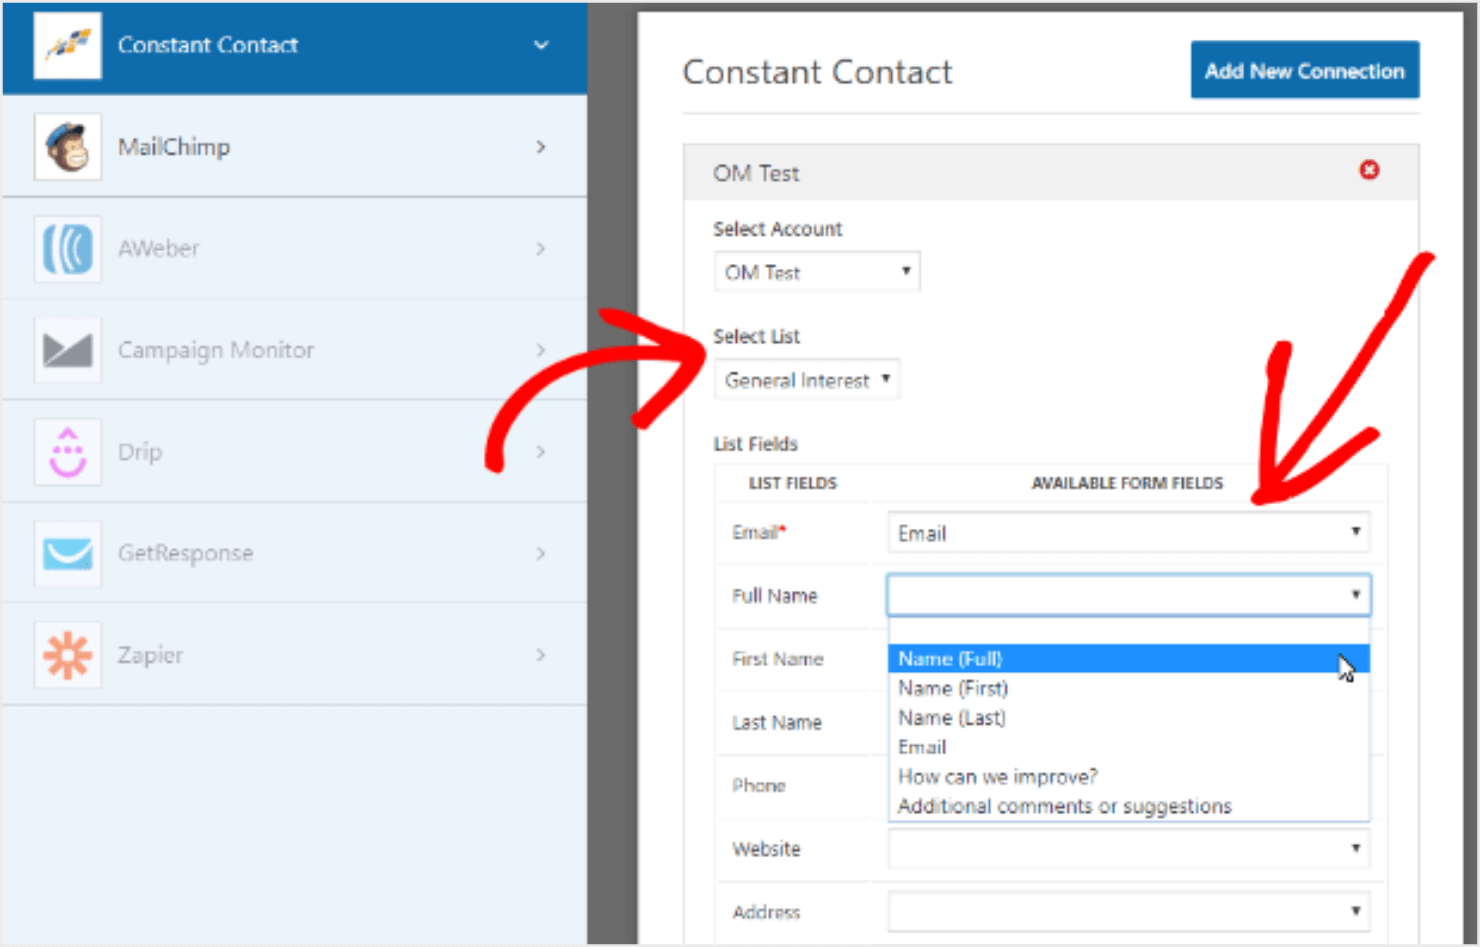
In the next screen, choose a list for the survey campaign. Also, select the form fields you want to match with Constant Contact:
Hit Save when you are done.
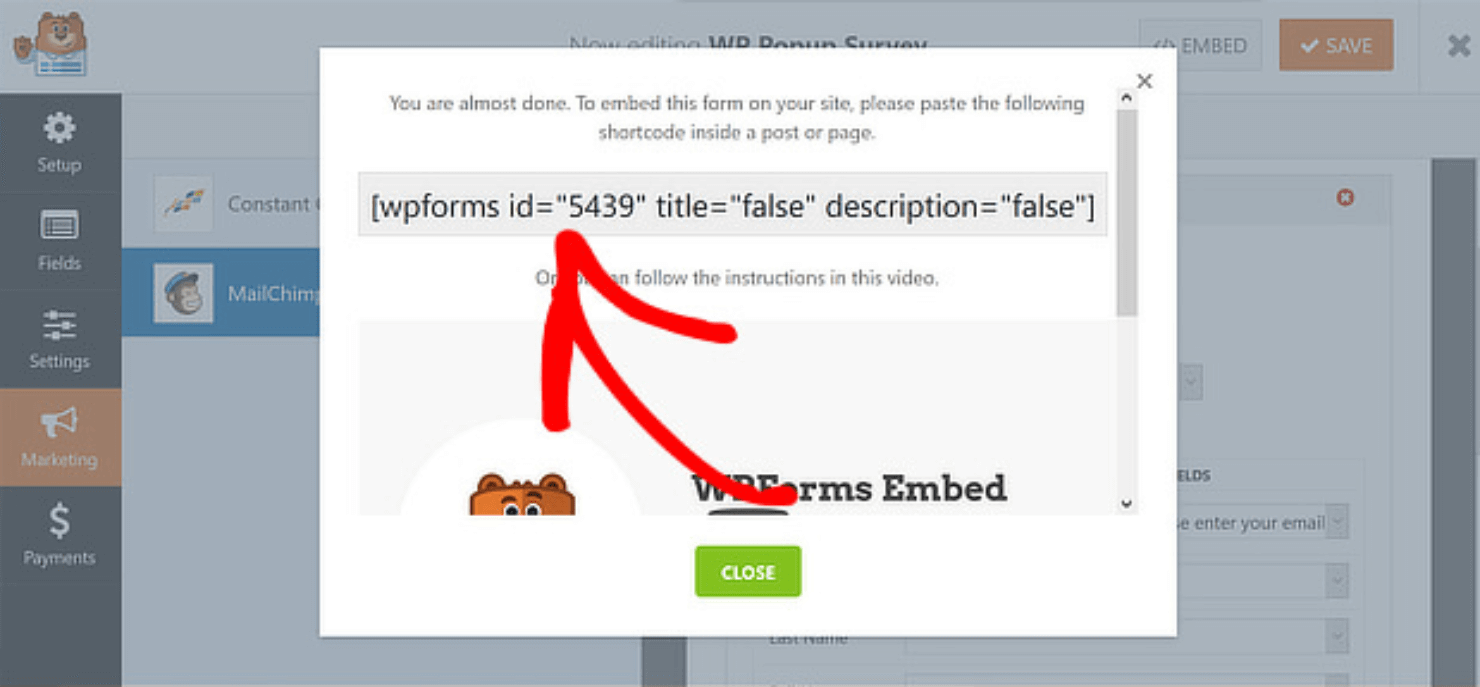
Click on Embed to bring up a shortcode or embed code on the screen. Copy and save the shortcode somewhere from where you can access it later:
Keep this shortcode handy because you’ll need to embed it in the WordPress survey popup that you’ll create with OptinMonster.
Now, let’s go to OptinMonster to set up your WordPress survey popup.
How to Create a WordPress Survey Popup with OptinMonster
Here are the steps you’ll need to follow to create a WordPress survey popup with OptinMonster:
- Step 1: Create a Campaign
- Step 2: Edit the Campaign
- Step 3: Set the Display Rules
- Step 4: Publish Your Campaign
- Step 5: Tweak Your Popup’s Settings
Step 1: Create a Campaign
To create your OptinMonster survey popup, log in to the OptinMonster account. Click on Create Campaign:
Choose a campaign type. I’ll use Popup since it perfectly matches our need to create a survey popup:
Next, choose the campaign template. OptinMonster offers 100+ ready-to-use campaign templates to choose from:
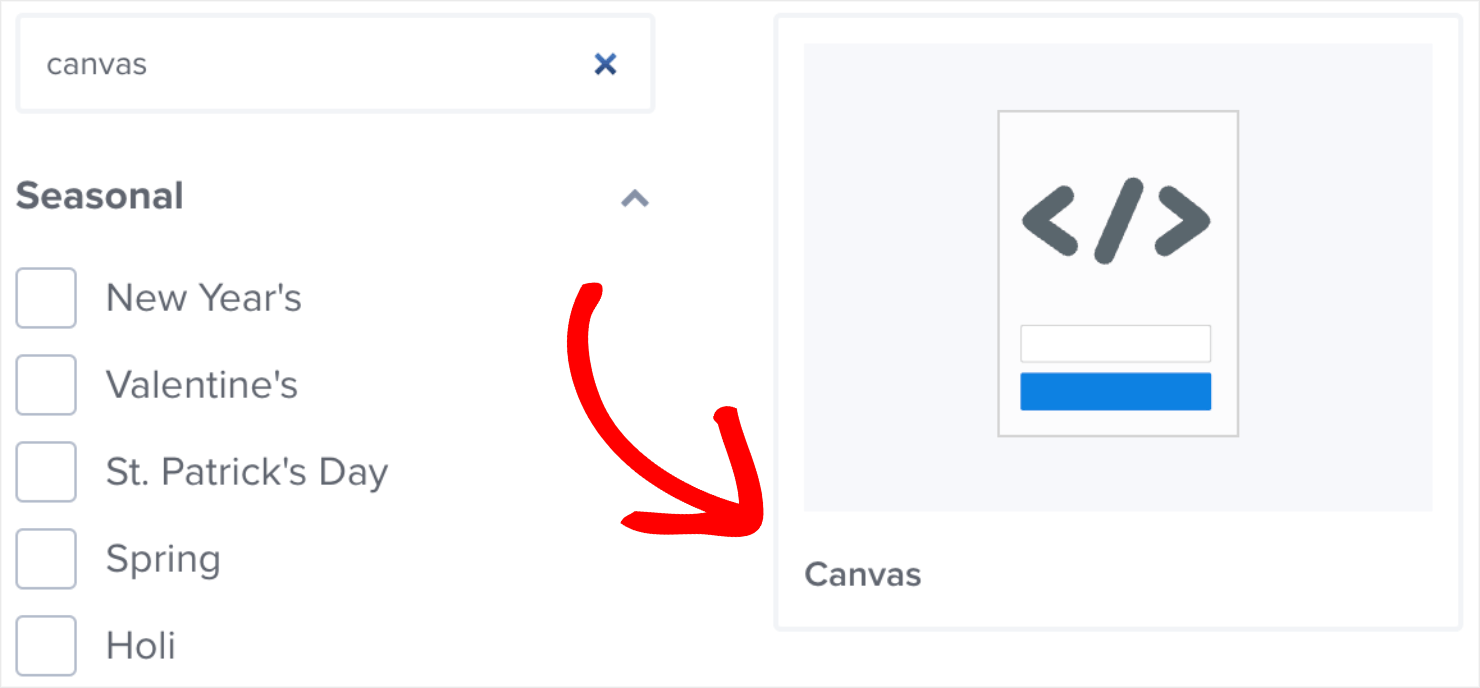
For today’s tutorial, I’ll use Canvas because it allows me to easily integrate the embed code from other sites:
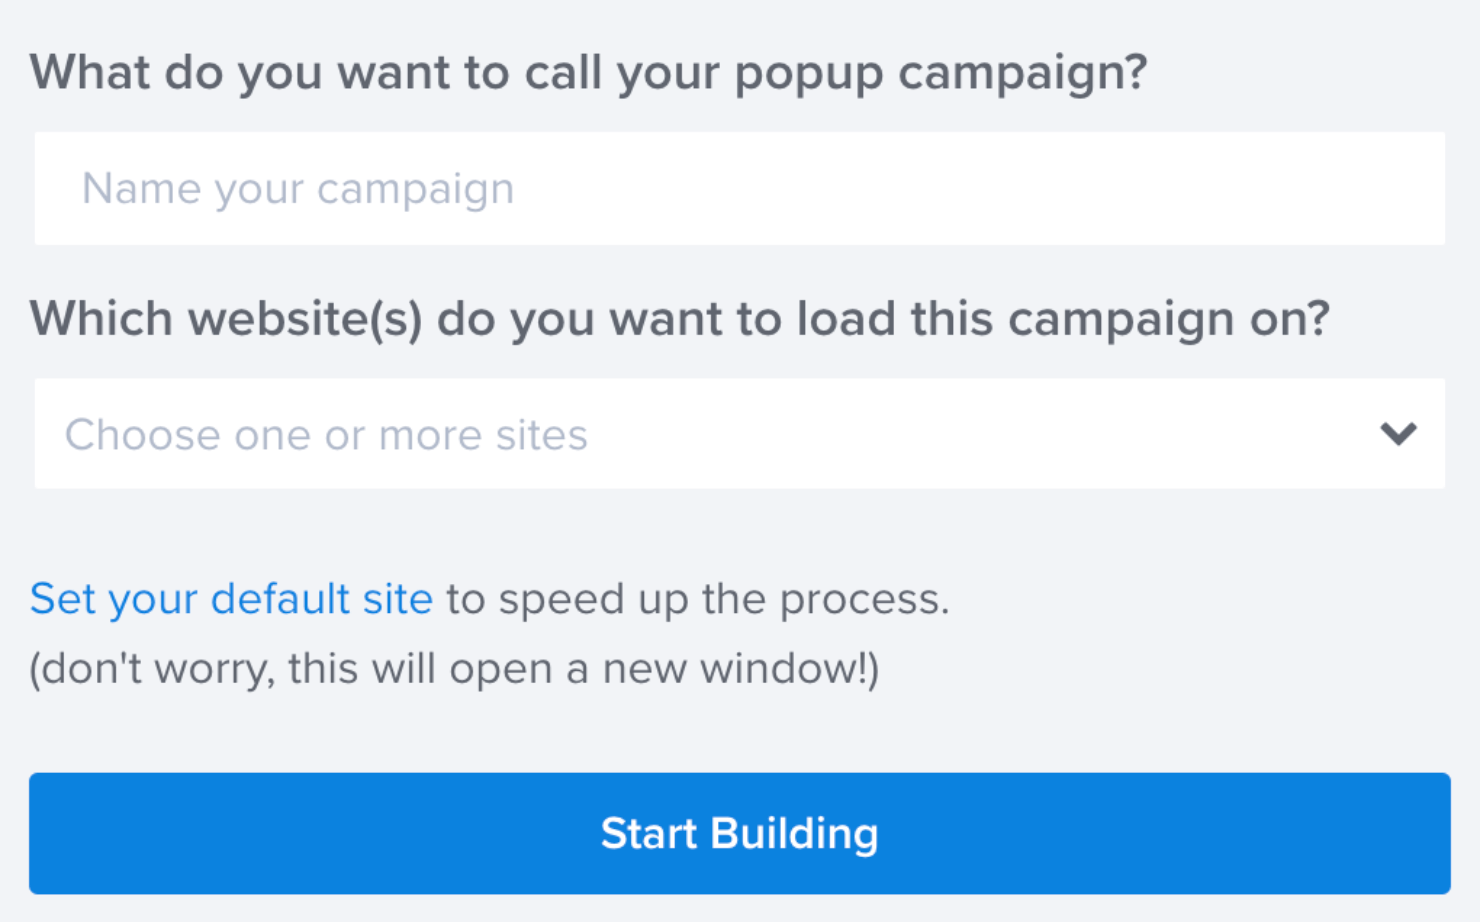
Give the campaign a name and press the Start Building button:
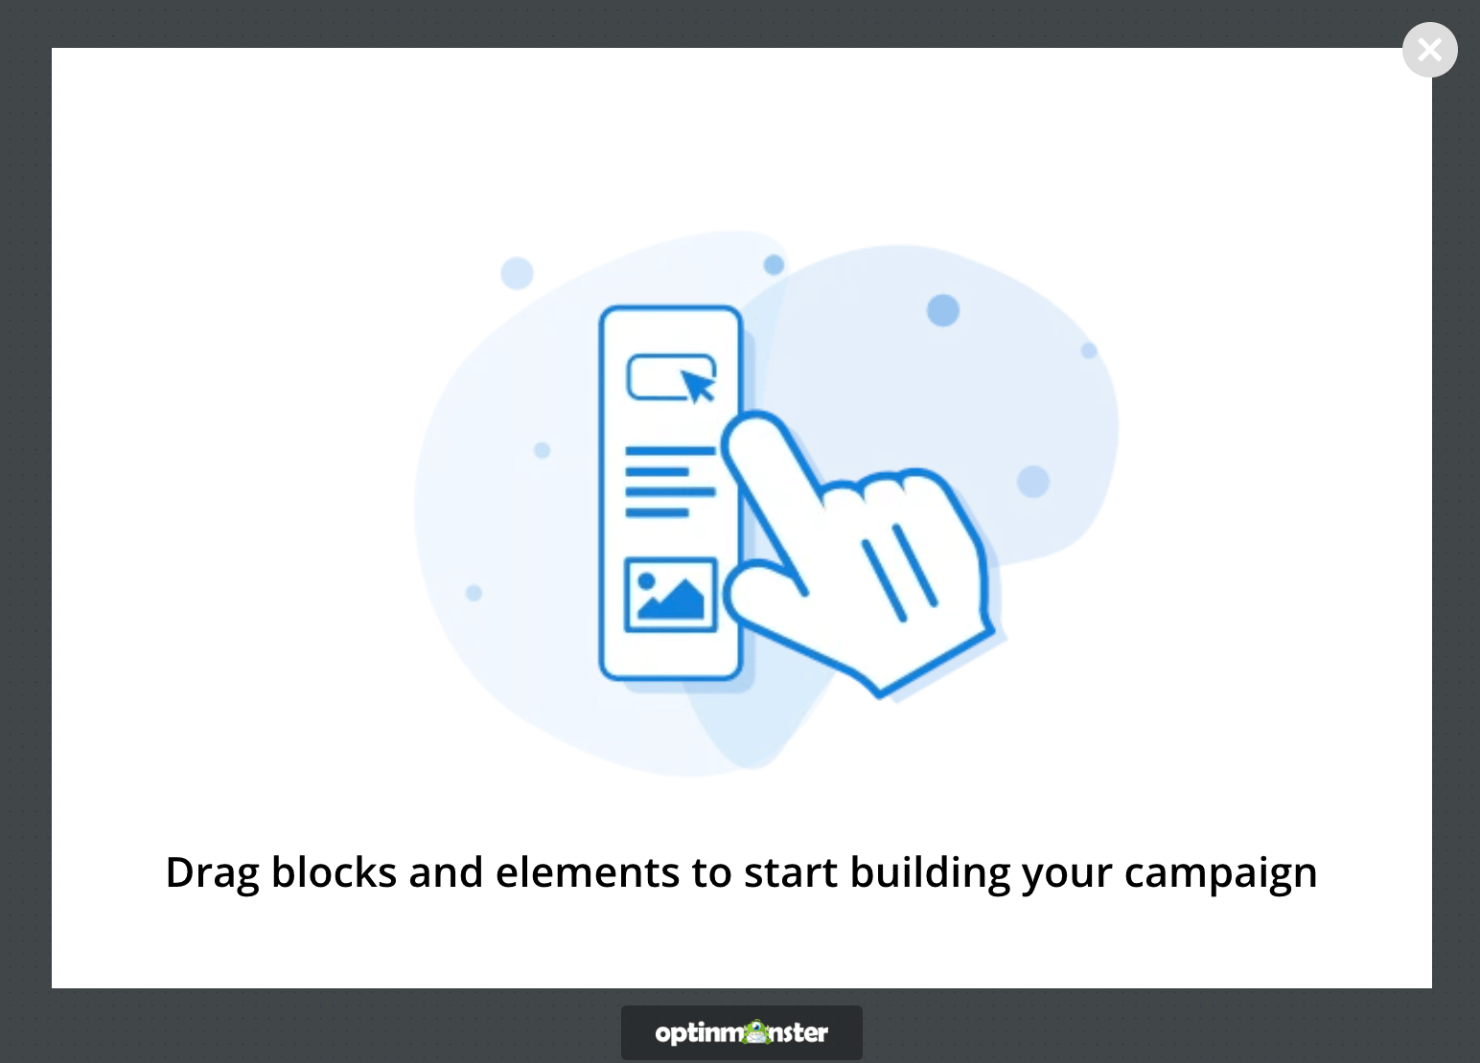
This will take you to OptinMonster’s drag-and-drop editor. Since we selected the Canvas template, it’ll appear like this in the editor:
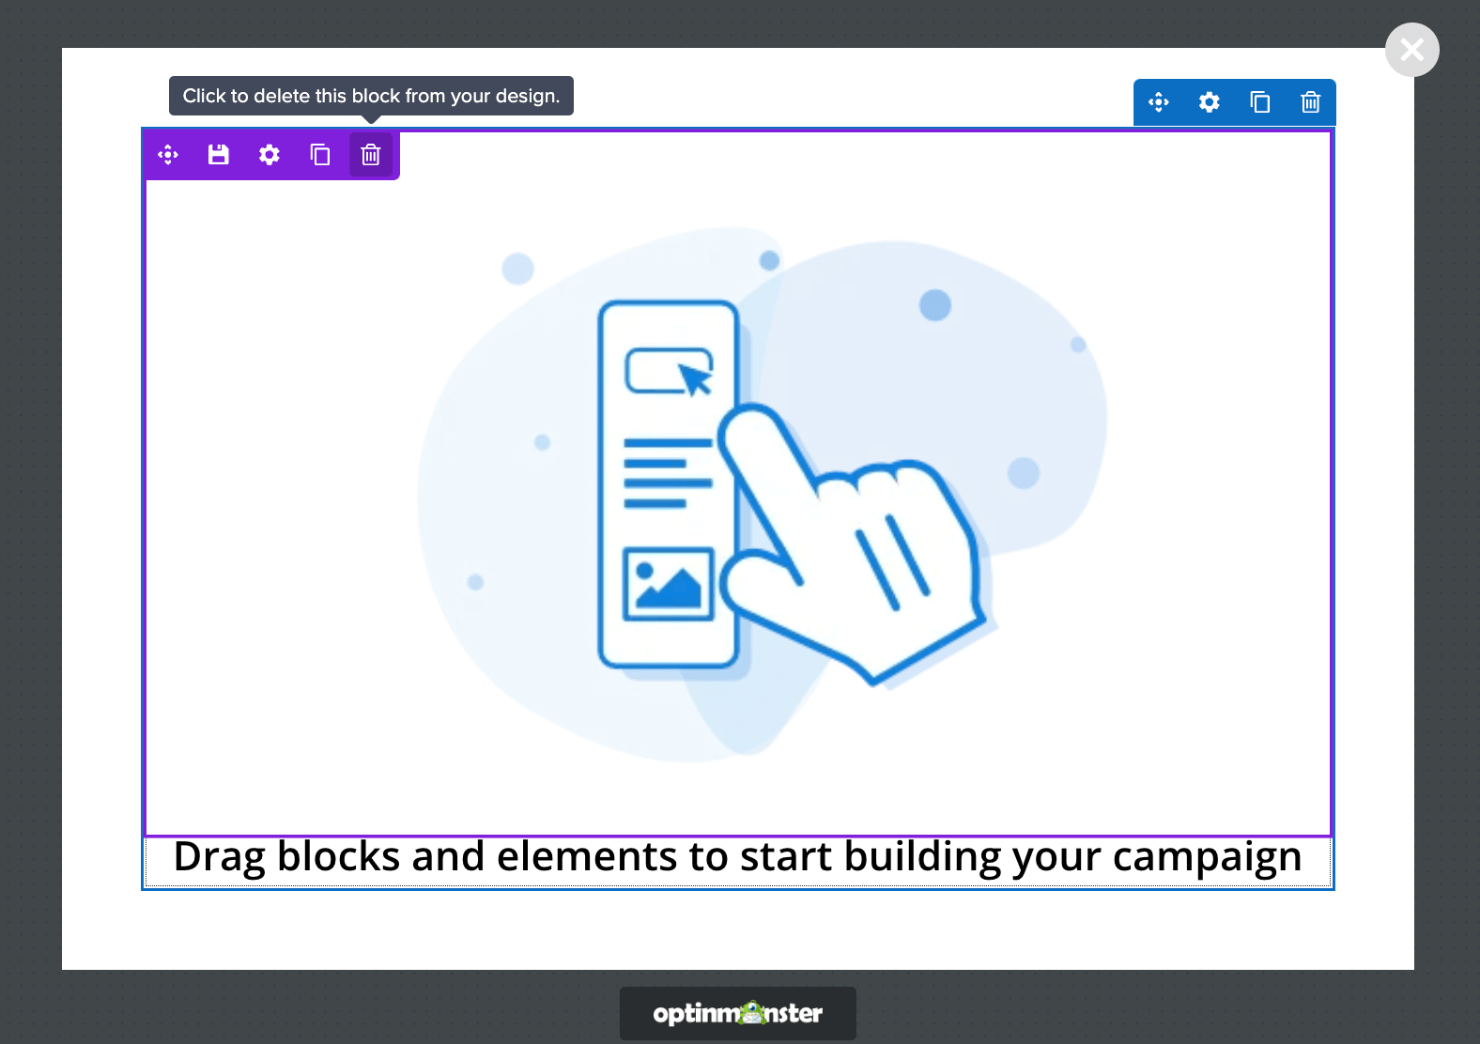
Delete the existing blocks on the template by hovering your mouse over them. We won’t need these default elements.
To delete the default blocks, simply hover over the element and click on the trash can icon:
Do the same with the text block:
At this point, your editor will look completely empty:
Next, we’ll add the necessary blocks to make it look like a popup.
Step 2: Edit the Campaign
In this step, we’ll design the campaign to make sure it stands out on your site when you publish it.
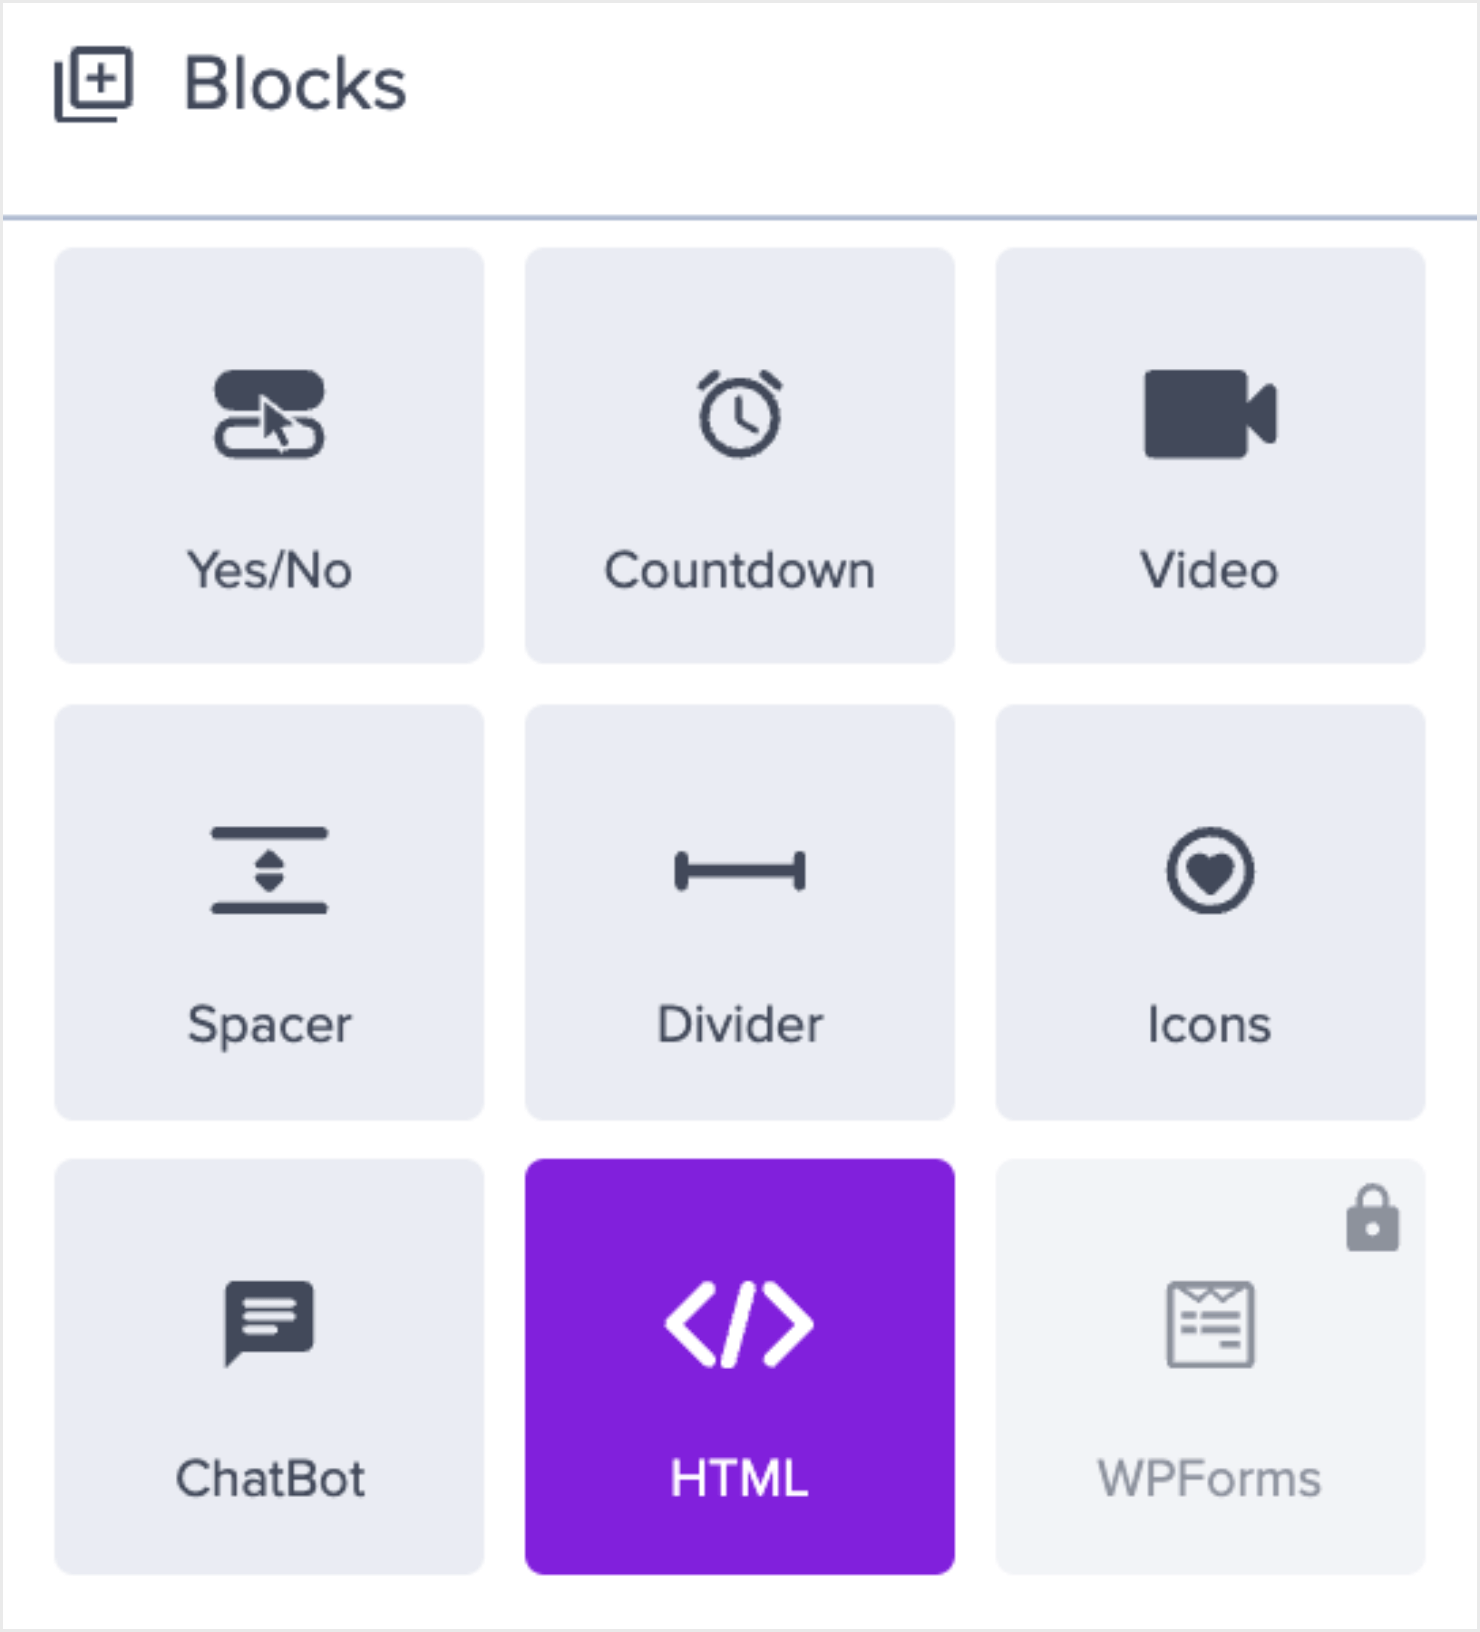
To do that, go to the Blocks menu on the left-hand panel and locate the HTML block from the options:
Drag and drop the HTML element to the blank editor:
With this, the editor will now look like this:
Do you remember the embed code that you saved after creating a survey form on WPForms? It’s time to embed it in the OptinMonster popup design.
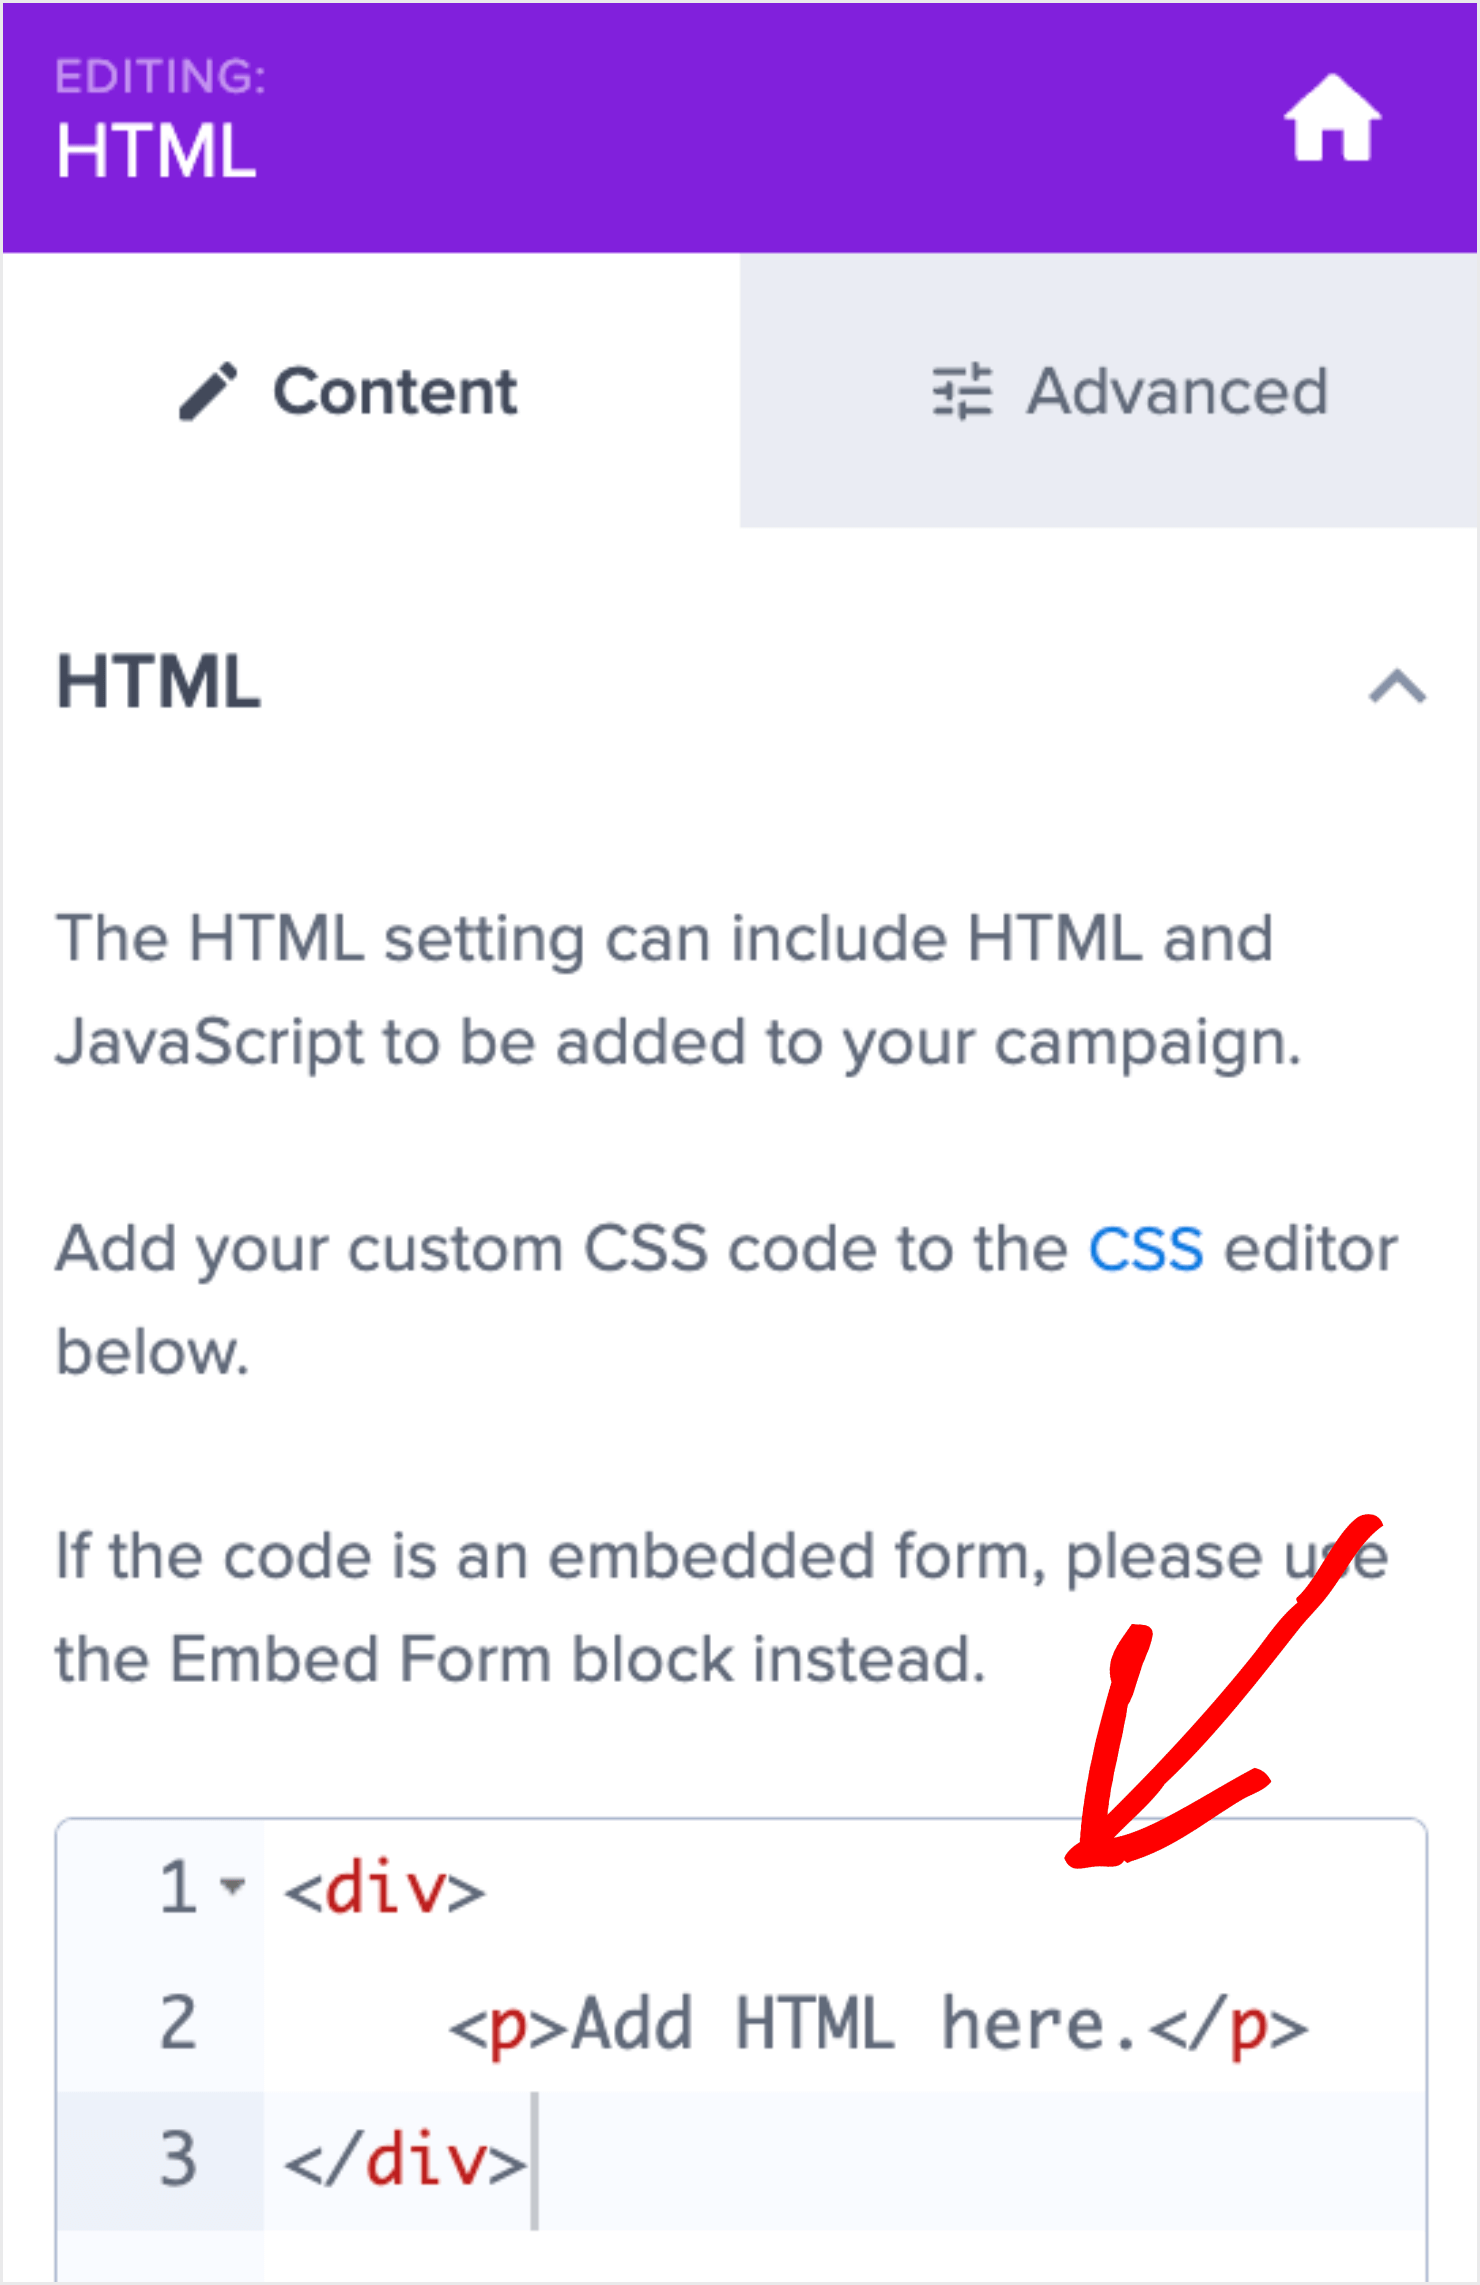
To do this, click on the HTML element in the editor. This will bring up the HTML editor on the left-hand side panel:
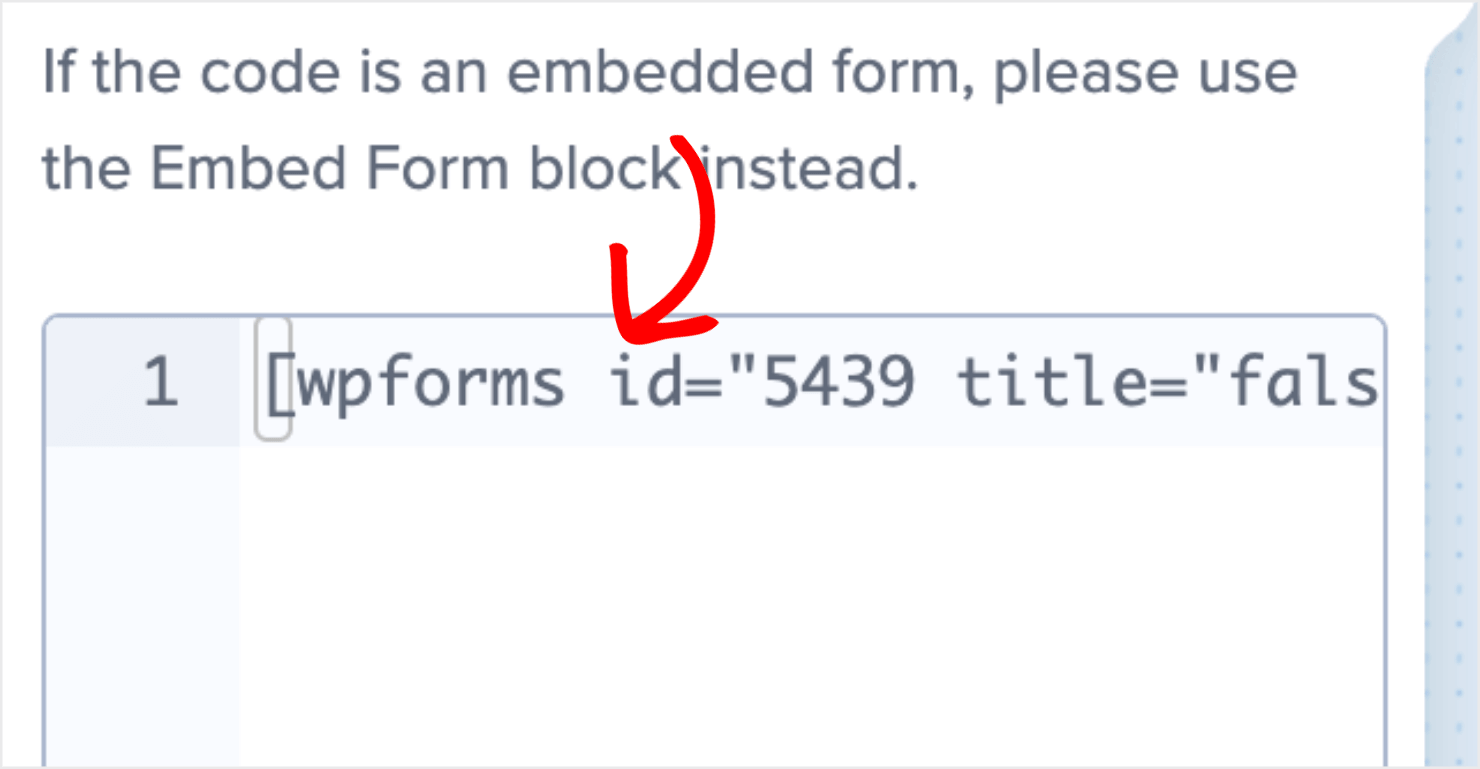
Delete the default HTML script and paste the WPForms shortcode into the editor:
With this, you’ll see the WPForms shortcode appear in the editor like this:
Don’t worry, the survey will pop up once the campaign is live on your site.
If you want to add any other text, you can also add it here. You’ll need to drag the text block from the left-hand menu panel to do that.
Here’s what I added to give the survey a friendly tone:
Don’t forget to save your campaign:
Pro-tip: Want to personalize the popup to match your brand style? Read our guide on Creating Your First Campaign to learn more about how to design the popup to your liking.
Step 3: Set the Display Rules
OptinMonster has a wide range of Display Rules you can use to change when your WordPress survey appears, who sees it, and on which pages of your site.
To do this, go to the Display Rules tab at the top of your screen:
You’ll see that the time on page is set to at least 5 seconds and the current URL path is set to is any page rules by default.
If you go with this default ruleset, visitors who stay on any page of your site for at least 5 seconds will see the survey popup.
But we don’t want to be this generic in our targeting. Because we want to understand why visitors are leaving our site, we’ll show the popup only to people who are trying to exit the site.
This will make the popup more personalized to the user experience of abandoning visitors and not annoying to other visitors who are perfectly happy navigating through the site’s pages.
To enable this, I’ll choose OptinMonster’s Exit-Intent® Technology.
Here’s how to enable it. Click on the time on page condition, click on When from the dropdown, and choose Exit-Intent® from the right-hand site:
To make your survey popup even more contextual, you can use OptinMonster’s page-level targeting to make it appear only to visitors on a specific page.
For example, you might want it to appear on your shopping cart or checkout pages to get feedback from customers who are about to abandon their carts. Or you can put it on your lead magnet page, to try to understand why your conversions are low.
To apply page-level targeting to your campaign, leave the current URL path option as it is. But click on the 2nd rule next to it and replace is any page with exactly matches:
For this tutorial, I added the URL of the website’s services page:
Once you’ve configured these 2 rules, save your campaign.
Step 4: Publish Your Campaign
Go to the Publish tab at the top of your page:
Under the Websites section, select an existing website or add a new one:
If you haven’t added any websites to OptinMonster yet, learn more about how to connect your website.
Next, go to the Publish tab under the Publish Status section:
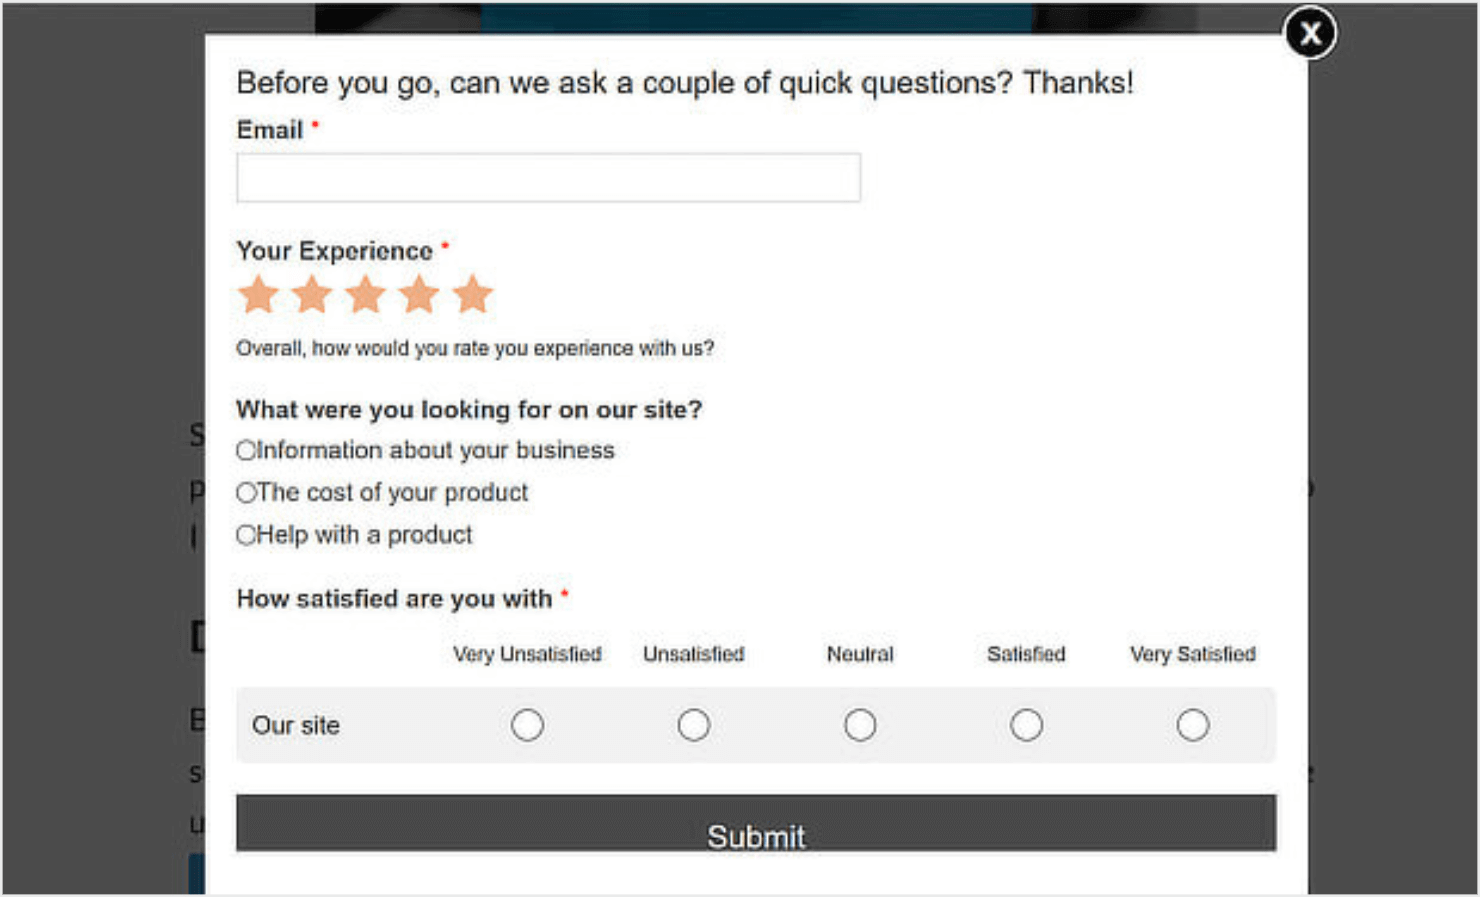
And there you have it. Your survey popup form is now live on the website you selected. Here’s how it appears on my website:
Step 5: Tweak Your Popup’s Settings
When you start using OptinMonster, part of the process is installing the connector plugin.
It ensures your popup campaigns display on your WordPress website. But that’s not all. It also lets you refine how the popups display on your website.
When you make your campaign live, visit your WordPress dashboard. Click on the menu link for OptinMonster:
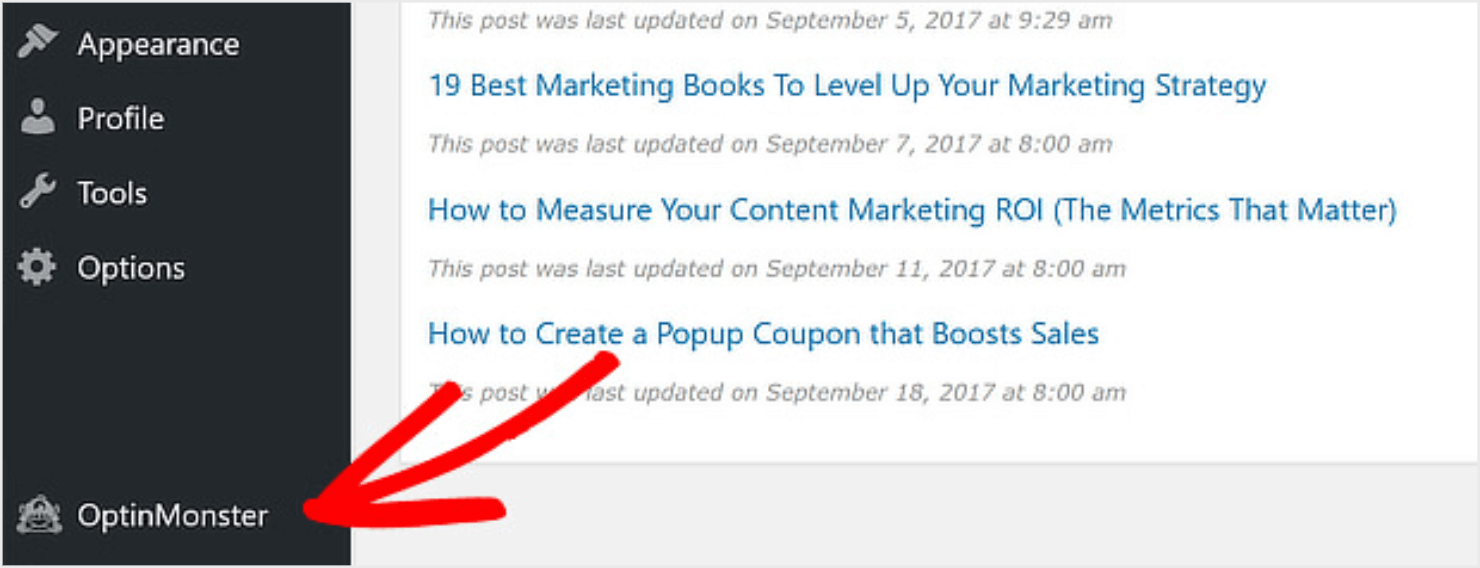
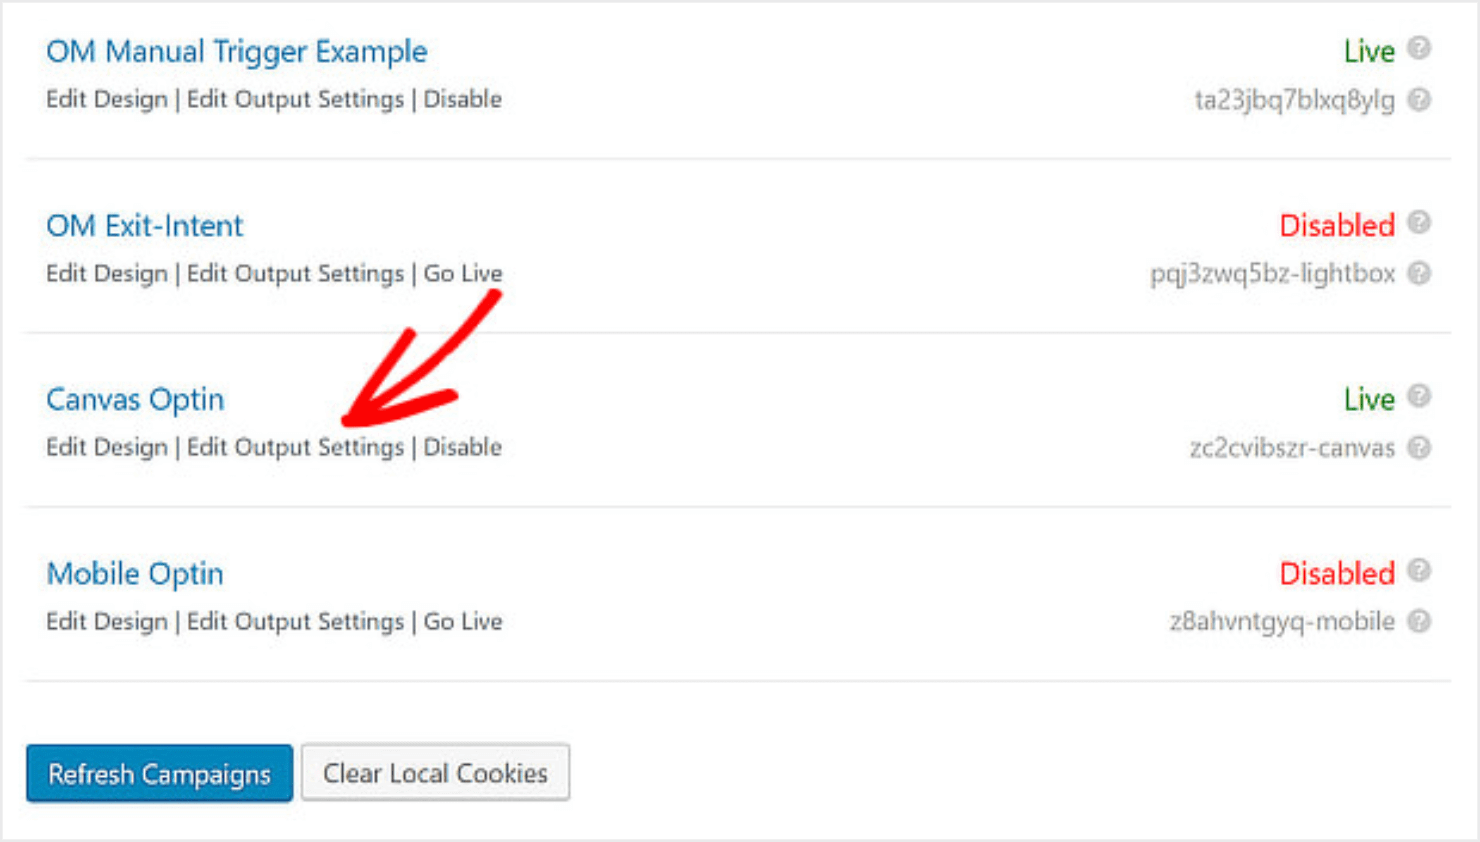
If you don’t see the name of your new WordPress survey campaign, click Refresh Campaigns. Press the Go Live link for the campaign you want to make live on your site:
When you see the campaign, tweak the display settings even more by clicking on the Edit Output Settings link:
This allows you to limit the popup’s display to certain categories and tags, for example.
When you’re finished, click on Save Settings to make your changes live.
Ready to Add a Survey Popup to Your Site?
That’s it! Now you know how to create a WordPress survey popup on your site. It’ll help you read your visitors’ minds so that you can deliver on their expectations.
If you liked this post, you might also be interested in the following resources:
- How to Schedule a Popup in WordPress (in Less Than 10 Minutes)
- Make Your Site Pop: 11 Brilliant Website Popup Examples
- How To Create a Popup Video: Step by Step Tutorial
Not using OptinMonster yet? Get started today and start converting more visitors into subscribers and customers!
Disclosure: Our content is reader-supported. This means if you click on some of our links, then we may earn a commission. We only recommend products that we believe will add value to our readers.

