OptinMonster makes it easy to schedule a campaign based on date and time. You can show campaigns on a recurring schedule or show them for a limited period of time, like during a holiday promotion.
In this article, you’ll learn how to schedule a campaign in OptinMonster.
Before you start, Scheduling Rules are available with a Pro or higher subscription.
Configure Scheduling Rule
When you create a campaign in OptinMonster you’ll want to customize when and where it appears to visitors.
To hide or show a campaign based on date and time, follow these steps:
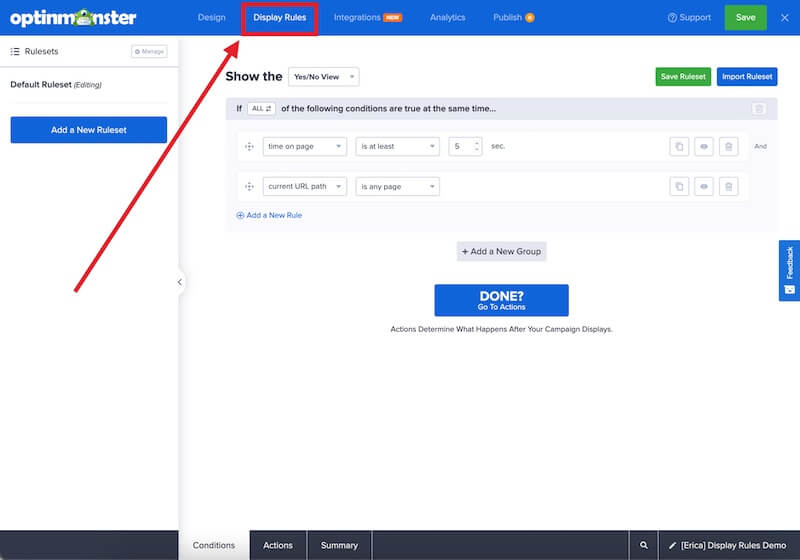
- Navigate to the Display Rules view of the campaign builder.
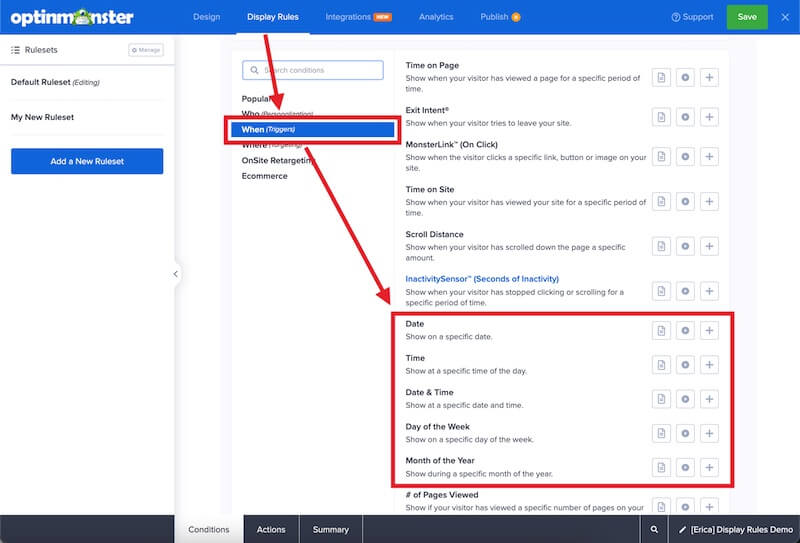
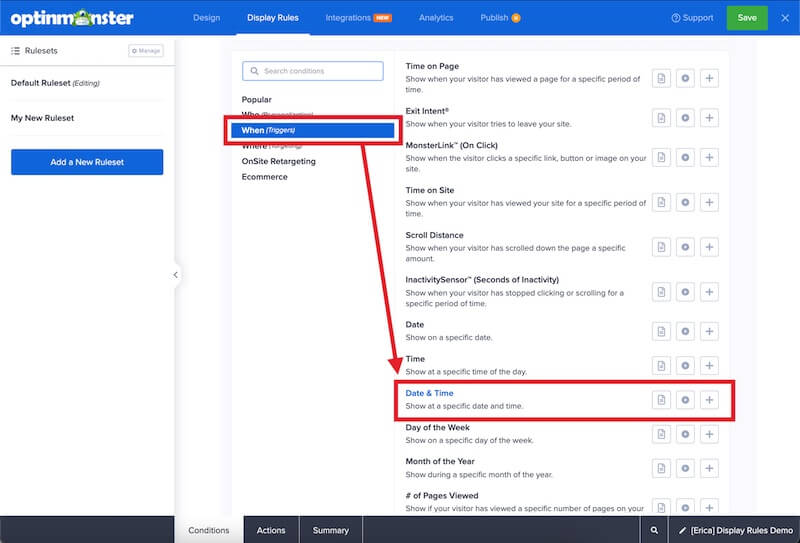
- Next, when adding or editing a rule select When (Trigger) from the left-hand list and select the specific Schedule Rule you wish to use.
The following options are available for scheduling:- Date
- Time
- Date & Time
- Day of the Week
- Month of the Year
- Once you’ve selected the rule you would like to use, you’ll be provided with configuration options specific to that feature. You can see examples of common scheduling setups later in this article.
- When you’re finished, click Save.
- When you are ready for your campaign to function following the schedule rule(s) you’ve configured, be sure to Publish the campaign. If the campaign is not Published when it is scheduled to appear it will not show to visitors on your site.
Configure Scheduling from Publish View
You can also view or adjust your campaign’s Date and Time scheduling from the Publish View of your campaign. To do this, follow these steps:
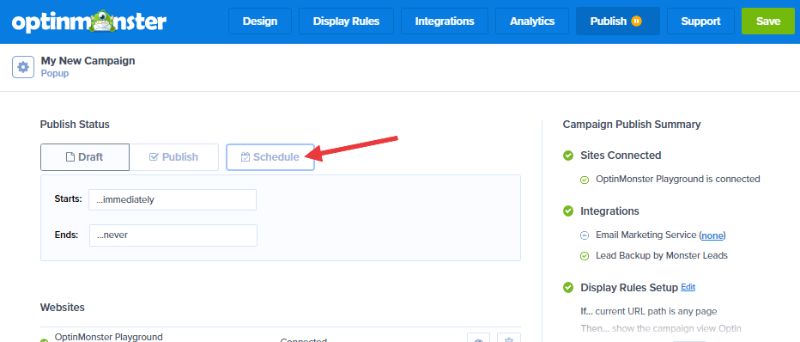
- Navigate to the Publish View and click on the Scheduling button to open the current settings for the campaign. If no scheduling rules have been added, this area will read “Starts: …immediately” and “Ends: …never”.
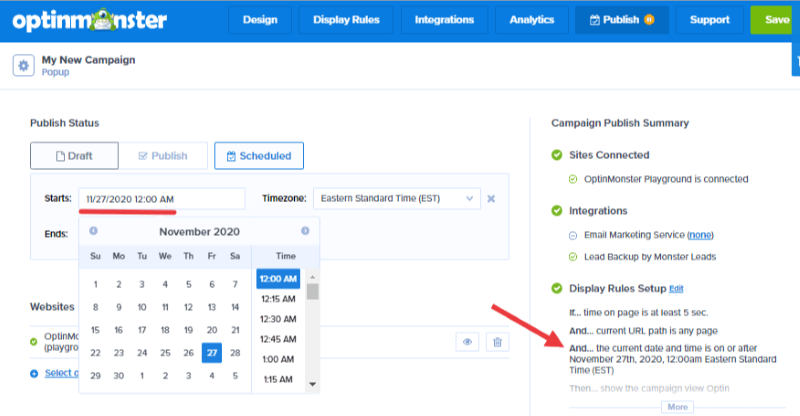
- Click on the Start or End Date & Time to adjust them in the dropdown calendars. Any Date & Time scheduling added in the Display Rules View or Publish View will be reflected in the other.
- When you’re finished, click Save.
- When you are ready for your campaign to function following the schedule you’ve configured, be sure to Publish the campaign. If the campaign is not Published when it is scheduled to appear it will not show to visitors on your site.
Examples
OptinMonster’s scheduling rules can be used alone or in combination with each other to fit your personal needs. If you are combining scheduling rules, make sure to use AND operators between them. This will ensure that the campaign shows only at the appropriate times.
Limited-Time Campaigns
This is the most common type of scheduled campaign, with an established “Start” date and time, “End” date and time, or both. The campaign will be able to trigger at any time during the specified time period. This type of schedule is usually used for limited-time offers, sales, or events.
To schedule a limited-time campaign, follow these steps:
- From the When (Trigger) submenu of the Display Rules, select the Date & Time rule.
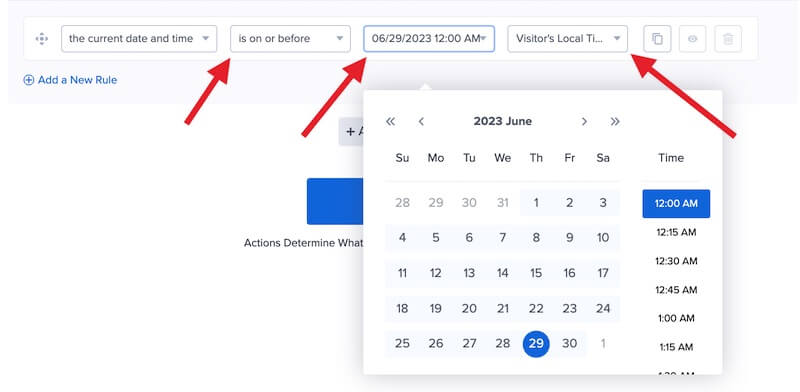
- The Date & Time rule will appear in your Conditions list as the current date and time, and its options will appear in fields to the right.
Configure this first rule as the Start time, choose is on or after from the first dropdown. Then select the date and time for when the campaign should begin showing to visitors on the site.
- Make sure ALL rules in the group are required then select the Add a New Rule option.
- Repeat steps 1 and 2 to add a second Date & Time condition.
- Configure this second rule as the End time, choose is on or after from the first dropdown. Then select the date and time for when the campaign should stop showing to visitors on the site.
Recurring Campaigns
These types of campaigns are scheduled to trigger on certain days of the week, between certain times of day, or both. The campaign will be able to trigger if the day of the week is specified, or the time of visit falls within the specified range. This type of scheduling is usually used for Day of the Week promotions, or for Click-To-Call campaigns where the business must be open to answer the phone.
To schedule a recurring campaign on specific days of the week, follow these steps:
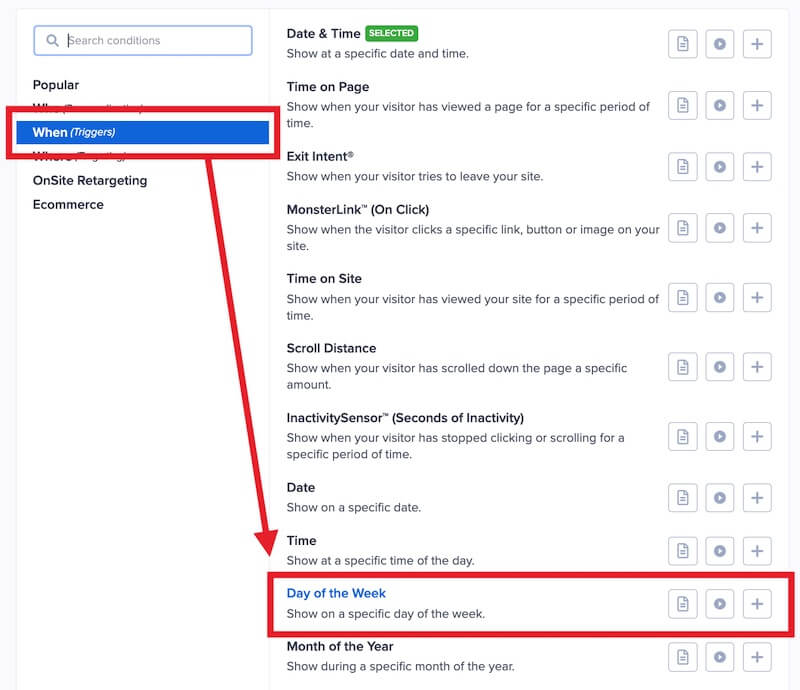
- From the When (Trigger) submenu of the Display Rules menu, select the Day of the Week rule.
- The Day of the Week rule will appear in your Conditions list as the current day, and its options will appear in fields to the right. By default, Monday, Tuesday, Wednesday, Thursday, and Friday are selected as allowed days.
- Remove days that the campaign may appear by clicking the X next to the day, or select it from the dropdown menu to add an allowed day.
To schedule a campaign during certain hours of the day(s), follow these steps:
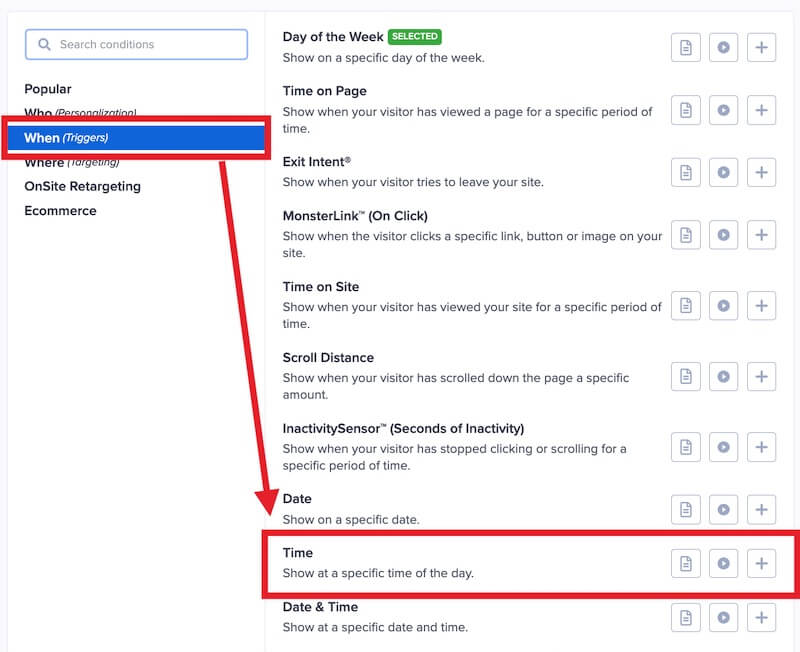
- From the When (Trigger) submenu of the Display Rules menu, select the Time rule.
- The Time rule will appear in your Conditions list as the current time, and its options will appear in fields to the right.
- To add a Start time, select is on or after in the second field, and then select the time and time zone for the earliest time the campaign should begin showing to visitors on your site.
- Make sure ALL rules in the group are required then select the Add a New Rule option.
- Repeat steps 1 & 2 to add a second Time condition.
Configure this as the End time. First, select is on or before in the second field, and then select the time and time zone for the latest time the campaign should be allowed to show to visitors on your site.
Troubleshooting
I scheduled my campaign but it never appeared on the site during the dates configured.
Check that the campaign’s status was set to Published. If the campaign was still in Draft mode it would not appear according to the schedule configured. You must Publish the campaign before it can appear during the dates you’ve specified.
