OptinMonster makes it easy to add your affiliate link to the OptinMonster badge. When your visitors click on the OptinMonster badge on any of your campaigns, they will be taken to your unique referral page, and you’ll receive credit (and your commission) for their subscription purchase.
In this article, you’ll learn how to add your OptinMonster affiliate link to the OptinMonster badge on your campaigns.
Before You Start
Here are some things to know before you begin:
- If you do not have an OptinMonster affiliate link, you can apply to become an affiliate for free.
Add Your Affiliate Link
To add your affiliate link to the OptinMonster badge, follow these steps:
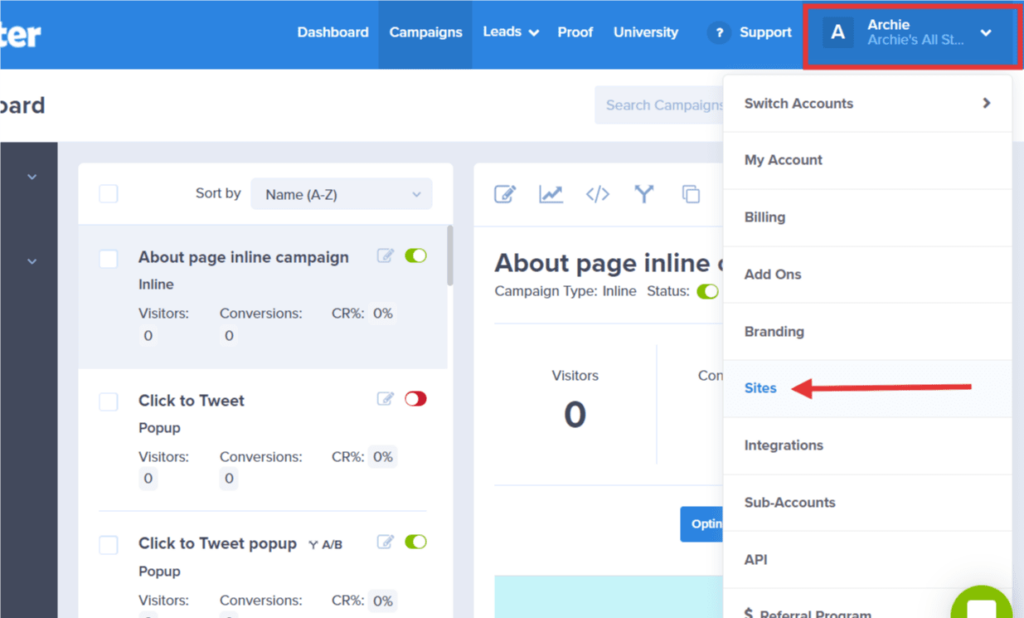
- From the OptinMonster dashboard, navigate to the Account > Sites page. You can access this page by clicking on your Account Name in the top right corner, then select Sites from the dropdown menu.
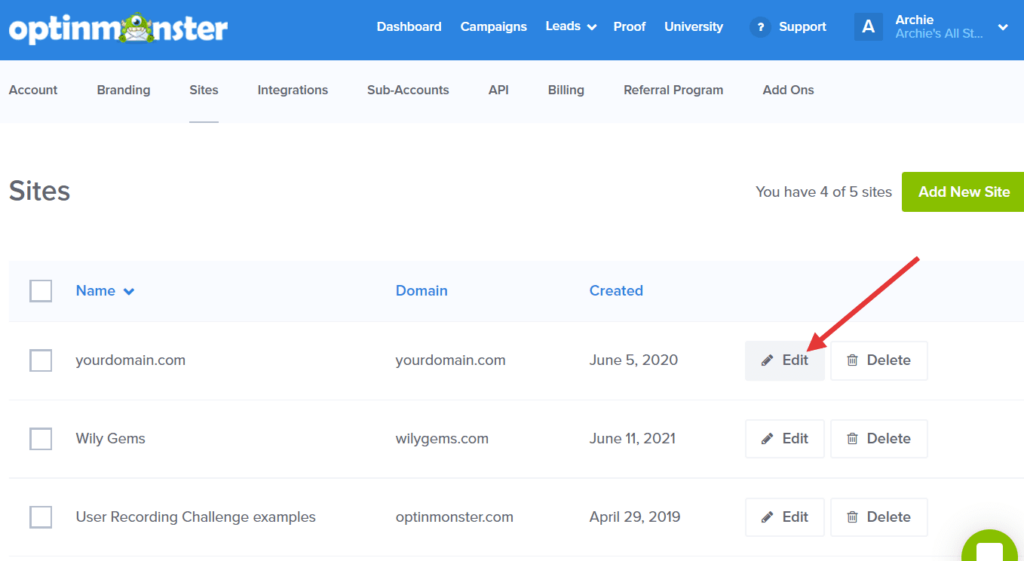
- The Sites page displays a list of all of the sites that are connected to your OptinMonster account. Find the site that you would like to use your affiliate link on and click the Edit button next to it.
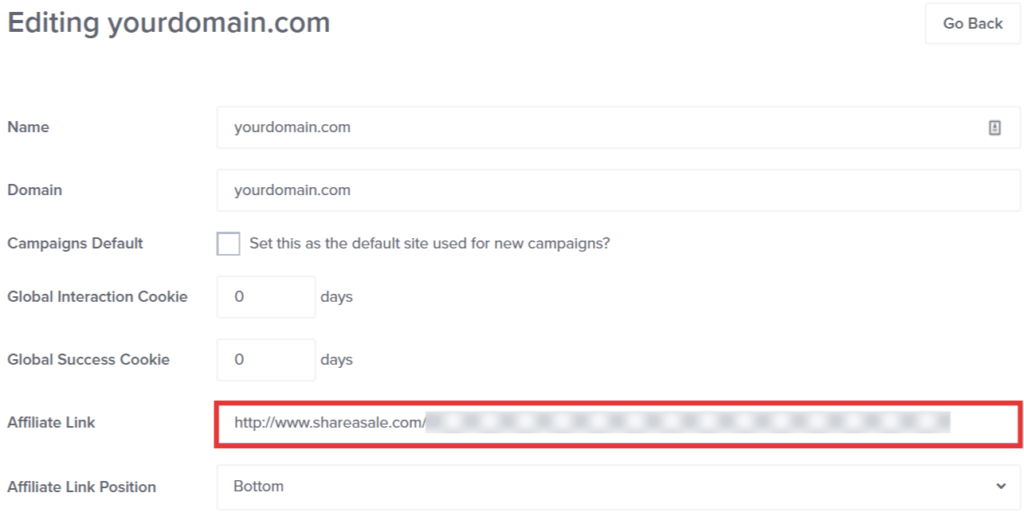
- Find the Affiliate Link field and paste your affiliate link in the input box.
- Scroll to the bottom of the page and click Save Changes.
Your affiliate link will now replace optinmonster.com as the redirect link when a visitor clicks on an OptinMonster badge on any of the campaigns on your site.
FAQs
Do I need to do this for each domain in my account?
You will need to repeat these steps for each domain you would like to use your affiliate link on. Each site must be approved, so make sure to include all sites you would like to use your affiliate link on in your affiliate application.
How do I enable the OptinMonster badge for my campaign?
You can enable the link by following our How to Disable the OptinMonster Badge documentation, but toggling the badge ON instead of OFF. Each new campaign you create will automatically have the OptinMonster Badge enabled.
What types of campaigns can I enable the OptinMonster badge on?
All campaign types support enabling the OptinMonster badge.


